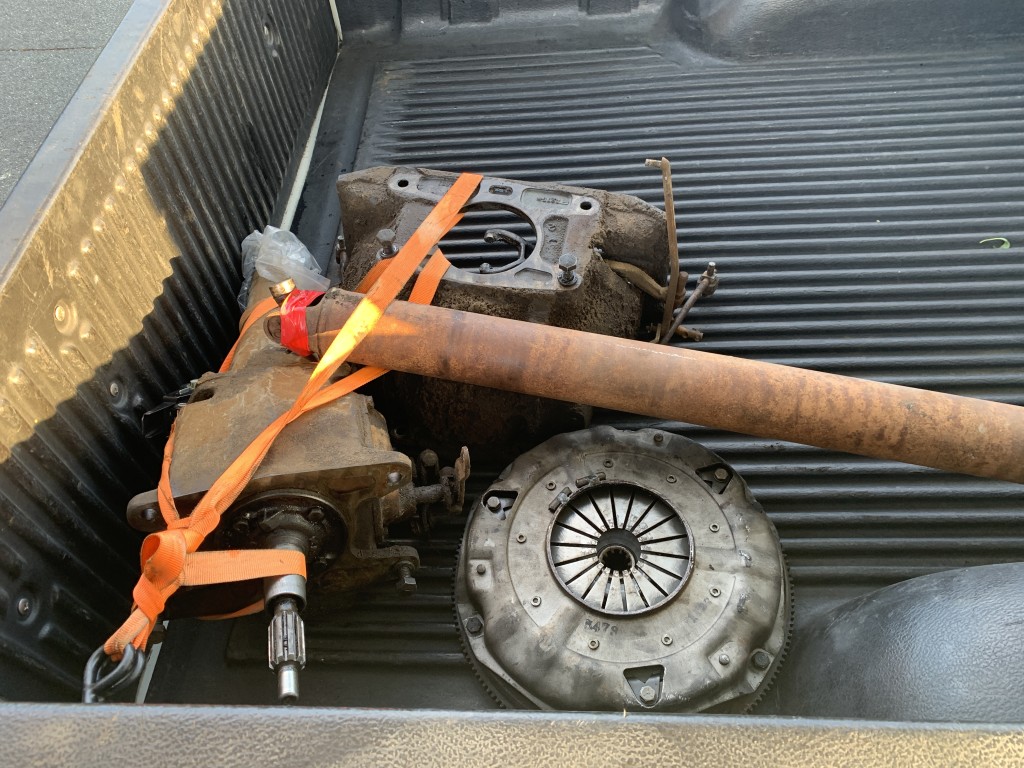
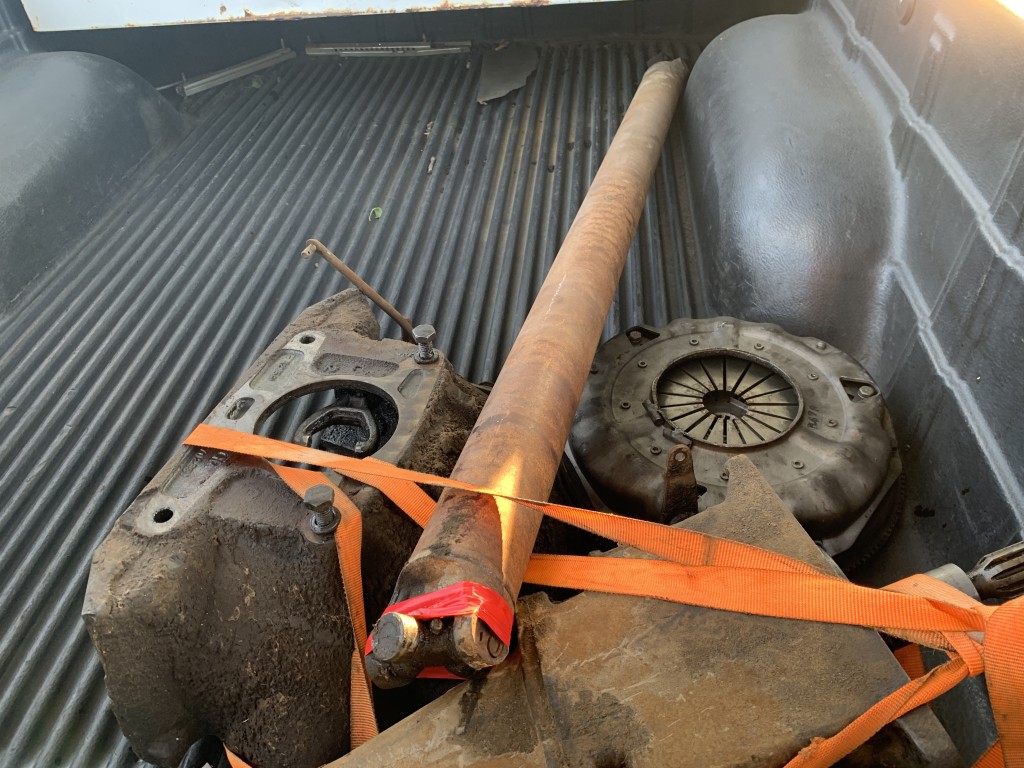
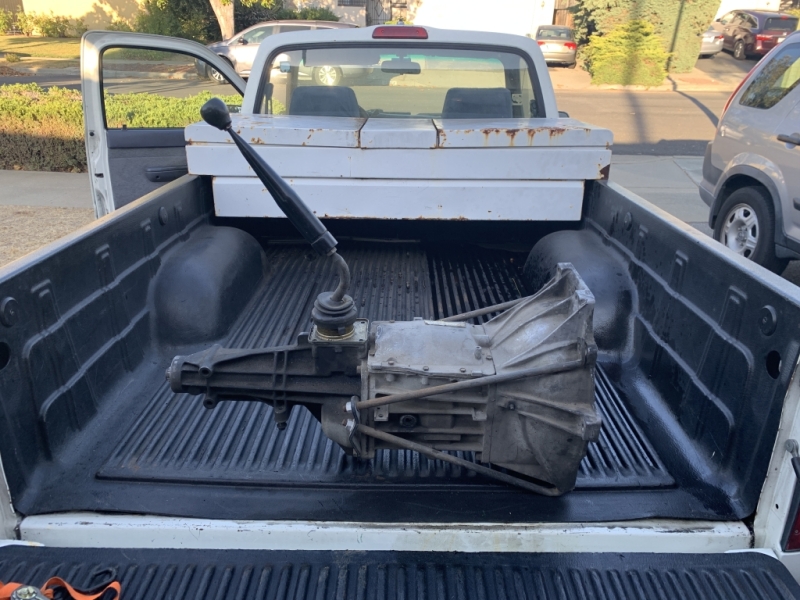
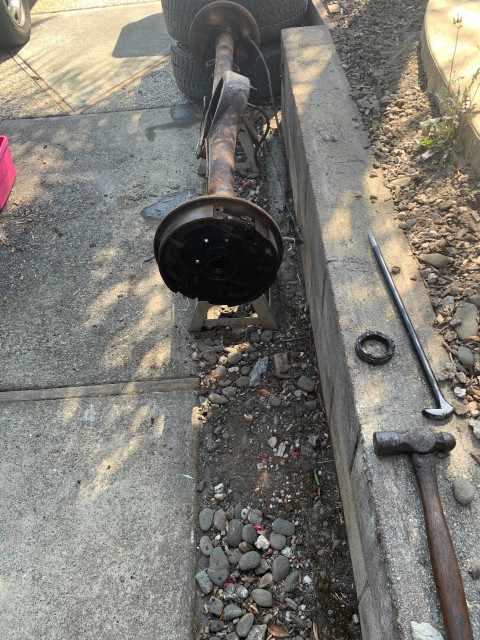
I picked up a 3-speed transmission, bell housing, clutch, flywheel and open drivetrain from a 1955 Chevy truck.
I have a 1946 truck with the closed torque tube.
Is it possible to use this open driveshaft on my '46 and attach to the carrier, does anyone know? I've read that '55 will do that, but just got the stuff home last night and haven't had time to measure too much stuff.
I'm looking at adapting a T5 into my '46, as I saw this adapter plate that looks like it would work.
https://www.hotrodworks.com/product/1937-1947-chevrolet-pickup-t5-transmission-adapter/There's a couple places that have those. That is for a torque tube, by the looks of it.
Ideally what I would like to do is be able to replace the ring/pinion in my rear end, adapt the open drivetain to my pumpkin, and use an adapter to use a T5 with the best ratio. The Astro vans had a 0.68 5th gear, but the more common is the S10 which used either 0.72 or 0.73. All of these are pretty close and will get me approx. 30% reduction in RPMs according to my calculations. That's a big drop, like going from 3000 rpm to 2190 rpm using the 0.73 5th gear.
I'm going to try and look at the u-joint back at the pumpkin and try to understand if adapting the '55 is possible. The other end on the T5 will most likely need a spline->u-joint adapter, those are fairly common for about $60.
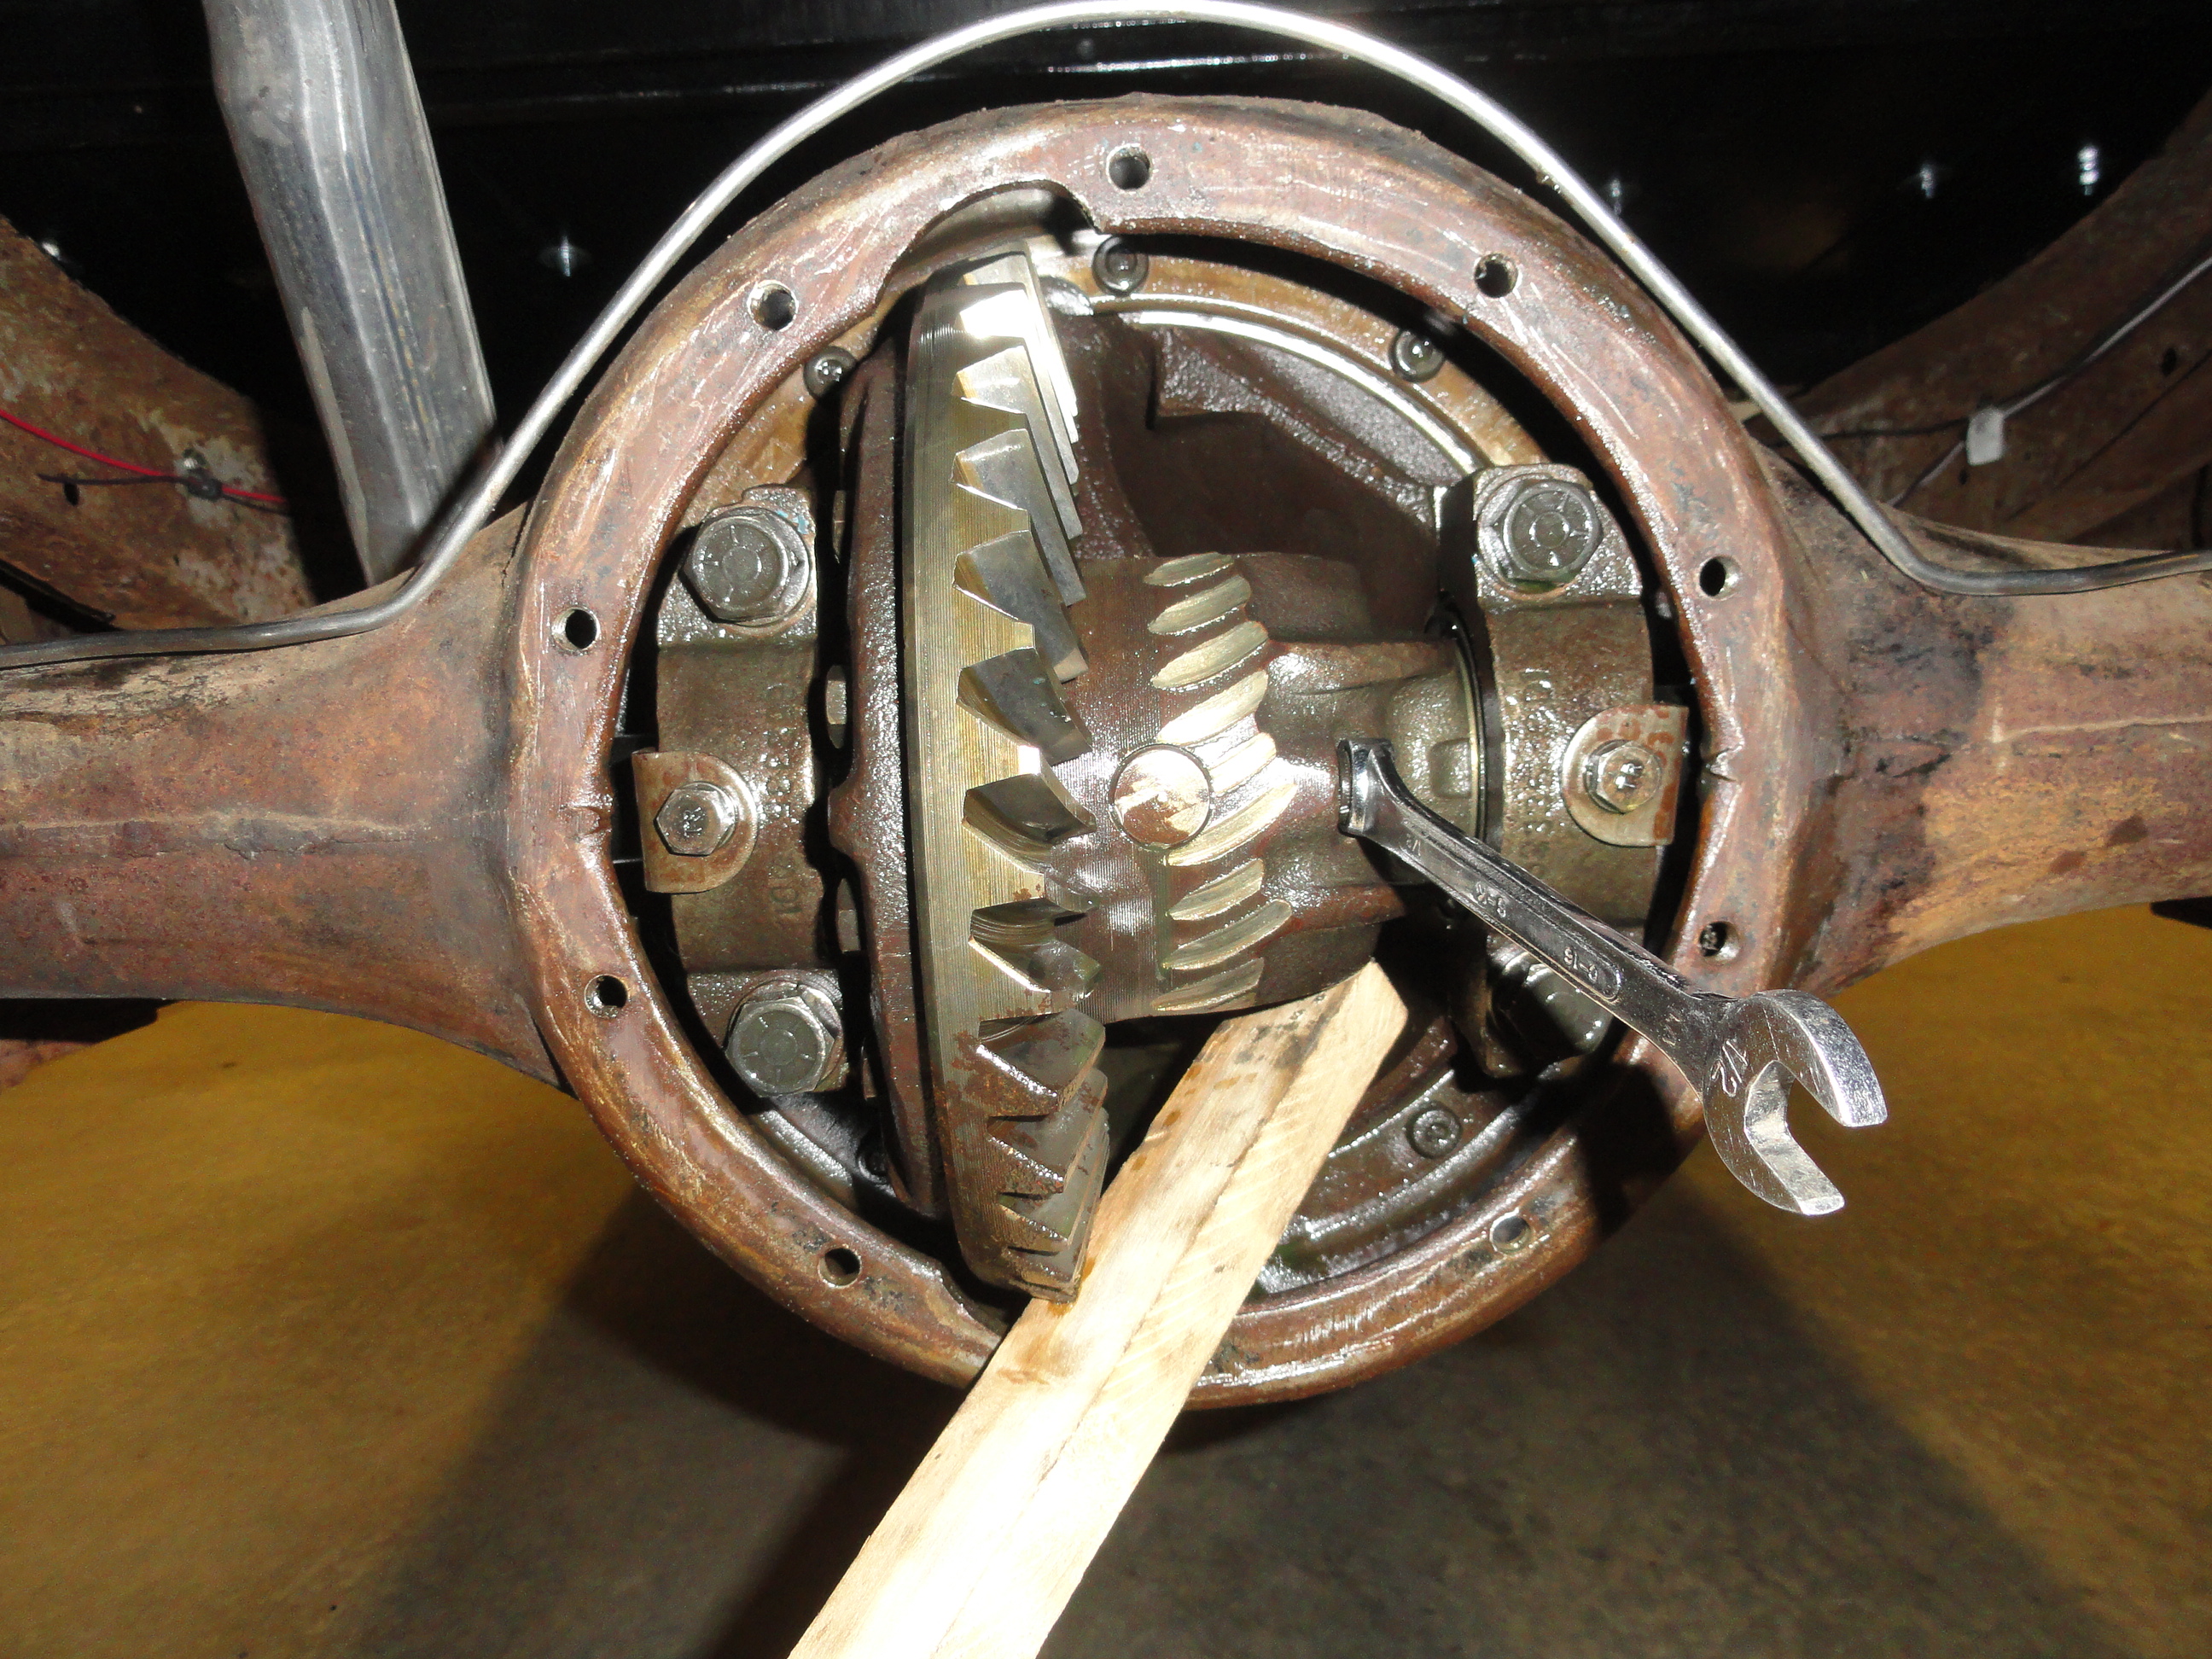
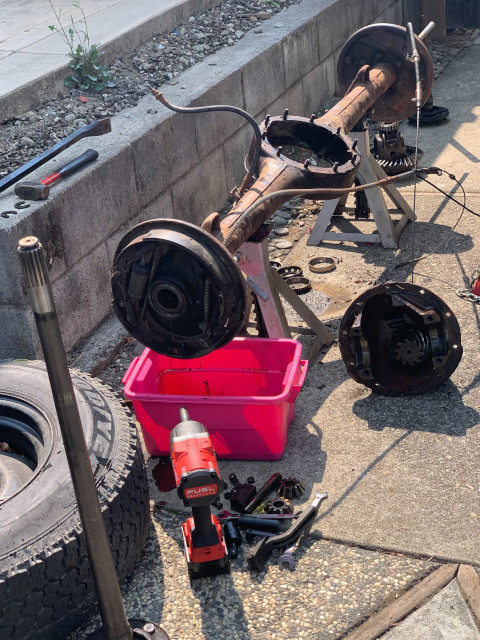
(pics, cause it happened)
On the left of this page is a link to Tech Tips. There is great info on T-5s there and even a link to the Stovebolt site. It will help you sort out the T-5 choices including using an S-10 tail housing to locate the shifter to a better place and which ones will bolt to your bell housing. Patrick's used to adapt Saginaws to closed driveline and sell a 3.55 gear set. Patrick is gone but the info is out there somewhere. He sold a nice shifter for a T-5 too.
My '53 pickup has a '57 GMC 270. The bell housing is the same as a '55 pickup and locates in the same place. I first went to open driveline with a Saginaw 4 speed. I went with a 3.55 Dana 44 limited slip from a '68 GMC 4x4, I welded new spring perches on it. If you go with open driveline and the old rear end I'm not sure how the hinged mounts on the springs will work. I lucked out and was able to pull a driveshaft out of a parts pile. Later I installed a T-5 from an S10, can't remember which one. I do remember that I found a clutch plate that fit the input shaft and worked with a pressure plate that bolted up. I was a parts man back then and could go through boxes till I found what worked. The T-5 input shaft is 3/8" too long on the very front. It can be cut. Since the bolt pattern on my T-5 didn't fit I made a 3/8" adapter plate and left the shaft long. I had to carve on the tranny case some because a couple of bolts were too close. I would not do it that way again but it has been working for about 20 years. My Ratios are not perfect low gear is a bit low but comes in handy for hauling heavy loads up the hill I live on. Second is a bit high for taking off from a stop most of the time. A little rear end gear change would fix that. It cruses between 70 & 75 at around 2,200 rpm and 3,000 rpm is 90. Tire size is important.
Beater,
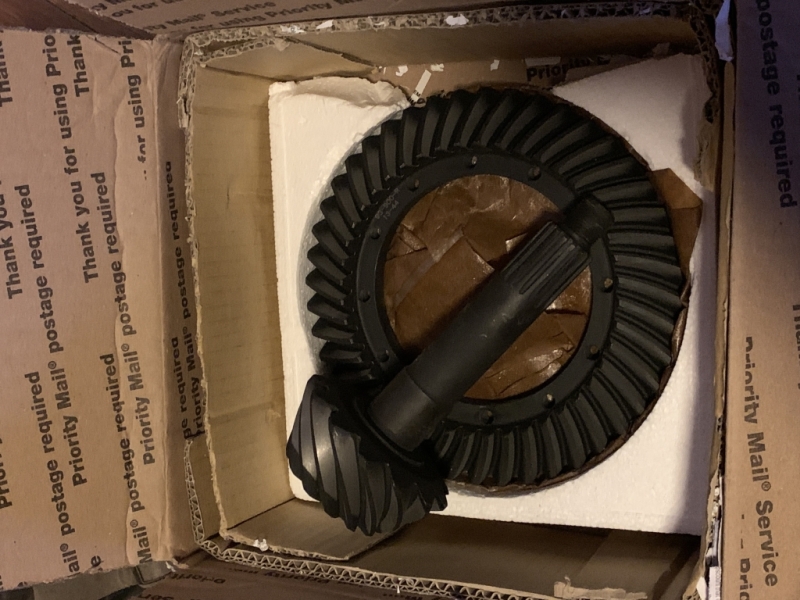
I have the 3.55:1 ring/pinion I got from Joe (Mothertrucker on the H.A.M.B.) I think he took over from where Patrick was, after Patrick passed.
I was hoping I could use that ring/pinion in my current '46 rear end and adapt the open driveshaft of the '55 to connect to the T5.
Will that work? Seems I've read the first year ('55) after the transition will work on the old torque tube, but I'm not absolutely certain. Like most things on the Internet, Abe Lincoln told us to be careful what we read...

I have never messed with the closed drivelines except for one my dad and I shortened when I was in high school. I do believe that pumpkin can be changed but not sure. The way the axle mounts on the springs is sort of hinge that allows it to move with the ball connection at the tranny end. I think that would not work with two U-jounts. But again I'm not sure. It is a pretty easy fix to weld new mounts on the axle housing. The oldest rear end I have here is a '49. I also have what I think is an early open drive line rear end. I'll try to check them out. You might have some luck on the Stovebolt site.
STOVEBOLT
Beater,
You know, I think I'm just gonna get this adapter. This wasn't available a year or two back when I was looking but there's an adapter plate for the torque tube.
I have the bushing to fix the trans side (the Oakie) so I have what I need to use the torque tube with that adapter. All I need now is an S10 T5. (found one I'm working on that has a .72 overdrive.
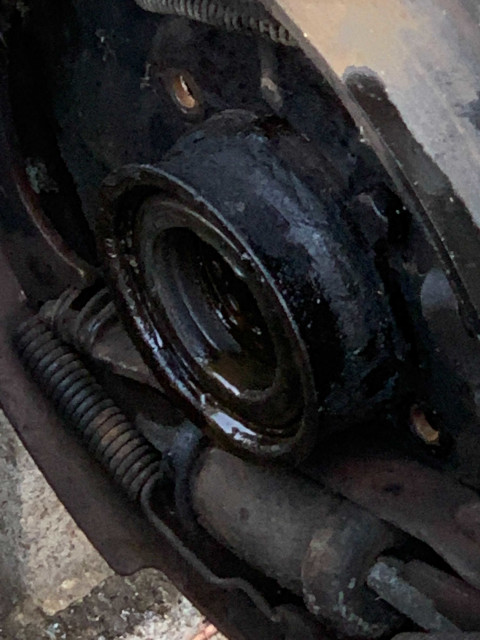
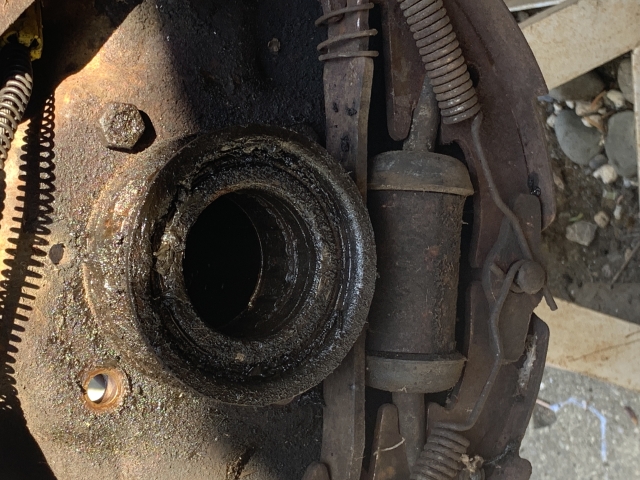
T5 -> torque tube drivetrain adapter. There is also an adapter for the '55 and up drivetrain, but I see no reason to change that with the Torque Tube adapter being available. The biggest problem with the torque tube, IMO, is that the bushing gets wallowed out and the oil leaks down into the rear end.
That looks like it will adapt a transmission to the bell housing but how can you adapt the back of the transmission to the closed driveline?
That looks like it will adapt a transmission to the bell housing but how can you adapt the back of the transmission to the closed driveline?
I was thinking the spline would fit. Maybe you're right and I need to look at that end.
Things I'd like to know.
1) will open drivetrain connect to rear end / carrier?
2) do I need anything to connect open drivetrain to t5?
3) with the torque tube adapter above, what else needs to be added?
4) do I need to replace the clutch? Seems that might be the case I saw someone using an 11" clutch for an Astro.
That looks like it will adapt a transmission to the bell housing but how can you adapt the back of the transmission to the closed driveline?
I'm not entirely sure and still doing some research, but it seems the yoke can be replaced. I don't know if the closed drivetrain is a problem with that or not. I do have the open drivetrain from the '55, and for certain if I got the rear end from the '55 this stuff came out of, it would connect. I also see an S10 rear end for $95 not far from me.
I have the bellhousing from the '55 and it will bolt direct to the T5 I'm told, but that would mean changing out the bellhousing. Can I get the bellhousing off without removing the clutch and flywheel? I think I would need to remove both before swapping out the bellhousing?
1. No, I think a later carrier and gears can be bolted to the old housing. It may be better to find a rear end for open drive line. It will have better brakes as well.
2. You will only need the right U-joint to fit both the T-5 yoke and the driveshaft.
3. I don't think that adapter has anything to do with the closed drive line. I think it adapts the S-10 T-5 to the original bell housing '46. Since your truck has a 325 you may have a later bell housing and transmission? Some later transmissions can be adapted from closed to open driveline by using a different rear plate. I used a open 4 speed trans in an closed driveline by doing this. A T-5 from a Camaro will bolt to your '55 bell housing with out an adapter. You would have to trim 3/8" from the pilot bushing area of the input shaft.
4. The clutch issue would be in matching the spline on the transmission input shaft to the center of the clutch plate. Some T-5s use a standard GM clutch spline I don't know if they can be swapped. I was able to find a clutch plate that worked with my stock pressure plate. Sorry I don't remember what it is. To use an 11" clutch plate you would likely have to change the flywheel and get the right pressure plate.
1. No, I think a later carrier and gears can be bolted to the old housing. It may be better to find a rear end for open drive line. It will have better brakes as well.
2. You will only need the right U-joint to fit both the T-5 yoke and the driveshaft.
3. I don't think that adapter has anything to do with the closed drive line. I think it adapts the S-10 T-5 to the original bell housing '46.
[quote=Beater of the Pack]Since your truck has a 325 you may have a later bell housing and transmission?
I was just thinking that while I was swimming, and probably need to get under and measure the bell housing bolts. The bell housing I got is definitely a later one, it has 9" and 8.5" center-to-center on the 2 sets of holes. I spoke with someone earlier that. If I have the new housing I don't need the adapter, as I understand it, that would be great. I do have the other bell housing and it's definitely newer, so I could plan to use that and save myself the adapter. Is that understanding correct?
Some later transmissions can be adapted from closed to open driveline by using a different rear plate.
The guy I spoke with today (transmission shop) said there's a yoke that goes on the rear, and that the yoke is difficult to find. That yoke needs to match the splines on the rear of the tailshaft.
The guy was trying to talk me into a T4 4 speed, but I explained to him that it's really the 5th gear that is most important to me, it is what will bring the RPMs down.
I used a open 4 speed trans in an closed driveline by doing this. A T-5 from a Camaro will bolt to your '55 bell housing with out an adapter. You would have to trim 3/8" from the pilot bushing area of the input shaft.
No worries on trimming, it's like a 2 minute job with a cut-off wheel in a die/angle grinder, have seen that done.
4. The clutch issue would be in matching the spline on the transmission input shaft to the center of the clutch plate. Some T-5s use a standard GM clutch spline I don't know if they can be swapped. I was able to find a clutch plate that worked with my stock pressure plate. Sorry I don't remember what it is. To use an 11" clutch plate you would likely have to change the flywheel and get the right pressure plate.
I think so Tom, isn't that the retainer shaft which the spline shaft comes out of on the front? That is in fact that one that gets the nose cut down. Those are interchangeable and some use a Jeep nose as it has the right spline. I can't remember the count.
FWIW, I have pics coming tomorrow, of an '86 (1352-145) with a 0.76 5th gear ratio and mechanical speedo.
This might be the yoke I need:
https://www.ebay.com/itm/272201532539EDIT: found this is the manual, what I need is a spline to u-joint like this one, but to adapt to the rear of the T5. See attached image.
Have a quick update, there's an S10 rear axle locally which is an older one with drums, but he was told it was the 3.42:1 gears which is good for me, slightly better than 3.55:1. Best of all, it's only $90.
He says he's going to hold it, but can't meet until Thurs. Hoping it's not what happens on craigslist right before the seller tosses you under the bus and sells it out from under you...(I think he'll hold it
)
I'm not familiar with that rear end. Is it 6 lug or will you have to change the wheels? How big are the brakes? How does the width compare? How close are the mounts to your spring width? The ratio sounds good. You'll be hauling ass it OD. Pay close attention to which T-5 ratio you choose.
I read this post this morning and near the end of the first post it mentions a T-5 adapter to closed drive line. It's for Ford but....?
https://www.jalopyjournal.com/forum/threads/chevy-ii-vs-the-iron-duke.568975/
Beater,
Unfortunately I would need to get wheels, it's a 5 lug 4.75 diameter, similar to camero, nova, s10, et al. This would mean front and rear wouldn't be the same unless I replaced the front axle also and moved to 5 lug 4.75" diameter.
On the AD trucks it seems they need the 4wd version as it's wider, but I think the narrow version will work with my '46, which has a 48" bed and the fenders are 11"-12" on each side.
The s10 axle is 54" I believe, from plate to plate. Don't know too much about the brakes other than it is an older rear with drum brakes. If I'm not mistaken the width of 2wd is 54", 4wd is 59", and ZR2 is 63".
EDIT: on brakes, from what I can tell the 2 sizes are:
10" x 2.24"
and
11" x 2-3/4"
I wouldn't want to have two spares. I think there is a Datsan/Nissan rear end that some have used that is six lug.
The closed AD rear ends I have have a 10 bolt pattern that looks the same as an open drive line rear end that is from a Chevy pickup that used the truck arm mount with coils springs. I have never broken a stock closed driveline or it's rear end.
There was a Truxtill (?) Overdrive that mounted into the closed driveline. I have actually only seen one on a pickup my friend had. I'm sure his in-laws have destroyed it by now. It operated much like a Borg Warner OD but was in the driveline. Ot had cables, linkage, and switches.Without a complete unit it would be hard to make work.
There are other OD transmissions beside the T-5s that have been used. The more you look dig into this stuff the more confusing it gets
I wouldn't want to have two spares.
Me neither.
As luck would have it, I sent a text to the guy I got the '55 parts from, telling him I was sorry I didn't get that rear axle from him...as it turns out that would have given me the same bolt pattern as my wheels, so I found out. Oddly, he implied I could still buy it from him.
I told him I thought he sold it, but if it still has it how much does it want. He said he would take $220, but we agreed to $200. Picking it up on Sat.
Although I don't really need the trans anymore, I can probably sell it and/or rebuild it and sell it for about $300.
While I knew about the wheel difference, I hadn't thought about the spare.

Thanks for mentioning that.
I think you are on the right track. That'll make things easier. The T-5 conversion will be easier. If a 3 speed OD would work for you you have some options there too.
MUNCIE (Light Duty) 1940-63 Cars, 1940-68 Light Duty Trucks: Parts List 74
Cast iron case and extension housing with 4-bolt side cover. Has non-synchro 1st and a "barrel" type 2/3 assembly. Units from 1940-54 have enclosed driveline, otherwise known as a "torque tube". Those from 1955-68 may have electric overdrive. Some of 1964-65 units have larger gears with the same tooth count as the 1940-68 units.
SAGINAW 1966-81 Cars, 1966-87 Light Duty Trucks: Parts List 92
Cast iron case and extension housing with 7-bolt side cover. Fully synchronized with 30 tooth synchro rings. 1966-69 units may have electric overdrive. It has a four step cluster and all the gears are helical cut.
There are other choices too depending on what works for you. The Saginaw 3 speed OD can take the gears & side plate from a Saginaw 4 speed. There is also a later 3speed with a 4th OD. The '55 trans you have is the Munci and there is an OD version of that. Not the best because it is not sincere into 1st but easy. The Od would be Borg Warner R10. They are old school but fun to drive and can be wired to give you 5 or even 6 forward gears. They take some study. The T-5 may be easier.
I think you are on the right track. That'll make things easier. The T-5 conversion will be easier. If a 3 speed OD would work for you you have some options there too.
It probably could work but would requiring cutting down the driveshaft. I might need to do that with that one, that I'm not sure.
Anything that is better than direct drive (i.e., 1:1 ratio) would be an improvement. I am not sure what gears are in that rear end, but will find out tomorrow morning. My initial goal would be to swap out the rear axle and pull my torque tube, then remove my 3 speed. I believe I have the later bell housing, but if needed I got one with the '55 parts. Once the open driveshaft and rear end are in, when I get a T5 it will drop right in, sans the length difference on the input shaft (commonly known problem which I'm sure you know about). I was supposed to get some pics of a 1352-145 which has a .72 5th. That's 28% lower RPMs no matter how you look at it.
Imagine the seller did get the pics before the weekend like he said...
And it is the best choice, IMO, those T5s are bullet proof. I think it would be the best choice of the possibilities.
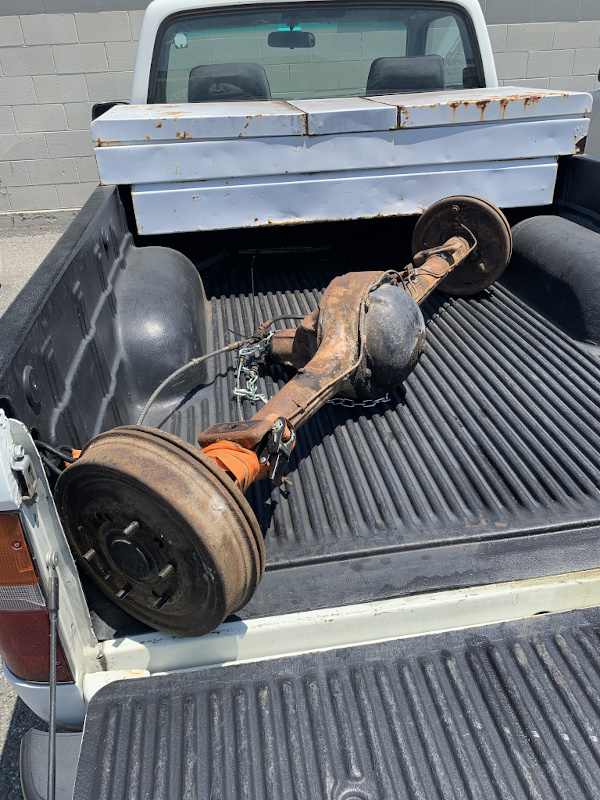
Ok, making some progress, picked up the '55 series 2 axle today, and there's a guy not too far (SacOTomatoes) that has a 3rd member with 3.55:1 ring/pinion for $50. Gonna try to get that first.
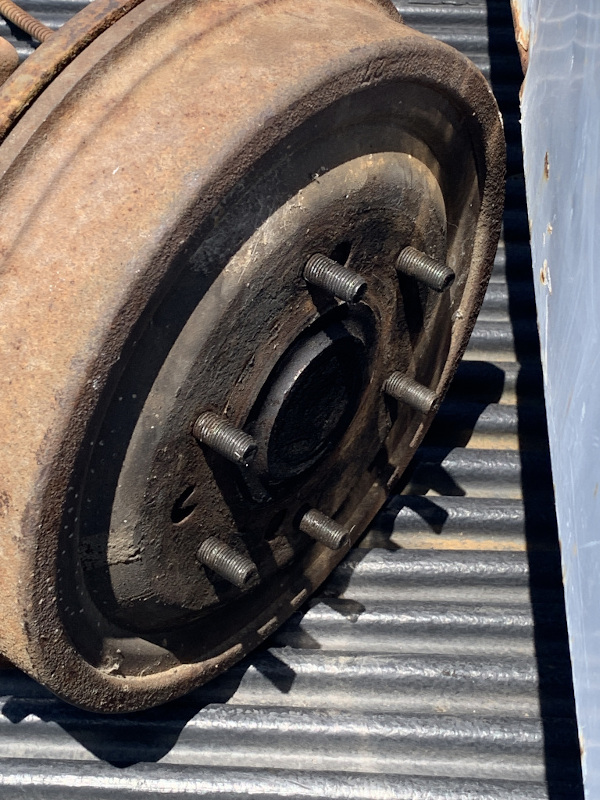
There are also 3.38 sets for this diff, but they sell for $400. If I need to, I'll sell the 3.55:1 set I have for my torque tube and take a loss to buy the newer set. I might be able to use my carrier with the older set, in the newer axle, that I'm not sure of yet, but that $50 3rd member would do it. Missing one stud from one side, he had to bust it to get the wheel lock off.
EDIT: I thought best thing to do is contact Mothertrucker (JoeM) who I bought my 1940-1954 set of 3.55:1 R/P from to see if he would exchange for a set of 1955-1962 3.38:1 set for the axle I have. He sells the set I have for $75 more.
The Series 2 set are 3.38:1, which is almost another 5-6% lower than the 3.55, best I can tell. Might as well see what he says.

It costs $30 to ship them on Ebay, but he sells the Series 2 sets for $75 less. I'll see what he says. If I only had to pay shipping that would be a sweet deal and I'd be done, except for the T5.
There is a reason these engines are so respected. It is because they do the job they were engineered to do so well. They develop good torque when working in a certain rpm range. The gearing in the transmission and rear end allow you to select were in the mph scale the engine hits the torque range. Some engine mods come into play too. The smaller the numbers in the rear end ratio the faster the axle turns and the higher the mph. This comes with the cost of less power for moving stuff. The 3.38s might be great for a light load at highway speeds. With an OD higher speed lower rpm and less power. Try to find ratios with the best use of torque through the rpm range your engine likes best.
This is where you have to be honest with yourself about what you will "really" want the truck to do. There are many ratio-rpm charts on line that will help get the speed you want in a rpm range you are comfortable with. Tire diameter is as important as gear ratios. (the original reason for big & littles) Where you will be doing most of you driving is important too. Flat land at sea level has a different effect than mountains at 6,000 feet. Do it once.
Beater,
I completely agree, and I know I won't be using this for towing, other than 1000 lbs. in the bed. I think I will drive it empty most of the time. No trailers, just haul items in the bed as I go shopping and such. I want something that is reliable and that I feel confident that I can jump in and drive 200 miles if needed, which would include hills, flats, and everything in between. My property in Lake County is 3 hours from the house (175 miles). I'd like to have a truck I would feel confident in driving that far and know I'll make it back home. I don't need it to haul a trailer, I will use another truck for that.
In that regard the lower gearing in 5th gear is the most important to me.
Good news. Joe got back to me and is going to exchange my 3.55 set for a 3.38 set for the 2nd series.

Once I find a T5 I'll be set.

Funny story about me and Mothertrucker...we were banned from the VCCA site at the same time. Both of us hate those pukes with a vengeance. I will NEVER, EVER have anything good to say about the VCCA.
You might wonder what we did or said...well, we were talking about ring and pinion gears in the truck forum, and that's supposedly only allowed in the Modified forum, because it's modifying a Chevy from original. WTF ??? Well, my truck doesn't have the original spark plugs either...I'm gonna go cry...
For anyone reading this, don't join the VCCA, it's a waste of money. They're just a bunch of old women sitting around the knitting table. Rather than create some trailer queen that you tow around to shows, drive 'em! Like all cars, that's what they were intended to do!
Lucky for us there are places where we can discuss this stuff. Lucky for them they don't have to listen. It seems like every site has it's rules and I know it takes a lot of work to attempt to keep our ramblings in some sort of order. Many sites get really pissy if you post in the wrong spot or heaven forbid something from the wrong year.
it sounds like you are well on your way to building a truck that will work for you. It is good that you won't have to make big modifications so if you decide later that something else will work better it's not a big deal. I have had both a closed and open driveline version of the 4 speed "granny gear" pickup trans, a Saginaw 4 speed, and a T-5 and could go back to the stock setup with no problems.
Lucky for us there are places where we can discuss this stuff. Lucky for them they don't have to listen. It seems like every site has it's rules and I know it takes a lot of work to attempt to keep our ramblings in some sort of order. Many sites get really pissy if you post in the wrong spot or heaven forbid something from the wrong year.
I've posted in the wrong forum here, or should I say wrong data. I posted some V8 stuff, but had stock49 remove it after I realized.
The VCCA makes me unhappy I can't discuss anything, they nitpick over so much. Many of the questions on their site are asking stuff like, "how many points do I lose if I don't have authentic wire? Stuff like that...
it sounds like you are well on your way to building a truck that will work for you. It is good that you won't have to make big modifications so if you decide later that something else will work better it's not a big deal. I have had both a closed and open driveline version of the 4 speed "granny gear" pickup trans, a Saginaw 4 speed, and a T-5 and could go back to the stock setup with no problems.
I'm looking forward to having better RPMs, the old ring/pinion are on their way back to Mothertrucker and I'm awaiting the replacements. In the meantime I'll be on the lookout for a T5. If I can get the rear end cleaned up and get the new r/p installed in it, I might be able to use the '55 trans to connect it all up. Of course if I find a T5 I'll swap it out.
take my word cutting your rpm by near 30% will make a huge difference. It will be good to go with the new rear end gears first. You may find with 338 and a tire that fill your wheel cut out ,around 30", you don't need or want OD. I think I have an OD version of your '55 trans.
Since I have this rear axle in addition to my truck, I can get this one all prepped and ready to install. When I get the ring/pinion I will be able to get it all installed, cleaned up and ready to put on my truck.
If I find a T5 I will get it, but if not I will use the 3 speed that came out of the '55 as it has the right fittings on it to connect to the driveshaft I will need to use with the T5.
The gears will only bring it down 18%, AFAICT (3.38/4.11), but the big gain comes from the T5. That will give me another 28%. Just the r/p gears would get me from 3000 down to about 2500.
So the T-5 will drop it to 1950 rpm. Where does you engine produce it's best efficiency? The cam in my 270 loves 3,000 and I have to pay attention to keep it from going there. With my tires, 3.55 gears and T-5 3,000 is 90 mph. 2,000 rpm is 60 mph but it doesn't pull well there. So 2,200-2,500 IS 70-75 mph and I got right at 17 mpg. I'm sure ai could tune and get 20. With 28" tires it pulls better but goes slower. It sounds like you are getting in there, in that range of efficiency. I think tire size is the last adjustment.
So the T-5 will drop it to 1950 rpm. Where does you engine produce it's best efficiency? The cam in my 270 loves 3,000 and I have to pay attention to keep it from going there.
That's a very good question and I don't have an answer to that. I just know that I have more power and the tires are about the same size of original. I currently have 235/xxr15 radials (can't remember the ratio) which is almost the same size diameter as the original 650r16s or 600r16s, the original tires
GM shipped with them.
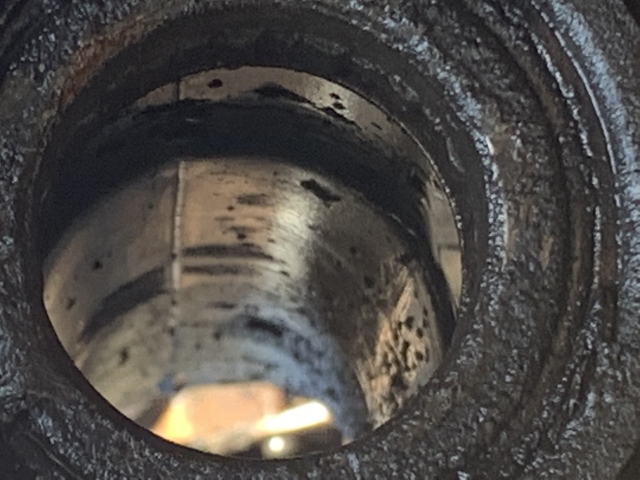
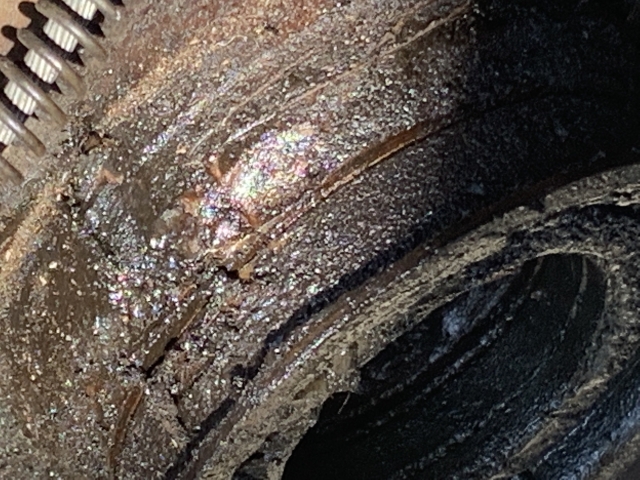
I'm not entirely sure where the noise is coming from, but I suspect some is from the torque tube front bushing being wallowed out, and possibly low oil in the trans.
With my tires, 3.55 gears and T-5 3,000 is 90 mph.
If I could get to 90, I'd be doing the snoopy dance.

2,000 rpm is 60 mph but it doesn't pull well there. So 2,200-2,500 IS 70-75 mph and I got right at 17 mpg.
I think I would drive it quite a bit if I could get that type of mileage. I have a little 2WD Tacoma with a 2.4L that gets me about 23 on the highway. And the flat bed, let's not talk about that...8 mpg when towing...

It sounds like you are getting in there, in that range of efficiency. I think tire size is the last adjustment.
Let's face it, the biggest gain is from both the r/p and the overdrive. With both, most of the problems are resolved.
If you do either by themselves, it still leaves problems on the highway. In the future I might not be in a position to get a T5, who knows, so while I can I want to get one.
Yeah, they sure seem to go for more $$$s than they're worth, but the T5 is just about the best Transmission to put in these old beasts it seems. To me, the T5 seems like the right transmission.
Then there is getting the speedometer regulated. I had mine working well enough then the plastic gear in the T-5 began slipping. No speedo for w while. I'd have to pull the tail housing. I'll pull it out someday. I need to modify the shifter to tighten up the pattern. Do that to yours before you put it in.
Then there is getting the speedometer regulated. I had mine working well enough then the plastic gear in the T-5 began slipping. No speedo for w while. I'd have to pull the tail housing. I'll pull it out someday. I need to modify the shifter to tighten up the pattern. Do that to yours before you put it in.
I've seen in a video that there's a clip that sits under the gear, and there's a little tab that goes in a hole. If that tab breaks off the gear will spin, which is bad mojo.
Maybe the little tab on this clip broke on yours?
Retaining Clip for GM T5 Output shaft If you need a gear:
9 Tooth 7 Tooth
That may be it. Someday I'll know.
For now I'll use the tach. The only real problem is in Peoples Republic of Nevada, Eastern California we have to report milage each year to register our vehicles. Mine is always the same.
That may be it. Someday I'll know.
For now I'll use the tach. The only real problem is in Peoples Republic of Nevada, Eastern California we have to report milage each year to register our vehicles. Mine is always the same.
Go ahead, rub it in...(I don't have a tach), my RPMs guesses are just that, a guess.
My tire size is 235/75r15, the diameter is 28.88".
The original 650r16 was 29.26". There's about 1/3rd of an inch difference, but the amount of tires to choose from is enormous. America's Tire has 44 different tires to select in that size, ranging from about $70-$200/tire. Tire Rack has 39 to select, $85-$210/tire. FWIW, if/when I buy new tires I see that have the Yokohama Geolander in that size, we've had really good wear on my wife's Honda CR-V, nice DEEP tread, they seem to last well.
I dont know if this will help,but when I built my 36 Pontiac, I found out that a 55 or later pickup 3rd member will bolt right in. All I had to do was change the axle gears to match the Pontiac axles. I even used the original brakes because they were slightly wider than the 55 brakes. As far as using the 5 speed trans, I only had to space the trans from the bell housing using a couple 1/2 washers
In between the bell housing &trans. You will need to drill out the mounting holes to 1/2. Hope this helps. Joe
Joe,
That actually does help some. Are you saying the third member from a torque tube will bolt into the open diff of the '55? That would have been helpful if so, but would have been before I sent the other 3.55:1 gears back to Mother Trucker. I'm currently waiting on the 3.38:1 set to come back to me.
Seems Joe said those gears wouldn't fit in the carrier, the pinion is quite different between the 2, when I was looking at them, the shaft is completely different.
EDIT: Update from Mother Trucker, Series 2 3.38:1 r/p on the way!
Ok, let me start this over...I had found an S10 in Sacramento that was a '93 with elec. speedo, but cheap at $350. Gearing not the best, 4.03 2.37 1.49 1.00 0.76.
However, another S10 surfaced for $425 w/mechanical speedo and it says rebuilt in Dec. 2020.
Hoping to get one this Sat. Waiting to find out about the gearing on the mechanical speedo trans, but that would be a great deal without having to pay shipping.
Ok, not sure where I am with the guy who has the mechanical speedo S10 T5, but I'm still scheduled to pickup the '93 S10 T5 with electronic speedo, and convert it.
Beater, I was asking this in the previous message, but removed it as I thought I was going to get this one that would have better gearing, but the 4.03 ratio rots for our trucks from what I've read. The .76 is not too bad on the 5th, but if I had my choice I would probably go with 3.73 on the 1st gear. My question is what do I need to change on a WC T5, so it has the synchros inside the gear, but I'm mainly wondering what needs to be done if I wanted to change 1st gear, as an example, do I only need to change the gear on the mainshaft ? I see a lot of gears, but they seem to be sold separately with no opposing gear, and this makes me wonder if those helical looking gears can mesh up with the opposing gear on the countershaft no matter what is on the mainshaft. Any thoughts of wisdom? Honestly, I don't really need the WC in my truck, not like the 235 is gonna blow it up, but the added bearings can't be bad.
EDIT: Update
Ok, not as bad as I had thought, I did cancel on the first guy with the '93 WC, but if for any reason the other guy with the mechanical speedo model falls through, I will buy the WC. I know the WC is the better trans, just that it will require more work. But I would get a better trans, IMO. I don't really need it, I think the non-WC will be such a difference, it will be like night and day...
The other guy has 3 T5s for sale, 2 are for Mustangs and this one is from a '91 S10, but he doesn't have a tag number. He said it was smooth and it shifted smoothly in all the gears. However, it's a strange deal...this trans is in storage and he owe's about $300 back rent on his storage, so they took his code out of the fence lock. I would hope they will let us in to see the trans before he has to pay as he need most of the money to pay his back rent. This is all seems like a craigslist debacle. But I have the '93 WC in the pocket if this falls through.
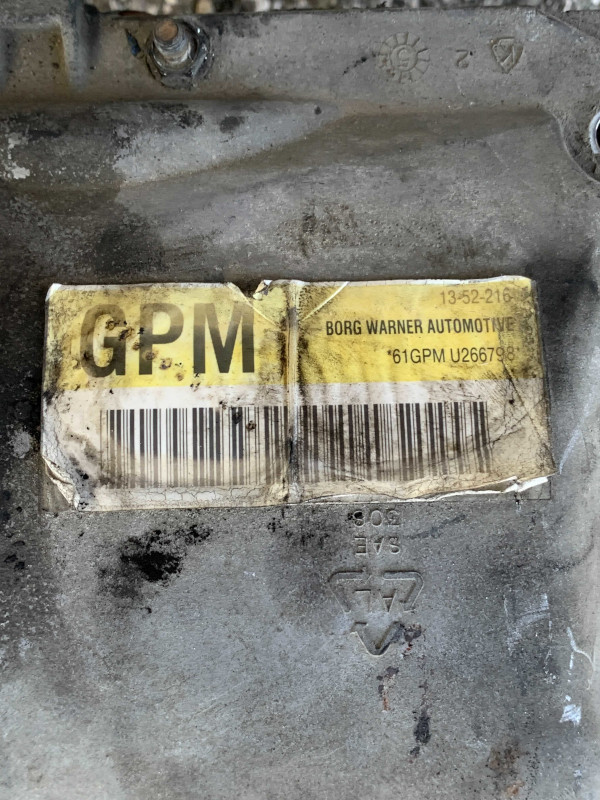
Ok, a long hot day on the road to snatch the '93 WC T5. The 2nd guy with the mechanical speedo was a giant flake, and finally this morning after my Bay Area Inliner metting at 11:00am, he said he was not able to get a hold of the storage office, or get them to call him back...I just said, thanks you, I'll buy the first one I was looking at. This is a 1352-216 tag. He gave me the bell housing with the clutch fork, which I need like a hole in my head. Maybe I can sell the bell housings on craigslist.
And the new 3.38:1 ring and pinion arrived today, that was faaaasssssstttt service from Mother Trucker. I can't thank enough for his more than warranted exchange. I bought the old set about 2-1/2 years ago. They were unused, I had never mounted them though.
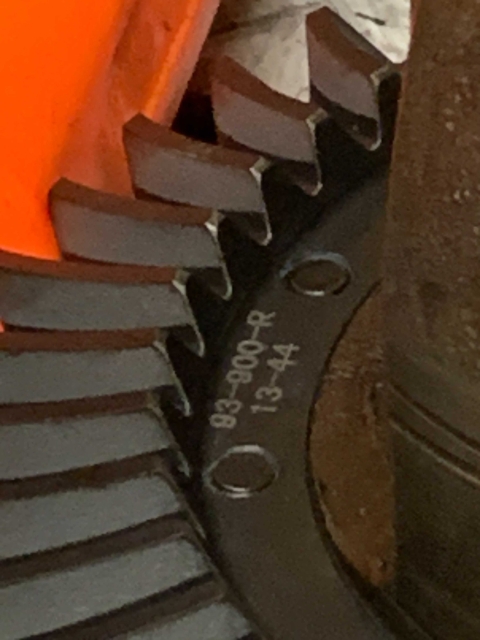
This set is a 44 tooth ring gear with a 13 tooth pinion. (3.384615385)
My hope is that the 3.38:1 might offset the 4.03 1st gear and make it slightly more tolerable, as hopefully the .76 on the 5th would be more tolerable also. I will see soon enough. First thing to do is convert to mechanical speedo, I think I'm gonna send it to the guy in Washington on YouTube, he charges $200, you send your electronic speedo, he converts it and supplies all the parts.
I think with the 3.38s you will be fine. If not you will at least be better until you can make it fine. Mine must be 4.03 low and it's a little low with the 3.55 rear end but comes in handy on the steep parts of my road with a load. Not like a "Granny" gear but low. You'll get used to it.
Not like a "Granny" gear but low. You'll get used to it.
I once drove a '42 with the 4 speed tranny, what a frickin' dog...even 2nd gear is pretty low also. I thought it was useless driving on regular roads, and the truck was fully restored.
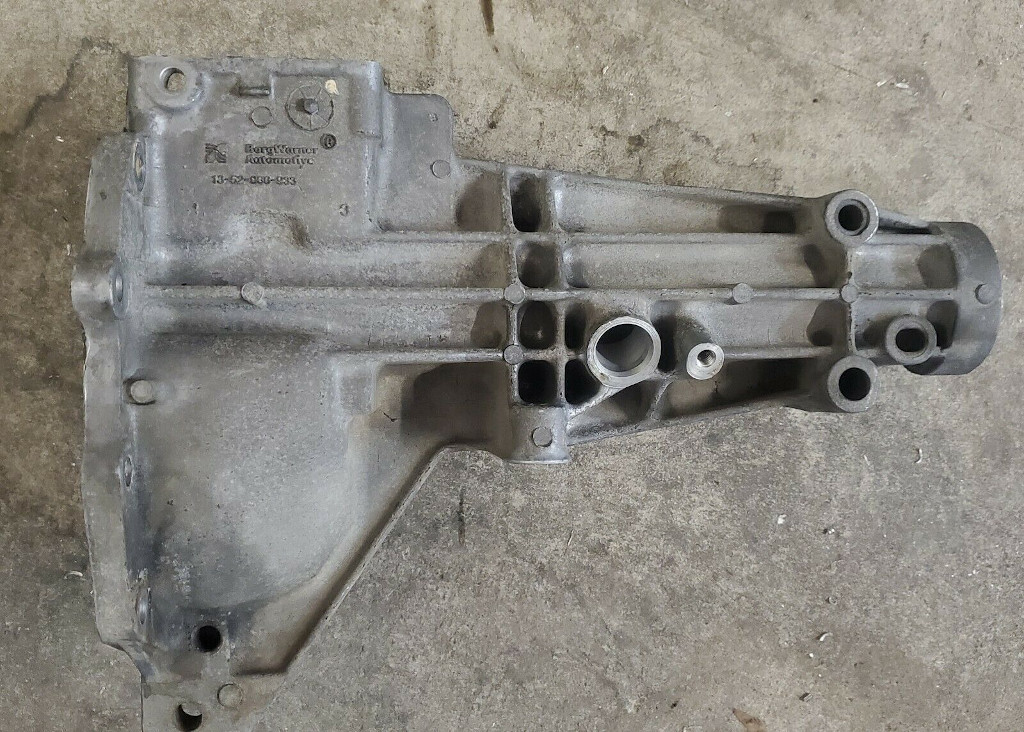
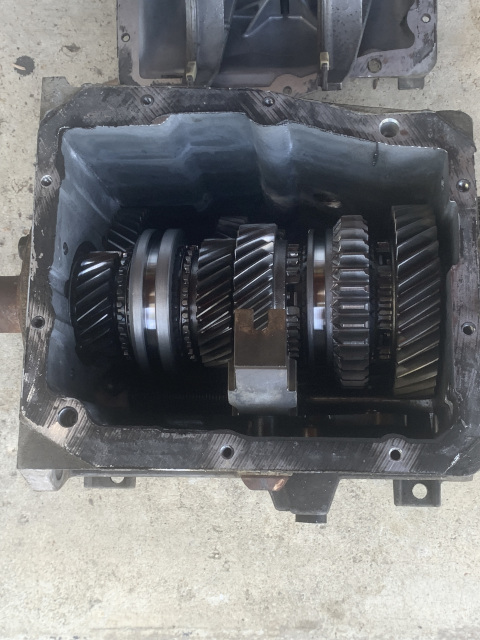
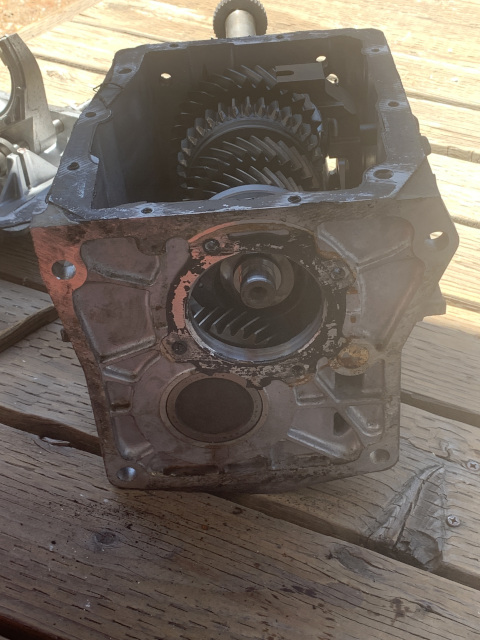
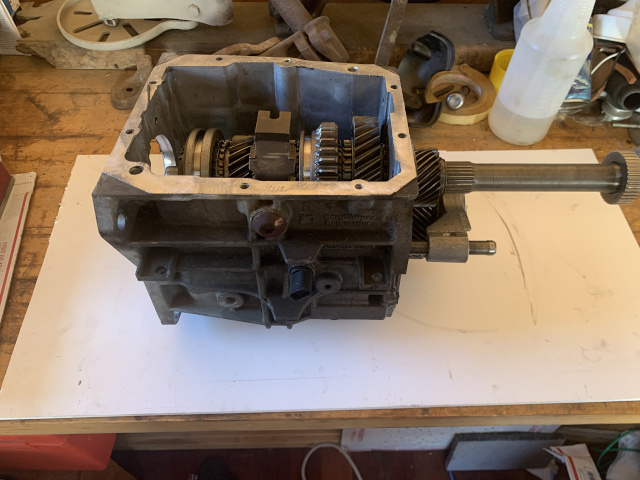
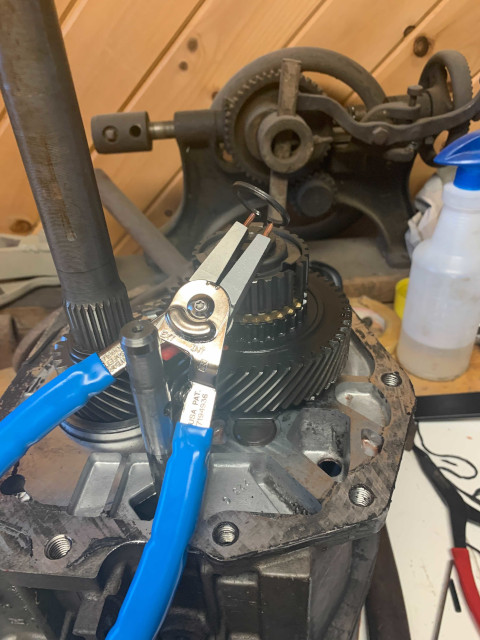
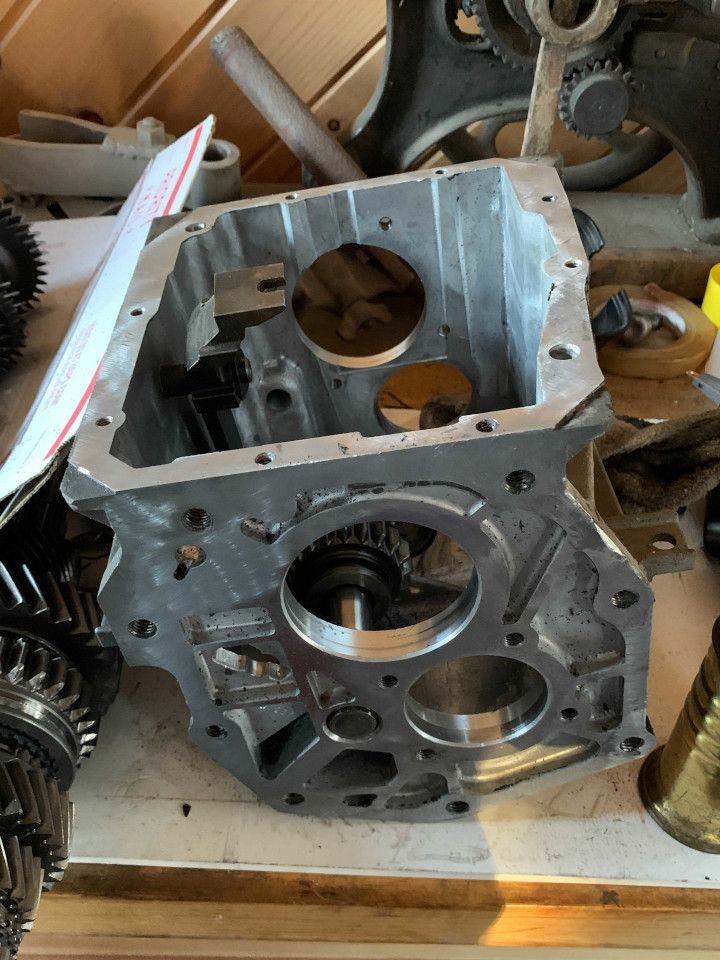
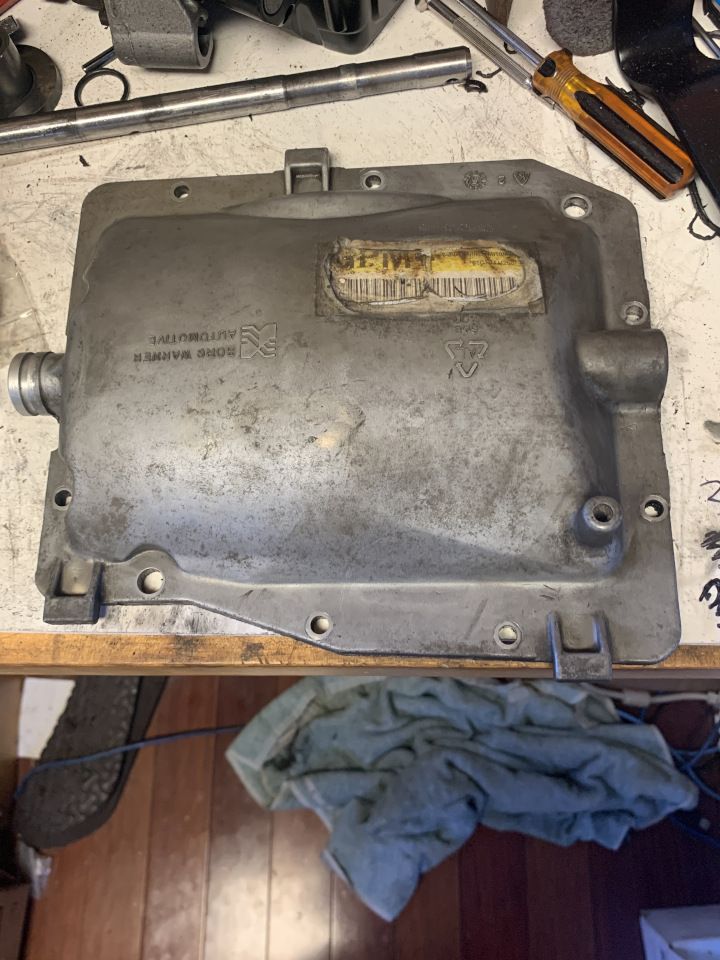
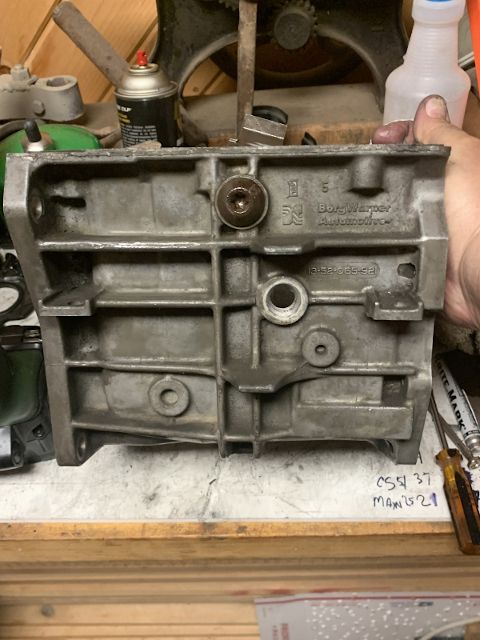
Made some progress today. First bill of order, loose the bell housing. I noticed this trans has support arms on it, I had first thought maybe it was from a 4WD, but after I get it off, I realized this bell housing is aluminum, my '55 series 2 bell housing is cast iron. Maybe that's why the supports were added. I wonder when that happened? There was some interesting changes happening around '93, Ford created what they call the T5z, a hopped up WC T5 for the mustang, and somehow GM seems to have used those changes as well. Lots of silicone sealer all over, gives me the feeling it's been rebuilt and someone has been in there, but gears feel good and smooth. A tad of end play on the input shaft but I think I can shim that out.
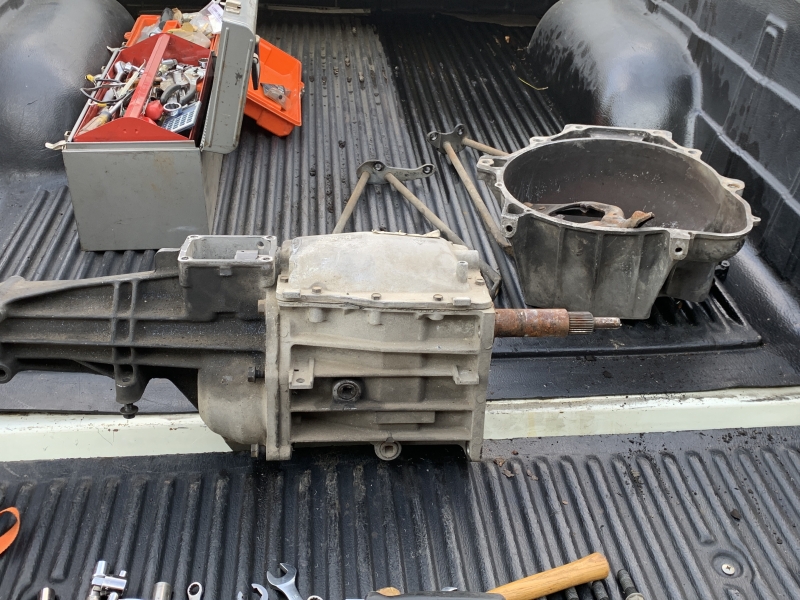
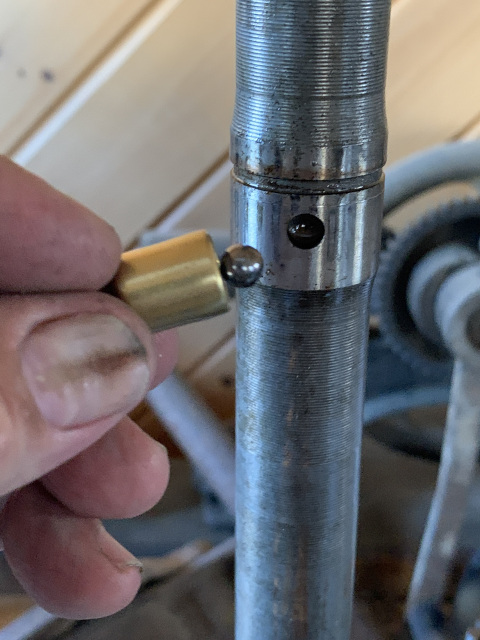
Then I separated the tail shaft, saving the shifter lever, pin, spring and ball bearing.
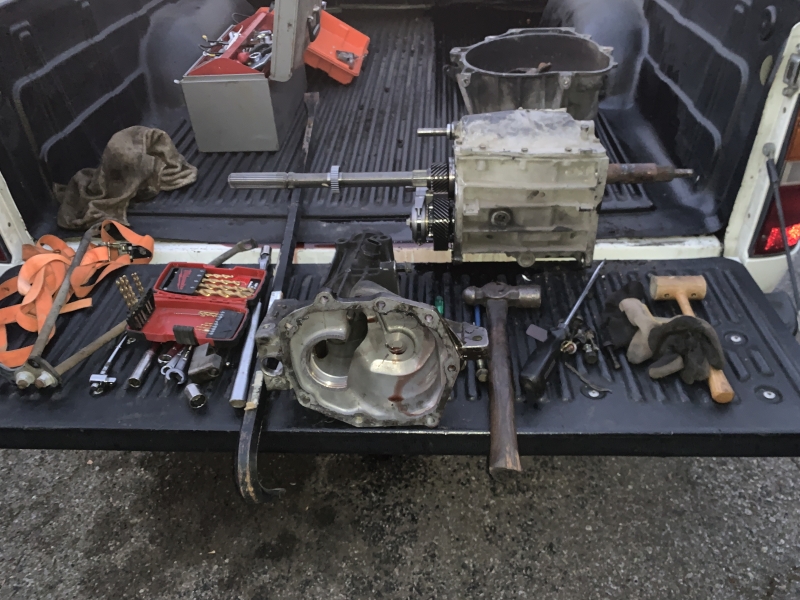
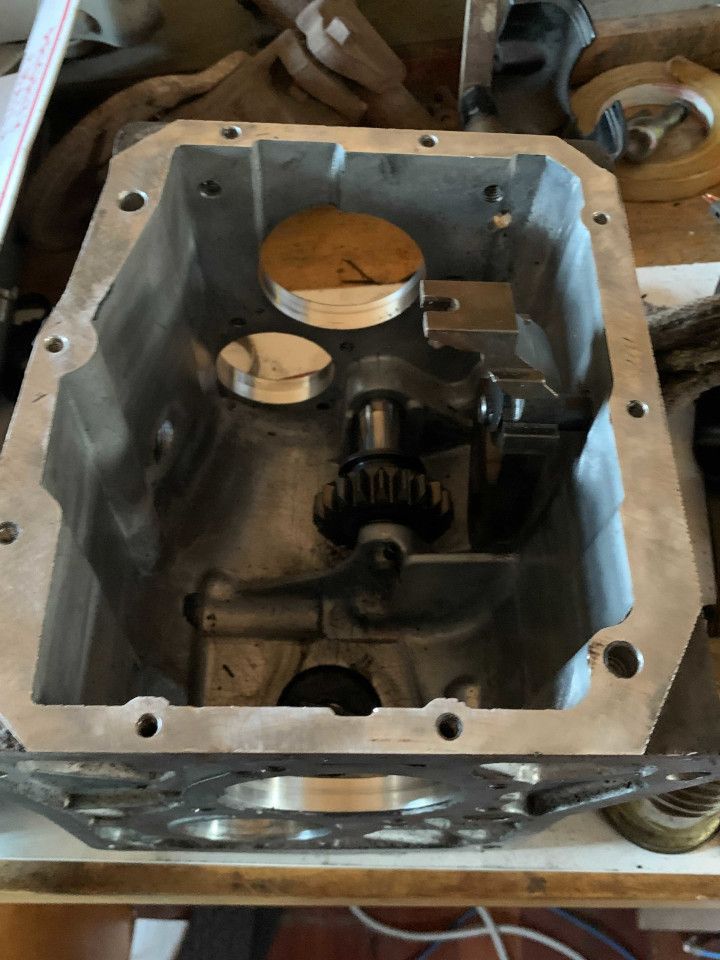
Here's the 5th gears, they look good:
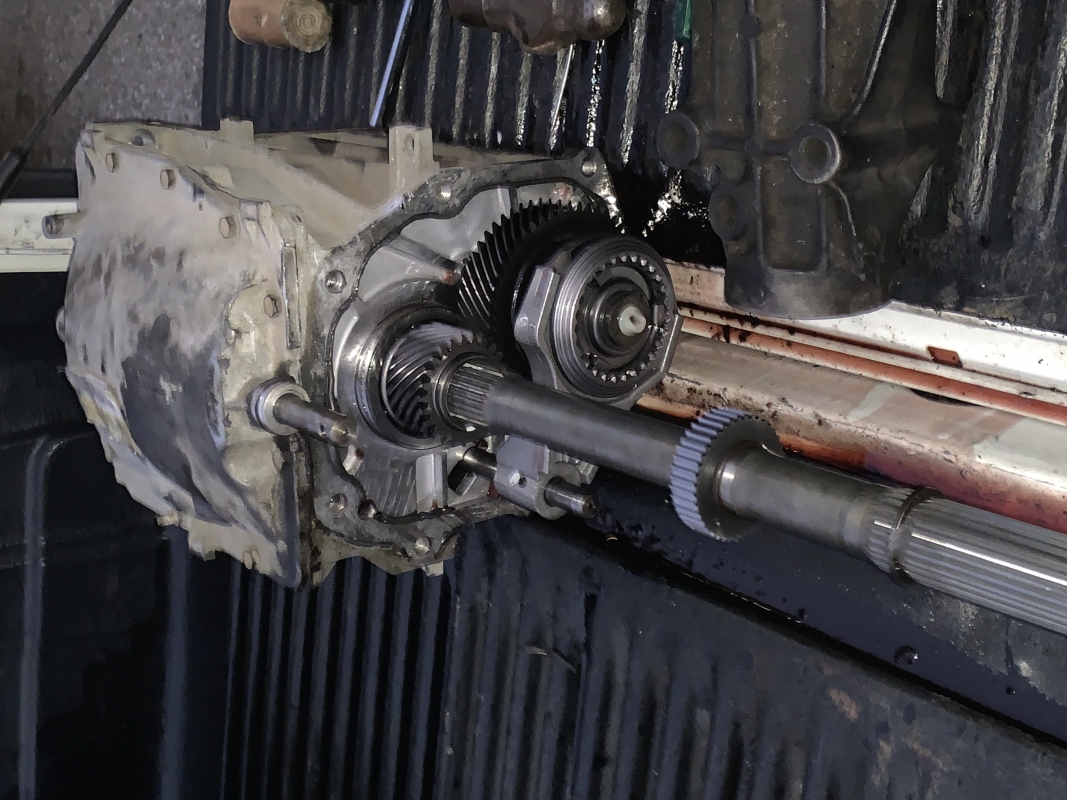
Close up shot:
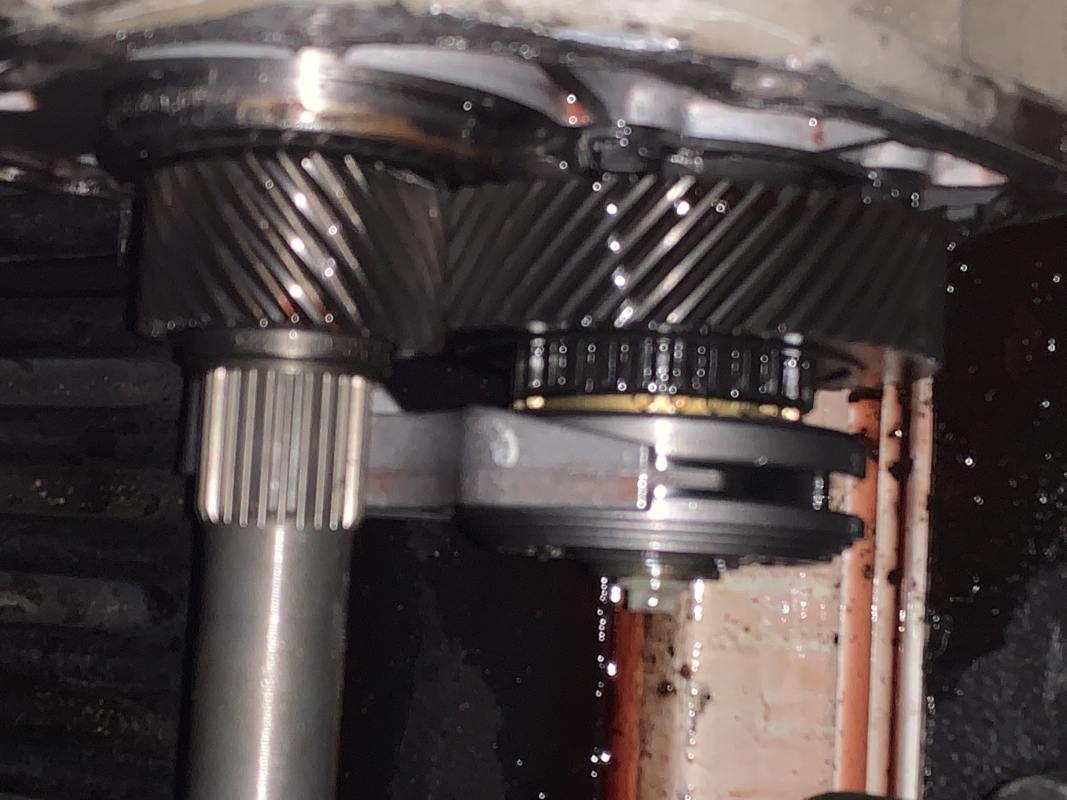
Looking good! There is a way to move the pivot point on the shifter and shorten the throw, a handy thing with a long lever.
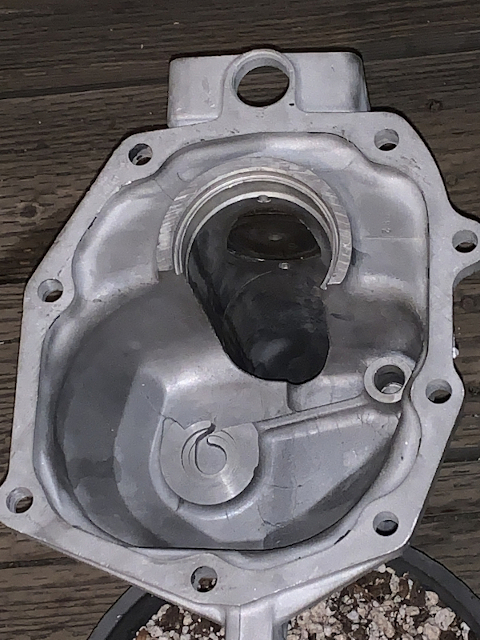
It looks like I can get to my speedo gear by just removing the tail shaft. Iy's been a while since I put it in.
Yes, you can change the speedo gear by removing the tailshaft, do a google and refresh your memory as you need to pull the shift lever and there's a spring and ball bearing and the pin that you knock out...but the tail shaft needs to pull past the top rod holding the forks in order to be removed.
The guy in Washington, from Ebay, takes the tire size and calculates the rear diff to decide what gear he needs. The online calculator I used basically did:
  Tire Diameter * diff gears
  __________________________

      Original Tire Size
That will give you the ratio the rear end should be, and by doing that I get a 3.34:1, pretty darn close to the 3.38 I'll be putting in there. I don't know if he will adjust up/down for the speedo drive gear.
Just sprayed some brake cleaner on it to try and clean the outside before I send it off to Washington. Need to find a box big enough also.
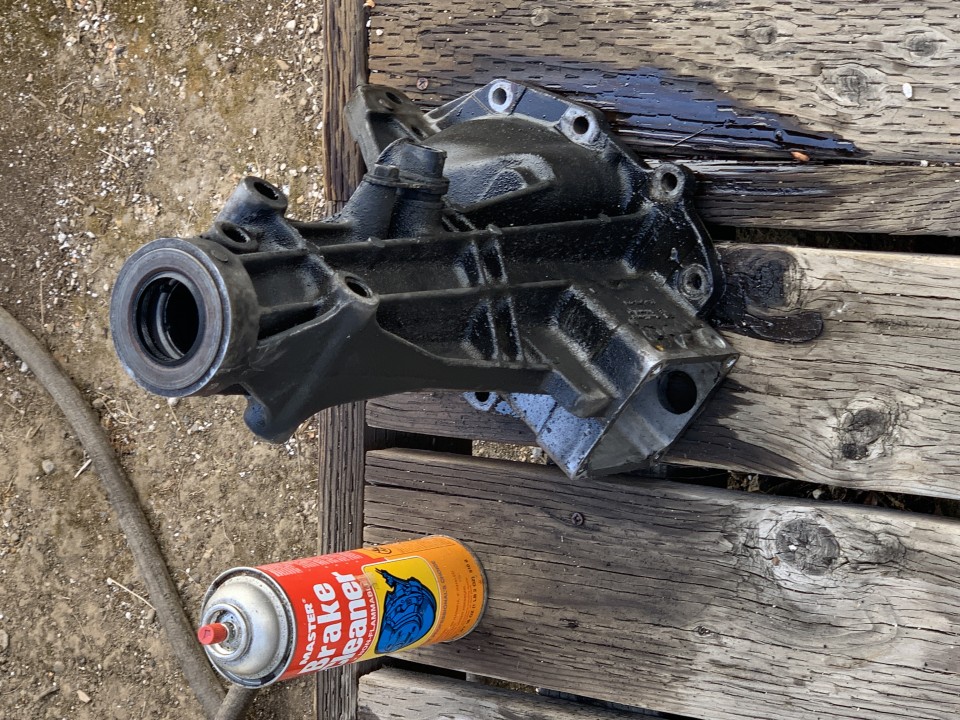
Shipping to Washington state to have the speedo converted.
Well, I think at minimum I'm gonna need to replace the 5th gear set also, since I went out earlier to count the drive gear and the main shaft gear...not good...drive gear is 25, main shaft is 51, which provides a 0.490. Looking at the numbers, someone was showing me that with the 3.38 gears I really need a .86 set, that would put me right around 2150 rpm at 65mph.
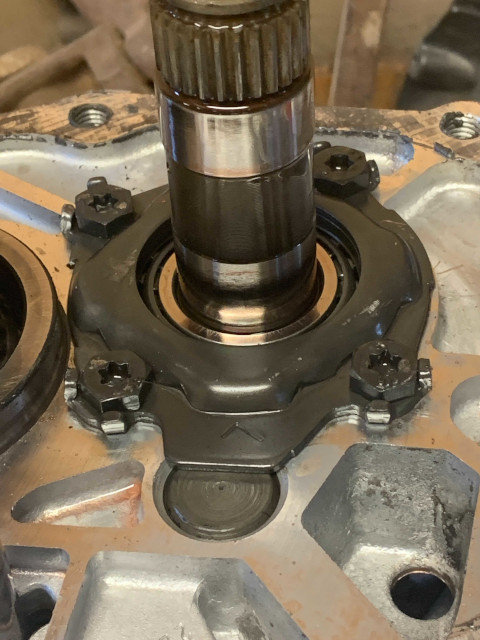
Ok, talked to a guy in SC today, he hangs out on Stovebolt under the username Lugnutz. Very nice guy, and he set me correct in a few things about the transmission.
1) although the tag says a '93 when you look it up, it has a small insignia with a 5 in the center, so Jay said it was a '95. You can see the odd screw with a nut on it. That one is being stubborn. You can also see the 5 in the center of the flower design, what Jay referred tot it as. That designates a '95 Transmission evidently.
2) I will most likely need to make or get an adapter plate as this T5 has a Ford bolt pattern, Jay said GM did that after late '93, and there are adapter plates available, but $175. At least it will work.
Ford T5 to Muncie Bell Housing 3) I calculated the 5th gears wrong, and he thinks they could be .86, or .76 as I had originally thought, which is perfect for me, if it is. I need to verify the gears inside the case, but one of the screw/bolts is stuck. Soaking with PB Blaster as I type.
This guy helped me a great deal in being able to start understanding my transmission. He's helped a lot of people, but I'm the first with a late model WC S10 T5. Everyone else had a NWC. If you watch this video, his 5th gear is a 25/61, my T5 has a 25/51 in it. If you calculate with the CS gears he has in his (37 on the 4th gear), I would have .86 overdrive which would be PERFECT! According to his calcs, my engine would be going about 2150 RPMs going 65mph.
https://www.youtube.com/watch?v=BcgX8R2l9OkAnd I did learn the rest of the puzzle today. I have the original 1946 bell housing in my truck. I'll need to make a bracket to hold the master cylinder that is in it now, the master cylinder and hard lines were done by the previous owner. I was told some folks let it hang with no added support and they seem to do ok, but I think it's better to make a bracket and secure it. It does have brake fluid in it...
Anyway, the pre-'54 bell housings had a slightly smaller pattern. I'm going to leave the bell housing in it that is in there now. Dave, over at Vintage Metalworks is going to make me a plate that will go from the bell housing pattern I have on my '46 to the Ford bolt pattern on the T5.
This adapter is for the '54-'62 bell housing to the Ford bolt pattern:
http://vintagemetalworks.blogspot.com/p/t5-9495.htmlThe reason I don't want to change the bell housing is that the older trucks like mine had a pedal mount on the bell housing and if I put the '55 Series 2 bell housing in it, I'll need to fabricate some type of pedal mount. I think it's easier to leave that the way it is.
Dave has a guy that will rebuild my clutch disc, or build me a new one that will work in my bell housing with a 26 spline for the input shaft. In short, the T5 will remain as-is, other than the tail shaft modification that is being done to it, I'll use the adapter plate for my '46 bell housing that Dave will make for me, and the drive shaft from the '55 I have. I probably will need to cut down my drive shaft, Dave thought possible 3" or so, and I'll use the '55 Series 2 axle with the 3.38 r/p.
Sounds like you have it all figured out. The video was interesting. I didn't know the OD worked that way. It is good to use the original bell housing. Will you use the floor starter? That alone is a theft deterrent now days.

Good deal finding someone to make the adapter, the more direct bolt up the better! I'm sure there is a clutch plate out there if you can find it. I worked at CarQuest and had access to catalogs with pictures and specs when I put the T-5 in mine. I think that OD ratio with your rear end gearing will be good. No matter what you will be better off then you were.
It is good to use the original bell housing. Will you use the floor starter? That alone is a theft deterrent now days.
I completely agree, many people wouldn't know how to start the truck with a pedal.
Good deal finding someone to make the adapter, the more direct bolt up the better! I'm sure there is a clutch plate out there if you can find it.
Clutch disc will be made for me by a shop in Tx, which Dave recommends. Dave is at Vintage Metalworks and is the guy who will make the adapter.
I think that OD ratio with your rear end gearing will be good. No matter what you will be better off then you were.
I agree, can't really make it worse.
This is the tail shaft when sending it up to Washington, I tried to use some brake cleaner to no avail:

And here's what it looks like coming out of Dan's parts cleaner. Not sure if he'll paint it or not.
Tail shaft is done and on it's way back to me.
XLNT turn around time, IMO.
Made only a little bit of progress, works has me up to my neck in problems...
Tail shaft should be here tomorrow, got a notice from UPS that it will arrive tomorrow.
I saw someone saying they passed $2k in doing a T5 conversion, and I started to add things up, with a rebuild kit, which I think I should do at this point, I'm up to about $1275. That's only the trans, and I bought the trans for $350 ($200 for adapter plate, $300 for tail shaft conversion w/tax/ship, and $125 for a new clutch disc I will need to get).

I have another $200 in the rear axle, $50 in the driveshaft, and let's not forget about $300 for the ring/pinion. The rebuild kit for the WC is $300, unlike the NWC which is about $100. Still, I feel the WC is the better transmission. In this regard I would still have $975 into the transmission if I didn't rebuild it, and truth be told, if I rebuild this T5, I will most likely last the rest of my life, or however long I have my '46. I might as well do it right.
The bottom line is that this will be one of the best improvements I can do to the '46 after it's all said and done. At least in the sense of making it drive able on the highways without dropping a V8 in it, an auto trans, and a new front clip, etc...that's not what I'm after.
EDIT: Oddly, the manager for Transparts Wharehouse, located in Redding, CA. They offer a WC rebuild kit that has Japanese Koyo, SKF or Nachi. The other thing I liked was that they use the OE Tremec synchros, those are the newer carbon fiber lined synchros which are supposed to be superior to all others. Includes all parts, including the spring clip that holds the reverse mechanism to the side of the case (inside that rounded torque head that doesn't come out).
Transparts Wharhouse WC rebuilt kit
You can not focus on the money. It's the improvement to your '46 and all the fun you are having that counts. Money is just the means to an end.
You can not focus on the money. It's the improvement to your '46 and all the fun you are having that counts. Money is just the means to an end.
It's not about the money, but I'm glad I have the money at the moment to get all these parts.
Some I had, but still, I had to buy them and they came out of my pocket at some point, but it's all moot...it's a hobby, we don't really need to justify our hobbies, they put smiles on our faces!
I mentioned before, I was in love with a '42 with dual intake Fenton, upgraded rear end, 235 like most all upgrade to, et al. I could have gotten it for $23k, but out of work at the time and no equity line to leverage.
When I did have cash I was able to pick this one up for $8k, ended up about $9k with shipping. I don't feel bad about dropping $2k into this, I knew when I bought it that it could potentially cost me more than $23k to get in the condition the other one was in, but not even sure I want to do that with this one...I like the patina. As you elude to, it's mostly about the journey. I'm just making it more convenient to drive. Still not sure what I'll do about navigation and/or radio, but I see some CarPlay panels that looks promising. I could use my phone like I do now, but I gotta have tunes while I drive, and a larger panel for navigation would be really nice. The rest is fine with me, steering wheel, brake, gas...and clutch/shifter.
EDIT: in case anyone is wonder, this is Alloy Specialties website:
http://t56cablespeedometer.com/And here's a couple pics of her work, I converted these to 480x640
THUMBNAILS so I could post here. Posting images here is pathetic at best.
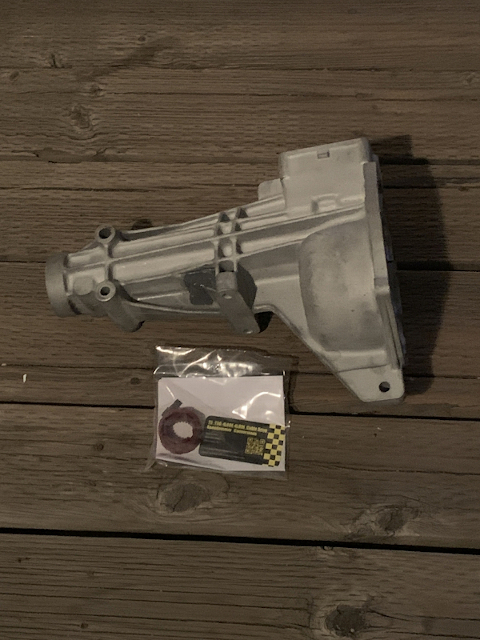
As a bonus, the tail shaft came back from Alloy Specialties in Washington. Can say enough good about them, this tail shaft was filthy and the grease laughed at brake cleaner. Albeit, I didn't give too much elbow grease, it was apparent it wasn't coming off easily.
Now this is completely prepped sans some paint. Luckily the main case wasn't nearly as dirty, that must have gotten cleaned when someone was in this T5 originally, there's a lot of RTV Silicone creeping out the seams...
I'd post pics, but after resizing 3 times, finally down to 600x800, I give up. Most all software I've used scales by resolution not size. Different images with different colors are different sizes, it just all depends on how it compresses. After resizing 4 pics 3 times, I give up, maybe you need to scale to 640x480, that's the resolution monitors were about 30 years ago...around the same time we were using 1200 baud modems...
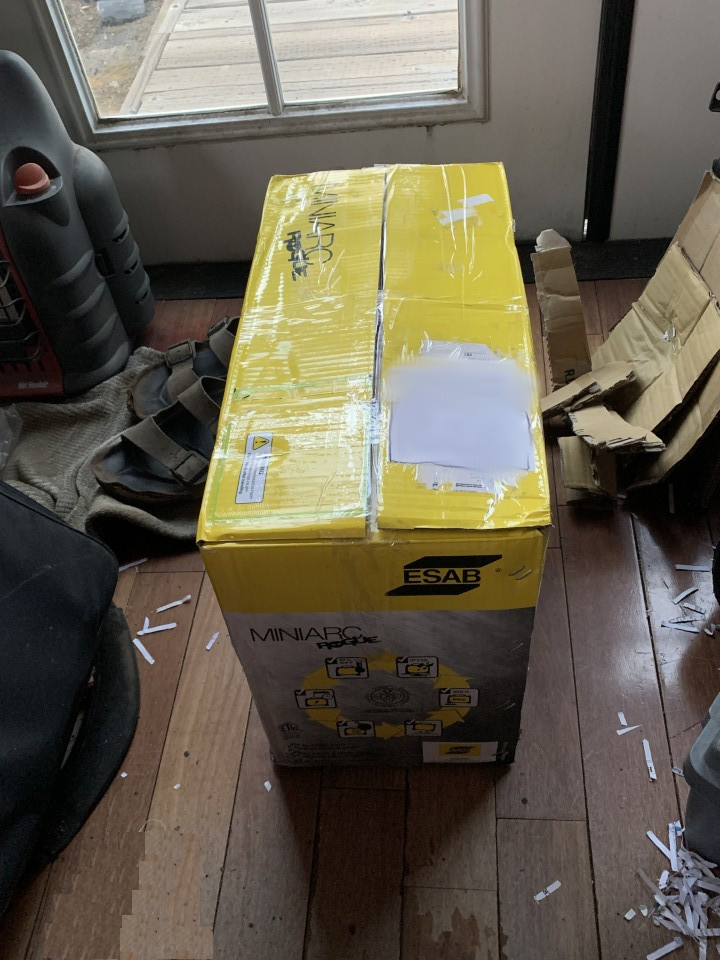
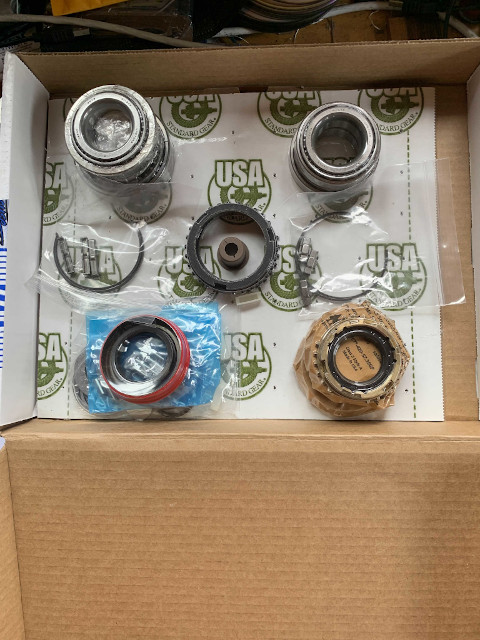
Got this WC rebuild kit today from Transparts Wharehouse, up in Redding, CA.
Despite the slathering of USA, the bearings are Japanese Koyo bearings, and one of the reasons I bought this kit.
I suspect other people get this same kit, it does have Tremec synchros, the newer style with carbon fiber lining, opposed to the older style that looks like auto trans liner. This would only matter on a WC T5, as the NWC uses brass synchros. WC T5 uses a brass synchro on 5th/Reverse.
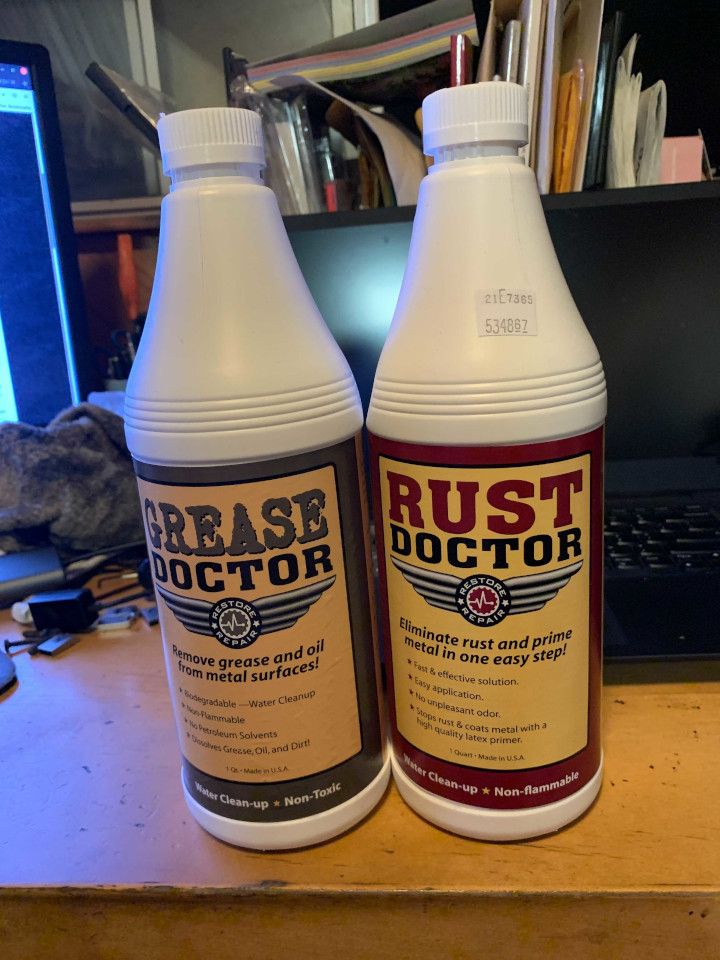
Tom, saw your roadster build over on the H.A.M.B., and replied to you, but was curious about the Rust Doctor. As I mentioned over there, I did buy a quart of Rust Doctor and a quart of Grease Doctor, they had a package discount.
I'm going to use that on the '55 Series 2 axle.
I use Evaporust but have been looking for something I don't need to immerse the steel in, and this stuff looks like just the ticket.
I really like it! I have fussed with all kinds of rust products. For things you can dip or soak my favorite is citric acid and water. It is cheap and environmentally friendly. I built a large tank with wood beams and a big plastic sheet and soaked my frame, front axle, drums, backing plates, steering parts,......I had tried sand blasting with a kit I got for my pressure washer. It worked pretty well but messy. I should have done it farther from the shop. Because of my laziness and not being satisfied a lot of it sat out and re-rusted, just light flash rust. So I put the Rust Doctor over that. Where there was rust it turned into a nice solid black coating that I have hammered on and you can weld through. Where there was little or no rust it left a light to clear acrylic primer. I have left a lot of it out and it looks as good as the day I coated it. Just trying to see what t really does. I'll still paint it when it is time.
The rust Doctor likes a surface with smooth rust, brush the loose flakes off. A lot of chassis parts are just what it likes. Eventually all my body panels will get Citric acid and Rust Doctor. The rust Doctor covers way more area than I expected. My frame took about a pint! No more Evaporust for me citric acid does as well and is cheap. It will not remove grease like the citric hand cleaners but won't hurt paint or plating except for zinc.
Gotta' get back on the roadster! Time just slips away while trying to keep this place running.
I really like it! I have fussed with all kinds of rust products. For things you can dip or soak my favorite is citric acid and water.
As a matter of fact, I use that to remove the blue coating off 1095 spring steel, you can usually find it at home brew shops, they use it for fermenting. I get similar results with vinegar.
I would love to have a pressure washer, like 5000 psi.
Eventually all my body panels will get Citric acid and Rust Doctor. The rust Doctor covers way more area than I expected. My frame took about a pint! No more Evaporust for me citric acid does as well and is cheap. It will not remove grease like the citric hand cleaners but won't hurt paint or plating except for zinc.
Yeah, Evaporust seems similar in price, but I like how this will allow you to brush on, close up a container and save it. Although Evaporust can be used over and over, it's got a lot of rust and other crap it removed.
Gotta' get back on the roadster! Time just slips away while trying to keep this place running.
I hear 'ya, I have a house to build...
I found a couple of parts I had left I had left in a can of Evaporust and forgotten, The liquid had evaporated and left the rust & crud, Just a big black flat hunk it the bottom of the can. I was able to bust out the parts but they were still rusty? I need to learn to follow directions. I think my wife bought me a T-shirt that says that.
Are you coming to the convention in Carson City in September?
I need to learn to follow directions. I think my wife bought me a T-shirt that says that.
You and me both, and I think my wife bought me a shirt that says it also, or maybe the kids...
Are you coming to the convention in Carson City in September?
No, unfortunately I won't be making it. Several of the local folks were encouraging me to go, but they said there's no tool swapmeet going on, and I don't think I can get my truck drive able to Carson City, 80 is a tough grade...probably won't have it in overdrive when I do make the trip over your way. I'm not in it for the dinner, I'd more be in it to meet others like you. We will most likely meet at some point as we're close, but this year is probably not it.
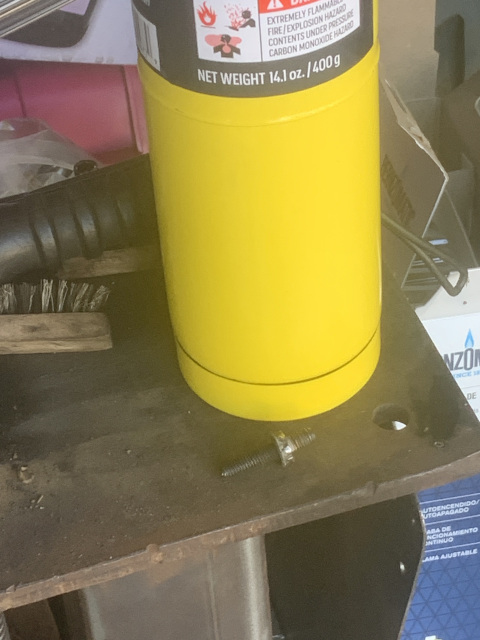
To continue on with my project, I used my little mapp torch to get this stubborn bolt out, probably red loctite, not sure. I took it to about 400 F. according to my thermal temp. Came out fairly easy, using a vice grips. Can probably reuse it, may get a matching one like the others.
Got it opened and counted the important teeth. The counter shaft 4th gear is a 37 as I had hoped, and my input shaft is in fact 21 tooth, so my OD is .86, the most important, and my 1st is is better also. I have a 32 tooth on the main shaft for 1st gear.
And finally, everything is in really nice condition, pad have just some slight wear on them, but it's all being replaced as I rebuild this.
"I'd post pics, but after resizing 3 times, finally down to 600x800, I give up. Most all software I've used scales by resolution not size. Different images with different colors are different sizes, it just all depends on how it compresses. After resizing 4 pics 3 times, I give up, maybe you need to scale to 640x480, that's the resolution monitors were about 30 years ago...around the same time we were using 1200 baud modems... whistle"
Several years ago this site was alive with discussion and pictures of posts & projects. The people who "run" things have chosen to fund a "news letter" that can not answer questions in a timely way and and support a FaceBook page that can not be searched for meaningful information. They wonder why membership is a problem. This used to be the source for inline engine information for many makes.

Several years ago this site was alive with discussion and pictures of posts & projects. The people who "run" things have chosen to fund a "news letter" that can not answer questions in a timely way and and support a FaceBook page that can not be searched for meaningful information. They wonder why membership is a problem. This used to be the source for inline engine information for many makes.
Well, if they want to continue to exist, they will need to adapt to the times. stock49 put some of the newsletter scans up as PDFs, that was very smart, that's the type of stuff they should do...don't spend money mailing stuff out, I used to do that 35 years ago when I ran computer user groups. Nowadays everyone has a smart phone, literally most everyone. I know there are some that don't, but at this point it's not something the club should worry about. Focus on the Internet.
They outta quit doing hard copy, only post PDF and build these forums and create their own piece of the web, rather than using Facebook, that will just not work out in the end, IMO. I don't like to use FB myself, it's not a free platform.
So I've started 2 EFFin sets of images, one for the real world, and one set of small 640x480 for the Inliner's forum, which is literally VGA resolution we used on computers 35 years ago...not sure how long I'll be doing that though...at some point the Inliners will get written off.
In my opinion the only reason this website exists now is because of the things Stock49 has been able to patch up and improve. This should be discussed at the convention but I doubt if it will be. There is a treasure trove if inline information hidden here that is far to difficult to retrieve. Posting pictures, even with the newer system, is just too time consuming. That is why my build thread is on the HAMB. I tried here and on another site and the HAMB is so easy.
By the way I don't have a smart phone, my pockets aren't big enough. I had one for two days and took it back. I have a little Koycera flip phone that the oilfield workers used. It has a special old android system that can not be updated but it does all I need plus it is my internet connection with a mobil hot spot that is far better than Hughesnet. It will also do a lot of things I don't want to do.
In my opinion the only reason this website exists now is because of the things Stock49 has been able to patch up and improve.
I sent him a PM, but he hasn't read it in a few days.
This should be discussed at the convention but I doubt if it will be.
Too bad as I think it's an important part of their future.
There is a treasure trove if inline information hidden here that is far to difficult to retrieve. Posting pictures, even with the newer system, is just too time consuming. That is why my build thread is on the HAMB. I tried here and on another site and the HAMB is so easy.
Agree again, and Stovebolt is easier also, they will allow images up to 5mb in size and you can post 5 per message. HAMB also, it's way easier to post pictures.
By the way I don't have a smart phone, my pockets aren't big enough.
But you use a computer, know how to post pictures and do it regularly.
Look, it's not too fun to surf on a phone, but it's convenient and most people can get a PDF on their phone if they have to. This all reminds me of a user group I ran in L.A. during the late 80s. The treasurer took about $5k of membership money and there was really nothing we could do about it. Police said there was nothing they could do, as she was given access to the bank account.
After that I never charged a membership for a user group, EVER. And I ran several groups, one in L.A. with IBM, and one with Sun Microsystems in the Bay area, but have never charged money as a membership fee after that. I have always made it free after that lady ran off with our cash. I hope karma got her and caused more disruption in her life than she could imagine.
That said, the writing is on the wall, there's no future in mailing hard copies to members, too much cost and work. The Internet is our future for better or worse, it's not something that the Inliners can solve, the world has already made that decision.
Moving along, input shaft is off. Bearing cover and bolts were really rusty, rust dust was falling out as I took the bolts out. Didn't use an impact in case that would strip the threads, so used a bit breaker to loosen them. I saw on a video it's not a great idea to use the impact wrench.
Needle bearings were dry, but that should be expected as they normally get lubrication from the ATF, AFAIK.
All the input shaft parts:

Main case ready for a face plant on my bench as soon as I clean space for it.
I realized there is no rush to get this done, I really want to do this right, paint the outside of the main case, top cover and tail shaft, and make sure I put everything back together correctly. Easy to not press a bearing or gear far enough.
The citric acid you can get at many pool supply places. Or you can get it off Amazon.??
The citric acid you can get at many pool supply places. Or you can get it off Amazon.??
Larry, I think I have a couple pounds of it, that should last me a while...I got it off either Ebay or Amazon, can't remember, just that when I was looking for it the most common was homebrew supply shops.
Got a spot cleaned on the bench and got the input shaftless T5 face planted on the bench.
Then I used a magnet to remove the ball bearing.
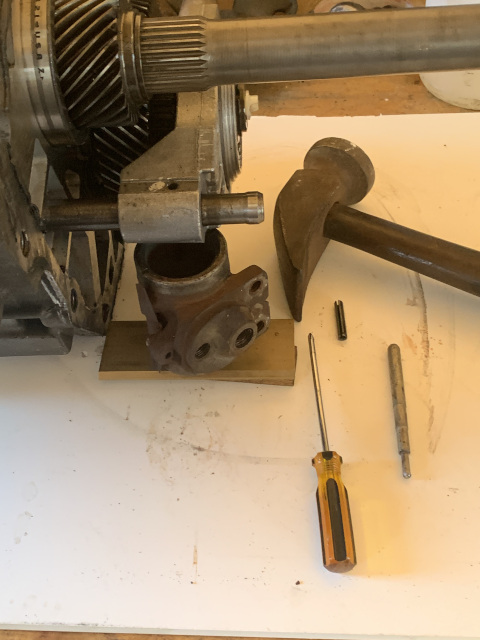
Used an old Huck cylinder to support the case while I drove the pin out of the 5th/reverse fork.
Then I needed to go up and get some ring pliers, mine were too big.
I was a tad surprised, HD had a pair of Channel Locks that worked perfectly, made in the USA, has a switch to change from in or out.
And now I'm stuck without a T50 to remove the counter shaft retaining plate.

You can get citric acid at the grocery store. It has so many uses it is east to find.
Good to see your progress. I'm not taking ANYTHING else apart until I put some things back together.
Here's what I believe I have gear wise in my T5.
4th-3rd-2nd-1st--5th
37---32---24---14---51 counter shaft
21---27---31---32---25 main shaft
1----1.48-2.27-4.03-0.86
You can get citric acid at the grocery store. It has so many uses it is east to find.
I have like 2 pounds of it. I mentioned to you, I use it to remove the bluing from 1095 spring steel when I make handsaws.
Good to see your progress. I'm not taking ANYTHING else apart until I put some things back together.
Thanks, I'm not a very fast wrench, but like to do things right. I'm not taking anything else apart until I get a T50 in the morning.
Upon recommendation from Beater on another fora, I'm going to use this on my '55 axle.
I hope it works as well for you as it did for me.
I hope it works as well for you as it did for me.
Me too!
It's an interesting concept, turning the rust into black magnetite, it seems to be able to contain it. It almost seems too good to be true, I mean, so little elbow grease?
Moving stuff in and around the shop today so I can bring home the chassis table we built at Bruce;s place. I found a lot more parts to de-rust.
Moving stuff in and around the shop today so I can bring home the chassis table we built at Bruce;s place. I found a lot more parts to de-rust.
Beater,
That sounds pretty cool, is that a long table that you can put the chassis on to work up higher? I've seen people using rotisseries made for chassis.
Someday I hope I can have a lift in my garage. Gets old crawling around under a car/truck on jack stands...Bruce seemed to help you out a bunch on that project, it's a shame that it ends so quick like that...I'm sure it's still a shock to 'ya.
I'll be honest, I never really looked at too many roadsters, but that Chevy body is so much cooler than any of the Fords. That body really has nice lines on it. That's a damn cool project...just not sure I'm ready for something like that yet.
To kind of keep on track, here's the progress I've made recently...
I used a bearing/race set to remove the front counter shaft race out of the case, a few swift wacks popped it out of there. The bearings and races are Timken that were in here, I'm replacing with Koyo, if that matters. I'm ok with that as Timken is not all made in the U.S. anymore, and quality is going into the toilet. I recently got Timken seals made in China.
I cleaned up the surfaces with my 2" scotch brite pad in a cordless drill.
I was able to tear the case down without a press, so far. But I will need to use my press to get the gears and bearings off the counter and main shafts both. The way I got the counter shaft out was like this...once the rear race was out I could pull the counter shaft up by sliding it over the idler, just enough to raise the rear bearing enough that I could get a bearing splitter under it, and was able to use 2 jaws on bearing puller to barely get under the bearing splitter in 2 of the recesses of the case. Then I held the center rod as I used my cordless impact wrench to pop it off. I will need to destroy the front bearing to get it off, no other way to do that, but so far all parts removed intact.
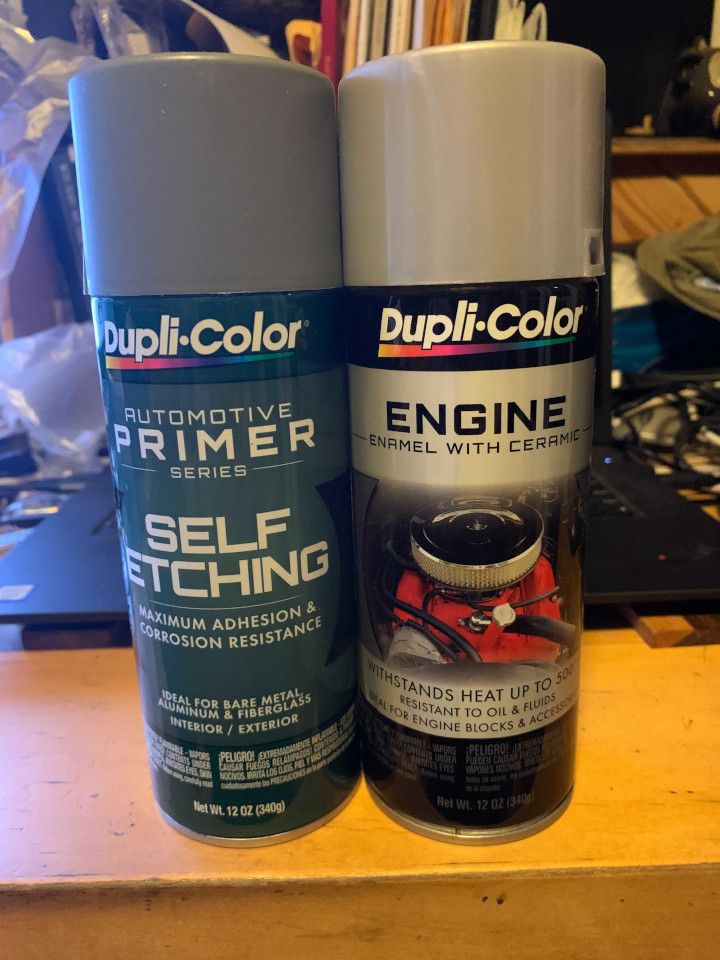
I still need to clean the outside of the case, and I'm going to go up to the auto parts store and get some of the Dupli-Color primer.
PS - this is still too difficult to resize the pics, go into the photo library, upload the pics, create a post and use those links.
We must make it easier to use these Inliners International Forums.
Got some self etching primer for aluminum to go along with the enamel with ceramic engine paint, good for 500 degrees. This is for the T5.
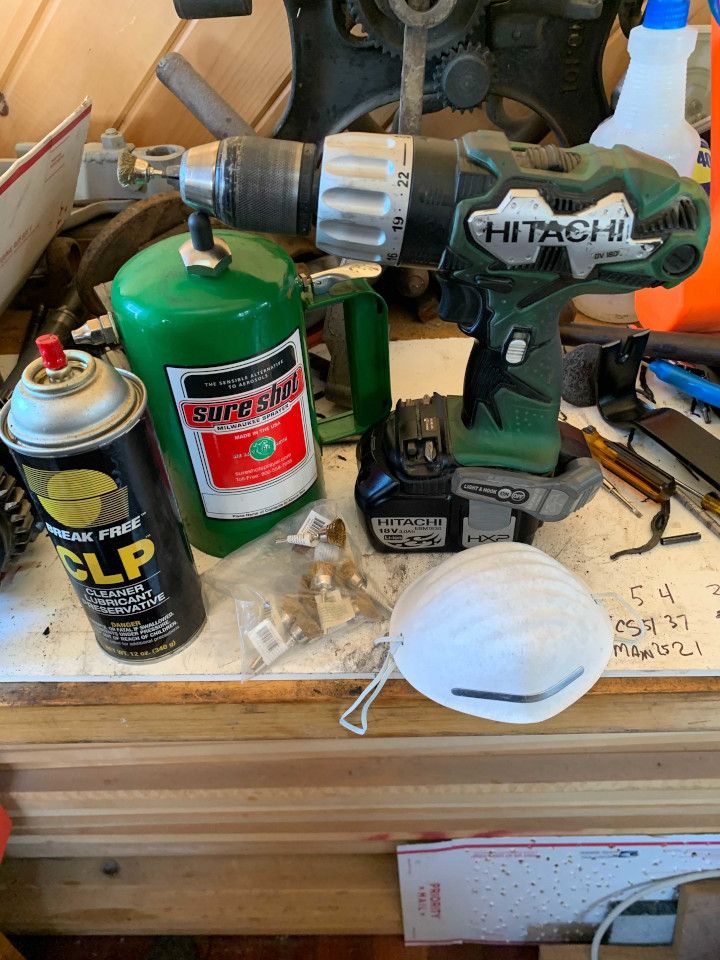
This is what is working for me to clean the outside of the case. These small brass wire brushes on 1/8" shank can be bought by the dozen on Ebay for a few bucks for a dozen. They can get in the tight corners of the recesses on the case, where the grease hides. Not perfect as it's pretty dusty, I wear a paint mask and should get my 3M for this, but I have these in my workshop.
Using denatured alcohol in a Milwaukee Sure Shot and using CLP for some stuff. I know that won't harm aluminum as the military uses it on AR receivers. It's a cleaner, lubricant and penetrant. Not my favorite odor, but beats Ballistrol which I have and have used...odor is brutal, IMO. Actually I have Frog Lube that is also used on ARs, and I think it has a cleaner.
Anyway, here's an example of how the top cover came out on the outside, I went over this a couple times and the small brass wire wheel gets into those small corners in the tabs and such, that's the hard area for me to get with a scotch brite.
Looks good to me. Thanks for showing what is working for you!
Looks good to me. Thanks for showing what is working for you!
Here's a better pic of the small brass wire brushes I mentioned, you can get them on Ebay for like $3 for a dozen. I used about 4 or 5 of them.
Then I pulled the speedo bullet out.

This is how the case is before spritzing the self etching primer.
EDIT: Beater, I was curious, my plan has been to paint the case before I reassemble everything, but I have a guy telling me to paint it after assembly. What would you do, paint before or after? Seems to me that if you wait, the shafts are in place, making it a pita to primer and paint. Also if I was to paint after assembly wouldn't the bolt heads be painted also unless I masked them off? That seems like a sour note to me... What say ye?
I don't think it matters, it's depends on the look you want. I'd probably end up having to repaint it after I wrecked the the paint putting it back together and that paint probably wouldn't stick because I would have gotten dirt and oil all over it with my greasy hands.
I was looking at some of the pieces I left out after using the Rust Doctor and I see some little places I missed showing rust. A few places on the frame didn't seam to get a good coat. I'll just hit those spots again. I plan to paint it all anyway. I still like it a lot.
I don't think it matters, it's depends on the look you want. I'd probably end up having to repaint it after I wrecked the the paint putting it back together and that paint probably wouldn't stick because I would have gotten dirt and oil all over it with my greasy hands.
Yeah, I know a lot of people don't paint them, so that's a possibility even though I have the paint, I'll use it for other stuff most likely. I'm gonna ponder on it as I go drain and look at the axle, chip some grease and other old stuff off and assess the situation.
I was looking at some of the pieces I left out after using the Rust Doctor and I see some little places I missed showing rust. A few places on the frame didn't seam to get a good coat. I'll just hit those spots again. I plan to paint it all anyway. I still like it a lot.
I hope to get at least some of it applied, but need to get the grease and excess rust taken off.
Now to change up a bit, arrrrrggggghhhhhh! The smell of old rancid organic oil after opening from being closed up!
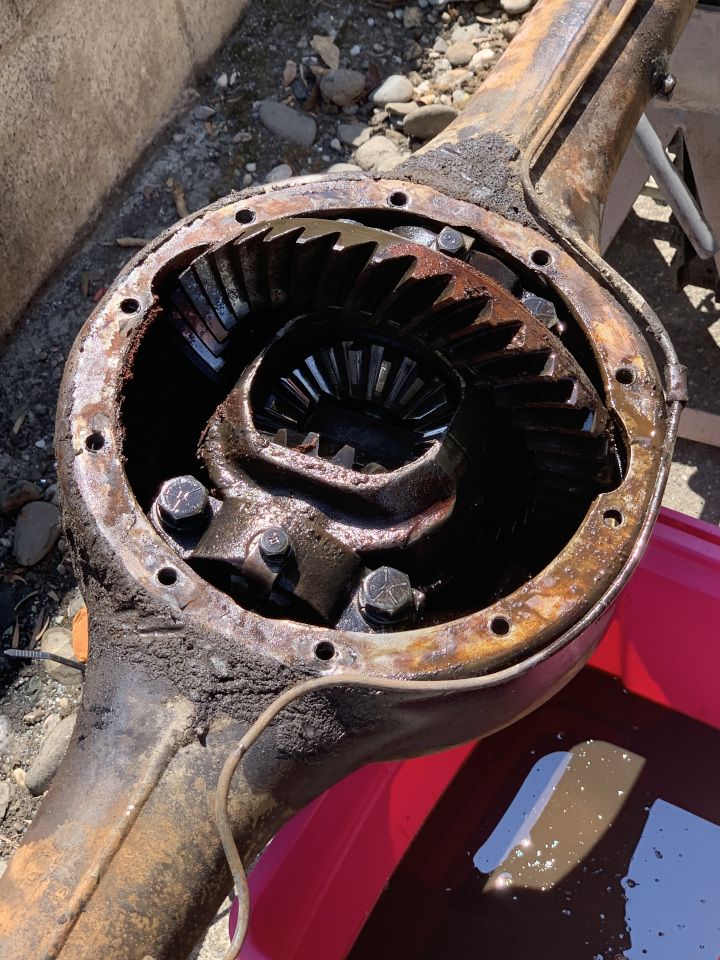

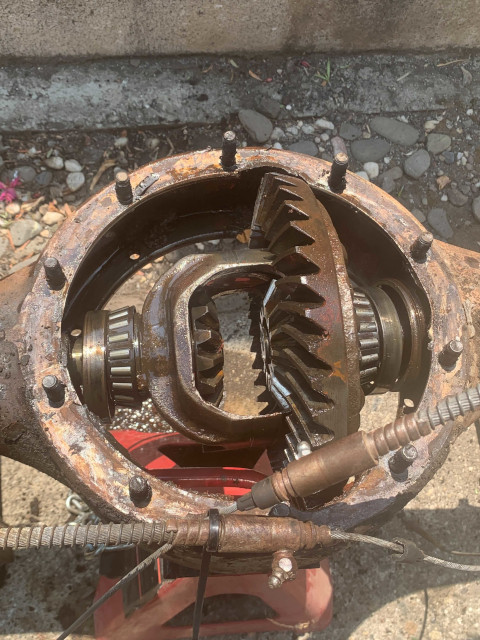
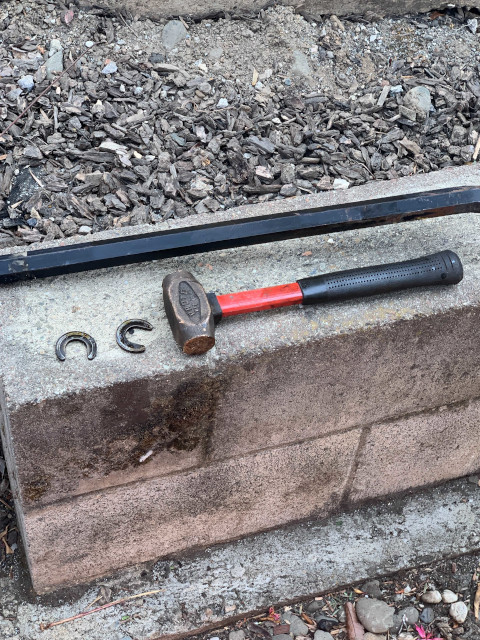
Ok, got the drums off, and got the rear diff caps off, but maybe I need to remove the front of the diff cover on the front to get to a pin so I can remove the spider gears. Here's shots from the rear, maybe I didn't need to remove these caps?
I still get an error, let me resize...stock49, almost certain problem is that all images don't compress to 720x960 and stay under 400k, so it gives an error on size.
I will take the front diff cover off tomorrow and hopefully get all of this apart, so I can get the axle all cleaned and possibly get the ring/pinion in place. I just got back from a run up to Sacramento to buy a 10HP motor from a guy.
I have referenced that, and see one step I may have forgot, which was this one:
EDIT: stock49, notice this scaled the image down on the screen, but if you open in another tab it's large. So, when inserting an outside image from another server, it scales it down on the screen.
Also uploading a 640x480 attachment. Won't allow me to upload unless I resize. As a test, open the image in another tab/window, then open the attachment.
Description: large diff pic resized to 640x480, this same image fails if it is not resized.
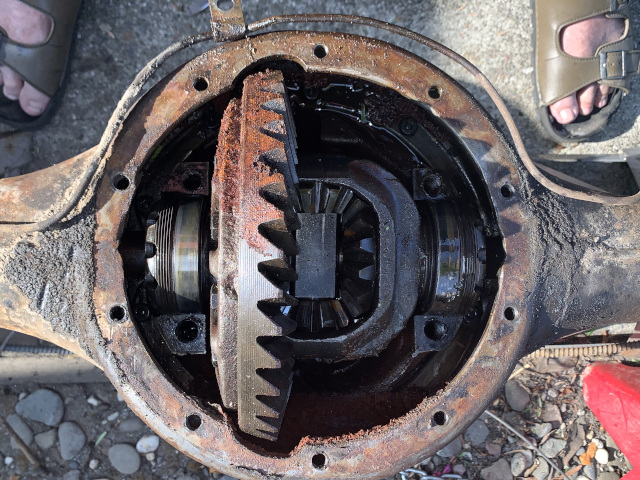
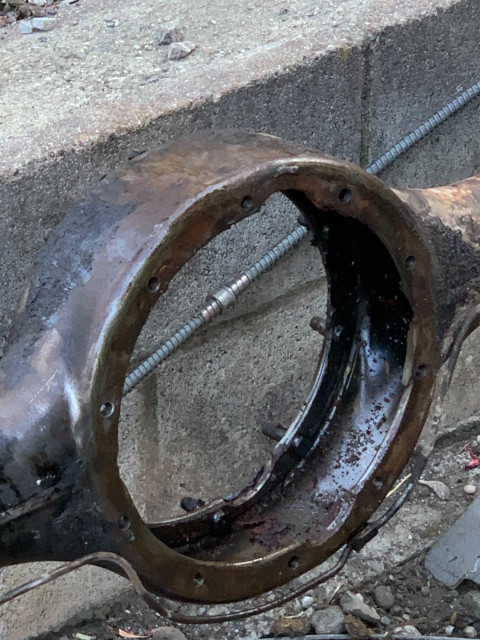
Ok, the reason is because of a couple things. First, the carrier is spun with this bolt shown above hidden in front. Everything is disoriented inside the rear end, and there are two pieces that hold the bearing race in, but those are unscrewed from the axle, so the half shafts are engages, but the stuff is not spinning freely. Lots of rust goop inside.
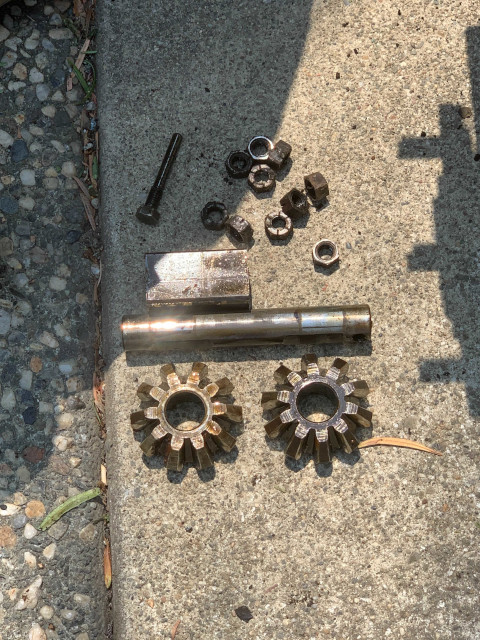
Got the front diff cover and pinion off.
Here's the pin, spider gears and center block (with the nuts to hold the cover on. I need a couple new nuts, they look like standard castle nuts.
Lastly, here you can see how the bearings, races and whatever you call the pieces that screw into the axle to hold the race, are all out of disarray.
I can manually lift and rotate the carrier, need to check on the circlips that hold the bearings on, inside the cage.
NOTE: Crap, I just though I caused this myself by removing the caps above. But the front cover has a set of caps on it, but the rears are the ones that are removed. The rear does in fact have to come off first.
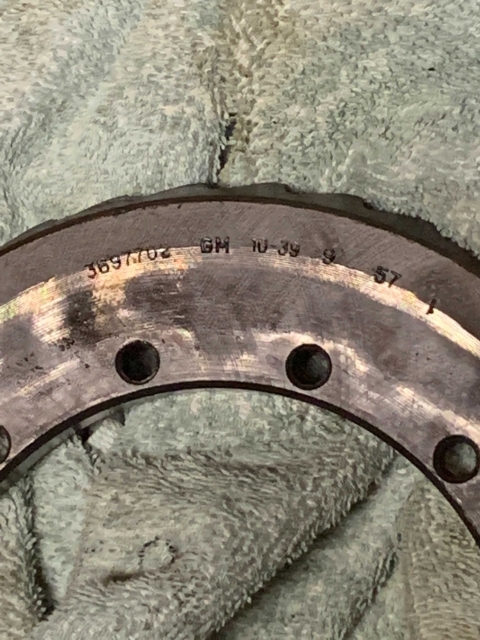
PS - ring gear is 39, pinion is 10, the stock 3.90:1, which is good. The 3.38:1 replacements I have will only work in this axle with this gear ratio I'm told by Joe at Mother Trucker Truck.
Description: races and bearings in disarray
Description: Front diff off
Description: pin, spider gears, center block
Ok, I seem to have hit a wall on these circlips that hold the half shafts in.
The following picture is from Deve's page which Beater linked to. It seems his Series 1 half shafts don't have that circlip, he just pushed the half shafts in and tink-tink...no can do on the Series 2. I tried a 90 deg. ring pliers, but can't get a good grip on it. I need to resort to a Series 2 shop manual if I can find one, I normally use a '48, but think there was a '56 possibly.

Ok, looking in the shop manual for a '55 series 2, it seems those circlips I mention must be the clips that fall out.
Maybe I need to use a BFH to knock them in...
Edit: BINGO!
Not a big, but a kinda small brass hammer:
And I got it all apart. Only need to remove brakes and parts to clean up and/or replace. Pads and drums look ok.
Description: Brass hammer and clips which clinked out...
Description: Carrier and half shafts are out, need to remove and clean all the brake parts also.
Now you are getting somewhere!
Now you are getting somewhere!
Do you know how to get those flanges off the end of the axles so I can get the brake plates with the parts off?
I almost have the '55 series 2 axle tore down. Maybe someone can tell me the trick to getting these flanges off the end of the axle? I think I might be able to use a puller with a bearing splitter. Has anyone done that before. I'll look at Deve's page but I didn't see anything there when I looked around.
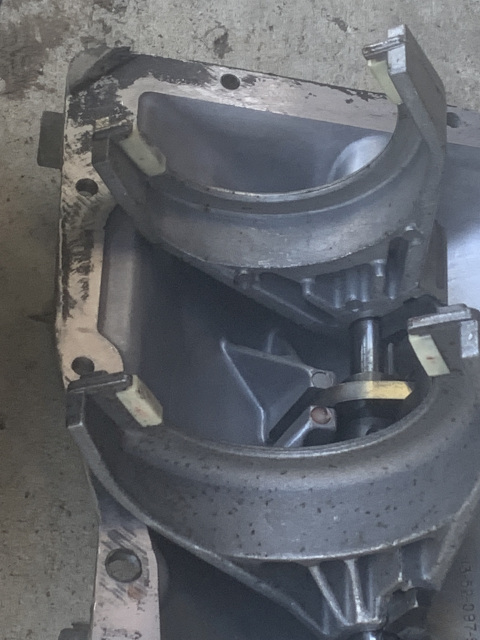
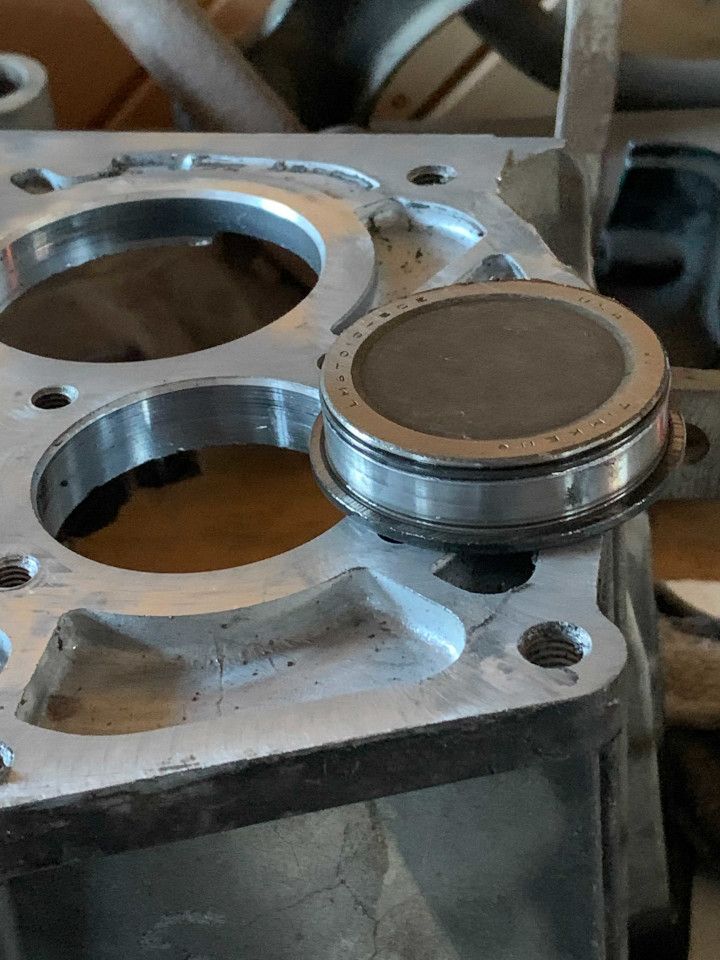
Got most of it torn down...I'm currently stuck ponder how to remove this flange on the end of the axle on each end
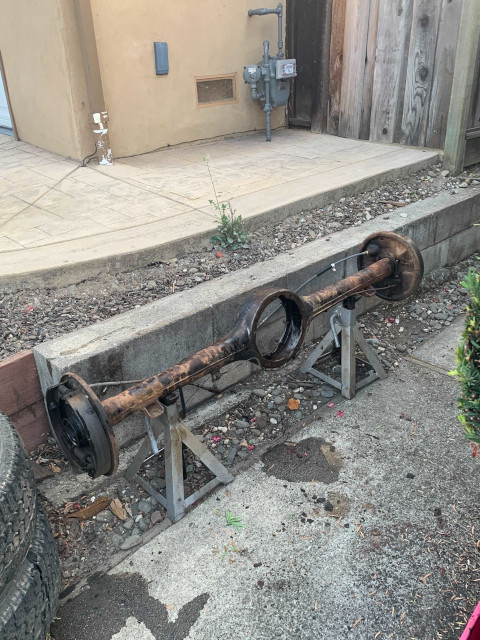
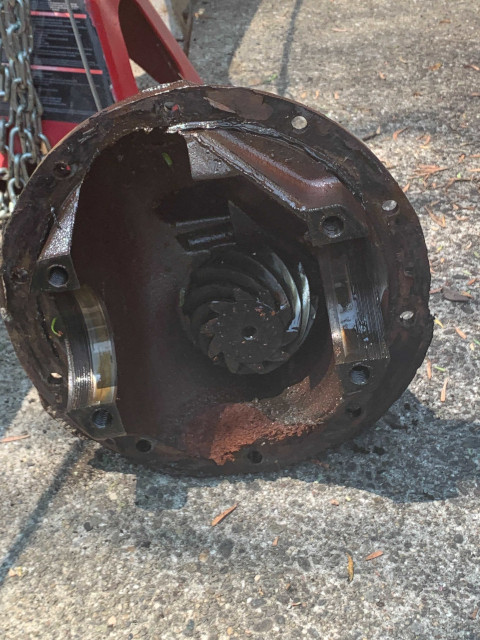
Knock, knock, anyone home? This is the empty pumpkin:
Flange on end of axle, one on each end:
Description: Almost have it tore down.
Description: Knock, knock, anyone home? Nope...
Description: axle/hub flange is preventing the brake plate and parts from being removed.
I can't see it well. Can you get the backing plate off without removing it? It may not come off if it is a part of the housing and holds the axle bearing.
I can't see it well. Can you get the backing plate off without removing it?
Nope, AFAICT, it comes off and the backing plate is able to be removed. I see a seam, if you look to the right of the flange you'll see a white area, just in front of that towards the flange is a seam, it's very hard to see in this pic, but I scratched around it with a dental pick and there's a seam there best I can tell.
It may not come off if it is a part of the housing and holds the axle bearing.
I don't think the plate would come off if that was the case, and I have the 4 bolts removed that hold the plate to the hub. That flange must come off. I will figure it out.
I just went out and looked at a closed and an early open drive line rear ends. On both the backing plate is riveted to the housing so different from yours. When you get the axle out of them you are done except for the seal & bearing. Do the backing plate bolts go through the back of the "flange you are trying to remove? If they do and the bolts are out try to carefully work a screwdriver between the piece and the backing plate it is just stuck. If what you are trying to remove is in the axle bore itself then it is the seal or the bearing and you may need a puller.
If what you are trying to remove is in the axle bore itself then it is the seal or the bearing and you may need a puller.
This may be the case, I'll try to get better pics to post.
It seems there is a seal in the center of the flange. Just went out and got a couple new pics, I'll upload them after I download to my computer and resize.
Here's the end of the axle, note the bolts, there are 4 per side. There is a seal with a tapered bearing behind it that holds the half shaft. I am not sure if I need to remove those first, I might be able to use a puller from the inside, just need to resetup the puller.
A peak inside, there's a tapered bearing behind the seal.
Here's the seam I mentioned, behind the flange:
If you can get a screwdriver behind the lip you can probably tap the seal out with a hammer. If not you will have to use a seal pulling tool and pry it out from the center.
LINK I think the bearing is a caged straight roller that runs on the big surface an the axle. I think it will come out once you remove the seal.
Funny, I just saw this tool on Rock Auto, but for $10 w/shipping at your link, I think I'll get it,
IF my pry bars won't work. I have some crow foot pry bars.
This is the one from Rock Auto.

I will need to get a seal, so even if I destroy it getting it out (like one on the T5 tailshaft), as long as I can save the bearing, or hope I can save the bearing. All the bearings seem in pretty good shape so far. Would you recommend new bearings or use the ones in the axles if they look ok? New bearings are most likely inferior...LOL
Mostly the flange kind of confused me. Looking at it now it is nothing but a taper bearing with a seal on top, race behind the bearing I am guessing.
EDIT: no, it's not a tapered bearing, it's a roller bearing with a caged race, or IOW, no race behind the bearing, it's built in.
EDIT2: I just ordered 2 rear axle outer seals and a pinion seal for the front of the diff. Missing 1 wheel stud, so ordered 4 studs and 4 nuts just to be safe. Tried to knock the rear axle seal out but couldn't see well and knocked the axle off the jack stands. I'll wait for daylight in the morning.
This might be good on the impact wrench!

Would probably pop that seal right out of there.
However, I got one of the seals out with my crow's foot, the other one is being stubborn and I need to wait until I have more time. I
THINK I might be able to move the brake plate up to the flange and tap it out by knocking a hammer on the back of the plate to push the flange off, it looks like a press fit. I can re-seat the new one with a bearing/seal driver.
The seal will just tap in with a hammer. It looks like the puller ifn the picture is meant to be used with a breaker bar. Did the bearing come out?
The seal will just tap in with a hammer. It looks like the puller ifn the picture is meant to be used with a breaker bar. Did the bearing come out?
I didn't try yet, been busy with work...I'm swamped. Might not be able to really get to it until Saturday, but still hoping I can get it cleaned before Sat.
The bearing has a lot of grease and I didn't have nitrile gloves on, so didn't try to get it out, but with all that grease I suspect the bearing will come out fine. Hoping the race does as well...LOL
I have 1 more hard line to remove from one of the wheel cylinders and will use the new cordless angle grinder on it...I tested it out, it really cleans it up nicely. I need to get the other half of the hardline off first, then use a wire wheel and clean it up good, simple green it, and rinse heavily and let it flash rust before I put that Rust Doctor on it. I want to see what the flash rust looks like, if it's even, etc...but I suspect all the grease needs to come off...the other thing is use the grease doctor on it, I might be able to use that and leave that extra hardline on it. I need to clean up all the parts and get the 3.38 r/p installed in the carrier as well. I have a bit of work, but hope to get the axle and T5 all ready before I even take the torque tube out.
Did the bearing come out?
Yeah, it came out today...unfortunately I horked the cage up good with the crow's foot trying to grab to something, so that will require new bearings. There's needle/roller bearings in there,.AFAICT that flange probably is not intended to come off and I don't see how you would get the plates off without removing the flange. Looks as if it was peened from the inside so that the plate won't slide off. However the flange has a seam to the outside of that peen.
Next plan of attack is to remove the brake parts from the plates and leave the plates attached...
I think the shoes and drums are ok, but would like to replace the springs, cylinders, piston seals, rubber end caps, rubber end seals, et all...Yes, the bearing and seal should both tap in with a hammer and/or bearing driver. I have set of bearing drivers, which I used recently on the T5.
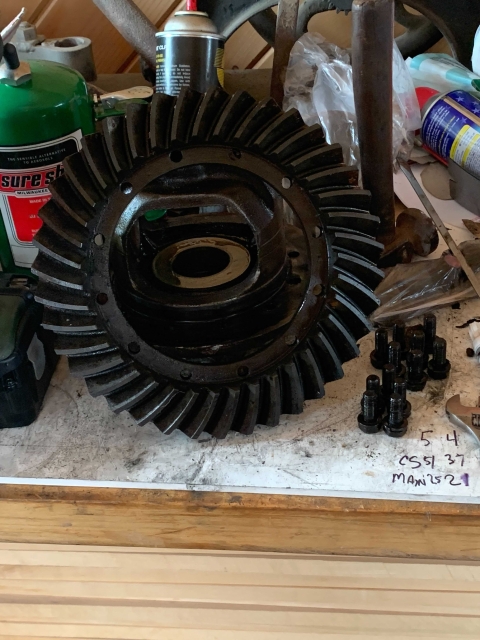
Brought the carrier in and put it on the workbench to replace the ring gear, the pinion is in the front cover of the diff.
Sounds like progress to me. Good work!
Sounds like progress to me. Good work!
I did order bearings for the rears last night. I think the inner bearings are ok in the carrier, will just clean them. I have quite a bit of cleanup to do in the meantime.
EDIT: I did just get this original 39 tooth ring gear off the carrier. Took a bit to tap it off, it was on there pretty well. Every time I take a bolt out I get a nice fresh smell of old organic oil organism growth in my nose...
This ring gear and pinion are in good shape, not sure if someone that has a 1-1/2 ton would want better ratios or not, but have seen some talking about swapping theirs. Most of the big trucks were geared at minimum 4.11:1.
Ran into a small issue, of course as I continue to rebuild this the more parts I seem to end up buying...
One of the carrier bearings was pooched. I ordered them late last night about 2:00am, and O'Reilly's will have it in by 5:00pm. These are National Wheel bearings, pretty common. Saved me about $60 from ordering them from Jim Carter...
I ordered both, no use in putting the other one back. I will take this into O'Reilly's with me and if it doesn't fit the race or the face outside is not the same size, or the inside of this, I will just return it without even bringing it home. O'Reilly's is actually pretty good, you order it and they ship it the next day for most stuff, they can even get it to your local store the same day in some cases. Truly a great resource.
However, you do have to pay up front and if you return it you need to wait up to 3 days for it to process your credit card refund.
(hoping they work out)
EDIT: Bzzztttttt, wrong bearing. The counter guy ordered 2 others but I'm certain they're wrong also, they don't even look like a tapered bearing in the picture, nothing like these with the race.
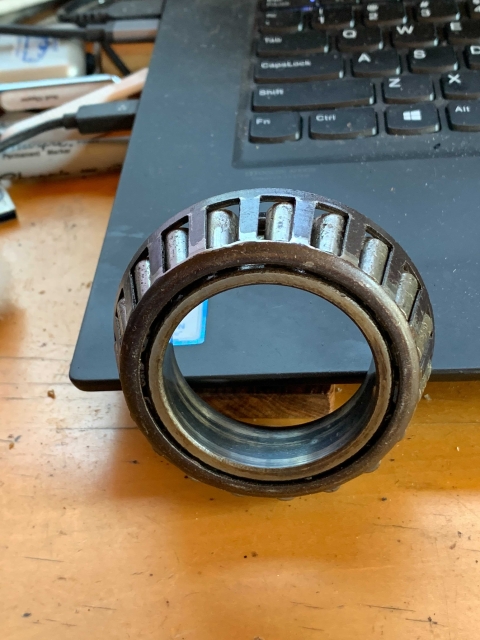
Here's a closeup of the damaged bearing, the bearings are flopping around and/or the cage is loose, but either way this bearing is not going back in. I ordered both of them. I probably could have ordered the outside wheel bearings from them as well. Oh well, got those from Jim Carter...still in transit.

Description: Pooched carrier bearing
Description: Pooched carrier bearing closeup
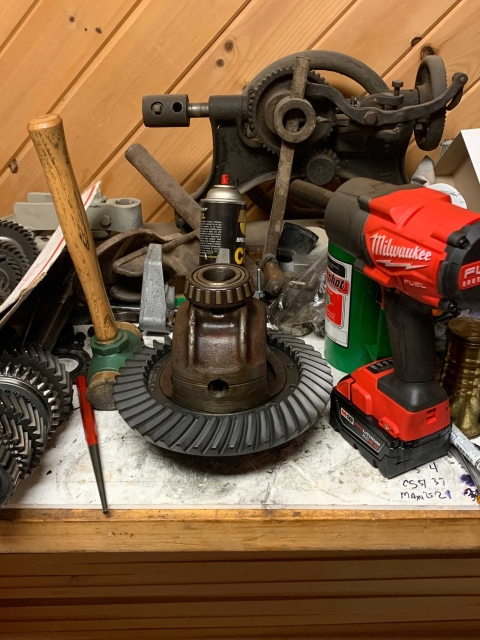
Today was a rough day, but getting back on track. I'm pretty certain the bearings the counter moron at O'Reilly's ordered will definitely not fit, I'll probably need to get them from Jim Carter...no rush. Started to clean the axle, but thinking to swap out the pinion and finish up with the T5. I probably should have focused on the T5 first, but wanted to start tearing down the axle so I could see what parts were needed. I have a full rebuild kit for the T5.
I got the new ring gear on, which took much persuasion from a 3 lb. Garnet rawhide, some tapping and using the impact wrench. I didn't put any thread locker in, but will take each one out and add some locker and tighten to 80 ft. lbs. My impact is much higher, but the drill/driver couldn't handle it. This 1/2" cordless impact is turning out to be quite the nut cracker, for lack of a better analogy...cracks 'em in and out.
Here's the stamp on the new ring gear:
And here's the old ring gear stamp.
EDIT: I just googled for the Hyatt 159286Z on the race and get the bearing and race for $26, and for 2 of them w/shipping it's about $75 less than Jim Carter...It is less than half. The part is made by Timken, as it was originally, at least the timken numbers that these match. They ship from Reno also, so I should get them fairly quick. (<cough> UPS ground). I've always been amazed how much bearings vary in price. Per the page, the bore matches my bearing and the outer diameter matches also. The new Timken part is made in <cough> China. These might be also, but the Hyatt stuff is made in America, I believe. BTW, National Wheel Bearings are made in Japan. That's a good thing, IMO.
The current crew behind parts counters in most "auto parts stores" is largely inept, but it's mostly not their fault. They are burger flippers. The only training they get is how to look up numbers that someone else entered in a computer bank using the information given them by the customer. The data is only accessible to them by going through a check list of on screen questions. Hardly any of them are taught to use any cross reference features if they are even available. Most stores no longer have catalogs that are up to date with what parts are available and if they are the vehicles we work on have long sense passed on from the pages. Almost all of these people were born long after new cars used points or carburetors. They are not into antique cars if they are car people at all. My younger son is the commercial parts man at an O'Reilly store in Reno and he can find what is out there. His brother and I use him all the time. He is not really a car guy but he knows parts at least from the commercial end. You also can not blame the speciality houses like Jim Carter & The Filling Station for making a profit. If there was a big market for what they sell it would still be in the big stores. These are now premium parts.
The days of walking is and asking for a gasket set for a small block Chevy are long gone. The parts are still available. Accessing them is a different game. The old part number is your best hope. When I worked at CarQuest I saved a lotto old catalogs and I can still get current numbers using the old ones most of the time. By the way about 90% of all cam bearings sold in this country, no matter the brand on the box, are made by Dura Bond in Carson City, Nevada.
Beater is right on this!! I spend twice as much time at the parts counter these days because the burger flippers don't know the actual internal workings of a vehicle, ANY vehicle!!
My go to parts guy moved away and I'm trying to cultivate, (read that "educate") a couple of new ones. One of the nearby parts houses still has the old catalogs.
HEY, BEATER!! Didja' ever consider that God MIGHT have created the monkey 'cause he was disappointed in humans???
Is that a "the chicken or the egg" question? If we descended from them then they had to be first but that doesn't mean they didn't learn from us.
Beater is right on this!! I spend twice as much time at the parts counter these days because the burger flippers don't know the actual internal workings of a vehicle, ANY vehicle!!
I know this also. So why do I continually try to buy parts from them? Cause they're fast. But fast and wrong doesn't do me any good.
My go to parts guy moved away and I'm trying to cultivate, (read that "educate") a couple of new ones. One of the nearby parts houses still has the old catalogs.
I think these are the original carrier bearings. They're Hyatt 159268 bearing and race.
HEY, BEATER!! Didja' ever consider that God MIGHT have created the monkey 'cause he was disappointed in humans???
Kind of what Roger Waters implied with "Amused to Death".
I got the other carrier bearing off using a puller, this one is in good shape and I could reuse it if I want, but for $26 I'll put a new one in. Might as well do this right while I have the rear axle torn apart.
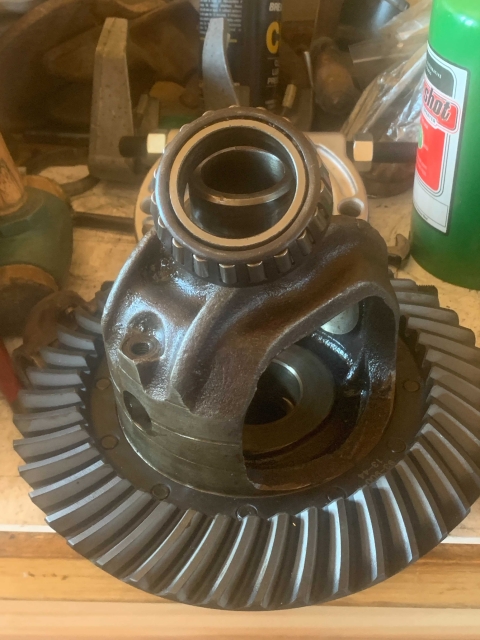
Same bearing, probably original:
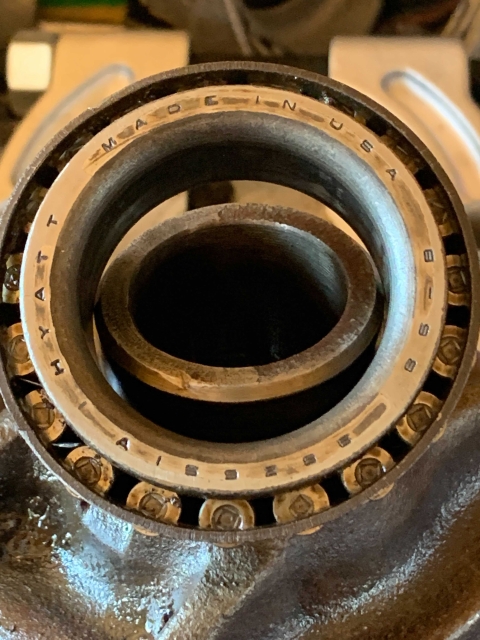
Description: Right side carrier bearing.
Description: Same 159286 bearing.
The days of walking is and asking for a gasket set for a small block Chevy are long gone. The parts are still available. Accessing them is a different game. The old part number is your best hope.
I have a parts catalog, am I best trying to search for those numbers and hoping a replacement comes up?
I know you've worked at a counter in the past, and trust me, I should be so lucky to find a guy like you at the counter, but life doesn't seem to work out that way for me.
So many of the part numbers are obsolete in the parts catalog...
You've been a great deal of help to me, and I really do appreciate it. In fact, everyone that has helped me has been a great help to get me through my projects...and I am very thankful to all of you. That goes for here on Inliners International, H.A.M.B., Stovebolt and IG...
I wasn't lucky to have a Father to show me how to wrench on cars and trucks, so it's something I try to learn on my own. As seen with the outside seal and bearing, I'm not always successful!
You will need to set pinion depth and ring gear position to get that rear end assembly to work properly and live. Different designs require different settings. If you aren't familiar with this operation, I would suggest that you find someone to do it for you or to walk you through it!
New bearings alone will change the settings. That new ring and pinion, even more so!
You will need to set pinion depth and ring gear position to get that rear end assembly to work properly and live.
Absolutely. I have some laminated shims that I can use if needed, but have about 6 or 8 Dana shims that are about .010" each. I have some spotting ink I use for scraping.
You didn't mention, but I know about setting the angle of the driveshaft, if I can to make it correct for the transmission. That's a ways ahead of myself though.
I found 2 more bearings and races for the pinion. Ordered the bearings but going to use the old races which seem to be locktited in place. I don't want to put any heat to it and the races are not in bad shape, so going with new bearings from MIBearing. I think about $48 for both front/rear pinion bearings. I think this is all the bearings, I have just about everything apart. Does this bearing #E!! ever stop???
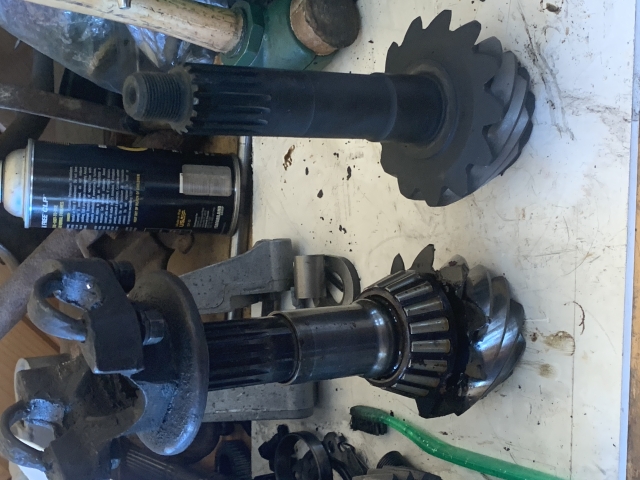
And yes, I learned my lesson guys, this bearing seal remover came today, I used it on the impact wrench, it wacked it right out of there.
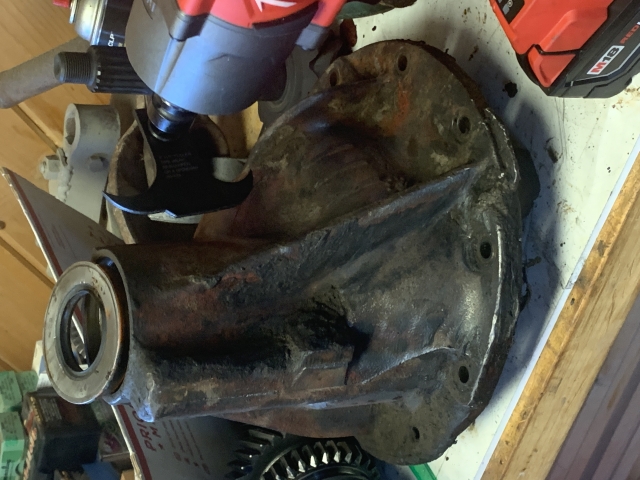
Moving right along!
I'd like to see a better picture os the seal removing tool. Is that the 1/2" or 3/8" drive impact? I have both and love them. The 1/2" will break 1/2 bolts with ease. Also the 1/4 hex drive is a surprisingly powerful little tool. I never cared for battery tools until my son got some of these. I have a bunch now and use them all over the property, one power source.
Take pictures of the setup process please.
Moving right along!
I'd like to see a better picture os the seal removing tool. Is that the 1/2" or 3/8" drive impact?
It is 3/8" drive, so I had to use a reducer, but it works good.
Here's a pic from Ebay:
And here's the link:
https://www.ebay.com/itm/142270137761FWIW, I just ordered a set of these, just under $8 w/shipping/tax. Goes 1/4->3/8, 3/8->1/4, 3/8->1/2 and 1/2->3/8 in impact. I have a 1/2->3/8, but don't have the enlargers or the 3/8->1/4 in impact. Not that these won't break, but they are impact.
https://www.ebay.com/itm/274895751940 I have both and love them.
I am loving mine so far. The 1/2" is so handy on this project, and I'm using my drill/driver for the lighter stuff. I have 1/4", 3/8" and 1/2" adapters to grab sockets.
I never cared for battery tools until my son got some of these. I have a bunch now and use them all over the property, one power source.
Me neither, but these new ones are getting very close to corded and/or pneumatic tools. Way more convenient.
Take pictures of the setup process please.
Will do.
Lastly, got a call from MIBearing, they need to order the bearings so they won't be shipped until Friday, and they'll be National Wheel Bearing, which is fine by me, those are made in Japan. Since my wife is Japanese I try to support Japan when I can as they make XLNT product. Timken are often made in Taiwan and China these days...
That is a first time I seen one like that. Most had handles.
That is a first time I seen one like that. Most had handles.
Me too! but when I saw this I instantly thought about putting it on the impact wrench, wack that out quick. It did the dirty deed for lack of a better analogy!
I have a couple other Lisle chatchkas...usually made in USA.
The 1400 ft.lbs. of torque bent it just a tad...it'll be fine I think...I don't think it was like that. Has a round plug with a square hole which is welded in a piece of sheet. On the tool it says if the tips dull, sharpen them on a grinder. I was thinking to round them over so they don't puncture the seals.
I wonder if that tool was designed to work with a breaker bar? If it works on the impact great.
Japan is better than Tiwan, Tiwan is better than China but sadly we can not avoid China. South Korea makes some good stuff. My mill & lathe are South Korean. We used to make good tools here but environmental laws killed it because Asian pollution does not affect the climate.
I'd have to agree on the breaker bar. Most seals pull out with that tool pretty easy. I have had the tip go through the tin/metal on a seal But in most cases your pulling the seal because it's bad so what would it matter right.
I wonder if that tool was designed to work with a breaker bar? If it works on the impact great.
I've tried it both ways, even with extensions on the breaker bar. I tried with an extension on the impact, off, the bit keeps flying off eventually.
The other one had some type of orange locker on it. I'm not sure what it is but it's strong as gorilla snot.
Japan is better than Tiwan
Couldn't agree more, Japan is my pick after America and in some cases before. It depends on the product.
BTW, the WC T5 is a perfect example of how the Japanese started kicking our rears in Detroit. The Japanese cars at the time were already using needle bearings and lined synchros, GM and Ford were only playing catchup at that point. Japan's auto industry caught the USA with it's pants down, and the T5 is one such example in the transmission design. Finally they redesigned the T5 to use tapered roller bearings on the shafts, needle bearings under the gears and lined synchros which were used in the Camero and Mustangs previously, but those gears are not good for trucks, nor is the placement of the shifter. The redesign for the S10 in '93-'95 included electronic speedo and '94-'95 were WC with the gearing I have in mine. Ford created what is known as the T5z, which is also referred to as a 2.95 gear set (from what I have read), these were changes that Ford made lastly in '93/'94 time frame. GM just piggy backed on those changes for the S10, but oddly didn't put it in V8s, but put it mostly 4cyl engines. This is interesting and seems trying to solve the same issue with low powered S10s in the day, bring the RPMs down with OD. This does align with the old AK Series or AD series in that they have inline 6 engines in them, so lack the V8 HP, but have the RPM problem at highway speeds. History is fascinating...
Now, a lot of people will tell you that a truck doesn't need the WC T5, that the NWC will do just fine and is easier to adapt as you can get those with mechanical speedos. But I don't agree, mainly because you shift more than most anything else other than steering when you drive a car. I don't see how it can hurt to have a better shifter, it's not about RPM and torque for me, the WC is just a better transmission than the NWC for the reasons I've outlined.
I'd have to agree on the breaker bar.
So far no-go on any of them. I have no idea what locker they used but I bet a little heat on the seal won't hurt. The other thing is use a cutoff wheel in an angle grinder and grind a few slots around the inside diameter, then break it into pieces with pry bars.
Not a lot of options on this bearing, but had I waited to try and get the number off the other one still inside on side of the axle, I ordered them from Jim Carter.
You can't see very well, but on the top rim it's stamped CHINA. They probably pay about $5 for this bearing and sell it for $55.
I did get 2 of them, so they probably profited about $100. No worries, I have saved time in the past and Jim Carter has helped me quite a bit to understand my truck. I have 2 new seals also.
Time wise it's easy to know it's gonna fit my truck, and this is a roller bearing with a race/cage, not a taper bearing with a separate race. I think this is called a roller bearing.
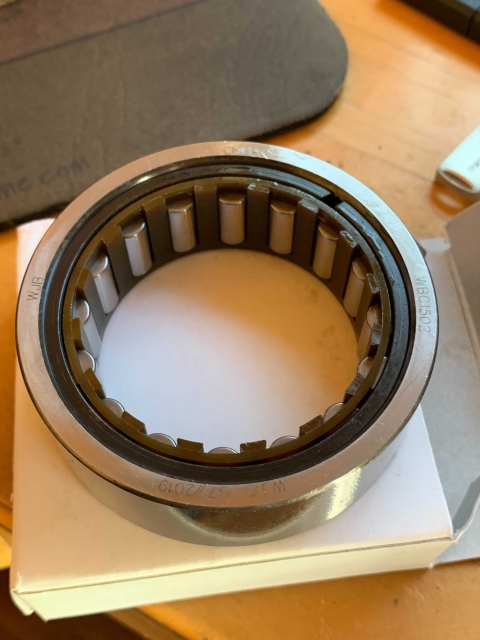
How does the part of the axle that runs on this bearing look?
How does the part of the axle that runs on this bearing look?
The half shafts looks pretty good, splines are fine. I need to clean them up, but they look good. I didn't notice any wear where the bearings ride, but will check closer when I'm out in the garage. Is that a common wear area?
Some rear axles have different length half shafts, but these look to be the same. I think some of the Ford rear ends have different lengths. This makes it possible to cut down the rear axle for the difference between the long and short on the long side, and use a short shafts on each side.
Slowly it's coming together.
These are good and strong rear ends. Properly assembled you will never have to worry about it again.
These are good and strong rear ends. Properly assembled you will never have to worry about it again.
Yeah, I'm guessing it will last my lifetime...
But if by chance I do wear it out, I'll rebuild it again.
I hope you do! '55 to now is 66 years so if you have to do it again in 2087 I hope I'm here to watch at over 150 years old. You still won't be older than your truck.
I hope you do! '55 to now is 66 years so if you have to do it again in 2087 I hope I'm here to watch at over 150 years old. You still won't be older than your truck.
I vaguely remember you're older than me, but if I'm here after 2058, I'll be pushing over 100.
I would think your roadster may be your last build? Or do you feel you still have more in 'ya? Seems like you can tinker on a Hot Rod for the rest of your life...
And somehow I feel that hankering for a Hot Rod to tinker on after I get Keroppi in line...
There are a few more piles of junk that could be turned into projects and some I should get rid of. A guy is coming next week to take away a 413 inch Dodge flathead six my friend and I had plans for a few years ago.
Was that one of Bruce's engines? That guy had some cool stuff he collected, most certainly.
No this was my friend Vic. He and I pulled this monster out of a big Dodge truck. Our plan was to put it on a a chassis and run it at Bonneville in a vintage class. Then we found out the limit for vintage classes is 375 ci. It would have been a lakster and 413 ci would have put it in the B class where the record was near 300 mph. That speed added a lot of $afety equipment we could not afford. Several thousand just for tires.
I did a thread on it here while we were pulling it but all of the pictures have gone away. Here are some specs:
Bore& Stroke 4 1/16 X 5 5/16
413 ci
171 hp @ 3,200 rmp
424 ft. lbs. @ 1,200 rpm
8.5 to 1 CR
12 ports
head 9" X 30: 33 studs
4' from crank pulley to back of bell housing
I like the old Dodge trucks, in fact, funny you mention a Dodge truck. I saw this the same day you sent me that pic of the Diamond-T. This one has a V8 in it, and the Diamond-T was about 11 years older, quite an amazing reformation. This is not bad, seems done in fair taste.
https://sfbay.craigslist.org/nby/cto/d/santa-rosa-1936-dodge-pickup-hotrod/7362414371.htmlWhat type of truck was that 413ci motor in? That's a monster! That's an inline 6?
That said, for me it's all about getting my 235 in as good of shape I can get it, and get Keroppi going with the new drive train, not to get distracted with other old trucks...but that 413ci must be one torque monster, not sure how that 424 ft.lb compares to the 235 ci I have, but it must be a lot higher.
It was in a BIG truck tahr had been converted to run a ball mill at an ore crushing operation with a belt drive. 424 ft pounds at 1200 rpm is impressive. It had a two cylinder air compressor for the brakes and came stock with dual carbs, ( two tiny Ball & Balls ) & geas exhaust headers.
It was in a BIG truck tahr had been converted to run a ball mill at an ore crushing operation with a belt drive. 424 ft pounds at 1200 rpm is impressive. It had a two cylinder air compressor for the brakes and came stock with dual carbs, ( two tiny Ball & Balls ) & geas exhaust headers.
Would you think about putting that in the '26, or is that slated for the 270 or 302? I think I have what I need with my 235, was just curious as you have a lot of options.
The '26 has a 153 Chevy II four cylinder that I'm building. The '53 has a 270 and I'm building a 292 for my '68 flatbed when it's turn comes.
The '26 has a 153 Chevy II four cylinder that I'm building. The '53 has a 270 and I'm building a 292 for my '68 flatbed when it's turn comes.
Wait, wait, wait...isn't that 153 that engine they put in the Corvair? It's an air cooled engine?
I do remember you mentioned a Porsche, so it's not entirely surprising that you would have one of those engines, but if that is the case all I can say is, "you gotta be kidding me".
I'm just cleaning today...hoping to get primer and paint after it cools down a tad...I scrubbed with simple green, then used a green scotch brite with de-natured alcohol, now cleaning inside on the bench. The main case is my primary worry right now as I an start to reassemble the majority of the T5 with it done.
As you can see there is still some grease, I'm not sure if the etching primer will get past that, but a small brass wire sheel on the cordless drill is getting it to my satisfaction.
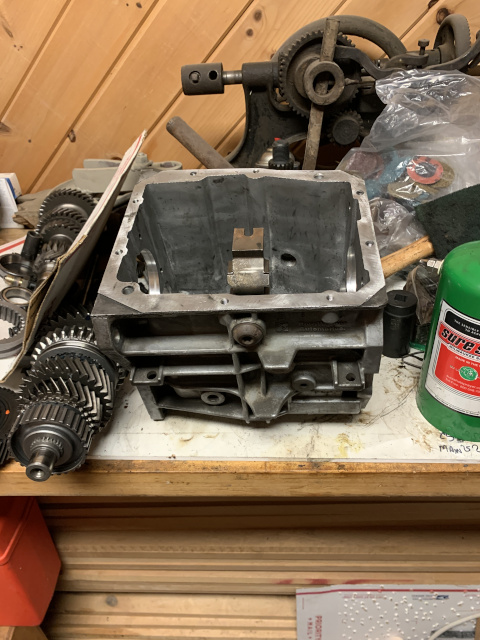
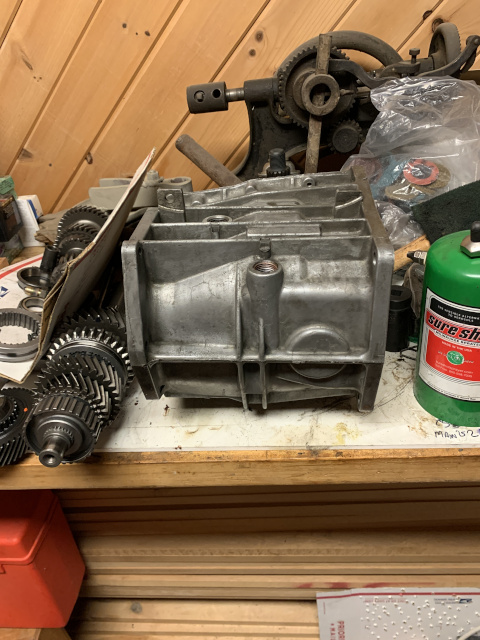
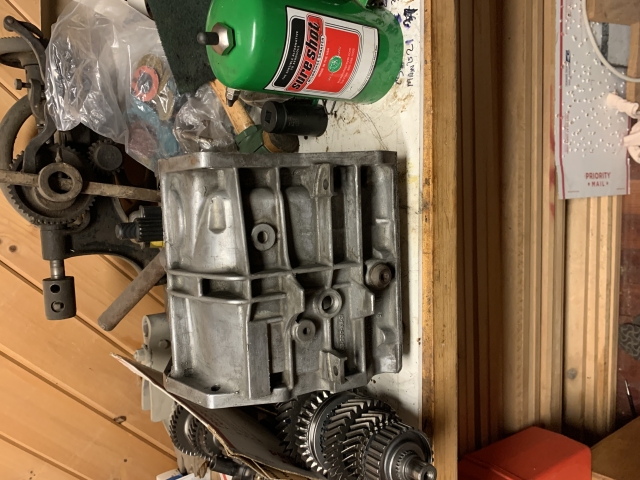
Cleanliness is next to....ah....impossible.
All engines are air cooled some just use air to cool hot water.
No, this is an inline four cylinder the baby brother if the 194-292 six family. It is 2/3 of a 230 six. They were about 90 hp stock. They were used in Chevy IIs from '62-70 and in some vans and Jeeps. Kind of related to the Later 151 Iron Duke that found it way from little Pontiacs to S10s. Boat manufacturers like MerCrusier, Volvo, & OMC used them and the later bigger 181. Also used in farm and industrial equipment. Stout light engines with lots of potential.
Yeah, the Corvair had an air cooled engine (no water) with a long belt running up and around a pulley, it was an interesting setup. The engine itself didn't use water to cool. Sounds like your engine is more like the 2.2L 4cyl ??? I think that's what they put in the S10, and what my T5 came out if I understand it correctly.
If it's not a Corvair, it doesn't have a Corvair engine; it's unrelated to any other GM design.
If it's not a Corvair, it doesn't have a Corvair engine.
Unrelated to any other GM design.
You lost me there. How could an S10 engine not be a GM design? AFAIK the 2.2L 4cyl is a GM design.
The Corvair had a turbo-6 engine, which was a rear mounted engine that was air cooled like a Porsche engine. AFAIK, this was the only American car to be built with a rear mount air cooled engine. The 4cyl in the S10 was about the same size. The S10 did have a Vortec in it that was a straight/inline 4. That was definitely a GM engine and was in several other cars, the Corsair, Baretta, Corsica, Lumina, etc...I just looked it up.
I'm not sure how those can't be GM engines...

My T5 evidently came out of an S10 with a 2.2L engine, so it seems by looking at the model numbers.
What does "about the same size" mean?
Corvair sizes: 140, 145, 164".
A boxer 6 and an L4 are about as far apart as you can get.
I wish it was easier to post pictures here. You have posted on my build thread on the HAMB didn't you see engine pictures there?
'26 Roadster Build 153 Chevy II
Didn't see this, or I should say I don't remember it. I've read through that thread a few times. Looks like a great engine for the roadster.
RE: Boxter 6,
EDIT2:Now I understand what you were saying about the boxer design of the turbo 6. I'm a bit slow panic. There is a couple engines on ebay, one from 1960 that looks rebuild able. All I knew about the Corvair is that it had an air cooled engine, much like the Porsche. I 'spose you need to shoot me for that, if I was still living in Japan I'd take the sword for you.
 NOT!
NOT!Beater, wouldn't it be cool to build an old flat fender pickup with the turbo-6 Corvair engine and a small pickup bed on top of it? Then use the engine bay as a trunk.
EDIT: I got an email from MIBearings today, my inner rear axle bearings and races, along with carrier bearings (NO races) for the top/bottom of the carrier.
In high school a friend had a Turbo Spyder. When it had just a few hundred miles on it it got T-boned and totaled. He bought it back from his insurance company and saved the entire drive train. He put it in a VW bus and it was really fun to take to Santa Cruz over the mountains. No I don't like the Idea of putting one in a pickup you'd lose the whole purpose of a pickup. Another friend has a Corvair with a trebled 350 in the back seat area. It's nuts too. Another old friend put a complete 500 Cadillac in the back of a Morris Minor panel truck, way too crazy.
I wish it was easier to post pictures here.
I tried, but I don't think it will get much better, and people won't post images as it's too much. I'm one of the only people that posts images.
This is not rocket science, there's many good forums around the net that are easy to post images to.
No I don't like the Idea of putting one in a pickup you'd lose the whole purpose of a pickup.
No, not at all. The way I would picture it is similar to how these guys add air tanks under the bed, but the corvair engine is a low design, and I don't think you would loose that much. I think you would have a useful little truck that could haul quite a bit if needed. I like to use a truck like a truck.
The older trucks had pretty low beds on them.
Anyway, that's what Hot Rods are all about, building what you want.
Bearings came in for the axle today. The inner rear half shaft bearings and races are Timken, made in U.S.A., but the carrier bearings are National Bearings, I thought would be Japanese but are made in Spain. I think this is better than China. I would pay extra to buy non-China parts. China can lick my third member and clean the grease out. Some things we just can't avoid China, as was the case with the outer wheel bearings I got from Jim Carter, which I paid a premium for. But at least I was able to find them.
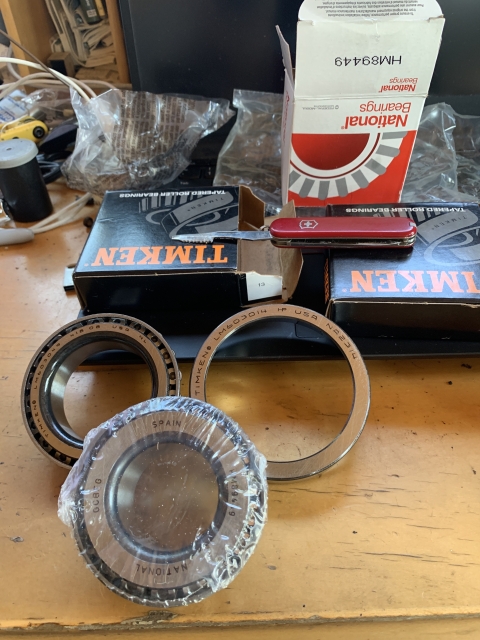
Got the masking done. I know this takes time and maybe primer and paint is not important, but I saw that without the etching primer the paint chips off during assembly easily.
Who knows, maybe I wasted time...
Top cover, top and bottom:
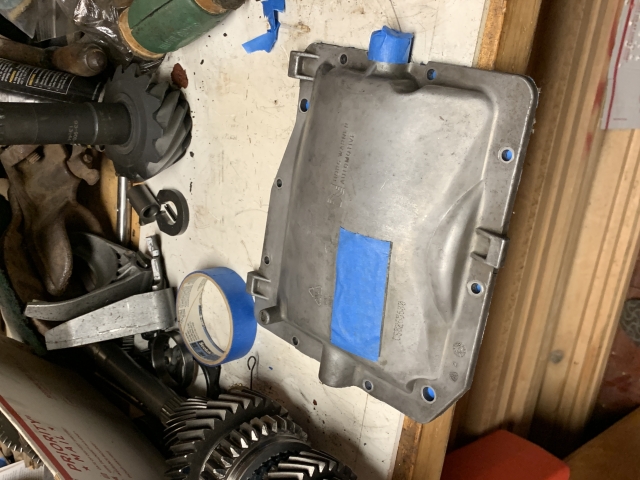
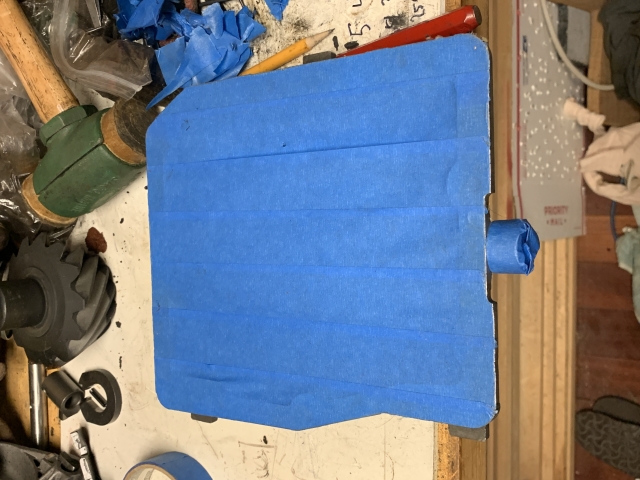
Bell housing side of the main case.
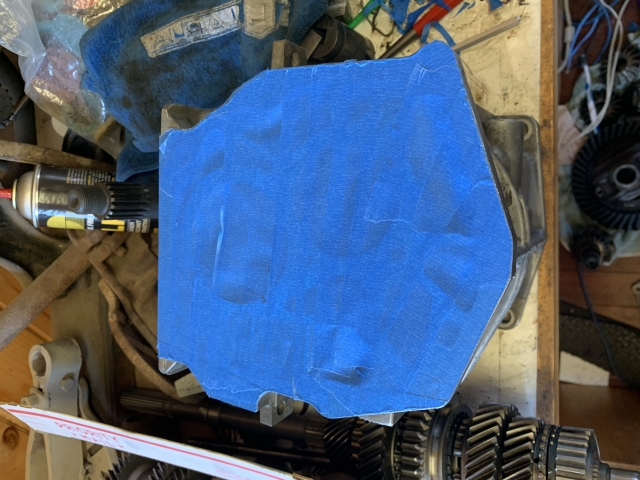
You are shaming me into doing a better job of paint prep on my engine & transmission assembly.
You are shaming me into doing a better job of paint prep on my engine & transmission assembly.
Bah, don't be. Since I got my truck I've wanted to take it over to a place that steam cleans cars/trucks, I've had them do 2 of my vehicles in the past, and it is amazing how the under carriage looks when they get done. In this case I don't want to drive my truck that far, and to tow it over is a PITA also.
My truck has so much gunked up on the transmission and bell housing and just the axles and under carriage, pedals, both axles, et al, is covered with gunk and old grease on it. I've been looking for a pressure washer, but a friend told me you need 5000 psi to be effective, and I haven't seen any deals on them, and most are more like 2500-3500 psi that I see for sale on craigslist. I will need to get it all cleaned before I replace all the rubber in the steering system. Ball joints and all the rubber, rubber in the leaf springs, it will all need to be changed out. I think leaf spring front rubber bushings will need to be changed.
Most all of the changes I would like to make are not actually visible on the exterior, stuff like better fuel system, better brakes, sound system, removable nav system, seat, etc...this is not really stuff you see.
I haven't even decided what to do with the Axle, but am still planning the Rust Doctor if I can get a good coating of rust after cleaning the axle. I may just clean and paint it, not sure. If I use the wire wheel it pretty much gets it down to clean metal, brushing the rust off.
Got the 1st coat of primer on...
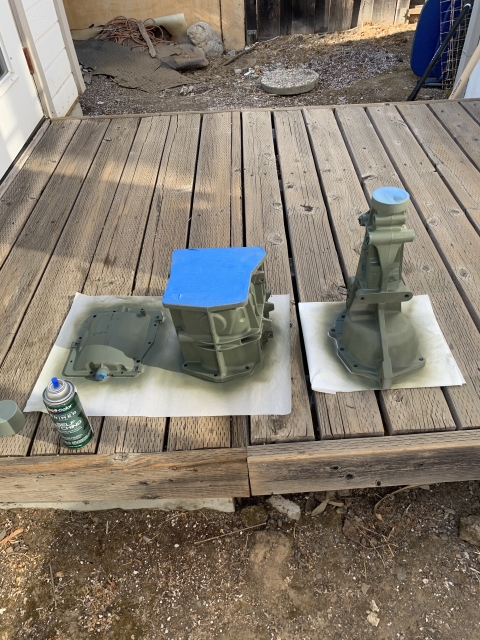
I added a 2nd coat of primer and this is the first coat of paint. I put a 2nd coat or paint but it looks about the same. No reason to bore folks with it.
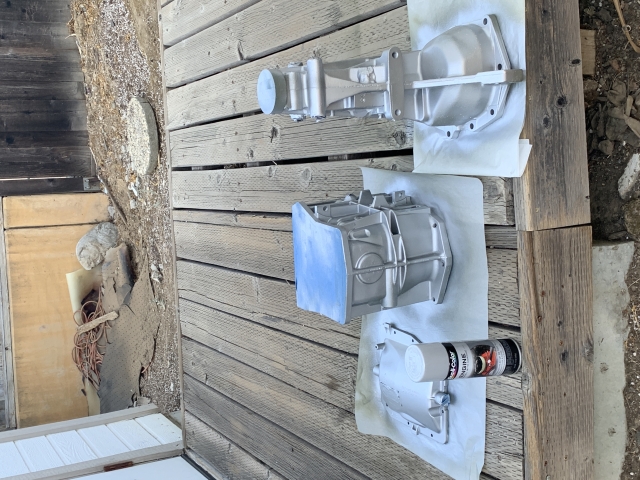
While I contemplate, I want to mention that recently I bought a cordless 1/2" impact wrench, I was impressed, it's a beast at 1400 ft.lbs. Then a friend convinced me to get a 1/4" hex collet impact driver, it has a variable speed trigger at 0-350 ft.lbs.
I bought this off Ebay for $120 w/shipping, included 2 x 2.0Ah batteries and the charger with a tool bag. The 2 tools are really a game changer for me when working on my vehicles. This smaller one is only 2 lbs. without a battery. I have been waiting to upgrade my cordless, and the m18 fuel is hard to beat, the chargers even support the m12, dual charging.
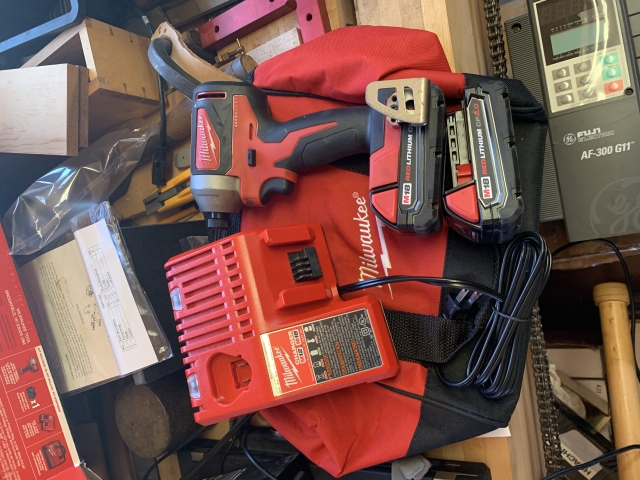
A while back I jumped into those Milwaukee tools in a big way. Impacts, 4 types of saws, drill, driver, hedge trimmer, router,...The only one I don't like is the weed whacker. It is just awkward and not balanced, I have the 1/2 & 3/8 drive impacts. The 1/2" will break 1/2" bolts. The little 1/4" hex drive gets the most use. Great tools!
I was mistaken on the 1/4" collet impact driver, it's only 2000 inch lbs., so it's 165 ft.lbs. Probably a good amount when working with 80-120 ft.lbs., seems a lot of auto stuff is in that range.
I was actually hoping the string trimmer was good, my husqvarna is also awkward, it has bicycle handles.
This small one is going to be handy, I can tell. It's so light, a really great tool.
Everything is all cleaned up and ready for assembly!
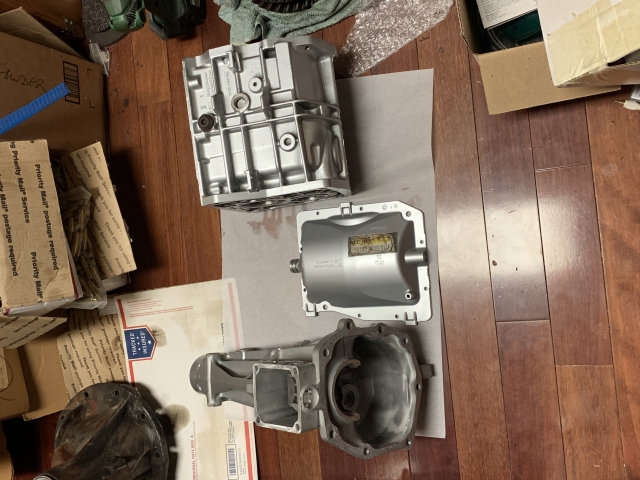
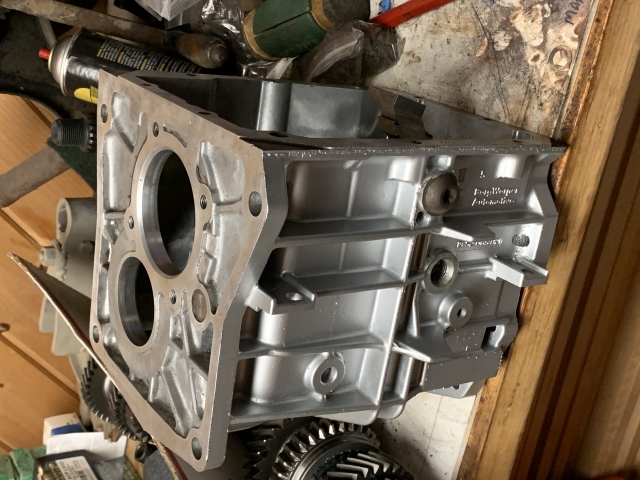
Tomorrow I need to dig my hydraulic press out enough to use it. I need to get those gears off the shafts so I can clean them up. I have the main shaft to get the gears off, and the counter shaft has some as well, and the input shaft.
That looks nice. It always to start with fresh parts.
That driver will drive 1/4"X 3' lag bolts into undrilled pine. Had an electric (corded) line trimmer that was light and powerful. Worked fine on 200' of cord a pain but still better than maintaining a two stroke. I gave it away when I got this one.
That looks nice. It always to start with fresh parts.
Indeed it is, but this brings up an interesting topic which I would like to explain, if for nothing else but casual conversation. This is the first time for me to rebuild a transmission, but after I get done, I want to understand the entire transmission. I've never really understood any of my transmissions.
After I get done, in my mind I will be able to visualize what's happening in the trans as I shift. The other thing is I plan this to be the last time I go in and tear this apart and rebuild it. I will die before that.
Also good to understand just what it takes to do a rebuild. Today is Labor Day, and I can't help but think about the labor it takes to rebuild one of these correctly. I hope I can understand the Inline 6 at that same level one day, being able to visualize the actual parts in my head to what the engine is doing while I drive. I can kind of conceptually understand that today, but I can't visualize the actual parts as I have never taken one apart.
I think this would work to pull the 3rd and 4th gear off, I have the bearing separator behind the synchro, I have new ones to replace those.
Wouldn't you know it Beater, 1/4" collet impact driver not enough testosterone to pull it. I don't have the 1/2" in the office. Will get it tomorrow, or wait until it eats me up.
So far I have disassembled everything without a hydraulic press. I do have a small one, but I need to dig it out...
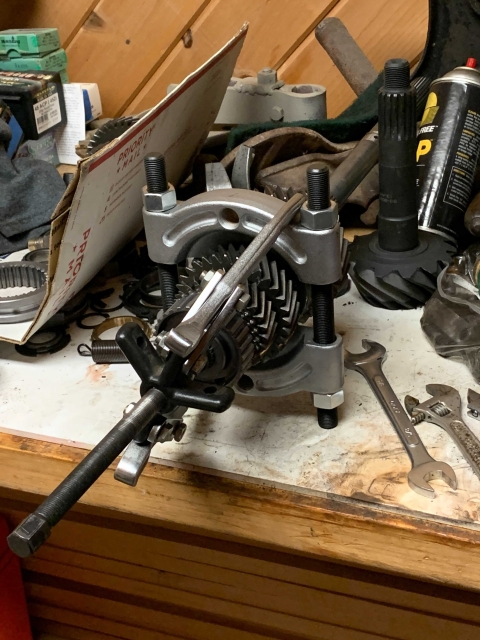
You are beyond me at this point. I had one of these apart about 20 years ago.
You are beyond me at this point. I had one of these apart about 20 years ago.
Beater,
The reason I'm showing this stuff is that many DIY folks do not possess all of the tools that others may have. Part of the problem in disassembling the T5 is removing the gears from the shafts, this includes the cluster, the main shaft and the input shaft. Maybe this will help to give some folks an idea on how to go about it if you don't have a hydraulic press. I'm certain this is moot for many more knowledgeable who have done this before, even 20 years ago. You would still need to tap the other side out with a dead blow. By other side I mean the other side of the main shaft. There are 1st and a slider with a synchro. WC has needle bearings under the gears along with lined synchros. Hopefully that makes sense to you. The inside of the slider, which is between 1st and 2nd I believe, is not removed. It stays on.
EDIT:
The bearing puller didn't work. I will need to dig out the hydraulic press... 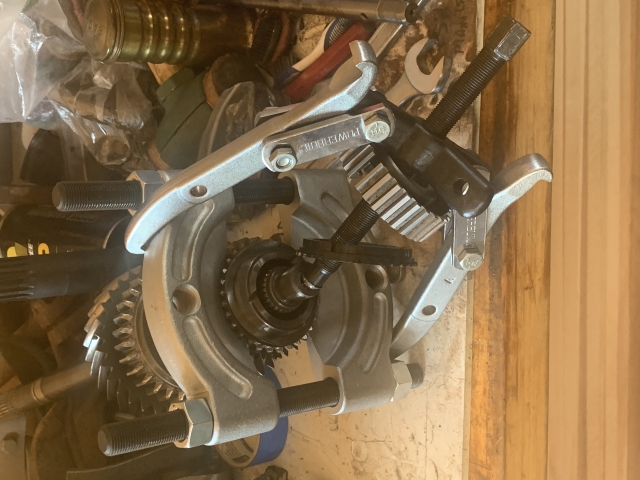
Previous person put this clip on backwards, small side should go out so you can get the tips in the remover. Notice how the ring pliers are facing the wrong side to remove...it's out now and I damaged one of the tips, it was a tad challenging to remove.
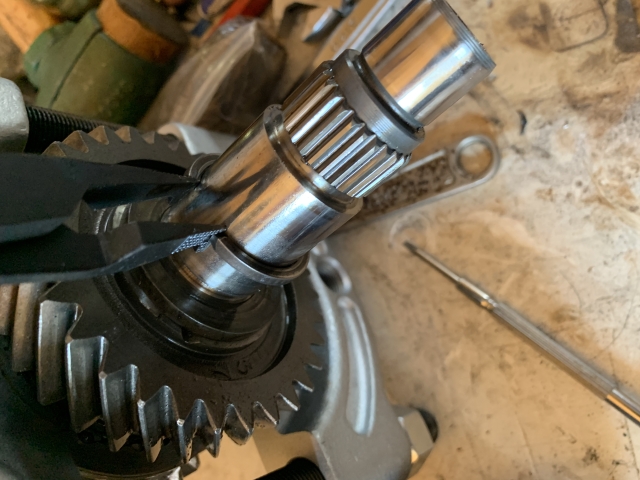
And that is to say this flimsy springy clips is not only difficult to get out of there (use 2 tiny screwdrivers to let you pry around and get it out), but they are known to cut people as well. Be careful with this one.
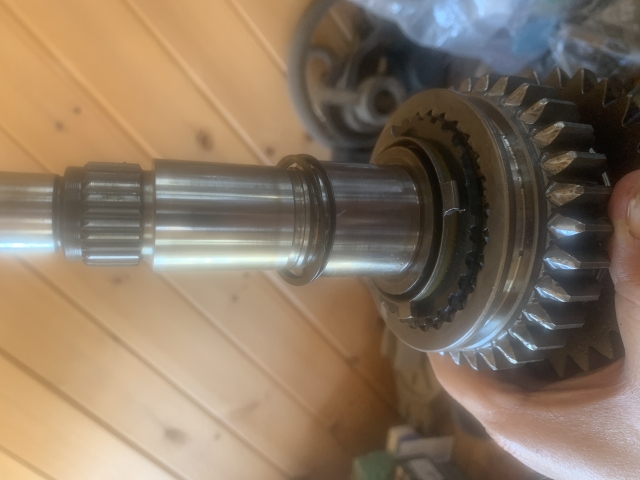
I will dig the hydraulic press out now as I don't want to beat too hard on the main shaft with a deadblow, I tried but was starting to hit harder than I like.
Making some progress, the main shaft has all gears, bearings, synchros, et al, removed. It was a piece of cake with even my cheapo HF 12-ton press. This last piece stays on, and shouldn't be taken off, it's the inside of the slider, I believe for 3rd/4th. It is broached on hot, and you should not take them off.
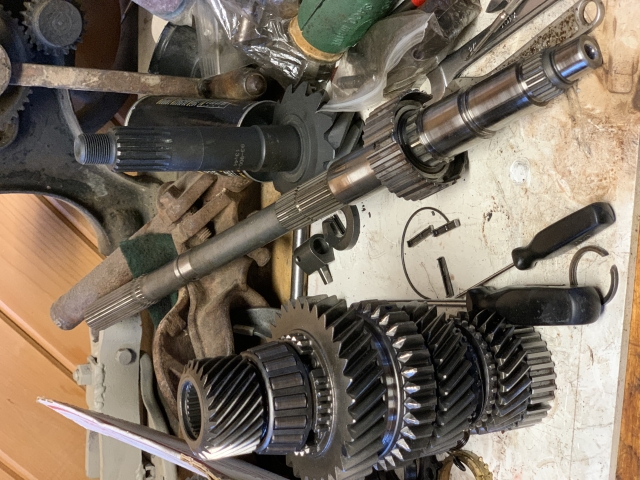
Don't forget that pesky ball to hold the needle bearing in place. Only WC have needle bearings inside the gears.
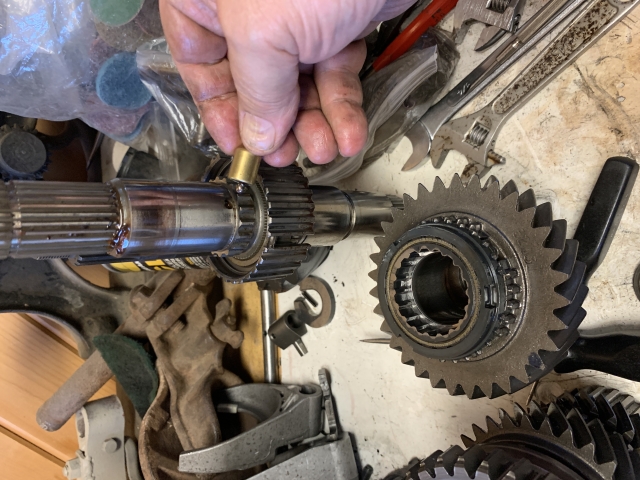 EDIT
EDIT: Darn it, wasn't so lucky with the counter shaft. My little cheapie 12-ton HF is not up to it...
I should maybe try a bit of heat on the bearing. I'm replacing it, so no loss.
Hoping I can get back to this soon, have my hands full with another bigger pending project.
Bigger, heavier, & scattered.
I hope it's working out.
Bigger, heavier, & scattered.
I hope it's working out.
Indeed it did! Everything is safe and sound in my yard now. I'm the new proud owner of an Inline 4! A Cummins 4B Inline 4!
Glad it worked out. According to my wife "Everything" is not in your yard.
Glad it worked out. According to my wife "Everything" is not in your yard.
Arrrggghhhh...teachers...
Does she mean because I'm less 2 wheels and tires off the trailer???
(technically she would be correct)
What she probably means is the ol' Beater has his share of stuff in THEIR yard. My school teacher wife is quick to point out that we have a yardfull too!!
What she probably means is the ol' Beater has his share of stuff in THEIR yard. My school teacher wife is quick to point out that we have a yardfull too!!
Beater definitely has more truck stuff than I do, but I have quite a bit myself, mostly machines.
Look what showed up today...I wouldn't say this was quick, had to wait over a couple months, but AFAIK I will be the first person to have an adapter for a Chevy '37-'53 bell housing (narrow) to either an '83-'92 S10 Chevy bolt pattern (wide) or a '93-'96 S10 WC T5 which has the Ford Bolt Pattern. I have the Ford Bolt Pattern and the older bell housing.
For anyone reading along if you use your original bell housing you don't need to do anything to support your pedals, Chevy mounted them on the bell housing. People do mod them, but this is just as well...A big thanks go out to Dave Farwell at Vintage Metalworks.
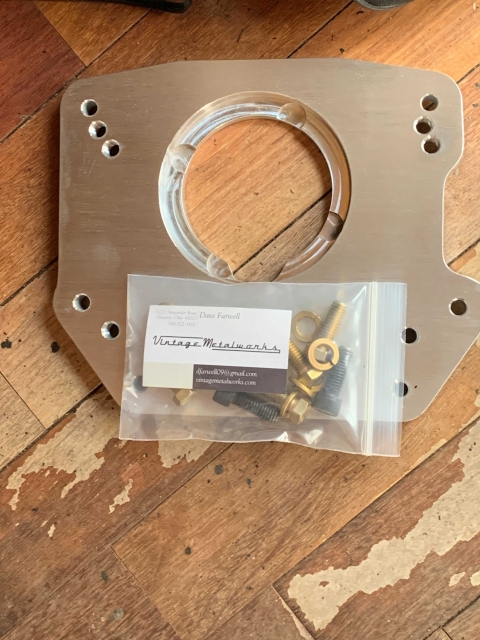
Yeah, It was a reference to what my wife referenced once as my private wrecking yard. She doesn't view it as yard art.
That is a cool adapter and I think a wise choice for you so you don't have to mess with the pedals. My '26 has the pedals mounted to the bell housing and it is stamped steel. I would like to keep them there because I'd like to be able to swap in an older Chevy 4 if I decide to build one.
Yeah, It was a reference to what my wife referenced once as my private wrecking yard. She doesn't view it as yard art.
I gotta call foul on that, my wife is similar. Me, my wife and both kids were having a conversation about our lake property...nobody was ecstatic over it like I was. Very similar to the yard art, since art is in the eye of the beholder. I just like old stuff in the yard...
Everyone suggested I give it up. My sisters, Mom, nobody seemed to see what potential the property had. Now my own wife and kids realize how much it means to me, and even my wife is warming up to having it as a 2nd home...More importantly they are seeing the value of what I did.
Maybe I will have a shop with a lift in it in the next few years. I've always wanted one. I would love to be able to work on cars the right way, with a lift.
That is a cool adapter and I think a wise choice for you so you don't have to mess with the pedals. My '26 has the pedals mounted to the bell housing and it is stamped steel. I would like to keep them there because I'd like to be able to swap in an older Chevy 4 if I decide to build one.
It's not that difficult to fabricate something up that attaches to the frame, but I think it's cleaner to do it this way as all the pedal parts are all the same as original. I agree it was worth having them make it for me, although I had half of what I needed, if anyone had a bell housing to match up to this, a template to overlay over the crankshaft/pilot-bushing hole would be what is needed.
They are not making any more land. Well that is mostly true, but we are using it up faster than it's being made. A property that is away from a big city with access to water & water rights could become your family's greatest asset and will never be worth less than what you put into it. Tough times are coming. Yard art will be another resource.
When I get to mounting my Chevy II 4 cylinder I want tiotry to use the stock mount positions. and try to put the pedals in a place so linkage will connect. A brake master cylinder will have to me placed somewhere. With Chevy inlines the left rear gets crowded with a mount, brake & clutch linkage, and exhaust. Don't know if I can make it work or not.
The one thing that was done to my '46 before I bought it was the brakes. A dual reservoir master cylinder and brake lines were added, but I may need to swap it out, or swap the lines, seems the big reservoir is going to the rear. I'll need to check that.
I plan for yard art at the lake. I have a big hill my property sits on top of and could use a couple pieces of clapped out farm equipment.
Dual reservoir masters are a good thing. I've never had a master cylinder fail but a backup is better.
Dual reservoir masters are a good thing. I've never had a master cylinder fail but a backup is better.
You know, here's the funny thing. I struggle with what I want to get for towing, grasping over a pickup rather than the flatbed I have, but the towing truck always gets down to something I really only need occasionally, I only tow a handful of times a year.
However, as far as having a truck to drive, it seems I keep coming back to my '46. My style is probably not for everyone, but I'm hoping that in the end my '46 will be scooting down the highway with tunes going away in the background...and most of my hauling will be able to go in the back of the '46.
But this drivetrain conversion is going to be key to have the truck I want with my '46. I don't need any other pickups, I have the one I want right here.
My old '53 has always been used for hauling. It was our only pickup for many years. It gets to by my hot rod buddy when we have a day off. It will never be pretty but I'm not afraid to use it.
Oh, I will always need some type of hauler, I just buy too much heavy stuff, but most of what I do doesn't require hauling, that's limited to a handful of times per year. My flat bed is probably just fine for most of my hauling that doesn't require a trailer, when I can get a forklift on the loading end.
Let me ask you this. My '46 is a 1/2 ton, does that imply that I am able to haul 1000 lbs? Isn't that how trucks are designed? So much discrepancy between payload, GVRW, tongue weight, et al...
Basically that is the idea. 1/2 ton a thousand pounds and 3/4 1500 but GVWR is a newer and far more confusing designation. I use it as a suggestion.
Here in Ohio we have a 10,000 pound GVW threshold - which demands a commercial truck plate (significantly higher fees - including a visit to the scales). Go above 26,000 pounds gross and one needs a CDL to drive it.
Here in Ohio we have a 10,000 pound GVW threshold - which demands a commercial truck plate (significantly higher fees - including a visit to the scales). Go above 26,000 pounds gross and one needs a CDL to drive it.
I'll share these pics, but don't want to de-rail this thread entirely, this is an Inline 4 actually, it's a Cummins 4B in this, but this was my mess back on Sept. 20th.
Let me preface this. You can see trans fluid under the flat bed, but as it turns out I think I lucked out and it just overheated and blew fluid out the overflow/breather. I lost a tire and wheel on the freeway, but able to get off...and lost the 2nd wheel and tire trying to pull it up that stupid driveway. Flat bed was towed to my yard, this happened up in Vacaville, CA, 100 miles from my yard. The trailer and crane were pulled into a parking lot for Sachs 5th Ave. which closed during the pandemic. This was over 22,000 lbs. for the trailer and crane, and I do have a brake controller, but still too much weight, and I have retired from doing any heavy moving in the future.
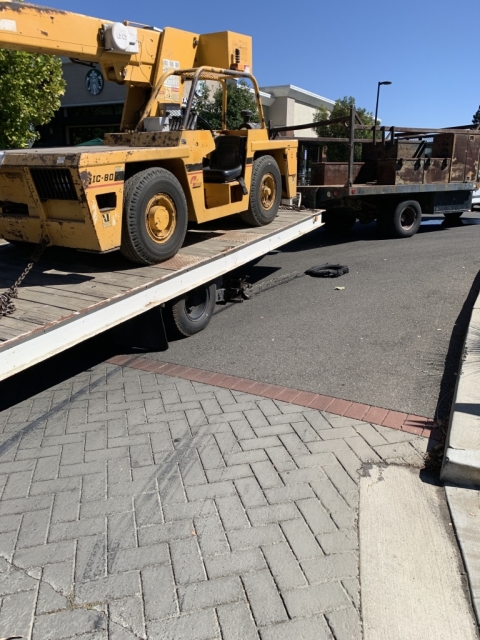
Last Sat. a rigger saved my bacon, I was on pins and needles for 2 weeks as I had just picked this up from an auction purchase in Sacramento.
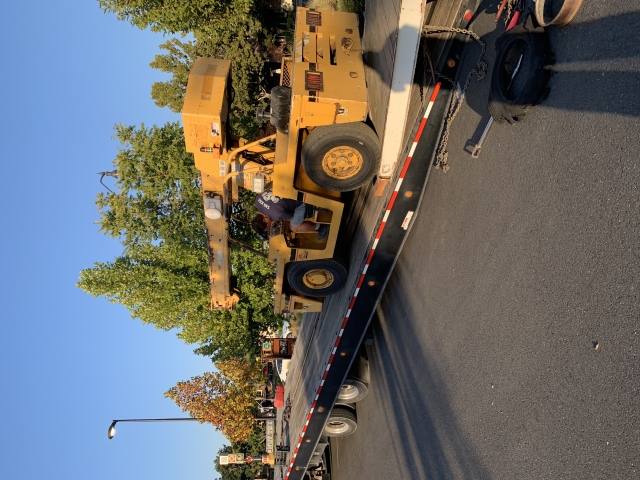
All that said, I am hoping to get back working on the T5 and rear axle this Sunday. As you can see, I've been a bit occupied to work on the T5 or axle...
Ok, thinking what panic mentioned to me a week or so back, keep doing this and it will get easier. Lucky I didn't break the gear on the countershaft, I did kill my Harbor Freight 12-ton import hydraulic press...maybe a good opportunity to get a better press and get rid of this crap I paid $25 for. I know why the guy only charged $25 now...but to be fair, I've used it for at least a half dozen projects. I ripped it up pretty good with a 3' pipe used as a breaker bar...
I tried to heat the bearing with my map torch, but no go...then a friend suggested I use a tig torch to heat it on the race itself...and when I went out I realized I had killed the press...so I went to his house and he started to press it on his press and something just didn't seem right, the videos I saw showed them destroying the bearing and using the top of the race to pull it off the shaft...I told him I wonder if none of those gears come off...so we used a couple small pry bars and whola, it came off.
Lesson in all this, counter shaft only has the bearing on it. Nothing else comes off. I would have been buying a new counter shaft had I busted this one...whew...ok panic, I learned another piece, but I'm gonna have to trust you that this stuff will get easier, I hope you're right!
Luckily I have a fair amount of tools, otherwise I would probably be breaking more stuff...that could have cost me a countershaft, about $150 on Ebay...whew...slipped that one...
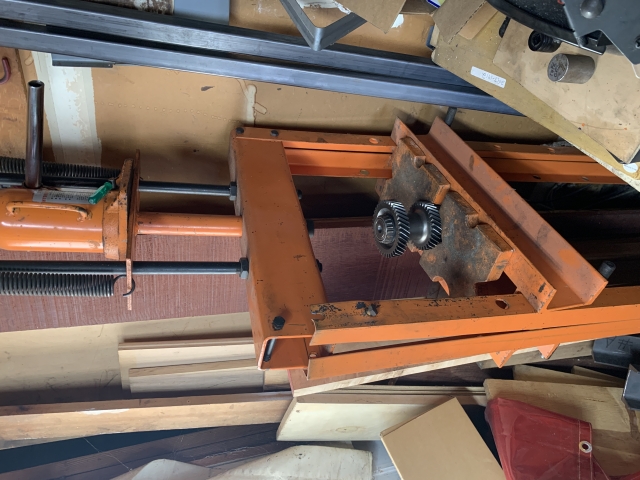
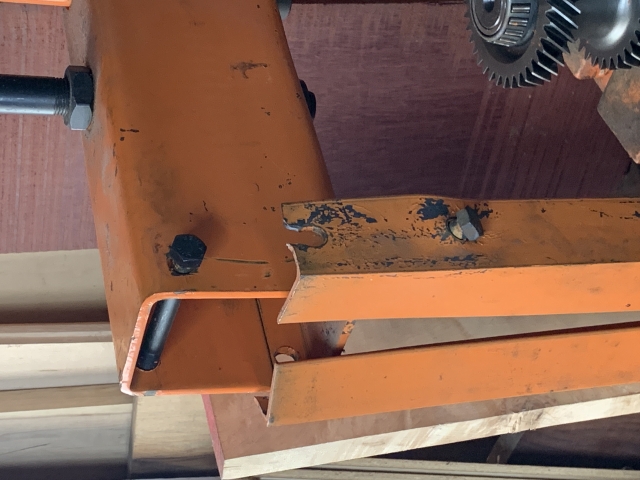
At least I got it off of there. I have a new one so no big deal on destroying it. I got it off whole, so the heat must have helped to loosen any locker. You can see the cage started to pull up on one side. As I said, I have a replacement in the rebuild kit.
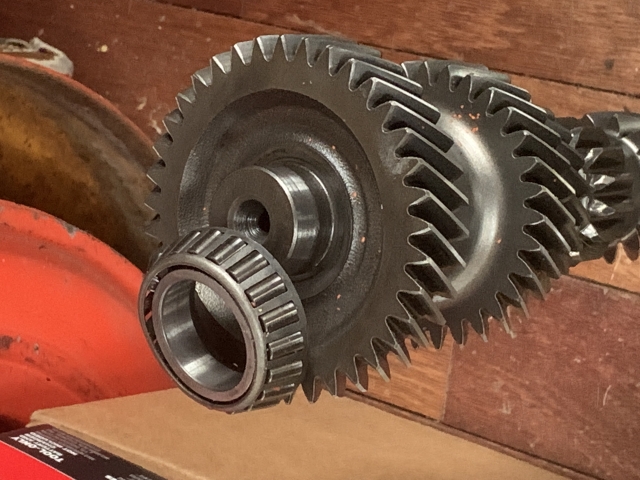
Straighten the press out and weld the frame up. You won't be trying to separate the cluster gears again. It that press won't take something apart it likely doesn't come apart.
One problem guys like me have is that the things I learn will likely not be used again. Build it, fix it and I'm off into the unknown again.
Straighten the press out and weld the frame up. You won't be trying to separate the cluster gears again. It that press won't take something apart it likely doesn't come apart.
Probably so, and I could probably use some 6010/6011 and blow through the paint. I'd rather find a decent one to replace it with, not a lot for under $1,000 for a decent Carolina. Welding will get it back together...until I can replace it.
Waiting for a call back from this one to see what it is, but with no-name it's probably imported. He did buy it 24 years ago, so it might be decent. I buy auto parts from Winchester, they're a part of Napa.
https://sfbay.craigslist.org/scz/tls/d/santa-cruz-automotive-shop-tools-snap/7392408053.htmlI'd probably trade it for your 000-18...j/k (kind of, I'd do it! LOL)
One problem guys like me have is that the things I learn will likely not be used again. Build it, fix it and I'm off into the unknown again.
I will be honest, I resemble that remark.
That looks like the one my son has. it's pretty tough.
I don't think the 000-18 would do as good of a job as the Harbor Freight press. The wood is pretty thin.
That looks like the one my son has. it's pretty tough.
I don't think the 000-18 would do as good of a job as the Harbor Freight press. The wood is pretty thin.
This one is not that rigid. I don't think the 000-18 would do very good at it either...but I think I'm gonna just pull those nuts and bolts out of there, clamp it with a couple C-Clamps and weld it with cellulose rod. Otherwise it will take a bit of cleaning to be able to tig it. I only have tig/stick welders.
Here in Ohio we have a 10,000 pound GVW threshold - which demands a commercial truck plate (significantly higher fees - including a visit to the scales). Go above 26,000 pounds gross and one needs a CDL to drive it.
stock,
Missed that before I think, but in California we have to have a commercial plate on any truck in order to haul anything in the bed. Even my '46 is required to have a commercial plate in order to carry even a bag of groceries in the bed. Minimum is about $160/year nowadays for a commercial plate, I *think*, I'm sure they can find reasons to charge more, I don't want to inquire to them...LOL
EDIT: We also need a CDL over 26,000 but also need a commercial plate for a pickup.
As long as I stay within 10k on my flat bed, I am not required to pull into the scales. It's only when I have a trailer on the back of the flat bed that you are required to stop. I think it would be hard for them to determine if you were hauling 2500lb or 4000lb. to make you pull in...(my flat bed is 7500lb). The problem is I do need to use a trailer to get most of my machines up to the lake.
Any progress on the pickup? Is the transmission together?
Any progress on the pickup? Is the transmission together?
No, have been busy...drove up to Lake County to take care of my expired septic permit, added a 30'x40' shop onto the septic permit so I can have a bathroom and utility sink in the shop, and run into the same septic. Will pull a separate building permit for the shop/garage, but the septic will not need to be redone. Environmental Health is happy, County is happy, I'm happy as I'll be able to save another septic permit by parlaying this on the same septic permit.
I also finished my job on Thurs. and start a new position on Monday. The company didn't want to save me, so they watched me walk. This is why I needed to do this on Fri. as the County is only open during the week. Since I start a new job on Monday, I really wanted to take care of this before I start the new job.
So all of this hasn't lent very well to getting any progress on the T5, but I was planning to look at some of it this weekend and/or get the hydraulic press welded together so I can use it still.
PS - did I mention my wife is nagging me with a honey-do-list also? She got new carpet last Sat. and I had to hire a piano moving to move the piano from the living room to the family room and back after we got the carpet installed. S&G Carpet wouldn't touch the piano. Now she has a few other things it's hard for me to say no when she looks at me with those sad eyes...
Life is crazy...
The old saying, "A happy wife means ...........". However we finish that reflects on our own situation/wife. No explanation necessary.
There are hoops that need to be jumped through unless you crave a constant battle. No fun or piece in that.
Good luck on the new job!
How familiar are you with septic systems? Be careful what goes into your shop sink. Septic systems are real world organic. Our has not needed to be pumped in it's life of almost 50 years.
The old saying, "A happy wife means ...........". However we finish that reflects on our own situation/wife. No explanation necessary.
Truth!
Good luck on the new job!
How familiar are you with septic systems? Be careful what goes into your shop sink. Septic systems are real world organic. Our has not needed to be pumped in it's life of almost 50 years.
Oh, I will be very careful about what goes down the utility sink, but I need to be able to clean parts and such, so even in the case I need to dispose of the hazardous material, I'll drain/dispose of it, that stuff won't be going into the leach field. I was most excited to find out I can have even a bathroom in the shop, cause you need a place to wash your hands if possible, it would suck to have to go into the house to do that each time. Although I guess I could put a sink outside without having to plumb the shop, having a shower there with hot water would be ideal, hot water for the utility sink as well.
A few good things in regard to my truck project is that I will be looking for a lift after I can get the shop in place. I really want to have a lift to be able to work on cars/trucks with. I'm fed up with crawling on the garage floor.
And thanks for asking, I do need to get myself back on track with this project, the past couple weeks have been pretty hectic, last week our house was torn apart getting new carpet (that Happy Wife deal...), interviewing on video and doing a 3 hour in person interview, has taken a toll on me.
I sure hope I can sort out and get this T5 back together. Most everything will be getting replaced with the rebuild kit. I could probably even tap the end bearing on the input shaft with a dead blow and a bearing seat. Maybe I'll do that rather than using the hydraulic press. Would be nice to have the press though, there's a couple other bearings that need to be pressed on (or BFH) as well. I'm looking around the workbench, there's a lot of parts, bearings, seals, lube, sealer, et al to put it all back together. Probably need to get things cleared and spread out a bit better so I can organize it better.
Sounds like you have plans. Keeping bad stuff out of the septic is not easy. Adding to the bacteria is good. I use the mice I take out of traps. Keeping roots out of the leach field is important too.
Look up some tips about putting the input shaft in the freezer overnight and heating the bearing. You have to work pretty fast nut the hot bearing will go on much easier.
Good luck with the new job!
I haven't dropped off the planet yet, but been swamped with a new job, traveling about 2-1/2 - 3 hours per day (1.25-1.5 hour one way) on the freeway...I'll be working at home most of the time, but needed to go in this week as my new manager left today to go on vacation for pretty much the rest of the year. I'll only be required to go into the office once a week if needed after I get everything setup...do it's a pretty good deal.
I cheated on the hydraulic press, I picked one up last night inside the Haight, damn good thing I had my phone as I would have never found that place without it. Typical SF City, up, down, up down, one way, left, people jumping out in front of you, more up, down, up down, another one way...I hate the city...so anyway, it's not ideal but the best I could find that was within what I would spend. It's an Arcan, I think they used to be sold by Nothern Tool, who quit selling them. This one is made in America, but the new ones on Ebay are Chiwanese. There are no press plates, but I have some cheapos from the HF press, I'm pretty sure they're cast but I can use them for now. Also no pins to hold the head plate, the portion that slides up and down and sits on the pins. In general it's way more heavy duty than what I have, and it's a 20-ton. It has a bottle jack, so not a lever/pump setup, but I was able to get it for $250. Not sure that's a good deal considering it's missing the pins and plates, but to be honest I don't see much under $1k that looks decent. The new 12-ton HF has a better bolt setup, looks more rigid and I'm sure stronger than the one I have which pulled apart, but I'd rather have this unit in my shop. It's in the pickup outside, it's drizzling so good I got the bottle jack in the tool box. Will get it out tomorrow, and hope to be able to make progress this weekend on the T5.
You sound busy. It sounds like the new job will settle down in a while.
I need to do some work on my HF press. It's good enough for what I do and my son has a better one of I need it. Several years ago I was doing a "quick" job at a friend's shop using his much abused HF press. You know the story it broke while I was using it so I drove home and took the piece off of my almost new one to replace the broken part on his. The big pin that does the pressing broke off at the top weld probably because the working end was mushroomed out of shape. Well, I never got his piece fixed and all his tools went away so I still have the broken one. I have thought of welding a fixture in there hat would accept impact tips like pickle forks, punch, ........& a flat tip like the original one.
I have been super busy, Last Wed. as I was just heading onto the freeway on my way home, my wife called that the main drain was backed up...Nobody will tell you how much over the phone, I don't get it. Just tell me how much you'll charge to clear it, it happens every couple years and I typically do it myself, but in this case I need to head out early in the morning. Fri. I finally got to work at home, but had to do the long travel 4 days.
Ok, I made out pretty good on this press after all is said and done. It doesn't say made in USA on it, but it is exactly the same press as made by Carlina in Travelers Rest, SC.

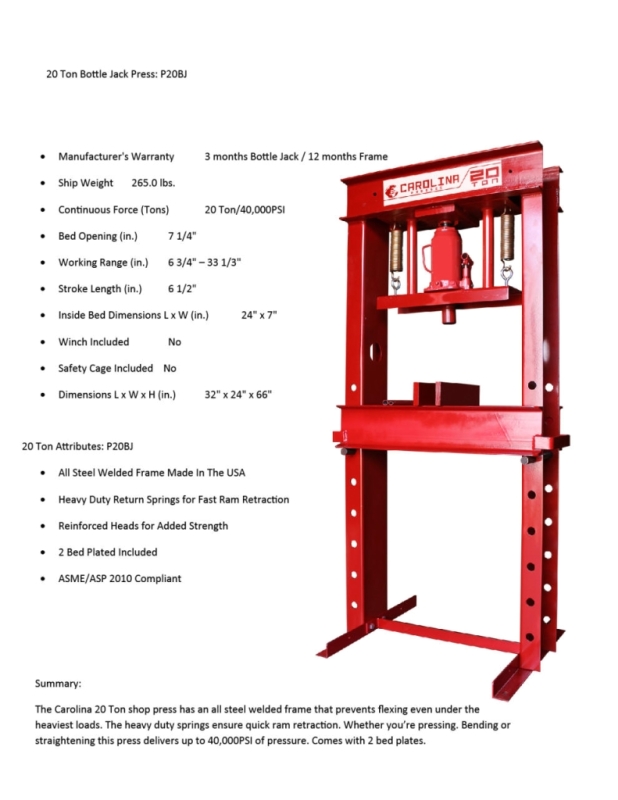
NOTE: stock, these images are 800x600.
This is the press I bought. No plates and the head plate is down at the bottom, I have some pins in the garage. Will use the HF 12-ton plates for the time being.
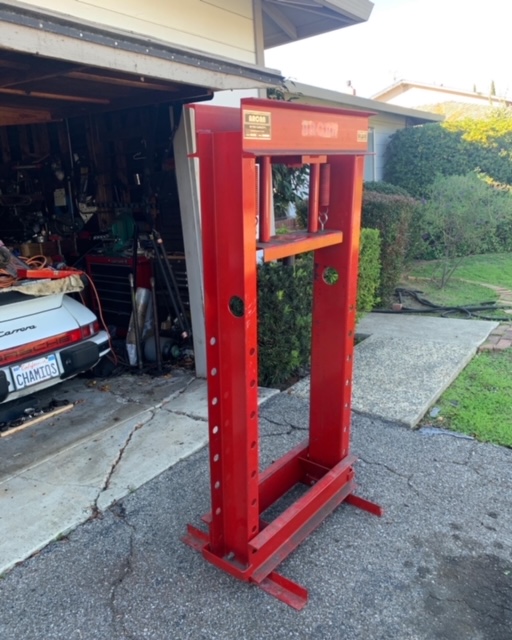
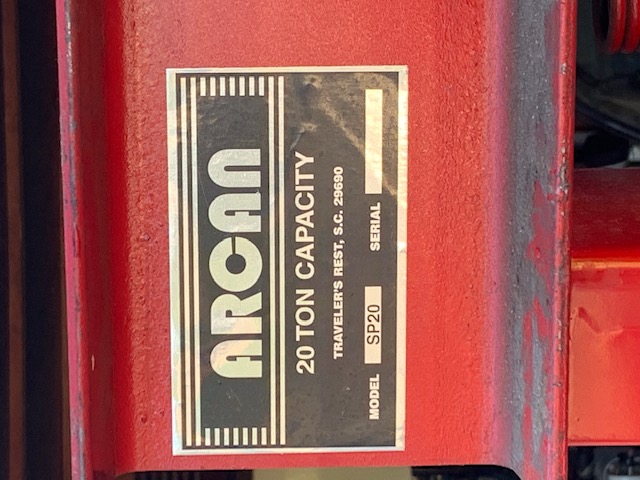
Looks plenty stout. You can break all your tranny parts with that.
Looks plenty stout. You can break all your tranny parts with that.
Indeed! I was thinking the same thing...great minds thinking alike and all that...
Getting back in gear, for lack of a better analogy...as I keep saying...I'm kinda talking out loud as I'm going alone but would welcome any advice on this one small piece of the puzzle, the Input shaft.
First, the back history on the T5 if I haven't mentioned this. A guy with a Ford truck bought this to put into his 60s F-100. This is exactly what he wanted, a WC T5 with a Ford Bolt Pattern on it to mate up to his Ford bell housing. Not being easy to find, he was going through the salvage yards and found this which he thought was a '93 S10. It is a '95, but they're the same T5, and they use electric speedos. However, the gears inside match up to Ford gearing and to get the input shaft for a Ford, it has a different spline, same issue I am solving. However, this has the Chevy gearing in it that I want, so even though I need to get a clutch fab'd for me with a 26 spline in my diam, I can solve that piece. This is the only way to get a WC T5 in an S10 front mount shifter T5 needed for bench seats. (whew, that was a mouth full in itself)
He bought another Ford T5 and sold this to me for $350. Now, the cheapest thing to do would have been to use the T5 as-is, because it turns out it was rebuild already as I saw a grinder mod that PaulC recommends on the shifter shaft. But I never want to have to go into this T5 again, so though I would just rebuild the entire thing and replace all the wearable parts.
I don't believe the rebuild kit includes any parts for the input shaft, and older vintage input shafts were 11 spline, and the '95 T5 I have has a 26 spline which is pretty much what a modern date input shaft may use, I'm not clear, but there was an intermediate spline count after 11 but less than 26.
Since I don't have any parts, I as leaning to just getting a new input shaft which was about $50 last I checked, but need to figure that out. There is some type of rubber seal in the bottom, and a bearing at minimum that I will need, and I can probably get the old bearing off, I don't know about the seal in the bottom of the cover, which is really crap'd up. Probably won't be pretty if I wire wheel and clean it up, but nobody is gonna be able to see inside the bell housing. I may need to cut about 3/4" off, that I'm not sure of yet, but I don't have a problem cutting a new one.
Theory on why it look like it does. I believe water got into the bell housing and/or when the S10 was sitting in the salvage yard from the shifter opening. I think it happened before since it was rebuilt, but I think whoever rebuilt it cheaped out and used the original input shaft to save some coin. Then I believe the S10 was in another accident and went to salvage at that point.
I am going to look for that seal and bearing to see if I can refurb the one I have, or find another one. Since my vehicles are different years than the specific model, I can't find which one has the manual T5 with overdrive, so having a difficult time finding the correct spline...I need a 26 spline input shaft assembly for a 1995 Chevrolet S10, and don't any offers for what would be a manual.
![[Linked Image]](https://www.inliners.org/ubbthreads/ubbthreads.php?ubb=download&Number=646&filename=IMG_4923.JPG)
![[Linked Image]](https://www.inliners.org/ubbthreads/ubbthreads.php?ubb=download&Number=647&filename=IMG_4924.JPG)
I did do some research on this and found an input shaft, which says it's for a GMC Sonoma (sister to the S10). It also says WC transmission, '93-'95. Perfect, I believe, mine is a '95 T5.
I have a 21 tooth gear with a 26 spline on the input. I counted the teeth on the input shaft gear, which mates up to the main shaft. I think I'm gonna order a new one.
I found the input shaft seal at O'Reilly's but it's $35 for the seal only.
https://www.oreillyauto.com/detail/.../a/4206/automotive-truck-1995-gmc-sonomaAnd I see an entire new input shaft for $60.
https://ampdistributing.com/collect...rg-warner-tremec-world-class-input-shaftEDIT: checking with Dave Farwell to see if it makes sense to go with a 10 spline, 21 tooth input shaft and use my existing clutch. I was planning to use the 26 spline and have a custom clutch made, but that would cost about $125. If anyone here has any thought on the input shaft being the same or not I'd appreciate it.
EDIT2: Oh wait, I just remembered that I do have an extra 3 speed Muncie transmission which has an original '55 input shaft, I can measure and count the splines to make sure of this.
Ok, it's always good protocol to answer your own question on the Internet I'm told...
NOT!Bolts were not that tight, easy to get the input shaft off...first a little quote from Lynyrd Synyrd...just to go along with the rancid organic oil smell...
Ooooh that smell
Can't you smell that smell
Ooooh that smell
The smell of death surrounds youThe answer is NO, you can't swap out the input shafts and I suspect why Dave Farwell told me to use the 26.
Here's the pic of each, side-by-side. You can see the bearing/race is completely different, the old 10 spline being a roller bearing and the newer GMC being a tapered roller bearing. I will be ordering a new 26 spline 21 tooth input shaft to replace the original.
![[Linked Image]](https://www.inliners.org/ubbthreads/ubbthreads.php?ubb=download&Number=648&filename=IMG_4927.JPG)
Good news is Dave Farwell has some seals, he said they come in the rebuild kit. So I may have a seal in my Transparts Warehouse overhaul kit, I do see a rear tail shaft output seal, but the parts are in cryo pack so I'm not sure. I don't see any instructions or info at all, just parts. I was under the impression the overhaul kit doesn't include the input shaft parts as there could be different engines that the T5 adapts to. When I open the rebuild kit, I will compare the seals vs this one after I take it out. Definitely want to get that out whole without tearing it, just in case the seal is not there. Just in case I need to reuse it.
I was hesitant to reuse this, as the retainer is so gunked up, but I can clean that off the outside and paint it with the same silver paint I painted the case/tailshaft/cover, spraying that on the outside and clean up the bottom, replace the seal, and use some anerobic gasket maker, and call that good to go. I just can't tell if this seal is in the overhaul kit just yet. I want this to be the last time I need to go in and rebuild this T5, it should last for the rest of my life, but my son will be getting my pee-cup and I don't want to force him with repair something, although he will have my shop after I get it done...if I end up with a lift, that would be sweet for him...
![[Linked Image]](https://www.inliners.org/ubbthreads/ubbthreads.php?ubb=download&Number=649&filename=t5-input-shaft-retainer.jpg)
![[Linked Image]](https://www.inliners.org/ubbthreads/ubbthreads.php?ubb=download&Number=650&filename=t5-input-shaft-retainer-seal.jpg)
I have to claim ignorance, not knowing that Tremec has a manual on their site. This looks to have all the info for both NWC and WC T5s.
This could be useful for many people with vintage pee-cups as the T5 is most likely the most popular manual overdrive transmission put into them, the S10 being the most popular for bench seats.
This link came courtesy of Dave Farwell at Vintage Metalworks.
https://www.tremec.com/anexos/TRSM-T5-0510-R1_173.pdf
I've done two of these one Ford WC for my son's Studebaker and the now WC in my '53 pickup. Both long enough ago that I don't remember the details. For my pickup I do remember searching the clutch & pressure plate books when I worked a CarQuest. I did find some that worked but don't remember what they are. I can't locate the notes either. The are in the shop I'm cleaning. Pretty sure it is 21 alpine 11" and the pressure plate had the diaphragm release. There is a long & short throwout bearing too. I made an adapter/spacer for mine so I didn't have to cut anything. It is an S10 but didn't have a GM or Ford bolt pattern.
You seem to be plugging right along.
Beater,
I didn't realize you had a T5 in your '53, and didn't know your son had a Study, that's cool, I have always kinda liked the Study pickups, natural lines to chop the top.
The S10 WC was only in the '94-'95 as I recall. Did you use digital gauges? I went to the hassle of getting the tailshaft converted so I could connect it to my mechanical speedo and keep the original look in the cab.
The are in the shop I'm cleaning. Pretty sure it is 21 alpine 11" and the pressure plate had the diaphragm release.
If you find it let me know, I'm curious what it is and how long the shaft is.There is a taper in this WC retainer and the input shaft has a taper that mates to it. You can see the taper in the phots above, the bottom seal has a taper under it, so the seal slipts over the shaft and the taper mates to the inner taper underneath.
There is a long & short throwout bearing too.
The length is an issue on some trucks also, and 3/4" needs to be cut off. I am not clear if this will be needed on mine or not.
BTW, the old 10 spline input shaft I have, has loose roller bearings inside, no race. So they are entirely different, with a enclosed roller bearing on the front. WC uses mostly tapered bearings, like Timkens.
You seem to be plugging right along.
Thanks, but I'm probably the slowest mechanic on the planet!
The Studebaker is a '54 station wagon.
The part that needs to be cut is the tip of the input shaft that goes in the pilot bearing. Mine was 3/8". Since my bolt pattern didn't match I made an adapter from 3/8" plate and didn't trim it. You can make a spacer even if your pattern matches. Just be sure the clutch plate full engages the splines in the input shaft. Trimming the shaft is no big deal either & easier than making a spacer.
![[Linked Image]](https://www.inliners.org/ubbthreads/ubbthreads.php?ubb=download&Number=652&filename=100_0272.JPG)
Mine has a mechanical speedo but the plastic gear either moved on the shaft or is slipping. Friend who built trannys helped build mine and did a WC upgrade.
The Studebaker is a '54 station wagon.
Oh, it's not a woodie is it? Study did make some woodies...slap me a surfboard that there and let's go on safari! I feel like I'm in high school again!
The part that needs to be cut is the tip of the input shaft that goes in the pilot bearing. Mine was 3/8". Since my bolt pattern didn't match I made an adapter from 3/8" plate and didn't trim it.
Yes, in fact this is why I said I don't know if I'll need to trim mine. My adapter plate that Dave Farwell made me should account for the difference. However, I'm not clean on the stickout, I need to measure to see. But mine might be different than the one from the '55. I will try to have it ready to swap in, but will measure mine when I pull the 3-speed out. Originally I was thinking I could use the 2 clutches I have if I was to use the 10 spline. That was my reasoning to ponder the 10 spline/21 tooth, but it's not going to work.
Mine has a mechanical speedo but the plastic gear either moved on the shaft or is slipping. Friend who built trannys helped build mine and did a WC upgrade.
What Dan has is a piece of spring metal that the end fits in the hold in the shaft, and it seems that all main shafts have this hole for the mechanical speedo, even the electric ones. But the tailshaft case is not so simple. I'm not exactly sure what he did, it's sealed up so you can't see. I'm pretty sure he does that on purpose, otherwise everyone would convert their own. I was really pleased with his work, he bead blasted the tailshaft and had it ready for clean/paint.
Do you just use an hoist when you do a rebuild? I wasn't sure if a engine stand was needed or not? I have a 2 ton gantry going in the new shop, with an electric hoist, so in the future that won't be an issue, but I do have a couple engine hoists. I was under the impression that most people removed the engines with a hoist and then moved them to a stand, some are pretty elaborate with water and power to test the engines. I know all that is not needed, but if I ever find a good deal on a lump I'd consider learning to rebuild it.
Here's the Conestoga Fewer that 2000 of this model were built but OT here it's a now supercharged version of that V8 model.
I like that, even though not a woodie, it's cool and I would still strap a surfboard on top and go on safari! LOL
By the way CNC DUDE makes an engine stand fixture foe Chevy & GMC sixes.
Good to know. I'd probably buy one if I was rebuilding one, although the setup you had with bolts on the top of the head hanging on chains looks like it was working, a stand would be safer and more stable when you work on it. The stand is how a real mechanic would do it.
Your '47 had a 235 bolted to the stock bell housing I think. The difference in these bell housings are with mounts, pedals, clutch arm, starter attachments .....As far as I know the distance from the back of the block to the face of the transmission is the same. So what you had before is what you want and measuring what you have will give you what you need. Just include the adapter thickness in the mix. You may come out like I did with no shaft cutting needed.
Yes, (really '46, but I'm not in a mood to split hairs) and the thing about that is that since the pedals are connected to the bell housing, I want to keep my bell housing that is in there so I don't need to modify anything for the pedals and if I ever did want to replace the engine, I could still have my pedals if I adapt to my bell housing. I suspect this T5 will stay in there, AND the 235 will stay in there for pretty much the life of the truck, however long that may be...it's gonna have to make it through my abuse, and then my son's for the life I can see for it today.
EDIT: Damn that 270 really looks nice in your '53!
I really liked it. The sheetmetal pieces were just hand buffed and sprayed with semi-gloss clear. I should have given it a couple more coats. The salt at Bonneville has not been kind to it.
I've had 4 Woodies, all fun but my favorite was a Morris Minor Traveler. A really cool little wagon.
I really liked it. The sheetmetal pieces were just hand buffed and sprayed with semi-gloss clear. I should have given it a couple more coats. The salt at Bonneville has not been kind to it.
It looks awesome, IMO. I wouldn't feel bad if I rebuilt an engine and it looked like that.
I've had 4 Woodies, all fun but my favorite was a Morris Minor Traveler. A really cool little wagon.
Well, I've owned about 4 dozen of Martins...ROTFLMAO (keyword being "owned")
So I guess I'll match my about 4 dozen Martins to your 4 Woodies!
I don't know if I've even seen a Morris Minor Traveler, it sounds like an extended mini wagon.
EDIT: just looked up the Morris Minor Traveler. That is cool, reminds me of the Wallace and Grommet mobile, but theirs wasn't a Woodie...
Straighten the press out and weld the frame up. You won't be trying to separate the cluster gears again. It that press won't take something apart it likely doesn't come apart.
One problem guys like me have is that the things I learn will likely not be used again. Build it, fix it and I'm off into the unknown again.
One time on my other '65 C20, it ate another center bearing, for some reason it liked to do that. Anyhow, it did it an hour from home, so while we waited for our ride to come get us, I removed the driveshaft. The next morning Pop put the shaft in the press at his work, to press off the center bearing. He was up to 9 tons when it finally popped loose! I was going to try it in the field with a ball-peen-hammer I had. I would still be there if I tried that, and that was back in the mid-late-nineties...lol...
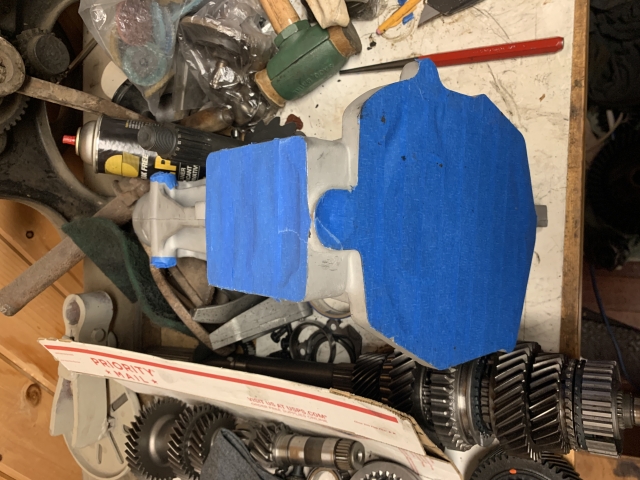
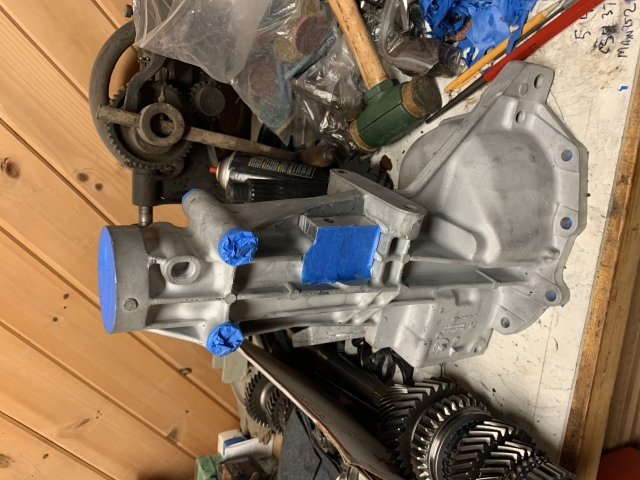
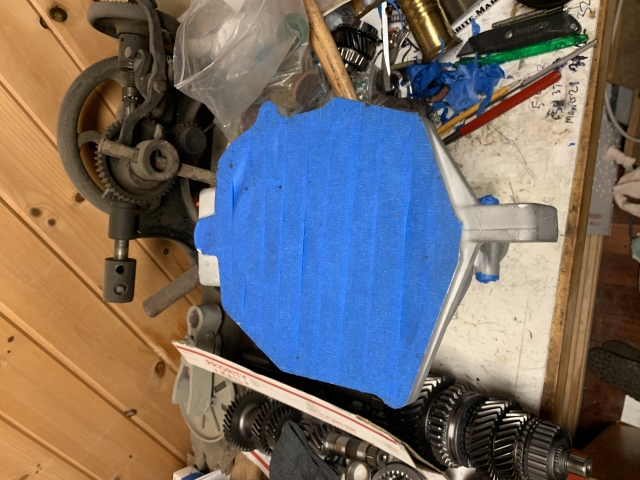
![[Linked Image]](https://www.inliners.org/ubbthreads/ubbthreads.php?ubb=download&Number=655&filename=1854184_l.jpg)
![[Linked Image]](https://www.inliners.org/ubbthreads/ubbthreads.php?ubb=download&Number=656&filename=pics.jpg)
![[Linked Image]](https://www.inliners.org/ubbthreads/ubbthreads.php?ubb=download&Number=662&filename=100_0256.JPG)
![[Linked Image]](https://www.inliners.org/ubbthreads/ubbthreads.php?ubb=download&Number=663&filename=100_0251.JPG)
![[Linked Image]](https://www.inliners.org/ubbthreads/ubbthreads.php?ubb=download&Number=664&filename=100_0309.JPG)
![[Linked Image]](https://www.inliners.org/ubbthreads/ubbthreads.php?ubb=download&Number=665&filename=100_0310.JPG)
![[Linked Image]](https://www.inliners.org/ubbthreads/ubbthreads.php?ubb=download&Number=666&filename=100_0315.JPG)
![[Linked Image]](https://www.inliners.org/ubbthreads/ubbthreads.php?ubb=download&Number=667&filename=100_1250.jpg)

