I'm a new forum member here, and posting the standard obligatory "Hey, I'm a new forum member" post.
This forum doesn't look too busy.
When I was looking for an Art Deco era truck, the beautiful blue with black fenders that is pictured on the banner had caught my attention early in my search. It really is a beautiful truck.
The truck I bought is more on the original side, has old patina, was painted with Rustoleum using a brush from the looks of it, and in general just an 'ol '46 pickup. Came from North Carolina where it lived most all of it's life on a farm, then lived for about a year in Missouri, and now will be in California for the remainder of it's life...maybe the remainder of my life would be more accurate...
I look forward to exchanging information with like minded folks that like to tinker and work on their trucks. My intention is to drive this, not restore it to it's original glory, so this truck will be a driver.
Initially I had a ground problem, and ended up replacing the battery cables 2/0 as my truck is still 6 volt. This seems to have fixed the intermittent starting problem I was seeing.
Now I'm looking at the brakes so I can get it road friendly and finish my registration.
The truck has a '55-'62 235 in it, but not too much of the electronics are working, that will be on my list of things to do...it has a gas tank in the bed, but the original is still under the seat also...
Here's a few videos the seller posted when I bought the truck, I moved them over to my YouTube account. Let see if this works.
It looks like a pretty solid and unmolested old truck. Welcome to the site. Looking forward to seeing more.
I agree, but haven't been able to spend too much time with it yet after I got the ground issue fixed on the starter/engine.
I just noticed that playlist didn't work correctly on YT, so I just added the separate videos.
Originally Posted By: stock49
On our forums we're striving for quality not quantity . . .
Not a problem for me. Actually I've run into a bit of adversity in regard to Chevy forums. I try to be considerate to others and leave respectable posts, but on Stovebolt the moderation was very heavy handed, like 1 out of 10 threads being locked...The way the moderators deals with issues over there is unacceptable. They modified a message I posted but the moderator told me he didn't have the time or could he take the time to make a notation. That was my last use of Stovebolt.
I tried the VCCA Chat Forums, but it was more like a group of old Grandmas at the knitting group trying to figure out how to "knit one, purl two". They banned me for about 5 days because they said I was "not being civil and several members complained about my attitude". The last thread I was in they were splitting hairs over my truck not being "original" because it has a newer 235 engine in it, or that I plan to upgrade the ring/pinion to a 3.55:1 set to make it more highway friendly which was not original. I felt a bit bad, my truck has "radials" on it. They treated my truck as it was a "hot rod". I never wanted to go to any car show and understand how these vehicles are judges, it just doesn't interest me. I looked at a few restored trucks that were nicer than mine, but to me they were not original, at least my truck is pretty unmolested, as BOP points out...I feel so also...it is a 72 year old truck. I like the patina, I like the cracked windows, I like the dings and dents...but I want to make it mechanically sound, upgrade the rear end (I have the ring/pinion already), brakes working, all the gauges working, and drive it...
Originally Posted By: stock49
Welcome aboard. Your '46 is a nice find. Glad you're gonna drive it. That's what they were made for.
I'm not looking for any drama, I have enough of that in my life already...was just looking for like minded people with old trucks that work on them and drive them. Maintaining and working on old trucks is an art in itself, something I'm not new to, but new to Art Deco era pickups...and looking for people that are familiar with it, who won't treat me like a little kid on the Internet and are capable of holding a rational conversation.
It's your truck, do what you want with it. There are a lot of drivers here and mostly guys that tend to make them more current driving demand friendly. We are a very eclectic group. If it has an inline engine it belongs here. We try to keep the drama to a minimum while at the same time feed our enthusiasm. Things flair up from time to time like in any family. Stock49 is working to get our site to be more driver friendly as well. There is a good and active local chapter of Inliners International in Northern California, check them out. That blue and black pickup you like may be one of them.
Welcome. I'm building a crazy Chevy 53 3100 pickup and people put up with me. When it comes to inlines of any breed you are in the right place. I don't think anywhere near the box and nobody here has ever put me down. More of a "let's think about this" attitude. As the man said your truck, your money and your dream. Just take us with you and share the joy.
It's your truck, do what you want with it. There are a lot of drivers here and mostly guys that tend to make them more current driving demand friendly.
BOTP,
Indeed I do plan that and not too interested what the car show crowd thinks of it, because I couldn't agree with you more...it's *MY* truck.
Just bothers me that people would even suggest that my truck is not original because it has a slightly newer 235 in it, or that it has radials on it, or other nit-picking...I sold vintage guitars for a number of years in the past and I would consider a guitar with original paint to be more original that one that was refinished. It's really a matter of perspective I guess...
Originally Posted By: Beater of the Pack
We are a very eclectic group. If it has an inline engine it belongs here. We try to keep the drama to a minimum while at the same time feed our enthusiasm. Things flair up from time to time like in any family. Stock49 is working to get our site to be more driver friendly as well. There is a good and active local chapter of Inliners International in Northern California, check them out. That blue and black pickup you like may be one of them.
Sounds like my type of place. I am not trying to be difficult, and that goes for other forums as well, but I've just noticed some pretty anal folks in the vintage chevy crowd, not sure why. That blue truck with black fenders is a beautiful looking truck. I don't know if/when I will paint mine, I kinda like the old patina...but I might in the future after I get it all running well.
Originally Posted By: mick53
Welcome. I'm building a crazy Chevy 53 3100 pickup and people put up with me. When it comes to inlines of any breed you are in the right place. I don't think anywhere near the box and nobody here has ever put me down. More of a "let's think about this" attitude. As the man said your truck, your money and your dream. Just take us with you and share the joy.
Indeed that is my plan Mick. Thanks for the welcome. If I do get out of hand, don't be afraid to slap me, I don't mind that if it is deserved. I am just getting too old to argue and debate with folks on the Internet.
There is another friendly site you could try. Rusty Bowtie ( HERE ) is mostly more modern V8-auto "street rod" style but they are very open friendly guys. There is a ton of skill there and some off topic discussions. It is a small group. One of the best things is a list of links to other sites and parts venders put up by members. It is about Chevys/GM but there is a place for others too. No drama at all.
Some of those "antique" sites think they are protecting the purity of their brand. That do tend to get picky. I joined HET (Hudson-Essex-Teraplane) site to get help with my 1919 Essex racer build. I got none. The Studebaker Drivers club is a great group. If it was ever a Studebaker it it still a Studebaker with them though there are purest there we were welcomed with my son's modified '54 station wagon. There is another Stude club that is not so friendly. As said before this place is mostly about engines though we are interested where they are it's about interest and not judgment. They are still letting me stick around maybe against better judgement.
There is another friendly site you could try. Rusty Bowtie ( HERE ) is mostly more modern V8-auto "street rod" style but they are very open friendly guys. There is a ton of skill there and some off topic discussions. It is a small group. One of the best things is a list of links to other sites and parts venders put up by members. It is about Chevys/GM but there is a place for others too. No drama at all.
Thanks for that tip, I'll check it out. Actually, although I am not planning to street-rod my pickup, much of the stuff I want to do is probably stuff that could be more suited to that crowd. The car show crowd is very against any type of non-OEM modification, being more concerned with how judges would score their cars and trucks...but I am more concerned about some stuff that will make the truck more convenient for me, not the judges.
EDIT: Registration is disabled, unfortunately...
Originally Posted By: Beater of the Pack
Some of those "antique" sites think they are protecting the purity of their brand. That do tend to get picky. I joined HET (Hudson-Essex-Teraplane) site to get help with my 1919 Essex racer build. I got none. The Studebaker Drivers club is a great group. If it was ever a Studebaker it it still a Studebaker with them though there are purest there we were welcomed with my son's modified '54 station wagon. There is another Stude club that is not so friendly. As said before this place is mostly about engines though we are interested where they are it's about interest and not judgment. They are still letting me stick around maybe against better judgement.
I'd say we might be lucky to have you around after that Death Wheel event!
BTW, that reminds me, I don't know what one needs to do in order to be approved on the H.A.M.B. but I just guess Ryan does't like me. I've tried to register at least a half dozen times, not the slightest in the way of a response. That goes for before and after I bought my pickup. Seems like that would be a good place for me, despite my truck being pretty much OEM, but those folks are not afraid to modify a vehicle.
Merry Xmas to all Inliners, may the 6 be with you!
You shouldn't have a problem on the H.A.M.B. Just don't talk about anything after 1964 or so. They are pretty forgiving about brake and drivetrain mods. Not real hot on discs, EFI, or electronic ignition that doesn't fit inside a distributer. Lots of good ideas there. You can post pictures there from your desktop or your phone too I think.
You shouldn't have a problem on the H.A.M.B. Just don't talk about anything after 1964 or so. They are pretty forgiving about brake and drivetrain mods. Not real hot on discs, EFI, or electronic ignition that doesn't fit inside a distributer. Lots of good ideas there. You can post pictures there from your desktop or your phone too I think.
You shouldn't have a problem on the H.A.M.B. Just don't talk about anything after 1964 or so. They are pretty forgiving about brake and drivetrain mods. Not real hot on discs, EFI, or electronic ignition that doesn't fit inside a distributer. Lots of good ideas there. You can post pictures there from your desktop or your phone too I think.
BOTP,
My problem is that Ryan doesn't seem to want to approve me over on the H.A.M.B., so it's not a matter of any specific topic, it's trying to figure out what I need to do in order to be approved so I can even post.
How to get banned from HAMB: point out how a "respected" member is completely wrong. IIRC I mentioned that Ford did not invent the flathead engine in 1932, and BANG "don't come back!"
I mentioned once that Ford/Merc flatheads are only competitive at Bonnevelle because they only race against each other. Every other brand has to duke it out. They didn't like it but they didn't ban me. They have their own version of hot rod history there. But there is a lot of good stuff too.
IMHO the '32 V8 was a great thing back in the day. Chevy only had a L6 pushrod OHV, and for many people "a V8 is better". The decay of the Ford as a sacred icon began in 1949, when you could get an OHV pushrod, parallel valve, quench chamber (sound familiar? Also describes an LSX) 160 hp Cadillac 331 from a JY that had hot flathead power as it came out of the car. Chrysler closed the door in 1951 with the 331 hemi. Garlits once blew up his Ford dragster engine and used the Chrysler 354 out of his truck, and it was faster...
I mentioned once that Ford/Merc flatheads are only competitive at Bonnevelle because they only race against each other. Every other brand has to duke it out. They didn't like it but they didn't ban me. They have their own version of hot rod history there. But there is a lot of good stuff too.
Well, I'm no Ford fan as of recent, although I do own a Ford 1-1/2 ton flat bed, if it was easy to replace it with a Chevy I would. In my quest to understand the speed limitations on the older vehicles, I came across quite a bit of information about Henry Ford. I'm gonna be nice here and just say that he was a disgusting man. If I never own another Ford I won't be hurt. Henry Ford was a bigot, racist, even a vocal antisemitic which is humorous as he was one of the biggest megalomaniacs in the history of America, on the level of Henry Disston, Rockefeller, Jobs, Gates, et al...
Originally Posted By: panic
IMHO the '32 V8 was a great thing back in the day.
It certainly was, but it was brought on by Chevy's inline 6. The most innovative thing about the 32 V-8 was the fact that it had a single piece cast block. That piece is innovative, although in the end Chevy kicked their @$$ with the SBC. The overhead cam V8 offered so many possibilities in regard to cooling and modifications.
All that is pretty much history, it can't be changed, IMO.
Previous to buying my 'ol '46 I was looking at Fords. I really did want a BB or a B, for the very reason that in '32 they changed to the Model B.
It really wasn't until the 50s when they became more streamline, stronger bodies, bigger V8 engines, but I longed for the old style crank windshield, the big grills, headlight buckets, et al
Originally Posted By: panic
Chevy only had a L6 pushrod OHV
And they were only able to sell it for about 50 or 60 years, go figure...LOL
Originally Posted By: panic
and for many people "a V8 is better".
But it is worth pondering that even Ford enthusiasts put SBCs in their resto-mods...
You shouldn't have a problem on the H.A.M.B. Just don't talk about anything after 1964 or so. They are pretty forgiving about brake and drivetrain mods. Not real hot on discs, EFI, or electronic ignition that doesn't fit inside a distributer. Lots of good ideas there. You can post pictures there from your desktop or your phone too I think.
BOTP,
I did get a reply from Ryan today, so maybe I will get approved.
I see an "Antiquated" section that I would most likely fit into.
I was down looking at my brakes today, but couldn't get the bleeder loose on the first wheel, I will replace it. I wanted to make sure I don't crack anything while using a BFH on it, it seems to be rusted on. I sprayed some PB Blaster on it a few times and will revisit tomorrow.
The wheel turns, so the shoes are not stuck, AFAICT.
I was trying to keep from opening up the system, but I can get a clean shot at the brake line to get off. At this point I think I will do that and get the brake line off, so I can use some heat if needed.
I don't get it, in your case your wheel was falling off...in my case I can't get it off...LOL
Very impressive! When people tell me they don't make that I say someone will.
Hah, not very impressive at all, it's but a wheel cylinder piston. Impressive is your project...
For me it's just about doing it. Sometimes I would buy it online, but if I can make something I will probably try...I had been pondering why there hasn't been any better material used for pistons, but the cylinders are cast iron. My original pistons are cast iron. I know folks do use aluminum. It is easier to work with. The reason I used cast iron is that there's a small amount of graphite in it and that acts as a lubricant in a bearing type situation. As such, some mills came with cast iron nuts on the table screw. Aluminum, OTOH, will gall when reaching high temps such as a no lubrication condition.
At the end of the day I'm gonna replace these with Bendix anyway! That said, the piston wouldn't be any different. However it seems the Bendix wheel cylinder has a larger bore.
I'm certain a better material could be used, I thought it would be cool to make some bronze pistons...but there are more factors involved like type of lubrication and such...in this case it's not worth trying to re-invent the wheel, if nothing else we know that disc brakes are superior.
Nice truck. I just went to a show this last weekend. Got beat for best truck by a '52 Chevy. The truck was immaculate though with a perfect original inline! Saw a 1950 with a flathead 6 too. It was pretty awesome.
My project started in October 2013 and finished up this spring. Just keep whittling away at it and she'll be done.
Thanks, I'm gonna take it as a compliment that you replied to my thread!
I was down looking at my brakes today and wouldn't you know it that I am missing one of the small stubby springs for the Huck brakes...I can't find any online with any of the vendors...I can try to substitute, but surprised that nobody has those. I bought a hardware kit from the Filling Station, but it didn't include those pin springs that connect the arms on the brakes. I have all of the larger pins, but missing 1 of the 4 short stubbies that are on the arm pins.
Somebody has one or knows where to get it.Try posting it on some of the truck forums. I can't help you with that year.
Yes, I was able to find one. A friend up in Napa has one that is supposed to arrive today, and also, Jim Carter is sending me one for free with a new catalog. He's a nice guy, I've talked to him a couple times and have bought parts from him.
I still want to replace the fronts with Bendix, but I have all the Huck parts and have the relined shoes which are arc ground.
I'm out of state working again. When I went home last time one of my guys decided to clean out the shop and took my old front end and a bunch of other parts to the scrap yard. He got $92 for it all. Did you get my message about that? They also took two 250's
I'm out of state working again. When I went home last time one of my guys decided to clean out the shop and took my old front end and a bunch of other parts to the scrap yard. He got $92 for it all. Did you get my message about that? They also took two 250's
No worries, I'm gonna leave the Hucks on it for the time being.
I didn't get that message, I don't think.
I've been busy as all heck with my foundation which I'm building a log home on...my '46 is gonna end up living up there.
I have the brakes back together and will leave them like this for a bit until I get things ironed out. Hope to get the bearings and wheels on tomorrow and get this beast rolling again!
Sometimes we need to make them roll just to renew the excitement. I'll probably use the Huck brakes on the front of my roadster partly because the wheels I want to use will fit the drums.
Sometimes we need to make them roll just to renew the excitement. I'll probably use the Huck brakes on the front of my roadster partly because the wheels I want to use will fit the drums.
The Bendix brakes are a direct replacement for the fronts, if you can find some. There is a 1/4" difference between width though, 1-3/4" vs. 2" on the Bendix.
If you look at the design, the Bendix makes a lot more sense as it doesn't really pivot, they slide in/out. I'm sure you know that BOTP, and I suspect the reason you're using them is the same reason I am...because I have all the parts in hand at the moment...
I've been appreciating some of the roadsters out there, that looks like a fun project...but I had better stick with this project as I have my hands full with my lake project. I can't wait to have the 'ol '46 up at the lake, puttering down to the hardware store along the lake, picking up some hardware and supplies, puttering back around the lake to work on the house...it all sounds magical...but life rarely works out so well...
The Huck versus Bendix debate is quite old. The 'apparent' preference to the Bendix system is somewhat distorted by past scarcity - as there was a time when Huck service components where just hard to come by. This caused many to switch over just to keep "rolling". But Huck service parts are plentiful today - and are of the same quality as available Bendix service components.
Moreover, the primary difference between the Huck and the Bendix system is pedal effort transmitted to breaking force at the drums. In a non-boosted system the Bendix requires less pedal effort compared to Huck. Period. Both systems require regular shoe/drum clearance adjustment - as the early Bendix design is absent the 'auto-adjusting' star wheels that are a great feature in the later versions.
Given that the Huck setup is installed and ready to go - I can see no reason to chase parts for a Bendix conversion.
I am running Huck on all four corners and with residual pressure valves and proper adjustment of shoe/drum clearance - Huck brakes rock!
as there was a time when Huck service components where just hard to come by.
I can't imagine that getting better over time, there are no pistons available, nor are there any of the anchor pin springs. So there are definitely parts that are not available.
Originally Posted By: stock49
But Huck service parts are plentiful today - and are of the same quality as available Bendix service components.
Not what I'm seeing, but I have what I need which is the main thing. I wouldn't replace the rears anyway, so maybe having both Huck is an advantage.
Originally Posted By: stock49
Given that the Huck setup is installed and ready to go - I can see no reason to chase parts for a Bendix conversion.
Me neither. If I was going to disc brakes it would be different, and who knows, maybe that will happen one day. For the time being I'm going to keep the Hucks on it. And thanks for weighing in, I do appreciate hearing what other have to say.:)
The part I really need to use on my '26 roadster so the 18" wire spoke wheels will work is the '49 pickup drums from the Huck system. I don't know if they will work with the Bendix system If not I'll just use the Hucks that are on the axle now.
Hi Keroppi . . . perhaps I need to clarify. My point was with respect to so called 'service parts': shoes, replacement cylinders, cylinder rebuild kits, brake job hardware etc. Service parts are replaced every time the brakes are serviced. There was a time in the past that Huck service parts were being ignored in the aftermarket because of lack of demand. But demand has surged and there are re-manufactured 'service parts' a plenty.
As for the specific part of the Huck system that you have mentioned - only the 'lock' is a service part: Anchor Pin Locking Clip
While the anchor pins and springs themselves - these were dealer only parts that were considered usable for the life of the vehicle. If they were lost or damaged then one had to go to a dealer parts counter for replacements - that is until they were considered obsolete. Then one could only find them at long established dealers with old stock still on the shelf - or at a bone yard.
As for the specific part of the Huck system that you have mentioned - only the 'lock' is a service part:
That might be the only serviceable part, but it's not the only parts needed. As I mentioned, no pistons are available (cheap chinese wheel cylinders are), nor the anchor pin springs. If you buy a hardware kit they include the anchor pin locks you picture (some replace with e-clips), the springs, rubber to cover the adjuster holes, and the adjuster sprockets, so it is odd that that stuff is not available.
Originally Posted By: stock49
While the anchor pins and springs themselves - these were dealer only parts that were considered usable for the life of the vehicle.
Certainly parts will be lost, parts will wear out, parts will be needed.
Don't get me wrong stock, I'm not really complaining, but just pointing out that Bendix parts are still available, AFAIK. Also, I have what I need and will collect some spares also, not a huge deal, but the operation of the Bendix is still superior, and they're easier to adjust. Aside from that, I plan to use the Hucks.
The part I really need to use on my '26 roadster so the 18" wire spoke wheels will work is the '49 pickup drums from the Huck system. I don't know if they will work with the Bendix system If not I'll just use the Hucks that are on the axle now.
That I'm not sure of, but I have a passenger car axle and it's not a rigid drop axle. Sounds like a cool project!
Got the lines replaced, of course not without some fightin' with rusted nuts on the hard lines. I got things replaced though...just that a 15 minute job ends up taking 2-1/2 to 3 hours...
I still need to fill and bleed them, but hopefully should be good to go. Did I mention how f#@$'d up it is to work in the dirt, and especially with stickers all over the place... I do hope you're taking notes, I'm using my USPS free flat rate game size boxes. The USPS will deliver them to your door for FREE! XLNT ground mat...
Ok, it seems that I may have discovered my starting problem. When Since I got the truck I have experienced intermittent starting issues, and have always assumed it was the ground.
After getting everything back together, I couldn't get it started, and unintentionally broke the selector knob off the battery charger. No good deed goes unpunished as they say...
I ordered a new switch, installed it a couple days later, only to be faced with the same "my starter has no b@!!$" and couldn't turn it over.
Went back the next day and took the starter off, attached the battery charger with 6 volts 60 amps and I could reliably pretty the starter switch button and it worked. So, I instantly thought I would put it back on and test it again, only to find out the threaded copper post which the battery positive connect to was spinning as I was tightening it. I looked at this one at home and it seems it isn't made to spin as there is no way to tighten.
DISCLAIMER: this is NOT the bad switch, that one is still on the starter. This was with old parts in the glove box. This switch seems like a "consumable".
So I ordered a new switch from Jim Carter and will test that when it arrives, supposed to be here on Thurs.
If this fixes the starter problem, it will be a big relief. I thought I had that fixed with new cables, but after it sat for a couple months while I procrastinated on the brakes, it seems it didn't fix it.
Rather than a ground problem, it could very well be a positive problems...arrrrrggggggghhhhhhhhhh!
In most of those the copper block can be turned around and it's like new.
I don't see how you would do that with this switch unless you ground off the solder/weld holding the button on and could pull out the copper piece...at least by looking at it. The one on the truck is fubar, the threaded post is spinning and won't tighten up...either that's my problem or I f#@$'d it up in removing and attaching the positive cable.
I kind of like the floor starter...it just adds to the charm of the truck...
New switch came today, Henco en China, so you know it's good!
Maybe it is the copper block on the starter that can be turned around. It's been a while. The floor starter is another security check. The 34 year old could never have started it. With my bad E-brake it is sometimes more than fun to start on a hill. I need another foot!
In most of those the copper block can be turned around and it's like new.
I don't see how you would do that with this switch unless you ground off the solder/weld holding the button on and could pull out the copper piece...at least by looking at it. The one on the truck is fubar, the threaded post is spinning and won't tighten up...either that's my problem or I f#@$'d it up in removing and attaching the positive cable. Yes they wear out.I have put several on my 53 in the last 40 years. Just think of it like brake pads. A lot of those years I had to use the starter a lot. I kind of like the floor starter...it just adds to the charm of the truck...
New switch came today, Henco en China, so you know it's good!
Yes they wear out.I have put several on my 53 in the last 40 years. Just think of it like brake pads. A lot of those years I had to use the starter a lot.
Yes, seems like it. I put the new switch on, but now starting to question the starter also.
I think I'm gonna pull it again and just get another rebuilt one from Jim Carter, it's $130 (+$90 core). I'll still have a spare switch and will be sure that the starter should be working, I hope. Before I do that I will just test running another ground to the starter mounting bolt. I tested continuity from the bolt to the negative post and it's conductive, but there is paint and possibly other grease on the starter mounting lugs, will try to wire brush that possibly.
Just want to make sure that if I swap the starter out it would be my luck the problem with exist...
Yeah, I have one I drilled out to fit the starter mounting bolt and will try that first, but if that doesn't seem to work I'll probably get a rebuilt starter from Jim Carter.
Tried running a ground to the starter, but it still doesn't seem to have enough umph to turn the motor over, even with a battery charger.
Pulled starter and trying to get a rebuilt, but Jim Carter has them backordered. I sent off a message to him and see what he replies. I'm guessing he can rebuild mine.
When I press the switch it will try to turn it over and hum...I don't think the hum is good.
It's not like a faint click where it doesn't have enough battery, seems something is wrong with the starter.
I see there is a small starter drive gear, and I wonder if mine is bad?
Maybe BOTP, stock49 or mick53 may know how to look inside the starter? Maybe after I remove that outer steel band around the heel end, I can get to that or possibly remove a door...
I brought it home and think I should at least try to get to this small drive gear and see if the teeth are worn off. I can get the drive for $25. Don't mean to sound cheap, but I resemble that remark as I'm not working...
EDIT: Nope, learning as I go...pulled it apart and now see that what they call the starter drive is the big gear in the end cover and taking it apart I see that it fits on the splined shaft which goes through the windings. IMO, that's quite a deal for $25 is the teeth were chewed up...but that's not my problem.
Here's a pic of those splines on the starter drive as well as the splined shaft.
Here's my problem, IMO, this is all $#!tted up on the inside, all the wires and springs are covered in rust, this can't stay on my truck looking like this. Will wait for Jim Carter to respond.
The shaft that goes through the field windings on the inside of the case is the armature. It has a set of windings that rotate inside the field windings. On the back end of it is a commutator. That is where the brushes ride and make contact between the windings. It has several copper strips separated by a softer insulation. It must be smooth and round or the brushes will not contact properly. If it has scratches, lines ,or is out of round it can probably be turned down slightly. The insulated slots can be deepened with a scraper or piece of hacksaw blade.
Check the brushes for smoothness and proper length. They wear out. The brushes need to move easily in their holder. The spring tension keeps them in contact yet allows them to move a little. If the commutator is too much out of round it will throw the brushes out too far to work. Clean all of the wire connections.
This is an easy rebuild. Do the best you can but it doesn't have to be perfect. Get all the dirt and grease out. These old things are pretty forgiving, that's why we love them.
This is an easy rebuild. Do the best you can but it doesn't have to be perfect. Get all the dirt and grease out. These old things are pretty forgiving, that's why we love them.
There's enough wrong with it that I think it makes sense to just get a rebuilt unit. There's a lot of rust inside, but the armature doesn't want to pull out, and I can feel rust/crud in there as I move it...the spings and wires can probably be sprayed with T-9 or similar, but even so the wires look very old and brittle.
Now, here's the irony...I have a receipt that the seller gave me with the paperwork. The receipt is dated 10-7-16, clearly states 1946 Chevy Pickup...
"Take off starter & install after rebuild. Adjust voltage regulator - adj carb - change ground cable."
There is no way this starter was rebuilt, this thing is so crusty inside, and one of the hex heads on the long screws is kind of rounded, but I got it off with a vice-grip.
Had the wires and armature been clean as they should have been, I'd feel better about it, but this could actually be the original starter to the engine, which is replaced as it's a '54-'62 235 with lubricated head.
Also, receipt says the ground cable was replaced. Yeah, one was that was too small running to the engine block, but the ground from the battery to the firewall was FUBAR. Seems like half arse work to me...
Unfortunately there are the unscrupulous types out there. May have pulled the starter for rebuild - got busy - and then just bench tested it, cleaned up the visible parts and reinstalled . . . :-(
Fortunately there are lots of sources for a replacement unit at reasonable prices.
That is strange. Maybe it ha been in a fold since then. I took two pickups from a ranch here along the river. They had sat in some pretty high water.
I know the previous seller had problems obviously, and it's never started properly since I had it, although after I messed with the cables it did crank over and I thought I had my problem fixed...apparently not...
Originally Posted By: stock49
Fortunately there are lots of sources for a replacement unit at reasonable prices.
Jim Carter is getting me one, I like him and he's helped me out recently with a spring for the Huck brakes. He has some of the best prices also, $130 for a rebuilt starter, +$90/core. I have mine all pulled off and taken apart, will just toss it all back together and send it to him. At least I will know that getting one from him should look like new inside. And I did test it off the truck, it works fine when hooked up to a battery charger, but it doesn't seem to work good when it has a load on it (i.e., connected to the flywheel). When it has the umph, it's strong...but it's intermittent. That I don't like...
And yeah, it may be possible to clean this one up BOTP, but everything is old, rusty and brittle, you can hear the crust when you start to pull out the armature...I don't want this back in my truck...but one problem is Jim Carter doesn't have stock, but the rebuilder is sending him 2, and worst case I can send my core back to them first.
I'll need to wait until Tues. as Mon. is a holiday and I don't think Jim got one today or he would have notified me.
I think your making the right choice getting a new one.They will have turned the armature replaced the bushings and so on. Jim sells good parts. Sounds like it has been bandaided to death. Sometimes it time to start with a clean slate. Good luck.
I think your making the right choice getting a new one.They will have turned the armature replaced the bushings and so on. Jim sells good parts. Sounds like it has been bandaided to death. Sometimes it time to start with a clean slate. Good luck.
I think so too!
Honestly, one of the good things about this 'ol pickup is there are not a lot of parts, so even if you replace one and it doesn't fix the problems (hey, I've NEVER done that! ) there are not that many. LOL
The biggest killer on these old beasts is getting the parts, that often takes several days to a week when you need them. But back to the point above, not a lot of them to stock as spares either...
When I bought my truck back in 1980 There were no 12 volt foot starters. I got tired of buying 6 volt starters so I took it to a rebuild place and had it rewired for 12 volt. That starter is still in there. I have replaced the contact button a couple of times.
When I bought my truck back in 1980 There were no 12 volt foot starters. I got tired of buying 6 volt starters so I took it to a rebuild place and had it rewired for 12 volt. That starter is still in there. I have replaced the contact button a couple of times.
Did you pull the entire engine out to put the 292 in it? Or did you use your engine with a different head? How did you go about that?
My 53 has/had the 235 in it. I'm out of state working now and should be home in a couple of weeks. I will be ready to start then. with my blower oil pump drive and crank fired ignition I have to move it back into the cab about 7" inches or so. Also my radiator and fan are about 8" thick so I will be moving the radiator as far forward as I can I had a mid shift kit put on my TKO 600 5 speed. It's going to get interesting.
If I remember correctly, you had bought some mounts for the engine? I guess you remove the 235 entirely and weld the mounts to the frame, then drop the 292 in? Do you need to use any of your 235 parts? Sounds like you're swapping out the tranny also...man that sounds like a fun project...
I'm trying to understand in case I ever decide to do something like that, I think more power would be fun...I wouldn't even think about doing something like that until I can get my house project going and was able to get a detached shop/garage...the home I'm building isn't required to have a garage, so I'm putting the shop in the basement to build the home. Problem is...that doesn't work out too well for working on cars...I have half a garage where I currently live and plan to keep this house...but even so...working on cars in half a garage is not ideal...it's hard to get floor jacks and tools around...one day I want to work like a real mechanic!
I have biscuit mounts that have a "c" channel on them that fit around the frame rails. The one that is further back has a plate on it to move it inline with the other one. I will try to find a picture and email it to you. I will be home in a couple of weeks and can get you pictures then.
I found some pictures. If you can send me your email I'll send them to you. I can't figure out how to post pictures on here. PS my lift is the best thing I have ever bought.
I have biscuit mounts that have a "c" channel on them that fit around the frame rails. The one that is further back has a plate on it to move it inline with the other one. I will try to find a picture and email it to you. I will be home in a couple of weeks and can get you pictures then.
When you do that, do you measure the differences in the engine so you know how to mount it in regard to the tranny?
Seems complicated to do something like that, I have never fabricated anything like that.
Originally Posted By: mick53
I found some pictures. If you can send me your email I'll send them to you. I can't figure out how to post pictures on here. PS my lift is the best thing I have ever bought.
I sent my email in a PM, would love to see pics.
I know that a lot of people go the S-10 route, but that seems pretty complicated also...and then there are some that just fab their own mounts and go to town...I guess you're in between, got the mounts and will fit it together yourself.
That's a serious investment in a project like that.
I'm pretty tapped out trying to build a new shop/home, but I could see taking on something like that...probably wouldn't be too profitable, but would probably be a $#!T load of fun!
PS - stock49/BOTP something happened a week or two ago and the site now recognizes me and keeps me logged in. Whatever was changed seems to keep me logged in now. I used to have to always login before I could reply.
Damn if this didn't fix my problem. I've read about the high compression engine giving problems with the 6 volt starter, but when it was starting it was strong, IMO.
One thing I was thinking is that maybe I can turn it over by hand if I could get a crank, my '46 has the ability to do that. Would that relieve any pressure in the cylinders?
Ok, this is not turning out the way I wanted, but isn't life like that most always?
Jim Carter did explain it where it finally makes a lot more sense so that I can understand the problem at hand.
As I have discovered (with some of your help! ) is I have a '56-'62 235 with the high compression 848 head. That of course is the good part, as Jim Carter had noted that it is top of the line for '37-'62 engines. However, in '55 Chevy changed to the 12 volt system and the flywheel changed as well. I'm not exactly clear if I can just convert the system to 12 volt and use the flywheel that is in it, but as Jim noted, apparently the previous owner had put the older 139 tooth flywheel in the '56-'62 235 so that the 6 volt system could be used.
Now, what are my options to fix this problem?
1) Change flywheel to a 168 tooth. They do sell a ring gear, but in order to put it on the flywheel you have to drop the trans...then heat and press on...probably not that big of a deal on this truck...
2) Jim Carter seems to imply that having the 12 volt battery on the truck with a 12 volt starter and generator will allow it to use the old flywheel on it. This would be a 12 volt conversion.
I will need to think about that, since I also need to replace the ring/pinion in the rear which requires everything to come off up to the transmission. It just might make sense to replace the flywheel at that point. Maybe it would be possible to use the 12 volt system until I can get to that, because the ring/pinion will be a fairly involved project in itself. The flywheel could be done at that time. If I can have the 12 volt system in place, maybe I can change the starter drive gear and flywheel at the same time when I do the ring/pinion on the rear end.
Any thoughts or anyone know of this situation and will the 12 volt starter band aid me back together?
EDIT: this is a good explanation of the problem, although I am not completely clear what my options are at this point and/or whether I will need to replace my flywheel before anything.
If your engine starts easily without a LOT of prolonged cranking the 6V starter will handle 12V. That pretty much makes the 12V conversion just a change of light bulbs, coil, condenser, and a voltage reducer for the heater. Possibly the horn or a reducer here too. You can change the heater motor if you like. If the old wires are in decent shape they are fins as they are bigger than the 12v system wires. Mt 270 GMC engine is a '57 so it was 12v. So for a while I ran a 12v starter on 6v. It was OK for the first start of the day but once the engine was warm it didn't work. I have run lot of 6v starters on 12v both Ford and GM and never had one fail.
I agree, and Jim Carter also mentioned that it can be done, but has approx. a 15 second window before it will ruin the starter.
But I have a brand new rebuilt 6 volt starter I got from him, and I think he will take it back and I can just get a 12 volt of the same style that will use the foot switch.
I'm gonna call him tomorrow, but I think that is what I will do. Aside from what you mention, there's the generator/alternator and a 12 volt battery. I have a group 65, not sure if it will fit, but I have a shelf on my firewall. I'll need to measure.
Yeah, battery and generator. I like generators in old stuff because if the battery fails you can push start them. 15 seconds is conservative in the sense that you can do several shorter cranks. I don't think changing the flywheel in order to use a 12v starter is worth the effort.
Yeah, battery and generator. I like generators in old stuff because if the battery fails you can push start them. 15 seconds is conservative in the sense that you can do several shorter cranks. I don't think changing the flywheel in order to use a 12v starter is worth the effort.
Can't an alternator be push started?
I pulled the rebuilt 6 volt starter back off the truck, it's on it's way back to MO to be replaced with a 12 volt version. I think I'm going to go alternator as it's quite a bit cheaper. They do have 12 volt generators but those are about $400. The 60 amp alternator is only about $100.
I will need a voltage regulator, voltage reducer for fuel gauge, voltage reducer on wire going to ignition points as well as using voltage reducers on any other accessories like radio (NO) or header (NO). I have a heater that came with it, but it's not hooked up and I am not sure there's electricity on it.
I will sheepishly admit that you mentioned converting it to 12 volt shortly after I got it and posted here. I guess I just needed some time to chew on it...
I haven't seen a Jim Carter catalog in several years but was always impressed with the quality. So I guess he makes a 12v starter with the right gear for the 6v flywheel. A car with an alternator might be able to push start if the battery was not completely dead. My pickup has and alternator. Or trucks have an amp meter, an alternator needs a volt meter.
I haven't seen a Jim Carter catalog in several years but was always impressed with the quality. So I guess he makes a 12v starter with the right gear for the 6v flywheel.
Yes, he does, I believe but I have sent a message off to make sure as I know he can make one up by putting the starter drive gear from the 6 volt on a 12 volt starter. He knows very well I have the 139 tooth flywheel and was discouraging me from swapping it out as it would require to separate and pull the trans from the bell housing. Anyway, they do have the drive gears and I'm certain he can make what I need.
IMO, he's a standup guy, he's the first owner of a parts company that has ever taken the time to respond to me personally. Plus they work on and sell parts for these old Chevys all the time, know the quirks and can make the oddball parts like a 12 volt starter with a 6 volt drive gear. And if that's not enough their prices are about the best online. Both starter drive gears are 9 teeth, but the 6v/139-tooth is 4 teeth per inch and the 12v/168-tooth is 5 teeth per inch. That's the main difference in why they won't work interchangeably. The gears would mash each other, expecting completely different arcs between the teeth. Involute gears are fascinating...
He says the 235 is plenty of power that one could want in the 'ol '46. Can't wait to get this all together. I still have the ring/pinion to do also, that should give it the last bit of highway boost I need.
He commented to me that the previous owner went to a great deal of trouble to put the old 6v flywheel on the 235, but I don't believe that's the case. The block appears to be a '51 truck block (JBM) and the head is the 848, so my theory is he pieced it all together and used the 216 flywheel.
Originally Posted By: Beater of the Pack
A car with an alternator might be able to push start if the battery was not completely dead. My pickup has and alternator. Or trucks have an amp meter, an alternator needs a volt meter.
Jim mentioned there's a problem if the battery is completely dead and you try to jump start it. That will cause bad juju on something, but that is only with a completely dead battery and he noted it is a very rare case that the battery doesn't have anything in it...but as a precaution as test before jumping would be in order. The voltage reducers aren't too bad, nor is the voltage regulator and coil. Probably $200 total for the alternator and all these parts, excluding the battery which I have.
Sounds like a plan. It will be fun to get it going. A good thing will be that you know what you have and have a reliable source for parts.
Yes, and Jim has written a number of tech articles that are on his site...he's just a good guy to me, he sent me one of those Huck springs recently for no charge also...
Actually he's helped me in narrowing down what I actually have.
This is a response from him.
------------------ reply from Jim Carter --------------- Alan, Engine block#3835911 is on a Pickup from 1954-55 and began in 1953 in the Corvette and passenger car with a Power Glide transmission. (This has modern insert bearing rods as do engines in vehicles today.) The head is from 1955-62. ALL you are using is from a 235 engine, not a 216. These very early 235's used a 6 volt system. Thus, the flywheel has the number of teeth used in a 6 volt. I can only assume the 3836848 head gives the extra compression to make it more difficult for a 6 volt battery and starter. Jim C ------------------ reply from Jim Carter ---------------
BOTP,
So the interesting thing is that Jim filled in the blanks about my block and head (if he is correct), and it makes sense in order to get the old flywheel by using an early 235 which had them. This is the best explanation I've heard from anyone.
When I was doing some research previously I kept running across information that cross referenced with the Corvette engine, and while I suspected it is not related to it, the castings are but are from different engines so the previous owner who swapped this 235 in knew what he was doing. The seller I bought it from bought it from him. The seller I bought it from raved about how much the guy that swapped the engine knew about these engines. That all makes sense now. He was already in his 80s when he sold it to the guy I bought it from, and was getting to the point he didn't want to be working on old trucks anymore.
And lastly, while it seems odd for Chevy to have put this incompatibility into the 6v vs. 12v flywheel, as Jim Carter points out, it ensured Chevy that the 2 systems could never be interchanged which would be a real problem in a car/truck.
If you ever have to change the ring gear on the flywheel just put the flywheel in the freezer and the ring gear in the oven and it will pretty much fall on.
If you ever have to change the ring gear on the flywheel just put the flywheel in the freezer and the ring gear in the oven and it will pretty much fall on.
mick53 I had been planning to do that...had read about a guy that did it in his oven and had the flywheel by the back door...my oven is right next to the back door...
Jim Carter sent me a reply and said the rebuilder is turning one of the 6 volt starters into a 12 volt. He also said that in 50 years some restorer will be pulling his hair out trying to figure this out...
I will try to stamp the flipper arm that attaches to the pedal with something like "139t flywheel" or "4t/inch drive", something like that...
Just got a call from Jim Carter Truck Parts. My starter came back rebuilt as a 12 volt.
Just to NOTE, for anyone looking at the same issue, between 6 volt and 12 volt, just so you know...
The starter drive gear will not fit on the newer 12 volt armature. The splines are different on the armature shaft, so you can't use a 6 volt armature with a 12 volt drive gear, or a 6 volt drive gear on a 12 volt armature as I would need. Chevy tried to make everything incompatible so people wouldn't switch the parts between voltage and the differences for 139/168 tooth flywheels.
Because of that, they needed to use the 6 volt armature and rewind it for 12 volts so I could have the 9 tooth, 4 TPI drive gear. The newer one for 12 volt is 9 tooth, 5 TPI.
Also coming is:
12 volt alternator w/neg ground Bracket to mount alternator 12 volt coil Voltage Reducer for fuel gauge Voltage Reducer for coil to points
I will need to use a 12 volt battery and replace all the lights for outside as well as dash and dome light.
Am I missing anything guys?
You will need a resistor for the heater fan if you have one.
You will need a resistor for the heater fan if you have one.
I'm pretty sure I don't have one as my truck came with a heater that is not installed. Most people say you don't need a heater in these older AK Series, the engine keeps you warm...LOL
Anyway, I'm not sure there's a fan or not, but I will check that out if/when I hook it up.
My parts should arrive tomorrow but it will take me a few days to get to it and it may take some to get the wiring/lights sorted out.
Sure hope this fixes the 'ol gal...I'll know within a week or two...
W/r/t "The block appears to be a '51 truck block (JBM) and the head is the 848"
1951 block has 15 head bolts 848 head has 18 head bolts
That would be a problem - but it seems that he has since moved on to verifying actual casting numbers "Alan, Engine block#3835911 is on a Pickup from 1954-55 and began in 1953 in the Corvette and passenger car with a Power Glide transmission." so it looks like block and head are compatible.
W/r/t "The block appears to be a '51 truck block (JBM) and the head is the 848"
1951 block has 15 head bolts 848 head has 18 head bolts
That is how Jim Carter concluded that the block isn't a '51, it's really a '53-'55 as best he can tell. If you look up in this thread you will see that the J looks like it was stamped on after the fact. M alone would be for a '54, at least from memory a week or two ago, so I think it's possible that it was a '54 that had the J stamped on it.
Jim Carter said you could never bolt a 848 head to a pre-'53 block, that was when they used it on the Corvette as well as passenger cars.
I think I mentioned above that it's a '53-'55 block, when I replied to BOTP, but there's a bit of conflicting info in my thread... But it has to be a Blue Flame Six block to go with the 848 head. The thinking is that Chevy didn't go to the 168 tooth flywheel until '56, when they went to 12 volt. However, by using one of the '53-'55 blocks that would have the 139 tooth flywheel for the 6 volt starter and electrical system that was in the truck. According to this link, M by itself could be for a '54 block.
Here's the block stamp, which I think you would agree is strange.
This is my believe on what I have. Does that make more sense how I described this?
Got my rewired starter today with the other parts. I'm don't fully understand how the alternator is wired just yet. Seems the number 2 connector gets jumped to the bat post on the rear of the alternator, then the number 1 goes to the ignition. And the wire that used to go from the generator field does nothing and the wire where it went into the voltage regulator and out of the voltage regulator get connected.
I also have 2 voltage reducers, I think one goes from starter to ammeter and one from coil to ignition/points.
Does that sound correct?
I sent some Qs to Jim Carter but I'm pretty sure they are gone for the weekend. I'm gonna get it on but not connected to a battery just yet. I'll replace and/or remove all the bulbs when I do so. I can do that in the meantime while I figure out how to wire it...
My rebuilt starter with 12 volt electrical.
12 volt conversion parts, starter, alternator, alternator bracket, coil, voltage reducers.
It's not that the later engine has 3 more bolts, but some of the bolts are in different places. Lay a gasket over the other engine to see which.
I wish I could but don't have any other engine, this was done by 2 owners before me. 4 owners total including me.
Anyway, I know it's the newer bolt pattern and know this block runs with the 848 head, and also know that the truck is currently 6 volt and has the 4 tpi 9 tooth drive gear that is for the 139 tooth flywheel. I could be off on some things, but the block and head are of the newer style.
What would make my engine correct would be to replace the ring gear on the flywheel with a 168 tooth, and replace the starter I'm putting in the truck with a stock '56 starter, 12 volt wtih a 5 tpi 9 tooth starter drive gear.
Here's a related question. From what I'm learning I can actually eliminate the voltage regulator as there's one in the alternator. Is this true?
I'm guessing the 'field' is negative? the other wire that was on the generator is the armature.
Hmmm...I need to ponder some...f#@$ing electricity is making my brain hurt again...this is supposed to be simple...
EDIT: Hah! Jim Carter directed me to you folks for the wiring. He said he'll try to find out but is not sure exactly. I found the Stovebolt 12 volt conversion page, and it implies the #1 connector goes to either Ignition or Coil->Ignition. Maybe what I have mounts by the coil, and allows for that insertion between alternator and coil...
Alternator->Ignition or Alternator->Coil->Ignition
ON my '53 pickup with the one wire alternator I hooked the output to the positive connection on the starter where the positive battery cable is. Keep in mind that with an alternator you will now be dealing with volts and not amps so your old gauge won't tell you what you need to know about battery charge. For the voltage reducer it depends on what you are running on 6V and how much amperage you are converting. If you want to run something that you only use when the ignition is on you have to come off of the switch. If it is something you need when the swats may be off you can connect at any always hot connection. That could be the hot to the switch or the hot from the battery. I needs to be fused. Don't ask how I know this! These old ignition switches don't have an accessory position which come into play with any thing you may want on when the engine is not running.
The ignition is definitely a monkey wrench, because it seems if you don't have that right, the engine won't turn off when you turn the key off. That somehow has to do with the alternator, and presumably as it supplies the power after the engine is started. That is also true for the starter, so that it knows when to start. But this is true for many components, the ignition tied to the lights, which are tied to the electrical and how the solenoids know they trigger their respective component.
This is to say, although this is a simple engine when compared to the electronics, there is still quite a bit going on for one mind to process...(speaking for mine! )
I think that is why it's so confusing to me, trying to understand how it all works, maybe I'm too ANAL in that regard. I appreciate you guys helping, much of it is starting to make sense.
Somehow if the field side of the alternator doesn't get back to the ignition the engine won't turn off. I will see if I can see that, and most likely the center is the place it should be connected already. EDIT: and for extra credit, do the field and the armature sides of the generator/alternator relate to the current as it alternates between phase? (like the stater vs the winding) Is that how it knows to turn the engine off, because the coil doesn't provide the spark any longer? (probably showing more of my ignorance here...)
It will run without a generator or alternator. Their job is to replace electricity used from that stored in the battery. So with a one wire alternator the only wire to hook up is to the battery positive which is easily done by connecting to the positive from the battery at the starter. The starter solenoid or in our case the foot switch sends power to the starter motor only during starting. The lights will have an always hot wire to the light switch or maybe a relay or both. Hot to one side of the heater. Hot to one side of horn relay. Hot to one side of ignition switch. Key on sends power to coil and on to then distributer. With an ignition switch with an accessary position some things get power in the ignition on position as well as in accessary position.Usually The coil is all that is turned off in accessary position. So you can choose to have heater, radio, etc work in one or both of the powered key positions. Nothing hooked to the ignition switch works through the switch in the off position. The always hot connection on the ignition switch (incoming from Battery) can power the other always hot devices. Find a good color coded diagram for your truck and follow it. The only real change you are making is removing/disconnecting the wires for the voltage regulator and generator and attaching the one alternator wire to the battery hot at the starter. It's pretty easy once you see it. Don't forget to replace all bulbs, flasher, coil, and head lights with 12V.
So I could connect a battery charger to the starter and not have the alternator connected to anything?
That might be a good test.
Originally Posted By: Beater of the Pack
So with a one wire alternator the only wire to hook up is to the battery positive which is easily done by connecting to the positive from the battery at the starter. The starter solenoid or in our case the foot switch sends power to the starter motor only during starting.
Which would back up connecting the battery charger to the starter and ground/frame, it should start and run?
Originally Posted By: Beater of the Pack
Find a good color coded diagram for your truck and follow it.
I have a jpg, but will look on the chevy manual project and see what is there.
Originally Posted By: Beater of the Pack
Don't forget to replace all bulbs, flasher, coil, and head lights with 12V.
The turn signal lights are on top of the headlights on my truck, got one side open and no bulb left, but socket with crusted in remains from the bulb, may need new sockets.
You will need to put a resistor in the power supply wire to the coil!! Many coils on 12V cars are/were 6V coils. The wire from the starter solenoid to the coil supplies 12V for cranking/starting purposes and when the starter disengages the coil circuit will drop back to 6V to run. Many 12V vehicles that get modified and 6V vehicles the get upgraded to 12V have problems starting because builders neglect to run the starter boost wire when they build their ride. Others burn up ignition coils because they have run 12V to a stock style coil that's designed for 6V operation.
Yes some coils need a resistor. It sounds like you will have to clean and maybe replace some stuff. If your pickup has turn signals they were added later and evidently used the parking lights in the head lights. In the rear they use the stop lights. So both park lights will be hooked into the turn signal switch.
It will start and run with no generator or alternator or battery charger if the battery is good and charged. Lights will work as well as all other electrical equipment. It will work until the battery is dead then you will have to charge it. Having the charging system working keeps the battery from going dead. With a generator you can push start a standard transmission car with a totally dead battery or no battery. Alternators need an exciter current to work. Some might make their own but not most. When using your wire diagram just focus on one circuit at a time and trace it out. Don't try to take it all in at once. Have it enlarged if you can't see it well. The ones in most manuals are too small. Just trust what they did and don't second guess them. They were engineers and usually found difficult ways to do simple things just because they could. The turn signals on my son's '54 Studebaker drove me nuts. I rewired the whole car an threw away ALL of the stock wiring. The only problem is that I burned up a headlight switch because I didn't put in a relay. It works fine now.
You will need to put a resistor in the power supply wire to the coil!! Many coils on 12V cars are/were 6V coils. The wire from the starter solenoid to the coil supplies 12V for cranking/starting purposes and when the starter disengages the coil circuit will drop back to 6V to run. Many 12V vehicles that get modified and 6V vehicles the get upgraded to 12V have problems starting because builders neglect to run the starter boost wire when they build their ride. Others burn up ignition coils because they have run 12V to a stock style coil that's designed for 6V operation.
Blackwater,
This is a bit different than I was thinking, so bear with me.
I looked at my coil yesterday when I was down where my truck is. There's a wire going to the ignition/distributor and one wire that goes back to the Ammeter.
Don't I want to put the reducer between the coil and distributor? I believe that is the coil out?
I'm not exactly sure what the Ammeter does, it seems to allow voltage to travel both ways depending on the system state, since the coil is getting current from the Ammeter, AFAIK.
The one piece I'm trying to understand is where exactly this voltage reducer goes that I have?
If your pickup has turn signals they were added later and evidently used the parking lights in the head lights.
Kinda, but not exactly. On the AK Series there are lights on top of the headlights and those are typically used for the turn signals. I am not clear what those were originally, they could have been for running lights, that I am not exactly clear on. that is one of the Art Deco features of the AK Series.
Originally Posted By: Beater of the Pack
In the rear they use the stop lights. So both park lights will be hooked into the turn signal switch.
That is probably accurate on my truck. I haven't traced down any of the wires, but know that not much of the lights are working.
Originally Posted By: Beater of the Pack
It will start and run with no generator or alternator or battery charger if the battery is good and charged. Lights will work as well as all other electrical equipment. It will work until the battery is dead then you will have to charge it.
That's an interesting comment as with no charge on the battery the AMP meter will blow I'm told. This must have something to do with the generator vs. the alternator.
Thanks for the help guys, I don't think I need to change too much wiring, the 2 wires are still used from the generator similar to how they were. The difference is the voltage regulator is removed from the picture and the field needs to get hooked to the voltage regulator out going to the Ammeter.
I'm not exactly sure what the Ammeter does, it seems to allow voltage to travel both ways depending on the system state, since the coil is getting current from the Ammeter, AFAIK.
The one piece I'm trying to understand is where exactly this voltage reducer goes that I have?
The ammeter is the indicator of battery health and generator function. On these old vehicle there is an always hot bus-wire that runs from the positive post on the starter (where the battery attaches) through the firewall to the Bat post on the ignition switch. Attached to the same terminal on the ignition switch is a wire that attaches to the + side of the Ammeter. Then there is a wire that attaches to the negative side of the Ammeter. It runs through the firewall and terminates on the Bat terminal of the voltage regulator. This is part of the so called "charging circuit". The Gen post on the voltage regulator attaches to the Arm post on the generator. When relays inside the regulator are magnetically closed the output of the generator flows on the charging circuit (since relay contacts connect the Gen and Bat posts).
You can reuse the wire attached to the Voltage Regulator Bat post in your alternator installation by extending it and attaching it to the Bat post on the back of the alternator (along with the dedicated wire running directly to the positive post on the starter). This will allow the Ammeter to function.
You need to use the voltage step down (or a resistor wire) on the wire sending power from the ignition switch to the coil. Constant 12volts with fry it. As Blackwater has stated some wiring diagrams include a temporary full 12volt path to the coil when the starter solenoid is closed.
You need to use the voltage step down (or a resistor wire) on the wire sending power from the ignition switch to the coil. Constant 12volts with fry it. As Blackwater has stated some wiring diagrams include a temporary full 12volt path to the coil when the starter solenoid is closed.
Are you sure about this? I'm putting in a 12volt coil, so there is no issue with the coil, but there is with the distributor which is staying the same, that is 6volt. Seems the reducer needs to go between the coil and distributor/points.
Converting to 12volt you will need a 12v coil. But even with the 12volt coil you will need a resistor wire or a ballast resistor between the ignition lead and the coil. The positive side of the coil cannot take a constant 12volts. The distributor side of the circuit is not voltage sensitive - it is merely making and breaking the path to ground - which allows the coil to energize when the circuit is closed and to induce a spark when the circuit is broken.
Converting to 12volt you will need a 12v coil. But even with the 12volt coil you will need a resistor wire or a ballast resistor between the ignition lead and the coil. The positive side of the coil cannot take a constant 12volts. The distributor side of the circuit is not voltage sensitive - it is merely making and breaking the path to ground - which allows the coil to energize when the circuit is closed and to induce a spark when the circuit is broken.
'stock,
Thanks for explaining that, I didn't realize that was a ground going to the distributor, so I guess the top of the coil that goes to the top of the distributor must be the current and then the wire just completes the ground?
So this goes on the firewall side...thanks for pointing that out. I'm gonna try and get back down there tomorrow and see if I can get the alternator mounted and the wiring done.
I'm not exactly sure if my Ammeter is like this one, but it says the year is correct and the color is also.
My question is, is one side hot and one side ground? Seems like a lot hooks up to that meter. I haven't crawled under my dash yet to see what is going on there. I'm sure there's at least some spider webs...
I've seen others that have 3 or 4 flat connectors on the back, but I think mine looks like this on the front.
EDIT: I see in the wiring diagram, the bat out of the voltage regulator does in fact go to the ammeter then to the starter and then the battery. Yes, that tells me I can just wire the bat out on the alternator and connect it to the starter/ammeter. Until a couple days ago I had always thought that the Ammeter was separate from the Amp gauge on the dash, but realize they are the same thing now...because in the wiring diagram there's several things connected on there.
This is my actual gauge on the dash, so slightly different on the face:
I'm not exactly sure if my Ammeter is like this one, but it says the year is correct and the color is also.
My question is, is one side hot and one side ground? Seems like a lot hooks up to that meter. I haven't crawled under my dash yet to see what is going on there. I'm sure there's at least some spider webs...
Hi Keroppi . . .
The ammeter is attached to the primary 'bus' of the entire electrical system of the car. It is essentially 'hot' no matter which side one is looking at. In the wiring diagram the + side is where the Starter Harness is attached along with all of the other uses of battery power in the car. The - side is attached to the Bat post on the voltage regulator. When the generator is spinning at sufficient RPM (and the battery is low) the Ammeter will show current flowing in the Charging direction. When the generator is not spinning at sufficient RPM the Ammeter will show the degree to which users of power are Discharging the battery (starter motor, ignition, lights, radio etc.) When the engine is running and the battery is fully charged the Ammeter will read dead center (neither charging or discharging).
The ammeter is attached to the primary 'bus' of the entire electrical system of the car. It is essentially 'hot' no matter which side one is looking at.
'stock,
So if anything is connected to either post on the Ammeter, it will be hot? That is good to know. That means it's always just measuring the total current in the system.
I will show some of my ignorance when I looked at the coil, it's actually marked + and - on the posts. Positive goes to the Ammeter, negative goes to the distributor.
Originally Posted By: stock49
When the generator is spinning at sufficient RPM (and the battery is low) the Ammeter will show current flowing in the Charging direction. When the generator is not spinning at sufficient RPM the Ammeter will show the degree to which users of power are Discharging the battery (starter motor, ignition, lights, radio etc.) When the engine is running and the battery is fully charged the Ammeter will read dead center (neither charging or discharging).
How is this effected by the Alternator? The Alternator is always providing current no matter how fast the engine is running, even at idle. Does this mean the needle stays constant when an Alternator replaces the generator?
This is actually starting to make sense. Thank you for taking the time to explain this to my thick head.
So if anything is connected to either post on the Ammeter, it will be hot? That is good to know. That means it's always just measuring the total current in the system.
I will show some of my ignorance when I looked at the coil, it's actually marked + and - on the posts. Positive goes to the Ammeter, negative goes to the distributor.
Look closely at the wiring diagram in your Service Manual. All of the loads attached directly to the Ammeter are wired to the + side. The only connection to the - side is the voltage regulator Bat terminal. This is because loads consume power and cause the Ammeter to lean in the Discharge direction. Leave the headlights on without the engine running and the Ammeter will lean further and further toward DIS eventually falling on the ground.
Also, take note that all of the loads attached directly to the Ammeter are all switched - ignition switch, light switch, etc. This is because the Ammeter is a direct path the battery. The positive side of your coil is wired to the ignition switch - so the coil is not energized until the key is turned on. Only a constant load accessory like an Electric Clock is wired directly to a Bat terminal.
Originally Posted By: Keroppi
How is this effected by the Alternator? The Alternator is always providing current no matter how fast the engine is running, even at idle. Does this mean the needle stays constant when an Alternator replaces the generator?
That is a common misconception - the alternator is not always supplying current. There is an internal regulator that is measuring battery voltage. When the battery reaches 13.5 volts (typical set-point for a 12 volt regulator) the alternator is switched off. If it did not switch off the battery would boil over.
In a vehicle with lots of accessories that draw a lot of amps the alternator will cycle on and off as the voltage frequently drops just below the set-point and then returns to the set-point.
Your expectation of the needle sitting dead center is likely with just the engine running.
I am running a 6-volt alternator and that's what I have observed. But if I turn on the head lights it will show a slight discharge. And my turn signals cause the needle to the tap in time with the flasher.
Look closely at the wiring diagram in your Service Manual. All of the loads attached directly to the Ammeter are wired to the + side.
I will look at it and see when I get down there tomorrow possibly. If the current actually just flows through the ammeter, it would imply that you could hook the stuff up on one side and the opposite side going to battery?
Originally Posted By: stock49
The only connection to the - side is the voltage regulator Bat terminal.
Which is why I ask the above. In theory you could use either side for the positive, although it would make sense for the positive terminal to be on the CHG side of the ammeter, since it shows positive when charging. Probably how it is wired when I get under there and look at it.
So far I haven't found a single 6 volt bulb that would come out of the socket without destroying the entire bulb, pulling the glass/filament off the metal plug and destroying the plug to get it out of the socket.
So far I haven't found a single 6 volt bulb that would come out of the socket without destroying the entire bulb, pulling the glass/filament off the metal plug and destroying the plug to get it out of the socket.
Bulbs that have been in place for decades tend to bond with the socket from corrosion. Penetrating oil helps.
Also, here's a nice write up from a bike mechanic about Ammeter function: Ammeter Ethic @themotorcycleproject his bucket analogy is easy to get one's head around:
Also, here's a nice write up from a bike mechanic about Ammeter function: Ammeter Ethic @themotorcycleproject his bucket analogy is easy to get one's head around:
'stock,
That's a great explanation! That with your explanation of the alternator above in how it is able to quit charging when the battery has reached it's charge level help make it all make sense. In a way, a ammeter is kind of a geeky thing in regard to knowing exactly what the current is at any given point in time, the ammeter will reflect that.
Interesting to note that most recent modern cars don't have a ammeter or a voltmeter, it seems something most people don't even need. When your battery doesn't start the car it's not being charged...
Made some progress today, but before I flip the key, I want to make sure I have things correct.
First I needed to refurbish a 12volt battery, so I got some epsom salt and distilled water and made some homebrew electrolyte...drained and replaced and charged at 12v 60amps, and it was holding 12.62.
NOTE: this is a good time to toss some salt into my wounds with a bit of irony...you can barely see the left meter on my battery charger behind the cables is a voltmeter, but the right meter is an ammeter. There has to be some irony in there wtih the 6v->12v conversion, given the generator used an ammeter and the alternator is better suited to a voltmeter. I actually bought this for the 6v capability, I didn't have one. $50 on craigslist.
I got the generator out, that old piece was pretty grungy around the bracket...LOL no worries...I cleaned it up with a wire brush.
I didn't get a pic of the alternator though, I needed to use a couple washers with the bracket to line up the belt properly. Used the same belt that the generator used.
I think I'll replace the belt, but the old one is on there for now.
Ok, the alternator connector 1 is looped to the battery post, I connected the old armature wire from the generator to the battery post as well.
I disconnected all the field and armature wires, and connected the armature wire to the bat terminal and checked everything with a volt meter before and after. Now the battery post of the alternator goes to the ammeter and then to the battery post on the starter, which goes to the + on the battery.
Looking for some feedback here. Here's the new coil, although it's loose in the holder, I will fix that, and you can kinda sorta tell that the 2 right connectors on the old voltage regulator and disconnected, but the middle one was the armature, and it's now going to the alternator battery post.
Per the conversation above with 'stock and 'beater, the coil - is going to the distributor, and the the positive is going to the reducer, which I mounted off the volt meter, and the other side goes to the ammeter, at least I'm believe it is as that was how it was wired for 6volt.
The one wire I don't have connected is the number 2 connector from the alternator. I was thinking this needs to go to the ignition. Is that correct?
I also have the fuel gauge reducer to install in addition to confirming the wiring and connecting the number 2 connector of the alternator.
You cannot simply connect the old ARM wire to the Bat terminal on the alternator. The Bat terminal on the alternator needs a path to the battery. As we discussed above that path could be through the Ammeter or via entirely new wire.
I recommend that you spend some time reading and/or studying YouTube videos on how the GM 3-wire alternator functions in its native home a - 64-72 GM car/truck. It is important to get your head around an electrical project before undertaking it. Its even more important when the project involves adapting a newer component into an older vehicle.
Heres a great video on where and why the three wires are placed in the native installation: GM 3-Wire Alt Video
Next I would do some reading on 12 volt conversions and Delco alternator wiring. Some of these conversion recommendations seem to specifically avoid working behind the dash board - suggesting that the ignition circuit running from the key to the coil should be involved. I am not a fan of this approach because it can come with unintended consequences. There are better places to pick up key-on 12 volts behind the dash. Moreover, the exciter wire provides the fault light feature. There are simple jewel indicator lights readily available that can be mounted in or under the dash.
You cannot simply connect the old ARM wire to the Bat terminal on the alternator.
Sure I can! I think you may have misunderstood. I used the armature wire, but I'm only using the wire in the harness to run from the battery post on the alternator to the battery out on the voltage regulator. It's not using the voltage regulator. As I mentioned I will just crimp a coupler connector and remove the voltage regulator all together, but it's not being used as both the armature wire running from the alternator and the line going out of the voltage regulator are using the out as a common post to connect. It's only a wire! The voltage regulator is not being used at all.
Originally Posted By: stock49
The Bat terminal on the alternator needs a path to the battery. As we discussed above that path could be through the Ammeter or via entirely new wire.
If I'm not mistaken, the battery out from the voltage regulator actually goes through the ammeter to the battery. If you look at the wiring diagram for a 1946 truck the wire goes from the voltage regulator battery out to the ammeter, to the starter, to the battery.
Originally Posted By: stock49
I recommend that you spend some time reading and/or studying YouTube videos on how the GM 3-wire alternator functions in its native home a - 64-72 GM car/truck. It is important to get your head around an electrical project before undertaking it. Its even more important when the project involves adapting a newer component into an older vehicle.
I agree and I did watch several videos, but think you misunderstood what I was saying. Sorry if I confused you.
I'm only using the wire, I could have just as easily used the field wire, it also went from the generator to the field in on the voltage regulator, I could have used it and moved it over and connected to the battery out wire also.
Originally Posted By: stock49
There are better places to pick up key-on 12 volts behind the dash. Moreover, the exciter wire provides the fault light feature. There are simple jewel indicator lights readily available that can be mounted in or under the dash.
Yes, this is what I was explaining above, most run the field to the ignition switch, otherwise the engine won't turn off when you turn the key off.
Sure I can! I think you may have misunderstood. I used the armature wire, but I'm only using the wire in the harness to run from the battery post on the alternator to the battery out on the voltage regulator. It's not using the voltage regulator. As I mentioned I will just crimp a coupler connector and remove the voltage regulator all together, but it's not being used as both the armature wire running from the alternator and the line going out of the voltage regulator are using the out as a common post to connect. It's only a wire! The voltage regulator is not being used at all.
Excellent! Glad you got your head around this. I did the same thing but kept the voltage regulator housing in the mix (as a prop) for stock looks: It just shunts the Arm and Bat wires together. And a I used the Fld wire as a body ground.
Originally Posted By: Keroppi
Yes, this is what I was explaining above, most run the field to the ignition switch, otherwise the engine won't turn off when you turn the key off.
Exactly. There are three posts on the stock ignition. Bat, Aux1 and Aux2. If the ignition coil is wired to Aux1 the exciter wire has to go on Aux2. They cannot share a post.
Exactly. There are three posts on the stock ignition. Bat, Aux1 and Aux2. If the ignition coil is wired to Aux1 the exciter wire has to go on Aux2. They cannot share a post.
This is the missing piece to the puzzle! Thank you! I will need to look at the ignition switch and see what is what.
Shamefully I will admit that I started to watch this video and didn't finish for some reason...but this I believe is the video you were talking about.
EDIT: I know now why I didn't finish watching this video, there is one difference in this wiring that is not the same for my truck, that being that the solenoid goes to the ignition for all non-floor pedal trucks. But for trucks with the floor pedal starter, the solenoid is inside and we don't have that position on the key. On the AD trucks they use a push button, don't they? I know some of the early ADs used a floor pedal, I'm not clear when that changed.
Which reminds me, I need to get a light bulb? I'm listening to the video now and he's got a bulb as I've seen so you can see if the alternator is charging or not.
EDIT: I just found this bulb that I will stop and get.
FYI, I really appreciate the help that I've gotten here. 'stock, 'beater, 'mick, you folks have been most helpful as I sort through this stuff with my 'ol '46.
I just joined the Inliners, something that was probably way overdue, but something that seems fitting.
I previously had a very bad experience with the VCCA, the moderator over on the VCCA Chat Forums is an Internet Nazi. Stovebolt is not my kind of place either, too many rules, too much heavy handed moderation, it just doesn't suit me. ChevyTalk has quite a bit of rules and guidelines also...but it has been here on the Inliners that you folks have offered me help and have come through with much of the information I've needed on my pickup. H.A.M.B. has also been good for me, but the Antiquated forum is not the mainstay there, but still the people are nice and helpful as well.
I don't know if it's possible to change my username to Traditional Toolworks or not? That is my company name. I'm ok with Keroppi, that's what I call my pickup, but would prefer Traditional Toolworks. Some places don't allow company names, I know ChevyTalk is like that.
Well, I had to order the light at O'reily Auto, and it came in but is kind of interesting, it's not an incandescent bulb with a metal socket, it's a modern style bulb that pushes into a plastic socket.
I have what I need, just need to get down to my yard and wire it up so I can test it. I still need some of the bulbs for the stop and turn signals..
I got the ignition hooked up, lost one of those little nuts, but robbed one from the Acc which was not being used.
Wasn't sure about the fuel gauge though. I have a voltage reducer, but I can see the 2 wires going to the gauge, but wasn't sure which is the correct side.
I'm at home now looking at the wiring diagram and one side of the gas gauge should be going to the ignition on that same post I connected the alternator to, through the light.
I need to connect the reducer on that side, I believe, as it goes to the coil. Is that correct?
The other side goes to the gas tank, but I'm not sure it's hooked up, and it could be to the old tank still. I have another tank in the back of the bed which is the one being used.
I'm at home now looking at the wiring diagram and one side of the gas gauge should be going to the ignition on that same post I connected the alternator to, through the light.
I'm pretty certain this is correct, but what I believe is the fuel gauge behind the dash seems to have continuity to both wires at the ignition post...something seems wrong. One side should go to the gas tank sender. I don't think that should have continuity to the ignition post. Hmmm...
I need to ponder a bit, but will have until next weekend most likely, so will see what Jim Carter says.
Prodding along I have to ponder that nothing is hooked up to the gas tank, which is in the bed of the pickup:
If I'm not mistaken a wire needs to be connected to the round chrome disk next to the filler tube. I'm pretty sure that is the sender unit.
I think I really need to get the gauge cluster out of the dash to be able to see what is really going on.
Has anyone ever taken a gauge cluster out of a dash on an AK Series? I believe I have asked this before. This might be a question of Jim Carter, I might be pushing the limited exposure on the Inliners. Even searching on Stovebolt and ChevyTalk rendered nothing.
Surprised that nothing in the shop manual explains how to get the gauge cluster out. I've been told there are a couple bolts on the back side, but I haven't been able to get to them yet.
EDIT: in case anyone reads this in the future, the voltage reducer/resister goes to the (E)mpty side of the fuel gauge. And both posts will show continuity, just different levels as it will pass through the gauge, so I was told. Steve at Jim Carter Truck Parts agreed with my assessment, that a wire should be connected to the sender on top of the gas tank, and that I should ground one of the screws to be safe.
Still haven't been able to get down to my truck again, been busy with a short contract that landed in my lap...I've been desperate for work, so this is a good thing...this Sat. the local Inliners are meeting for breakfast in Milpitas, gonna try and meet up with some of the local boys, and make some inline 6 friends...maybe I can get down to my yard after...
Surprised that nothing in the shop manual explains how to get the gauge cluster out. I've been told there are a couple bolts on the back side, but I haven't been able to get to them yet.
EDIT: in case anyone reads this in the future, the voltage reducer/resister goes to the (E)mpty side of the fuel gauge. And both posts will show continuity, just different levels as it will pass through the gauge, so I was told. Steve at Jim Carter Truck Parts agreed with my assessment, that a wire should be connected to the sender on top of the gas tank, and that I should ground one of the screws to be safe.
Shouldn't have take the gauge cluster out. You can get to all the wires through the service hatch in the firewall.
Glad to hear that you have a service manual in hand. It describes how to trouble shoot the fuel gauge. In particular one cannot test continuity in the sender wire while it is attached to the gauge and the sender.
That looks like a plastic tank. If so the ground wire to the sender body is a must.
Shouldn't have take the gauge cluster out. You can get to all the wires through the service hatch in the firewall.
I wish that was the case. No access from the firewall on the '46, that is something that changed on the AD First Series.
I was actually thinking about cutting a hole in the firewall, I have the voltage regulator there which is not going to be used.
Originally Posted By: stock49
Glad to hear that you have a service manual in hand. It describes how to trouble shoot the fuel gauge. In particular one cannot test continuity in the sender wire while it is attached to the gauge and the sender.
I'll go look in there again, I have the 42/48 shop manual. I didn't see it...🤔
Originally Posted By: stock49
That looks like a plastic tank. If so the ground wire to the sender body is a must.
Actually it's metal, just dirty. If I ever get this beast running again I'll probably redo the bed and build a cover for the gas tank to have some storage, thinking about a wooden toolbox type cover.
That looks like a plastic tank. If so the ground wire to the sender body is a must.
stock,
You're right, that is a plastic tank. I thought I thumped it before and it was steel, but it is plastic, it's hard, but it's plastic. There is nothing connected to either the tank in the rear or the tank under the seat, so I figured it was probably safe to try and fire it up.
I connected a battery and it cranked really strong, but it didn't fire. I looked and I have the negative side of the coil going to the distributor, and the top of the coil going to the top of the distributor, but I didn't check to make sure those cable plugs are seated inside well, so I will do that tomorrow. I wasn't sure if I had the coil connected backwards, but looking online it looks like the negative side does go to the distributor, or am I wrong?
As a data point, the light is on that is connected to the ignition from the alternator, and it dims a lot when it's cranking, but doesn't go out completely, but I think that is normal until the alternator is running faster with the engine.
The positive side of the coil is going to the voltage reducer and then to the ammeter, I believe, that was the wire that was connected to the coil previously. I don't think it matters what side the wires go on for that voltage reducer, it looks like a resistance spring of some type. I will ask that to Jim Carter.
Seems it must be those coil connections from the top of the coil, I will try to go back and look at that tomorrow.
FWIW, I had breakfast with the Bay Area Inliners in Milpitas, and we drove down to Aroma, between Gilroy and Watsonville, lots of cool cars at a HUGE show there and the owner of the shop there had some really cool Inliners...one was a really cool old race car with a 235 hemi in it and a Wayne head. He had a second Wayne head, I was told those are used by people that race Inliners.
I will check those coil connections and see if I can get spark at the spark plug. One nice thing about the floor starter, you can do that from inside the engine compartment.
Very odd, seems like it was a fuel delivery problem, but after giving it a couple shots of starter fluid it was pumping ok. when I pull the choke the bubble gets about half full...so it seems to work when it runs faster and get more fuel...
I think adjusting the valves is going to be in my future.
I think I also need to replace fuel lines and/or filter as well as grounding and running the line to the fuel sender, as suggested by stock. First thing I need to get a battery that will fit that tray, and relinquish this one for the trailer winch.
Congratulations ! Yes I think valve adjustment is in your future. It sounds a bit like a thrashing machine but some of it could just be the video. Make sure you check the oil to the rocker shaft. That could be some of the noise. These often plugged with sludge from old oil. They even used to sell after market oiling kits to bypass clogged passages. At least you now have a runner to play with, much more fun.
Congratulations ! Yes I think valve adjustment is in your future. It sounds a bit like a thrashing machine but some of it could just be the video.
I think it just needs adjustment to get it dialed in...
Originally Posted By: Beater of the Pack
Make sure you check the oil to the rocker shaft. That could be some of the noise. These often plugged with sludge from old oil. They even used to sell after market oiling kits to bypass clogged passages. At least you now have a runner to play with, much more fun.
I will definitely be checking all of that out when I adjust the valves. I want to get a valve cover gasket before I do that, I know it will probably come off in pieces...but for mentioning it, now it will come off nicely in one piece...
I have a lot of stuff to do, wiring, body work, bed replacement, windshield crank, et al...that is all in addition to basic tune-up stuff...lights, hoses, etc...I'm sure you know the list pretty well...
Today it gets a new battery, one that will fit the tray...
I have 2 primary areas where rust is really bad. Both door bottoms need to be replaced. And the bottom rear of the cab, wasn't until I pulled the seat that I could see daylight from the inside. With the seat in place no light when under the truck...some pitting along the center bead of the cab and some other rust, but I'll need to clean some of the paint off. Point being that I have my work cut out for me...
Not exactly just yet, although getting closer...the problem is definitely fuel related, but it is the air cleaner and carb itself. I see some gas is leaking at the base of the carb, and it wouldn't start with the air filter on it, so that needs to be upgraded to dry possibly...it's dry now, but supposed to have oil in it...
I could get it started by taking the air filter off, then I got a backfire when giving it some gas so turned it off. Then I noticed some gas around the base of the carb...that will need to be rebuilt. Got a new battery in, replaced the fuel bubble filter, but the carb seems to be a weak point.
I had this pic, but the number is gunked up...so will need to go down and clean it and get the model so I can get the right kit. I see a place online that has a complete kit with all parts and screws needed, but will get model to know for certain. Evidently some Carter YFAs are marked as YFs after they transitioned. Model number should be right above the casting on the bottom, along that flat.
Unfortunately as I work though getting it going reliably, I'm running into some of the basic maintenance that hasn't been done on this for years...
EDIT: Hmmm...interesting...I was trying to clean the carb up on the side to see if there was a model number hiding under there, but no...as I was doing that I thought to possibly just take the carb off the truck and bring it home and I noticed the mounting nuts were not very tight at all. This could account for the gas I saw around the base. I will check that when I get back down there, I had to swap the battery, and have that out already. I bought a 24F (negative on left side) which is correct, but the post running from the firewall to the front grill/radiator rests on the negative post...I didn't want to cross the cables to the battery, so returned it...but I didn't have a battery in it to test.
I had this pic, but the number is gunked up...so will need to go down and clean it and get the model so I can get the right kit.
Those are all casting numbers. On Carter's the model number is found on tag affixed by a top cover screw: The stamped number (in the carburetor body base - not the cast iron throttle base) can also be helpful in locating kits but this number can be shared across specific models.
On Carter's the model number is found on tag affixed by a top cover screw:
'stock,
I don't have that, but I do have a label of some type that it is probably on. I will look at that and see if I can clean that off. If you look at this pic, that label on the left must have something under the grime.
I was so focused on looking in that area where it shows "stamped"...and I also saw on a site that some are stamped on the small wing (I think on the right).
That said, I really suspect the loose nuts were a part of the backfire and/or leaky gas out the bottom of the carburetor. I will try to get back down there tomorrow and check, I have the new battery in hand. Thanks for the info, will update when I find out more.
EDIT: stock, I think your image you posted is the carburetor that is supposed to be on my engine. However, I think the previous owner that swapped the engine in used the Carter YF that was on the 216 that was originally in the truck. The Carter 3211 YF was evidently designed for the later 235, so I have read. What is the difference, do you know? Is it the needle or valve?
Well, there is a definite problem with the air cleaner as well as the fuel pump Seems to run ok, but doesn't seem to be pumping fuel very well. Need to look at that.
After tightening up the nuts on the carb mount studs, there is no leaking and it seems ok. Once it's warmed up it will fire right up on the first crank. I put these videos together.
No fuel pump rebuild kits available (metal top), but there are fuel pumps available for $60, so ordered one as it needs 10 day lead time. That is definitely a part I want to refresh.
I did find the model number of my Carter YF carb, it's a 964S which was shipped on 216s. The late model 235 I'm told shipped with a Carter YF 3211 which has an automatic choke and uses a heat stove from the exhaust to the carb.
You can search for vacuum leaks by squirting some of your starting fluid on the carb base and the intake to head gasket while the engine is running. Any change in engine speed means a leak. Some fuel leakage on carb my go away when the gaskets soak up some moisture after sitting dry for so long. When you are changing the fuel pump bolt out the lines. A filter between your new pump and the tank might save it.
You can search for vacuum leaks by squirting some of your starting fluid on the carb base and the intake to head gasket while the engine is running. Any change in engine speed means a leak. Some fuel leakage on carb my go away when the gaskets soak up some moisture after sitting dry for so long.
I will do that, just to eliminate any problems. That goes for the fuel pump also, I see some oil possibly around the block that I was sure if was wet or not...it looks pretty dry now and seems to work enough to get it running reliably. Fixing the air filter problem will help that.
Originally Posted By: Beater of the Pack
When you are changing the fuel pump bolt out the lines. A filter between your new pump and the tank might save it.
I have to give a big thanks to Jim Carter once again. He's selling me a used glass top fuel pump at a great price. I'm going to get a hard line to go to my carb and he has the filter that goes inline up by the carb. The one I have requires a separate hose to connect it, this will be cleaner. Also getting an dry air filter which should fit in the old oil canister. It's 6-1/2" in diameter x 3" tall. I'm waiting for him to reply but think I can just pull the oil mesh top portion out and put this in and use a top plate with a wing nut. Then I only have one other piece to replace, that going from the fuel pump to the gas tank. Mine has some mickey mouse hillbillary used on that piece...
You have made me take another look at Jim Carter. I have bought parts there in the past but never asked any questions. I thought it was just a business with a guy's name like so many others.
Ok, I'm concluding that the fuel pump is my problem, and here's why. I went down and cranked it for about a minute with a couple breaks in between, I cranked it plenty and no start.
This is what the fuel bubble looked like:
I was amazed it wasn't Hencho en China...a bit of a shocker! That bubble is almost bone dry! I know I could spray starter fluid in the carb and once it gets going the fuel pump will most likely be able to pump enough to keep it running, just like it did the past couple days...but the video from yesterday shows the lack of fuel in the bubble while it's running as well. And, FWIW...Bosch was able to have the product made in Israel and be able to sell the product on the counter to me for less than $6. This concept that we can't survive unless we embrace China is a bit over the top, IMO.
RE: Jim Carter Truck Parts
Jim met a local guy that has a '37 Ambulance he drives, and a '37 Canopy he sometimes shows. Remembered him 20+ years later, the guy bought most of his parts to restore both of them from Jim. They are just very helpful, and he did offer to sell me a used fuel pump, but found a NOS in box, never used so I bought that. If I send a message to their ebay account, Jim answers, sometimes late in the evening after he's gotten home. The starter was another case in point, he rebuilt my 6v as a 12v so I would have the correct drive gear. And he turned it around in a couple days after getting my core.
There could also be an air leak in a fitting or the line between the tank and the pump. The line could be plugged with crap stirred up from being disturbed after sitting so long or if there is no filter between the tank and pump the pump it's self may be full of crap.
Jim Carter sounds like the kind of outfit we have too few of today. Someone who enjoys the business he is in and gives great service in rare anymore. It's partly our fault fo usually shopping for the cheapest part. I'm guilty.
There could also be an air leak in a fitting or the line between the tank and the pump. The line could be plugged with crap stirred up from being disturbed after sitting so long or if there is no filter between the tank and pump the pump it's self may be full of crap.
I was getting fuel when I started pulling the rubber off the hard line, so pretty sure it's clear but I will be replacing everything back to the tank as well. I need to ground the sender and hook the sender wire up to it as well.
I wish I would have read on Stovebolt earlier, I probably would have just switched over to an external electric fuel pump, they are cheaper and probably better in the end.
Originally Posted By: Beater of the Pack
Jim Carter sounds like the kind of outfit we have too few of today. Someone who enjoys the business he is in and gives great service in rare anymore. It's partly our fault fo usually shopping for the cheapest part. I'm guilty.
He is a good guy, but I'm sure there are people that felt they were screwed by them in the past and won't do business with them...the world is like that...because even a guy that will bend over backwards to take care of people will occasionally run into someone that just can't be pleased, or even <gasp> make a mistake themselves. He's been helpful to not only me, but others I know, so that does speak some about the guy. They're a small shop, less than a dozen people I'm pretty sure.
When I was a parts counter guy I had people who would get pissy because I didn't know what part they needed for something that had modified by persons unknown. Or even worse the customer didn't know the year or other info for the car they were driving. " Oh, I think it's a '79 or maybe a '97, they were all the same back then." There are lots of people out there who don't even know enough to ask a relevant question and think they are so important that the rest of us spend our waking hours plotting against them. The customer is not always right but a good businessman makes them think they are.
Or even worse the customer didn't know the year or other info for the car they were driving.
Now to make things worse for them they probably deal with a lot of people like me...it's not that I'm trying to be dumb with them, just that the truck is 73 years old, it doesn't even have the engine in it that was supposed to be there, and the one it has is put together with a different year block and head. Guys over at the VCCA don't consider mine to be original as it has parts on it that were not originally on this truck, yet my truck is actually more original than one that is completely restored...mine hasn't been repainted, just more paint slopped on with a brush...my interior is not pristine, with shiny new paint and everything looking like it did in '46, no sireee...yet mine is original from '46...
This is to say, some people drive their trucks/cars to places other than a car show, and, that $#!T breaks over time and we fix it the best we can...
Bringing this back to the parts vendors...finding a good one that has run into similar issues goes a long way to solving one's problems. They have seen similar issues, they know what people have typically done to these trucks, they know how to fix some of the issues that need modern solutions as many of the older ones are not available anymore.
I spend about 3 hours a day on the phone chasing parts. I realize that most of my parts are one off. I also understand it takes a while and will be expensive. Most of the big name "custom" shops are not interested in making parts if they are not going to sell 500 of them. I thought that was what custom meant. You have to find that one guy that not only will but wants to make your part. Usually and old guy. Most of them hang up on you when you say inline six. I'm building a pretty good network of these people because they seem to know of each other. It took me a week to find one guy to make my oil pan for my 292. $1500 and 6 weeks. I'm perfectly fine with that.I should have it in a couple of weeks.
Custom and new replacement part is code talk for Chinese knock off. Finding someone who can "fix" a worn or broken part or make a missing one is becoming very rare.
Custom and new replacement part is code talk for Chinese knock off. Finding someone who can "fix" a worn or broken part or make a missing one is becoming very rare.
Indeed that is more important for me as I plan to keep most things original, but one never knows what the future will bring to me...Maybe better stated would be era correct, as I am not adverse to putting better parts on my truck.
As an example, I was pondering over the electric fuel pump and I think in the future something I would consider is using 2 tanks, each with their own electric fuel pump and have a toggle switch on the dash to flip the power between each fuel pump. This is how my flat bed is setup from the factory, it has 2 tanks. My ultimate plan would be to add a saddle tank under the bed and refurb/replace the tank under the seat, that would give some decent range of mileage the truck is capable of driving.
I think 'mick makes a valid point though, it is harder to find people to work on an Inline 6 than it is a V8. More importantly, these shops that call themselves "Custom" don't make "Custom" parts most of the time, they just add aftermarket parts...A lot of folks swap a V8 in their beloved trucks, so that does happen also...I just don't see myself going into such complex conversions and will most likely stick with what I have in it right now. I drool at some of the pics mick posts, but I certainly can't afford to do something like that at the moment. I'm actually lucky to have the truck, given I'm trying to build a house that has pretty much drained my entire savings and has put me into even more debt than I had...
The local Bay Area Inliners were a great bunch of folks to meet, and even mentioned a couple places that will do work on these beasts if one desires...but a lot of the fun for me is in doing it myself, even if it takes me 4 times as long to do so. These old trucks are a heck of a lot easier to work on than their modern counterparts...
I have a '68 C-20 flatbed, originally a camper special. Originally it had a 327 and someone put a 350 -350 in it. The V8 died a few weeks ago so now I can build the 292 L6 I've been planning for years. It will get several truck up grades and be a good vintage work truck. It will be better than when it was new and nowhere near the cost of a new one.
What I'm trying to say is your truck is not a valuable collector's item. It is not stock and if you spent lots of time and money to "restore" it would not be stock it would be restored. They are only stock once! It is however a survivor and mostly the changes that have been made were done to keep it doing what it was built to do and make it a better truck. If you continue along those lines you won't go wrong.
About the brushed on paint, a friend in high school bought a '47-'48 Chevy woody. The metal was brush painted black and the wood was thickly brushed pink. We made fun of him until we helped strip the paint from the wood. It was near perfect. It was one of the nicest woodies around and he got it for almost nothing. By the way in the beginning they were all brush painted.
Yeah, I'd really like to get an old Chevy flatbed, but I have too many things on my plate at the moment, and I will be content with the 1/2-ton. I was looking at a '46 flatbed to use as a flat bed, but finally realized I am much better off with a 1/2 ton, that's really what I want to drive around. Most of the time I just haul light stuff.
Originally Posted By: Beater of the Pack
The V8 died a few weeks ago so now I can build the 292 L6 I've been planning for years.
Do keep us posted on this, would like to see some pics if you have...I had a '64 C-10 when I was young, bought it in Oregon from an old farmer...had a gun rack inside the rear window, as most every truck did in those days (late '70s). I was sure sorry when I sold it, I bought a VW van, ran the oil out and seized it up on the freeway...was left with nothing...LOL The guy I sold it to put about $3k into it and made it a kick @$$ work truck...
Originally Posted By: Beater of the Pack
It is however a survivor and mostly the changes that have been made were done to keep it doing what it was built to do and make it a better truck. If you continue along those lines you won't go wrong.
Exactly, and that is what I was after in the end. I was wanting to buy a '42, was restored in pristine condition, but had a 235 with a Fenton dual intake and the rear end changed. Really nice truck, but wasn't working and no cash...after I got a job I was working 50 hour weeks and ended up with enough cash in pocket to buy what I have. My wife wasn't happy as the first one was really nice, it was also $23k. I paid $8.5k for the one I have, so quite a difference...
Originally Posted By: Beater of the Pack
About the brushed on paint, a friend in high school bought a '47-'48 Chevy woody. The metal was brush painted black and the wood was thickly brushed pink. We made fun of him until we helped strip the paint from the wood. It was near perfect. It was one of the nicest woodies around and he got it for almost nothing. By the way in the beginning they were all brush painted.
I am going to try and take the brushed on paint off, eventually. I kinda like it the way it is for the time being. I need to decide what to do about the rust and how to best get it cleaned up, but would like to see if I can remove the top rustoleum and spray clear matte over it. And before that I will most likely swap the ring/pinion over. I have a lot to do, but just takin' one piece at a time.
This is not original either, it has a newer 235 in it with the Fenton and the nice interior, the VCCA would frown on that...
The way I got my wife to agree to me buying a truck, she says I tricked her...but I told her this was like buying a brand new 1942 truck, and that $23k was not a lot of money. I was planning to drive it as my daily driver. I told her with proper maintenance I didn't think I could wear it would in the rest of my life.
Keroppi is like the poor man's version of this truck...some assembly and TLC required...
Fabricate a plate to fit over the old fuel pump, mount 2 pumps right there, and run the power up to a toggle switch on the dash. Then run 2 tanks with a toggle to flip between them. That's pretty much what my Ford flat bed does but with high pressure fuel injection V8. This would be the low pressure version for the single barrel using the above low pressure fuel pumps.
In regard to the distance from the fuel tank due to the low pressure pumps being better at push than pull, I think a better place for the fuel pumps would be the old battery tray, under the passenger seat, I can mount the 2 pumps there and they would be close to both of the tanks.
Don't you think that would be better?
Also, I think I figured out what that setup on the '42 above is. Those must be the Carter Weber 2 barrel carbs that Langdon sells, those are the same air filter covers he sells also...
That looks like a bad @$$ setup...but I'll be honest, I don't know if I need that much power, and in fact the 3211 must be more than enough for my needs. I'm not a real hot rodder, I'm more after reliability and having the proper carb. Anyone running dual 3211s on a Fenton intake?
Too much yappin' and not enough turnin' screws...
Seems the valves were cruded up and not flowing...I think this is going into evaporust tomorrow.
Yes, put the pumps near the tanks. make sure the power to them comes off the the ignition switch so you can turn them off with the key. If there is an under hood fire you don't want to have to think about shutting off the furl supply.
Just wondering why you don't put the battery back in the original place. I left mine there. It is sometimes a pain but battery access is not needed often and it isn't in the way. One of the things I like the best about my sixes is the easy access to the plugs and distributer dour a tune up. Also to the dip stick, fuel pump and fuel filter.
Years ago I started a thread here about my flatbed. It was mostly about the engine plan which was a turboed, throttle body injected, 292 truck. I built a megasquirt mother board to run the injection but just gave up on making it work. When I get the 292 in the truck I may take another look at it. LINK
Yes, put the pumps near the tanks. make sure the power to them comes off the the ignition switch so you can turn them off with the key. If there is an under hood fire you don't want to have to think about shutting off the furl supply.
I wonder if it would be possible to use the connection off the alternator that goes to the ignition to determine if the alternator is running flips the dummy light on/off? I'm not sure how one would do that, but it seems there must be a way.
Originally Posted By: Beater of the Pack
Just wondering why you don't put the battery back in the original place.
No particular reason, other than it's a PITA to lift the floor panel as it doesn't come all the way off, you need to tilt it open and prop it up unless you remove the pedals/shift/brake. My floor needs to be knocked into shape with a hammer and the tray is all rusted. I did get another battery to fit the tray also, but the new battery would fit under the floor. I can't think of any plus to move it back other than it frees up the firewall for something else. I'm gaining the voltage regulator space though. I agree access is not needed often, but I have been accessing it quite a bit recently.
Originally Posted By: Beater of the Pack
One of the things I like the best about my sixes is the easy access to the plugs and distributer dour a tune up. Also to the dip stick, fuel pump and fuel filter.
I've owned cars you had to lift the engine to change the plugs. The 911 doesn't have a lot of space and it's a real chore to set the valves as you have to remove a few things to get access...this looks fairly straight forward to set the lash.
BTW, I hadn't realized this, but a guy pointed out to me that I have solid lifters, and that some people prefer that for higher performance. I had been under the impression that I have hydraulic, but that is also another quirk about my truck.
Originally Posted By: Beater of the Pack
Years ago I started a thread here about my flatbed.
A local Inliner, I think he might be the President of the Bay Area Inliners, but he has a C20 (I believe) with a 292 in it. He bought it with only 60k miles on it and it had been sitting in a barn for most of it's life not running. He mentioned they run more efficient and get better gas mileage with a dual intake, but he only had a single carb on his. He did add headers and dual exhausts that made it rumble nicely.
I had a '40 pickup many years ago. I don't remember where the battery was. I thought yours be be like the ADs under the floor on the passenger side close to the starter. The access door has a loop handle that you turn to latch and un latch and it comes completely out. I'm going to use one of them on my '26 roadster.
I had a '40 pickup many years ago. I don't remember where the battery was. I thought yours be be like the ADs under the floor on the passenger side close to the starter. The access door has a loop handle that you turn to latch and un latch and it comes completely out. I'm going to use one of them on my '26 roadster.
beater,
This is one area where they improved a number of annoying characteristics of the AK Series when they moved to the AD. On the AK Series, the floor is one large piece that spans the drivers and passenger area, so it's not as easy to open. The battery is in a tray under the passenger floor, I believe the same place as the AD. Even with the battery mounted on the firewall, there's still a crap load of room to work on the engine.
Another area they improved was to be the access panel on the driver's side firewall so you can access the back of the dash without having to contort into a pretzel. They also removed some of the cool features that I personally like, such as the crank out windshield, but arguably the solid window is a much more stable design, as is the top opening hood, it is those features that drew me to the AK Series. I wouldn't mind having an Ak Series 'burb, those are pretty darn cool...
My fuel pump is in the Jacuzzi...
And being the bottom feeder that I am, I picked up this vintage set of flaring and swagging tools with a pipe/tube cutter and simple bender. $26 on Ebay.
Try as I can I can not find a removable access panel on the firewall of my '53 AD or any of the other AD Cabs sitting around here. Do you have a picture of one? I'll feel soooo dumb if I've spent so many hours in the cramped space behind the dash when there was easy access.
Try as I can I can not find a removable access panel on the firewall of my '53 AD or any of the other AD Cabs sitting around here. Do you have a picture of one? I'll feel soooo dumb if I've spent so many hours in the cramped space behind the dash when there was easy access.
Well, maybe I'm mistaken, but thought it was on the firewall by the steering. On the AK Series there's a voltage regulator hanging on the firewall and I was under the impression that is where the AD has an access panel. stock49 was the one that mentioned it here recently.
I could have left this stuff in longer, but it got most everything clean. Just a bit of grease left on the outside. I blew through the valves to make sure they're working and they seem to be. I can blow in through the flat side with the cross on it...opposite side of the brass cap. NOTE: even after soaking overnight in Evapo-rust, the fuel pump still tastes like gasoline... but I know they work in one direction, everything assembled back together.
NOTE: on this pic notice I traced the gasket so I could make a cover for the hole when I replace the fuel pump with the electric pump I ordered.
That's the plan, but need to get the registration finalized first. Once I can get it down to the scale to get it weighed, and get it to the DMV to verify the VIN I'll have a complete registration.
Now you have me pondering if I can get it to the scale tomorrow...I think it's about 20 miles to the scale, so 40 miles round trip. If it would get that far, it might be able to make it to the DMV which would be another 10 miles. My other choice is try to trailer it. I don't have a registration, but do have a faded temp in the windshield and all the paper work. I'm paid in full, just pending this weigh and VIN verification. I can only drive it during the day as none of the lights work, and of course that I wouldn't get stopped.
Here we can have a police officer check the vin. Would that help? Any trip you don't have to make to the DMV is a good thing. Even the bad cops are better than the DMV.
A typical VIN check will only show fairly recent: 1. stolen 2. registered but probably not 3. owned by someone else, but not registered 4. lien against title
Here we can have a police officer check the vin. Would that help? Any trip you don't have to make to the DMV is a good thing. Even the bad cops are better than the DMV.
I'm not exactly clear, but it seems a CHP can verify it, the problem is I'm not sure there is a CHP by the area, there is a public scale on the freeway, but they won't weigh it, I need to take it to a certified scale as they say the one on the freeway is only for large trucks on the highway. The DMV is the other option, pretty close, so I was just thinking of taking it over there.
Today is not stacking up well to take it over, I'm busy with some work stuff...*sigh* I've worked so little in the past couple years I should be thankful...
Originally Posted By: panic
A typical VIN check will only show fairly recent: 1. stolen 2. registered but probably not 3. owned by someone else, but not registered 4. lien against title
panic,
Yeah, they have already done that much, they need the physical verification of the actual VIN on the vehicle. The truck was last registered in MO. The CA DMV is requiring me to have it weighed and get the VIN verified. All the rest of the paperwork has been taken care of.
I had to have mu '40 weighed in California to determine if I needed car or commercial plates. if it weighed under the limit I could have regular plates but haul only "personal" loads like groceries or camping gear. The never bothered me over anything I ever had in it. I Nevada now we have to report the milage we drive every year in order to license for the next year. Not far from here to a luxury tax for extra road use.
I had to have mu '40 weighed in California to determine if I needed car or commercial plates. if it weighed under the limit I could have regular plates but haul only "personal" loads like groceries or camping gear. The never bothered me over anything I ever had in it. I Nevada now we have to report the milage we drive every year in order to license for the next year. Not far from here to a luxury tax for extra road use.
For that very reason I'm registering it as a commercial vehicle, I want it to function as a truck. I was told if you register it as a car you can't carry anything in the bed. I don't know how true that is, but that's what the DMV told me. However, they also told me that '46 needs 2 plates and on the form it clearly states that '45 and '46 only needs 1 plate (I didn't see on there at the time).
I am going down to the yard tomorrow for certain and will see about possible driving it first to see how comfortable I would be driving it, or think about loading it on the tilt-top trailer and taking it for a maiden voyage. I haven't hauled with it since getting it all functioning with new tires.
Well, I got down and was thinking maybe driving to the scale would be a decent excursion for the pickup, and it did fire up and continue to fire so the fuel pump seems like it may have fixed the problem I was having.
I got the trailer setup but seems I lost the mounting bolts for the winch...
A trip to Home Depot and $9 later had me some grade 8s with lock washers and nuts, but not without getting stuck in traffic for a police related shooting (so I found out later). It was dark by the time I got the nuts and bolts. Originally it used square nuts inside the feet of the winch, so hopefully this works ok, they didn't have any square nuts.
Going back tomorrow and will attempt get the pickup loaded on the trailer and haul it to the scale.
Well, after some running back and forth to the hardware store, then ordering 10mm square nuts from McMaster, but only to find out that two of the legs were smaller...I got it mounted and have the pickup on the trailer waiting to be hauled down to the scale.
Keep in mind, this is a huge milestone...Being the bottom feeder that I am, the trailer needed tires, winch needed a solenoid, hitch on flat bed needed work...as did adding a brake controller for the trailer brakes...battery not as good as it can be, but using the charger with it while the winch is running. I'll need to get another battery for the winch.
PS - I should add, the fuel pump seems to be working fine, I pulled the choke out all the way, pumped the pedal 3 times, hit the starter and 2nd crank it fired. Pushed in the choke to about 1/2 or 1/3rd quickly and it idled nicely until warm.
Well, I did get it weighed, 3000 lbs. on the nose, but I had 2 jack stands and 2 wheel chocks inside the bed, forgot about that...no worries...
3000 lbs. is the cutoff for commercial requirement, although I already registered it commercial as I want to use it like a truck, but 30 lbs. shouldn't cost me much more as I'm already commercial. In contrast my 911 weighs 3200 lbs. and is about 1/3rd the size, and coincidentally goes about 3 times as fast...LOL
It was a long day...no power at the scale, but the office let me plug in my battery charger and park the flatbed and trailer by the door to get it off...
Ran pretty good on smooth pavement. I've only driven it on the rough highway and the dirt turnaround by my yard.
Finally getting it back on the trailer turned out to be difficult for the winch to pull the rear tires up on the trailer to finish winching it up. I'll need to make some ramps for it. It was able to winch it up at the yard, but could have had something to do with the angle of the ground. A couple guys helped lift/push the rear tires on the trailer and the winch was able to pull it up and upright the tilt-top.
Then after all that I was pretty beat, but went over to the DMV in hopes I could finish getting it registered...no such luck, the DMV is never easy to deal with... Even though I could open the hood on the passenger side, and the VIN plate was at frickin' eye level, the morons couldn't verify it "on the trailer". She told me I could talk to her manager if I like, but she was yet another moron that told me the same thing. DMV is about 10 miles from the yard. I'll try to drive it over there, possibly tomorrow and get those morons out of my hair. I want to finalize this and get the tags, so they don't tell me, "sir, you need a weight certificate within the last 30 days..."...BTDT...
Well, after some running back and forth to the hardware store, then ordering 10mm square nuts from McMaster, but only to find out that two of the legs were smaller...I got it mounted and have the pickup on the trailer waiting to be hauled down to the scale.
Keep in mind, this is a huge milestone...Being the bottom feeder that I am, the trailer needed tires, winch needed a solenoid, hitch on flat bed needed work...as did adding a brake controller for the trailer brakes...battery not as good as it can be, but using the charger with it while the winch is running. I'll need to get another battery for the winch.
PS - I should add, the fuel pump seems to be working fine, I pulled the choke out all the way, pumped the pedal 3 times, hit the starter and 2nd crank it fired. Pushed in the choke to about 1/2 or 1/3rd quickly and it idled nicely until warm.
I had a somewhat similar thing happen at the DMV section at AAA. I'd paid my registration via check through the mail. Great. Needed a smog test, 1991 Cherokee Laredo that hadn't ran in about a year. Got it smogged and it passed with flying colors. Instead of waiting for DMV to mail the sticker I went to AAA to get the sticker. They said they couldn't give me the sticker, that I would have to wait for DMV to mail it. So I keep my paperwork with me in case I get pulled over so I can show them that it is registered.
I'm gonna try and get it over to the DMV tomorrow...we'll see how that goes...
Well, the truck wouldn't start today after I got down to the yard. I will need to replace the entire fuel line now. I could get it to fire with some starter fluid but it wouldn't stay running, so something is plugged in the lines...I'm pretty sure the line between the tank and fuel pump.
Good thing is I have the parts already and should have put them on, but procrastinated and thought I had it fixed with the fuel pump being cleaned and refurbed...might be a good time to replace the fuel pump with one of the electric pumps I bought, but I think I'll try the mechanical fuel pump first as I have a hard line going from the pump to the carb.
Yeah, it sucks, but at least I know what the problem is and I think I have what I need to fix it.
Well, I thought I had what I needed, but the hard line doesn't fit the carb, either need to get an adapter fitting or a different line...
I am also not sure if I need hard line or not, the auto parts store told me that you can only run so much distance with a rubber line.
Anyone know if that is so on these older beasts?
I have a new rubber line going from the tank to the fuel pump, and put the old line going to the fuel pump on, but it doesn't seem to be getting gas to the bubble filter. I guess the fuel pump could really be bad...
It fires up with some starter in the carb, but doesn't continue running as there is no fuel being delivered...nothing now...
Well, I thought I had what I needed, but the hard line doesn't fit the carb, either need to get an adapter fitting or a different line...
I am also not sure if I need hard line or not, the auto parts store told me that you can only run so much distance with a rubber line.
The hard-line from the pump to the carburetor is a double flared compression fitting. The inlet into the carburetor is pipe threads. One typically finds a brass fitting that copes between the two (it is the same on the pump side).
There is nothing wrong with using sections of rubber in a fuel circuit. They are great for adapting to inline fuel filters or even an inline electric fuel pump. But they are used as transitions - flexible sections, etc. The majority of the run from the tank to the fuel pump should be hard-lines that are firmly attached to the frame.
Based on your on-again off-again experiences (with the fuel system on this truck) my hunch is that you have contaminants in the bottom the fuel tank that are getting pulled into the line and plugging it. I would pull the tank and clean it thoroughly.
With the clean tank you can install a new line to the pump and know that the path between is clear. Given that the tank is in the bed - the line you need is not stock. One can buy copper-nickle alloy tube (cunifer). It is super easy to bend and flare.
Fabricate yourself a custom hard-line from the tank to the pump. I would include an inline filter close to the tank (but in a place that is easy to service).
Guys, you haven't lost me, just been swamped with a bunch of stuff. Lost my main email server 2 nights ago, and I think I just got it rebuilt and working again...my wife's email on there also, so I was on the hook...and during all of it I forgot our Anniversary...but it's 33 years and she said 33 is not a great number anyway... During all of this I finally got a new job that I start next Monday...if all of that is not enough, I got a call from PG&E yesterday morning and could be getting close to having my power line dropped to my property where I'm building in Lake County.
Sooo...I agree with stock, and I was able to get down there and start looking at things. There seems to be some crud in the old hard line on the frame. But tell me something, does it NEED the hard line? I ran a rubber line from the tank to the fuel pump to try and avoid that as I didn't have another hard line. But it doesn't seem to pump. I removed the tube from the tank, it goes in through the top, and that all looks good, it's cut at an angle so should pickup fuel fine, even if there was crud in the bottom of the tank. But I'm not getting fuel to the bubble filter, and as such won't run. the hose is new, so I know it's clear. It's about 6'-8' from the tank to the fuel pump though...what I wasn't sure is if the pump can't pull through such a big hose, IOW if that prevents it from getting fuel to the pump. I don't know enough about fuel systems to know... I might be able to blow compressed air through the old hard line and see if I can get it clear...if that is where the blockage is.
I would like to do as beater says, and clean out the tank, not exactly sure how it comes out and/or if there's a drain on the bottom, I may have to just pull the tank and drain it out the top filler. I'm not clear on how the tank is held in the bed, but suspect from underneath. There are no floor boards where the tank is. Would be nice if I could get it on a lift somewhere, but that's not so easy without it running.
One option is to replace the fuel pump with an electric, but the pressure is the same so not sure that will change too much unless the pump is fubar.
I was down with it on Sunday, but wasn't having a very good day. Finally when it got dark I left...but wasted about 5 hours running back and forth to the parts store to get some fittings.
I don't know much about 46's but I would suggest removing the tank and cleaning it and all the lines properly. It's no fun and not sexy but you will avoid a lot of problems in the long run. Also gives you a chance to inspect the tank for weak spots. When it starts bouncing around all kinks of stuff breaks loose and destroys your filter and maybe your pump. I found a silver dollar size chunk of solder in mine from when they soldered it together
I don't know much about 46's but I would suggest removing the tank and cleaning it and all the lines properly. It's no fun and not sexy but you will avoid a lot of problems in the long run. Also gives you a chance to inspect the tank for weak spots. When it starts bouncing around all kinks of stuff breaks loose and destroys your filter and maybe your pump. I found a silver dollar size chunk of solder in mine from when they soldered it together
I agree, and will need to do that...it won't be happening until about a week, looks like it's gonna be raining solid for at least a week...
I'm in SoCal, it rained almost the entire drive except for about 10 minutes up around Salinas. Lots of traffic already for the holiday...I'm gonna try and sneak back home on Friday. I start a new job on Monday, and it's gonna be raining all week long. If it's cleared up by a week from Sat. I can try and revisit the gas tank. I agree, it needs to be taken out entirely.
But tell me something Michael, is the 5/16" flex hose too large for the pump to get enough suction? I think I should plan on putting back in a section of hard line to be safe. I don't know if replacing the pump with an electric pump would be wise or not. I hate to change too many thing at once, I could introduce other issues...What say ye?
5/16" is the stock fuel line size in the 40's era. I don't think that you have a pump issue - I think that it is more likely an obstruction.
I am a fan of electric full pumps - but not for constant use. I have an Airtex in-line pump bolted to the frame in front of the passenger side rear-wheel. When it is 'off' the stock mechanical pump can pull fuel through it. I have the pump wired to a switch under the dash. When the car has sat for a few days the carb-bowls tend to go dry. With a flip of a switch the fuel system is primed in a just a few seconds. No cranking-cranking-cranking to refill the bowls. Once the engine is running the mechanical pump does the job and compatible with the fuel pressures expected from a carburetor.
The electric pump also makes a fairly annoying sound that I wouldn't want to listen to when cruising. But it is great in terms of hearing when the carb bowls fill and the needles close into the seats. The sound of the pump changes noticeably. Car is ready to start. The other benefit was at initial build/installation time. The electric pump can be turned on and off while leaks are detected an addressed - long before the engine is fired.
You mentioned going to a dual fuel tank set-up. Perhaps you should clean both tanks and invest in the permanent plumbing for that . . .
The other noises my cars make usually drown out little sounds like electric fuel pumps and worn out brakes. I have to run an electric pump on my roadster now because I cut the fuel pump lobe off of the cam.
Hope everyone is having a great Thanksgiving, and got to spend some time with their loved ones! I'm at my Mom's with my wife and the kids drove down also...so it was a small but nice TG.
Originally Posted By: stock49
5/16" is the stock fuel line size in the 40's era.
This is exactly why I used that size, the truck had 3/8" hose on it, and I'm not exactly sure what size the hard line was in the middle, but I believe that is where the blockage is.
Originally Posted By: stock49
I don't think that you have a pump issue - I think that it is more likely an obstruction.
I think this is two fold. I think there is blockage in the hard line between the tank and fuel pump, however I removed that factor and ran a new 5/16" Gates hose from the tank to the fuel pump. I don't believe the mechanical fuel pump is capable of pulling fuel through the line however, and am not a fuel delivery expert, but that is what I believe.
The reason is that another gent I had originally met over on Stovebolt, his name is Jon Goodman, and is the person using the same electric fuel pump(s) I bought and he claims that the electric fuel pumps are entirely different beasts than the mechanical counterparts. He is using the exact same type of fuel line that I installed, but the electric fuel pump is capable of pushing the fuel through the hose. The mechanical pump just must not be capable...but I could be wrong. This is his thought also.
Originally Posted By: stock49
I am a fan of electric full pumps - but not for constant use. I have an Airtex in-line pump bolted to the frame in front of the passenger side rear-wheel. When it is 'off' the stock mechanical pump can pull fuel through it.
That is interesting stock, and I would say tossing a monkey wrench into my logic above, but the fuel hose connects to a fitting on top of the fuel tank, I pulled it out of the tank. There's aprox. 3/8"-1/2" plastic tube that extends down, and it is cut at an angle, so if the tip was on the bottom of the tank it would still be able to suck fuel, unless there was about 1/2"-3/4", the length of the angle cut on the end of the tube. I can see the gas is above that, as the tube is wet a few inches up. However, I don't know for certain, I'm just guessing it can pull. The other guy has the exact same fuel line, using no hard line, only the same Gates 5/16" flex hose.
Originally Posted By: stock49
You mentioned going to a dual fuel tank set-up. Perhaps you should clean both tanks and invest in the permanent plumbing for that
That is the plan, and I have been planning to replace all the lines at the end of the day, so I am faced with that now.
Originally Posted By: Beater of the Pack
The other noises my cars make usually drown out little sounds like electric fuel pumps and worn out brakes.
If I can get everything running reliably I would worry about the noise later if it is a problem. I don't know how much I will be able to hear it, but my plan was to put both pumps in the original battery tray under the floor. Worst case I could cover them with an enclosure and sound proof it as best I can.
I appreciate the comments, not trying to debate or dispute either of you, and more so welcome your comments. I'm just trying to get the beast running and understand this. If my theory is correct, it will be good data for people to know in the future when running their fuel lines, that 5/16" ID is too big for the mechanical fuel pump. I've never seen a hard line that size being used for a fuel line, so there might be a reason for that.
Sounds like you're dealing with plumbing that depends on siphon action. Not sure why it is plumbed that way. Are there no outlets in the bottom of the tank?
The stock fuel system is built around gravity feed. The tank outlet is higher then the fuel pump. The pumps only job is to lift fuel to the carb.
Your buddy is correct. Inline electric fuel pumps 'push' fuel. And they aren't good a dry starting a siphon. They expect gravity to deliver fuel - which they in turn push forward and up to the carb.
Sounds like you're dealing with plumbing that depends on siphon action. Not sure why it is plumbed that way. Are there no outlets in the bottom of the tank?
The stock fuel system is built around gravity feed. The tank outlet is higher then the fuel pump. The pumps only job is to lift fuel to the carb.
Ah, this reminds me of something I've seen online, where the fuel lines need to be primed before using. I am pretty sure that's the way this tank is setup, with siphon action, otherwise why wouldn't they have used the bottom outlet? I believe the answer is because there is no bottom outlet. I will look. I'm also pretty sure that priming the system is most likely needed as there would be a lot of air in the system. I've seen some guys suck on the fuel line until fuel is obtained and spit out what's in their mouth...doesn't sound too tasty to me...but maybe if I had some water at hand and rinse out my mouth well, it might be tolerable.
Originally Posted By: stock49
Your buddy is correct. Inline electric fuel pumps 'push' fuel. And they aren't good a dry starting a siphon. They expect gravity to deliver fuel - which they in turn push forward and up to the carb.
Exactly, I think this is my problem. $64k question is what is needed to prime the system and get fuel filled in the lines? I'll need to read...of course the other option is just convert to the electric fuel pump and let it push the fuel to the carb.
On a good note, I finished my first week on my new job and it's good to be back working...hoping I can get some work done on the fuel lines next weekend if it will quit raining.
On a good note, I finished my first week on my new job and it's good to be back working...hoping I can get some work done on the fuel lines next weekend if it will quit raining.
Well, I think *somebody* was working over the past couple years, but it wasn't me, I have only worked about 2-1/2 months in the past 2 years. I really took a whoopin' on my savings and equity in my house in order to get the foundation in on my lake project where I'm building a home for Keroppi I'm hoping to get back on my feet soon so I can get some more parts for her.
I am getting Keroppi a small pressie for the holidays...a NOS and rebuilt Carter 3211 carb. That's the carb that was made for the high compression 235. There's a guy over on Stovebolt that has a few NOS 3211s, Jon Goodman, the same guy that gave me the lead on the low pressure electric fuel pump. He has a 235 in his pickup with a 3211 carb and one of the Autobest electric fuel pumps. To be honest, the Carter 964S that is in it would most likely be fine, but the 3211 is auto choke and I think that will be better all around.
I'm trying to take next year off to work on my truck. I have only been home 9 months out of the last 2 years. My goal is to get the chassis and drive train done in time to shake it out before drag week next year. We will see how that works out. I'm heading to PRI in indy tomorrow and plan on spending $15K. If I can stay in that budget I will be ok. Hopefully I will make some good connections.
I'm trying to take next year off to work on my truck. I have only been home 9 months out of the last 2 years. My goal is to get the chassis and drive train done in time to shake it out before drag week next year. We will see how that works out. I'm heading to PRI in indy tomorrow and plan on spending $15K. If I can stay in that budget I will be ok. Hopefully I will make some good connections.
While I didn't invest in my pickup like that, it was a stretch to buy it...at the time I was working for 2 months, 50 hours week and getting time and a half on those extra 10 hours a week. Unfortunately I didn't work for a year after that, so it was a bit tough to justify to my wife...luckily she's one of the most understanding woman I've ever met. She's pretty happy I'm back to work. I'm pretty close to getting the electrical service at my lake project, but have a couple things I need to do at my current house...to appease my wife and balance things out. I have a fair amount of things to do to the pickup, but won't be investing as much into her as you are, but who know, maybe that will change over time. My first priority is getting my log home in place on the foundation, as that is where the pickup will ultimately live. And hopefully it will be running reliably at that point.
What type of parts are you buying, seems you had most of the stuff you needed?
The rest of my dry sump oil system, My entire distributorless ignition and crank trigger, blower intake for my 12 port crossflow head, Valve train, fire suppression system, cable drive fuel pump and headers. I had most of the people picked out and just met with them face to face. I ran into Mike Finnigan just by chance and we talked for about an hour about my build and other stuff. He just a regular guy. I went to seminars on suspension, wiring and shocks.
The rest of my dry sump oil system, My entire distributorless ignition and crank trigger, blower intake for my 12 port crossflow head, Valve train, fire suppression system, cable drive fuel pump and headers. I had most of the people picked out and just met with them face to face. I ran into Mike Finnigan just by chance and we talked for about an hour about my build and other stuff. He just a regular guy. I went to seminars on suspension, wiring and shocks.
Your truck sounds like a dream truck, at least for me. I'm anxious to see you getting it on the road, which I'm sure you are also.
One thing I'm thinking I may try today on my truck is to pull the hose off the tank, fill it with gas to the top of the hose and reconnect it. Maybe that will give it enough gas to get it going and continue, the bubble filter should get any air out that is left in, but that should give it enough to be able to pump...
It is clear but I'm pretty sure the yard is muddy, it's been raining for about 2-3 weeks pretty much constant here on the west coast...but I'm gonna go down as the weekend is all I have to get down there these days now that I started to work again, and that's a good thing, IMO.
Went to the yard yesterday, was clear when I left, stopped by the store to get a turkey baster. I figure that would allow me to get fuel into the line, and it turned out to be easier than I suspected as I can pull the tube out of the tank and just held it upside down and squeezed fuel into it until it was filled. I then quickly turned it over and jammed it into the tank.
Gave it a spritz of starter fluid to get it going and it fired up and stayed running, I could press the gas, get more fuel, etc...
Then I got in the truck to make sure all was good and it would start, stop, rinse and repeat...I'm gonna declare this a victory and the fuel delivery problem is fixed after the fuel pump rebuild. I have not done anything with the electric fuel pump yet, but will revisit that when I get the NOS carb in a week or so...
This last video shows a problem I have noticed previously, when the starter pedal is engaged, it's angled slightly and doesn't engage the flywheel properly unless you stomp fairly hard. I may need to adjust that, possibly with a BFH...
You might want to try starter shims first. Just a thought.
You might want to try starter shims first. Just a thought.
I will try to diagnose the problem first. Seems to me that when the starter pedal is pushed it engages the starter drive gear to the flywheel. I have looked at that once and it seems the pedal pushes slightly skewed, in the video I mention I need to stomp it hard (so that it engages the drive gear properly).
Where do the starter shims go, do they go on the pedal mechanism? When the starter is out it's easy to see how it activates the drive gear. Do the shims go on the drive gear rod? Seems the same effect could be done at the flipper mechanism that the pedal attaches to. It was all muddy at the yard, of course, so didn't spend too much time there after I got it going reliably.
A while back we were talking about cleaning your gas tanks. Here is how 12Bolt Tom does it. Probably 1/2 gal of diesel and a scoop full of the gravel laying there would clean it right up. Remember to take the gauge sender unit out first. (just testing the picture thing)
How do you do it? Or is it only for special guys like you?
It is on the list of things to do for me to get the tank cleaned, that goes for both the tank in the bed and the original tank under the seat.
Tomorrow I'm going down to try and get the 'ol '46 to the DMV, the DMV that's by my yard is open on Saturday. Not very many DMVs are open, but the Santa Teresa DMV is...I'm hoping she'll fire up after sitting for a week and make it over there. I know the brakes still need some adjusting, but I think they are working...
Wish me luck! This will be the maiden drive! I don't have a registration and the temp is long expired...but taking all my paperwork and license plate with me to the DMV...just in case I get pulled over on the way over there...I think it's about 6 or 7 miles from my yard where my pickup is. I've been pretty busy with my new job, and will have to take off 2 days next week for Xmas and 2 days the week after for New Years, so hoping I can get this taken care of tomorrow, it would be a great Xmas pressie for ME! Although I don't really believe in Xmas, but we do kinda sorta partake in it...but I believe in Santa Claus as much as I do in the Easter Bunny, or the Tooth Fairy...
The picture posting is reserved for Inliners International members so I re- insisted after a few years off. The folks in charge now are making attempts to fix some things that had been ignored for quite a while. So yes, members can post pictures. Stock49 has to put you on the list to post to a gallery hosted on our site. He has posted a "how to" here. The process is rather cumbersome compared to some other sites but it is not necessary to have your photos hosted in one of the sites that charge you to do that. It is not as easy as the HAMB but we don't have their resources. The picture above was my first, a test. I'm sure with practice it will be easier and I'm glad that I can at least get some pictures on here. The photo forum is at the bottom of the forum list on the home BB page.
So what do you think of the gas tank cleaner set up? Tom either posted that or sent it to me a few years ago. It made me laugh out loud but it is a great use of equipment you have to do what has to be done.
I belong to Inliner International, I'll contact stock to put me on the chosen members list.
I was able to get down to the DMV, just got home...I got the VIN verified, paid my reg fees, but am waiting for Sacotomatoes to verify my plate is good to go...and they will send me my tags I'm told...there was some question on the clarity of the plate, but I told her I could refinish it and make it clear if that's what they want. I like it as-is.
Truck definitely needs some TLC, and I need to readjust the brakes, they feel too tight and need bleeding.
Congratulations! Any win with the DMV is cause to celebrate I don't care what state you are in. A long time friend the wife of a long time friend was an office manager at the Carson City DMV and two former students worked there. They all ran and hid when they would see me come in with a fist full of parers. They cut me no slack at all. I actually started driving out to the DMV in Fallon where I was not known. Nice picture!
Congratulations! Any win with the DMV is cause to celebrate I don't care what state you are in.
Ain't that the truth!
I think I might only need to pay $45/year for reg fees, but not sure yet until I get my tags back. I only had to pay $45 today for the regs this year, however my initial pay was about $1,000 including taxes. They had in the system for me that I owe $540 because it was never finalized since last year, and Oct. was when the regs ran out...so they had a bunch of charges...strange thing is I was paid in full...but they changed that and took that off for me. It was the DMV that told me I wouldn't be fined when I took the truck on my trailer to get the VIN verified, so at least they took it off.
Originally Posted By: Beater of the Pack
I actually started driving out to the DMV in Fallon where I was not known. Nice picture!
I think I mentioned to you before, I drove up to Fallon to look at a '46 with a 327 in it, but it needed a LOT of work. That was a lot of gas and time to get up there, 6 hours one way, but sometimes we have to do what we have to do to find a truck.
Looking at the pic you posted, it looks like he's lifted the tractor axle up and attached the tank to the wheel and just let the tractor run for a while...kind of like a rock polisher but using gravel inside the tank. I've heard you can just put dish soap and water inside and rinse it around, but it wouldn't have the same effect like gravel.
I have access to some gravel, but not sure how I would spin it. I have a forklift, but nothing like a tractor with big wheels other than the forklift itself. I need to ponder.
FWIW, it took a bit to get the truck started, but once it was fired up which it as able to do after a couple tries, it ran pretty well. I drove it all the way to the DMV, stopped in the drive through, it fired right up, and drove it over and parked in the lot, about 2 hours later after I finally got out of there, it fired right up again, and I drove it to the gas station, filled the tank up (it was only about 3 gallons shy of a full tank), and it fired right up and I drove it back to the yard. I put a bottle of lead substitute in the tank before I topped it off.
Still has a problem popping out of gear, but much of that could have to do with driving on a rough road. Monterey Hwy is pretty rough, that's where my yard is in Morgan Hill.
Not sure if Tom used gravel. That was my idea. It sounds like your truck is liking being started more often. Sometimes jumping out of gear can be caused by worn gears. It could also be old dirty trans oil that won't let it go fully into gear, dirty sticky slider not working freely. Or bent shifter forks that don't let it shift completely, not getting the full throw.
It sounds like your truck is liking being started more often.
It was a long road figuring out the hard start, converting to 12v, rebuilding the fuel pump and adding new fuel lines...
Originally Posted By: Beater of the Pack
Sometimes jumping out of gear can be caused by worn gears. It could also be old dirty trans oil that won't let it go fully into gear, dirty sticky slider not working freely. Or bent shifter forks that don't let it shift completely, not getting the full throw.
I'll be honest, I'd really like to get a T5 in it rather than messing around with what I have. However, that means a new rear end most likely.
My '53 has a T5 and a '68 GMC 4x4 Dana 44 limited slip with 3.54 gears. It will cruse 70-75 all day long and go faster than I want to drive it. The hardest part of swapping the rear end was getting the E-brke to work. I still need to redo that part. It's a matter of cutting and splicing some cables. Make sure you get a T5 with the Chevy bolt pattern and an S10 shifter/tail piece. I got an S10 with another bolt pattern. I had to make an adapter and carve on the tranny case some. I did however get one with a low first gear that comes in handy for hauling and climbing the steep hills on my road. It is sort of too low for regular use and second is barely too high though I do sometimes take off in 2nd. With a 4.11 or 3.70 rear end it would be perfect and still cruse around 70 mph.
I've been keeping an eye open for a T5, but it's not one of the things I *NEED*, of course that never stopped me from getting something I wanted...
I don't want to spend too much right now, and currently committed to a 3211 NOS carb that has been rebuilt. I do want to get some 3rd row seats from an Escalade/Yukon/Tahoe/Suburban, but just haven't seen the right set at the right price yet. Ideally a set of black leather seats that are split in the middle would be my choice, but a 60/40 set would also be an option. I exchanged some mail with a guy that has a 1 piece 3rd row seat that is grey, not the best condition but no tears or stains. Those 3rd row seats are 48" wide.
While I really would like the T5, I think it probably makes more sense to replace the ring/pinion first as I have a 3.55 set that will go in my rear end, and I do have a 4.11 rear end at this time. I have the stock 3 speed tranny. My thought is if I do pull the tranny and see either worn gears or shifter fork, or similar, but first I should probably change the trans fluid and see if that helps at all. As I said, the road is pretty rough, but I know that shouldn't effect the trans too much...that glove box door keeps popping open when driving on the rough section, will need to look at that also.
And the worst part is that my yard is all dirt and now that the rainy season is here it will be a mess for several months. I really need to get the pickup home so I can work on it where my tools and driveway are. I looked at renting a bay with a hoist, but they want $80/hr for that...all of the sudden crawling under minimal space under truck got a lot more attractive! LOL
My '53 has a T5 and a '68 GMC 4x4 Dana 44 limited slip with 3.54 gears.
beater,
I've seen a number of Dana rear ends, they were common on Jeeps, and I have also read that you can replace the T5 spline with a Jeep spline to fit a Chevy 235.
How can you tell what type of rear axle would work best? I should probably be asking this in drivelines...
Some Dana/Spicer 44s in GMC 4X4 pickups were limited slip. That is what I found, a '68. I cut the spring perches off and rewelded them where I needed them. I had a drive shaft that worked. I don't know what it is out of, just luck. Or as my wife says," If you have enough crap piled in the yard some of it is bound to fit something." There are lots of versions of 44s. I'm pulling the gears and limited slip carrier out of one we ran in my son's Studebaker. It has the keyed axles and hubs the Studes used. The carrier is from a GMC the gears are Studebaker , 4.27. The ones in Postal Jeeps are very narrow. There are at least two sizes of carrier and probably different splines. Dana 44 is a group with lots of interchangeable parts not just one size fits all. Some of the early open drive line Chevy pickup rearends will probably take your new gear set and bolt right into your truck. The T5s also have a lot of interchange, as do many transmissions. I've rebuilt a couple but don't know a lot about them. There is a length of input shaft thing that can be fixed with a spacer or sometimes cutting 3/8" (I think) off of the shaft. The split count is a matter if finding the right clutch plate or maybe a different input shaft. Can of worms.
Or as my wife says," If you have enough crap piled in the yard some of it is bound to fit something."
Words of wisdom! My wife usually just rolls her eyes...LOL But she's a good sport after 33 years of me dragging old iron home...a guy at work had a fitting t-shirt on, it said, "Only one more car, I promise...". My bigger interest is old vintage machines...
Originally Posted By: Beater of the Pack
There are lots of versions of 44s.
That's an understatement.
Originally Posted By: Beater of the Pack
Can of worms.
Indeed a lot of worms given the rear end and the trans. Knowing I will need to replace the entire ball of wax, I haven't been in a rush...OTOH, I kind of feel if I really want this pickup to run well on the highway, that may need to be done. Not a priority, but a desire. Finding the specs on this stuff is horrendous. Finding the correct width axle, the proper length drive shaft, etc...my '46 might be narrower than your AD Series, I'm pretty sure that might be true.
I love FREE, especially when it's something I have wanted. Color is not ideal, beige, but price is right.
The owner took this 3rd row seat out of his Yukon and it was in his garage when he wrecked it. When the tow service hauled it away he forgot to put this in the vehicle.
Even has the seat belts! (I currently don't have any seat belts in my '46). Looks in new condition.
The good news is that the 'wrong' color is light. I have read several threads over the years about guys changing the color of leather upholstery. Here's one from the H.A.M.B. Seems a product called SEM is the to one look into . . . apparently it's a spray on.
The good news is that the 'wrong' color is light. I have read several threads over the years about guys changing the color of leather upholstery. Here's one from the H.A.M.B. Seems a product called SEM is the to one look into . . . apparently it's a spray on.
That doesn't look too difficult, although I thought it was cloth as the 2nd pic is of the under/back of the seat which is cloth. But it doesn't look bad at all, and beige does go with the green, so would leave me open to doing the inside of the interior in a beige/cream or green...the beige might even go with the black. I'm gonna put it in first before I dye it.
I was just looking over the SEM site and they have a lot of products, but not really clear which one is for dying leather. I also looked around the Fiebings site, I've used their saddle soap on some leather work I've done. They were mentioned in that thread also, but SEM seems to be the brand of choice in that thread.
A nice deal for free, the guy had a beautiful home on the water up in Discovery Bay. Turns out it came out of a Suburban which his son sold...so I misunderstood him on the phone, but it's in nice shape.
EDIT: stock, after reading on HAMB in the few threads over there about refinishing a seat. I'm more than happy with this acquisition. I mean, how can you be unhappy with a free seat? it was a beautiful day to drive out and pick it up. But if I do ever want to turn it black, it looks easy enough, and it's CHEAP for the dye. Thanks for that tip!
That's so lazy thieves don't have to steal the while plate to get new stickers. The California Association Of License Plate Thieves probably lobbied in Sacramento.
That's so lazy thieves don't have to steal the while plate to get new stickers. The California Association Of License Plate Thieves probably lobbied in Sacramento.
Although I had my tongue in cheek on that one, it's actually not so funny...in SF they do not prosecute people for personal crimes that are less than $1000. This includes breaking windows, stealing from stores, anything that costs less than $1000 including drug related crimes and prostitution.
Boudin ran for office on not prosecuting those crimes, and was elected. WTF is wrong with this State. I just saw a video on YouTube that said Newsom passed a law that would reduce traffic violations for low income people ONLY and raise it to others to pay for it. He needs to be voted out of office in a bad way...
Not a chance of getting rid of the Dems at this point. They finally chased enough of them to Nevada to take over last year. We are now completely controlled by Las Vegas. No one else needs to vote. New slogan: What happens in Vegas screws up the whole state!" When they get rid of the electoral college the entire country is gone.
So if you don't pay a prostitute in San Francisco is that rape or less than a $1,000 theft?
So if you don't pay a prostitute in San Francisco is that rape or less than a $1,000 theft?
I think it's worse than that, you can beat her up like a no-nothing classless pimp and walk away...
To keep this on topic, got this sticker this morning at the Bay Area Inliners Breakfast...no Inliner would be complete without one of these in the window!
You might want to try starter shims first. Just a thought.
mick,
Where can I get starter shims for the old starters? I see some on Amazon, but not for the older 2 bolt chevy starters.
Any tips on where to get some of those?
I know that sometimes the starter will grind, and I wasn't sure if that means the bendix was pushing out too far and going past the flywheel teeth, or just what.
Can someone explain this so I can understand what I need to do in order to fix it? I'd hate to keep grinding the flywheel.
Let's hope. You would think with people fleeing California that those who leave would not want to make their new homes like what the left but it isn't working out that way in Nevada and Texas. Are we talking politics or news? Or how it effects our cars and their use? It is sad that the car "hobby" is so embroiled in politics because politics have taken over all aspects of life and death.
It is sad that the car "hobby" is so embroiled in politics because politics have taken over all aspects of life and death.
Indeed it has...if only they had kept their promise with the 30 years old cars not needing smog, the fact of the matter is that they are trying to get any older cars off the road now. When I was at the DMV to get my truck VIN verified, there was a lady who had a 1985 car which she said ran fine and passed smog, but the shop that smoged it flagged the car because it exhibited some smoke. This is very disturbing as they only paid her $1000 for the car, which she claimed would not buy a replacement. So we have a car that passed smog, was completely stock but because some smoke came out the exhaust they made her take it off the road. That there is politics at it's worst and how it effects our hobby. I have a 1984 911 which passes smog, but I don't drive and is registered PNO. It could be deemed the same one day. That's worrisome.
Only two counties in Nevada have smog regs but they both are pissed and blame their air quality on the surrounding counties who don't have enough cars to dirty the air if we all went to the cities at once. We'll have state wide smog rules at the end of the next legislative session along with California and Massachusetts gun laws. Another Virginia right here. Two Commie Counties and 15 American counties. A couple of years ago a young friend drove his '59 Caddy to Reno. It smoked just a little at the bottom of a long hill. A local phoned the cops and they impounded his car. A cop here pulled me over because he saw smoke in a group of cars he was meeting on the road. He turned around and pulled the oldest one over, me. The smoker got away while he was trying to convince me that I was the polluter. I said," Where's the smoke? There's no smoke coming from my truck." He kept me there for several minutes revving the engine while he checked everything on the truck.He gave me a verbal warning and left. And we are supposed to respect them. Only when they respect us!
That's horrible, I'm not sure there's anything they can do in Cali if you own a '75 or older. AFAIK, I'm never required to smog my '46, and once you have your tags, it's just a matter of paying regs each year.
The lady I met at the DMV was the first I had heard of being flagged for smoke at a smog test that the car passed.
I saw Tesla's value as a car company went over $100B, yet he's loosing money...I don't get it...
Well so far we have no smog tests here in southern Oregon, they do in the major cities. Maybe that's why the Californians come up here and buy cars and trade in their old ones.
Well so far we have no smog tests here in southern Oregon, they do in the major cities. Maybe that's why the Californians come up here and buy cars and trade in their old ones.
jalopy,
That was certainly the case 40+ years ago when I lived in Oregon for about a year and a half. A lot of people used to register their cars in Oregon as it was much cheaper and easier to register. Even back then, the migration was taking place and while all the Oregonians hated the Californians, I bet they dominate the State today.
The one odd thing about Oregon had always been that people couldn't pump their own gas, is that still true today? About 10 years ago I was visiting my sister and the attendant in Grants Pass damn near was gonna shoot me for trying to pump my own gas. I did bring back a '63 Chevy pickup, even came with a gun rack in the back window!
I used to live in Cottage Grove 40+ years ago, but came back to Cali as Lane County Community College wanted outrageous registration fees for school, since I was considered a non-resident.
TRIVIA: I moved up there about '77, it had been legal for girls to go topless at the University of Eugene, but several months after I moved there they put a ban on that...
The Mega Tesla Factory is just over the Flowery Range from me. Nevada and Storey County gave away the farm to get them here. The promise to the County residents was that our county would be so rich in 5 years we would pay no property taxes. My taxes go up every year, Tesla has not made a profit yet. There is a huge turn around with employees and during construction there were massive health issues. There was a huge theft of material a couple of years ago just as the company was unable to meet payroll. The whole thing is as phony and the bullett proof pickup. They are making the nastiest batteries in the world with no environmental oversite.
I wonder if the IRS would be interested in the dates and prices of land transfer for pennies per square foot from prior owners to local party officials just prior to the deal, only to be bought for 100 × that figure by Tesla.
No, it's not a bribe - Tesla didn't pay for it, YOU did.
There's been a lot of problems with the workers striking and protesting at the main plant in Fremont. When it was the NUMI plant, the manager for the Corolla line lived next door to me, but he moved his family back to Japan when Tesla did the deal with Toyota. Teslas are like Candy in the Valley, the immigrants LOVE those cars...I guess after you're riding a goat to work it's nice to ride a new Tesla the next month with a new job in America...
At my new job there are only 8 charging stations at the main office across the street, there's a lot of electric cars, including Bolts, Leafs and Teslas. I'm not sold on electric yet and won't pay the high price for a new car...
The batteries are NASTY and you can not buy a replacement set if you wanted to. Where do the owners thing the electricity at the charging stations comes from? How big of a load is there on the power grid when everyone gets home from work and plugs their car in. I saw a video of a service company that goes out to save stranded electric cars with dead batteries. The charge them with a diesel powered generator.
I just put 100 amp service in my garage for a future electric.
I'm putting a 320 amp circuit in the house I'm building so I can use 100 amps for 3-phase machines (55amps continuous 3-phase) using a digital phase converter.
I'm not sold on electrics and can be happy driving my 'ol '46...but I do need 3-phase to run my industrial machines.
I have a 10X 37 lathe, and decent size drill/mill, drill press, blast cabinet, 6x48 belt and 12" disc sander, Hobart wire feed welder.,20 gallon compressor, bench grinder, wire wheel, and lots of hand tools that I run on a 40 amp 120 V system. Can't run it all at once but I can't use more than one tool at a time. I'd like to have a bigger compressor and better welder. The rest is fine for me. I have a big blue Miller welder 10KW power plant that will take on the bigger jobs someday.
I run my machines at home on a 30 amp dryer circuit, I run a 7-1/2 HP RPC on it to power up to 5 HP machines.
I have a Rivett 1020F lathe, one of the finest toolroom lathes made in America. It came out of the Hershey factory in Oakville, CA when they closed it down...
I picked this up for the new shop a few months back:
I have gone to some auctions lately with my son who is assembling tools for his shop. His place is filled, my place is filled and he has some at a friend's place. There are so many quality tools and tooling out there with shops going under and what shops are left going totally to CNC. Some is selling for less than scrap prices and a lot not selling at all. Almost all of my machine tools came from a friends custom gun shop when he closed it. He mostly built custom 1911 Colts. The tools are good enough for me, way more accurate than I am.
My theory has been, first built the shop, then build the house.
I want to get my basement setup as the new shop, then build the house on top of it. I have the log shell up to the top plates, but have quite a bit more work to do in order to turn it into a house.
My first industrial machine was a Yates-American G-89 table saw, I drove up to Sparks, NV to fetch it...5HP direct drive saw that will take an 18" blade. The fever was started...
I've built a few 1911s, not easy firearms to build. John Browning proved it's hard to distinguish between genius and idiot savant. He was certainly one of the most brilliant firearm designers, but for anyone that has built a 1911 and understands the complications of the angles on the ramps, barrel, lugs, et al, this statement makes perfect sense.
I'd be afraid that if the shop was done first the house would never be done. But I've been living in a place for almost 50 years where neither are done. The yard is a mess too.
That is quite a saw. I got my band saw out of the back of the shed yesterday to clean it up for the Chevy wood project. Also checking out the table saw to see if I can make it work again or if I need to get another one. I cut too much firewood and aluminum with it.
Browning was certainly on the genius side maybe with a touch of savant. It would be interesting to know how his designs came to him. In some cases they seem to come from nothing before them and other times he improved what he and others had done. Complication didn't slow him down. Rather than simplify the complication he often just made it work anyway. It is amazing how rugged many of his designs are. A good old loose rattling 1911 will just keep going.
I have some woodwork to do on my Chevy also, gonna buy the metal strips and cut the wood for the bed, and I need to cut some kick panels for the cab as well.
The 'ol '46 is gonna take second fiddle to the house...but in the end I just want a simpler life...building stuff at the lake...
A friend of mine has a car hoist in his shop, I'm thinking about asking him to help me swap out the ring/pinion on my rear end.
Life would be easy if we only had one project at a time. Progress is often a little here and a little there but it's all progress. If you can find friends to help you can sometimes make more progress and enjoy being with a them at the same tome.
Years ago I redid the wood in the bed of my '53. I bought a kit and new metal strips. I had the strips powder coated. It didn't hold up as well as I thought it would. The wood didn't either. I just treated it with wood preservative and sealer. I have a '50 GMC that I got for parts. The original wood in the bed is almost as good as new. It was painted with a paint that looks a lot like what is on the good wood in the '26 roadster. I'd like to know what that is. I thought about doing the bed with some of the new decking material.
Life would be easy if we only had one project at a time.
Ain't that the truth...I just called my contractor to find out if the electrical is in yet, but no it's not...so still waiting on that piece for my lake project.
I have a number of project on my pickup that are lining up as well...so the backlog is building...
Originally Posted By: Beater of the Pack
Progress is often a little here and a little there but it's all progress. If you can find friends to help you can sometimes make more progress and enjoy being with a them at the same time.
Funny you mention that, I have a friend that has a car hoist in his garage. He's having a get together and requested that if anyone had a project that some of the people could get together and work on, maybe we could plan something out...it's all metalworkers, but there's a few different things that needs to be done in regards to fabricating...including welding some type of angle along the bottom of the cab and fabricating something to hold the seat in place.
I'm thinking with some help it might be possible to get the ring/pinion, carb/hard-lines, welding to fix rust, and seat mounted in the 'ol '46 that there could be something for everyone and it might be able to get done in a day.
Originally Posted By: Beater of the Pack
Years ago I redid the wood in the bed of my '53. I bought a kit and new metal strips. I had the strips powder coated. It didn't hold up as well as I thought it would. The wood didn't either. I just treated it with wood preservative and sealer.
I'm thinking to use resin on it, possibly West Systems. I have some strips of hard maple that I think would work out nicely.
Originally Posted By: Beater of the Pack
I have a '50 GMC that I got for parts. The original wood in the bed is almost as good as new. It was painted with a paint that looks a lot like what is on the good wood in the '26 roadster. I'd like to know what that is. I thought about doing the bed with some of the new decking material.
Mine has been redone before, possibly when the PO put the gas tank in the bed, but the wood looks like skis with the ends all warped up...I know I can do better than that!
If it wasn't for previous owners our old cars would be like new.
LOL. It's a great line Beater. But it does cut both ways. If it weren't for previous new car owners there would be no used cars . . . suffice to say the fewer previous owners the better?
If it wasn't for previous owners our old cars would be like new.
LOL. It's a great line Beater. But it does cut both ways. If it weren't for previous new car owners there would be no used cars . . . suffice to say the fewer previous owners the better?
I completely agree stock, because no more new cars for me. I'm through buying new cars, the last one I bought was in '92, and I was forced to retire it due to an accident that wasn't my fault. The insurance company totaled it and only paid me $2500 in 2015, I paid $28k for it new in '92. I put 200,000 miles on it (Toyota Previa). No more new cars for me, so good to all people who buy new cars...and will sell them to me used.
------------------ reply from Jim Carter --------------- Alan, Engine block#3835911 is on a Pickup from 1954-55 and began in 1953 in the Corvette and passenger car with a Power Glide transmission. (This has modern insert bearing rods as do engines in vehicles today.) The head is from 1955-62. ALL you are using is from a 235 engine, not a 216. These very early 235's used a 6 volt system. Thus, the flywheel has the number of teeth used in a 6 volt. I can only assume the 3836848 head gives the extra compression to make it more difficult for a 6 volt battery and starter. Jim C ------------------ reply from Jim Carter ---------------
Digging my thread up as I just found an interesting piece of information on the '53 235.
As mentioned above by Jim Carter, the Corvette had the newer block in '53, but I noted this earlier on the Wikipedia site that in '53, the Bel Air shipped with a higher 115HP powered 235 with hydraulic lifters. This was evidently the same as the '53 Corvette "Blue Flame". This would have provided plenty of blocks from 1953 that would fit the '54-'62 heads.
Has to be true, it's on Wikipedia, right? In '53 even though they had hydraulic lifters, the HP went up to 115HP. The later engines were 135HP. That's more than 50% more powerful than the original 85HP 216 that came in my '46.
This would better explain how my engine was put together. I don't think it was an original '53 as it has a newer head on it. I also don't think it was a Corvette engine. The guy who put it together definitely knew what he was doing, and picked the parts specific. I think that would be Clarence Little from NC, he was the 2nd owner. I think he bought the truck in '83.
Originally Posted By: stock49
Also, here's a nice write up from a bike mechanic about Ammeter function: Ammeter Ethic @themotorcycleproject his bucket analogy is easy to get one's head around:
I just read through this again, and this is an XLNT document on how the ammeter works. At least makes it understandable for me. Thanks again for a great link stock49!
I have always wanted one of these since I was a kid.
Getting hard to find the good ones, most of the newer ahooga horns are crap.
This is a vintage one that's been tested to ensure it's 12v. The seller actually bought it at an antique swap meet, to find out it was 12v, while his car is 6v.
Putting it on my list of todos when I get to the electrical.
I know it's really called the Klaxon horn I remember reading a couple years ago, probably a quick google would show who invented it...his name wasn't Klaxon, but he created it early in car history, and I think it was on the Model T and the Model A. Not sure if it was on other cars or not, anyone know the history and/or if other cars had it?
I wouldn't have to honk my horn at all if there wasn't so many inconsiderate people not paying attention to where they drive...
If you pick up a used horn and it doesn't sound right: most have an adjustable tension screw somewhere near the diaphragm. Loosen the lock nut, and turn the screw while trying the horn to get the best sound.
If you pick up a used horn and it doesn't sound right: most have an adjustable tension screw somewhere near the diaphragm. Loosen the lock nut, and turn the screw while trying the horn to get the best sound.
Thanks, good tip.
The seller said it was loud, but I was asking him if it had the "right sound". Some of new ones sound pretty lousy.
I will try adjusting the screw for best overall tone. Thanks for that tip.
So lately I've been doing a bit of pondering, trying to come up with a game plan for what I need to do on my truck to make it a decent/comfortable driving truck.
These are some of the things I've come up with.
1) most important is to get the drivetrain upgraded with the 3.38:1 ring/pinion in it. This is probably THE single most important upgrade on any of these older trucks, including the AD series. Really wasn't until the 60s when things started to modernize, IMO.
2) Music. For me music is mandatory, I've always had it when driving and I need to have it in Keroppi. I don't want to destroy the classic look of the interior, so my plan is to build a mount that can allow a captive touch screen display to swing out on a hinge so it can be put back into the glove box when not in use.
3) Navigation. This pertains to Music as well, since I will be using a CarPlay device so I can play music from my iphone as well as use Maps for navigation. Suffice to say, I can use my phone, but having put a CarPlay in my daily driver, it's a game changer. These stereos will allow you to listen to either vmail or text messages, and it will let you dictate your response. These devices will NOT send notifications while your phone is plugged into the car, and while that was annoying at first, I really think this is a good safety feature.
4) This is not needed, per se, but I would like a 2nd gas tank in Keroppi, just for extended mileage. I have a gas tank that was added to the bed, the original is still under the seat. My plan is to clean that up and use it also. I have a toggle switch that will allow me to divert power and sending device from tank to gauge on dash. This is the style of switch I will use: https://www.ebay.com/itm/282501084052
5) Carburetor/fuel lines. This is not something really needed, but I will replace my hardlines and use 2 electric low pressure fuel pumps. I will be using these: https://www.amazon.com/BOXI-Externally-Universal-Pressure-Electric/dp/B07H7BRJSX/ref=sr_1_2 In addition, I have a Carter 3211S that was NOS and rebuilt by Jon Goodman, who hangs out on Stovebolt, which I don't. This is the carb for the 235 that Carter made. I have a 964S on my 235 now, I think it may have been from the original 216, but it does work fine on the 235. I will sell that once I swap the 3211S on it.
6) Bed. redo and replace wood and cut custom length metal stripping to use between the wood. Will probably use hard maple as I have a bunch of that and I will use either varnish or West Marine epoxy so rain doesn't warp the wood.
7) Fabricate mount for Suburban seat. I haven't decided how to mount it, but there's a tube that runs along the floor (top of frame for gas tank in this case). I think I can somehow use some u-bolts but may need to fabricate or weld something usable. This also gets me seat belts as well.
8) Sound deadening. panic brought up a good point about sound deadening. There is pretty much bare metal in the entire cab, so these trucks are noisy. Need to work on this little by little, there's a lot of room for improvement.
This is a list of fixes that I think will make Keroppi all that much more comfortable to drive on the highway. Others may not need these features, and if so, no harm in me updating my thread. If I can finish this list above, this will be a decent driving old truck.
Lots of sound deadening, insulating, etc. on every surface you can reach: under the carpet, firewall, door panels.
Very good point actually. I have thought about that some as well as the hood. I love the look of the side hoods, but that's pretty rattly and noisy also. I am not sure if there's a way to change the hinges to something more modern that doesn't make so much noise.
I've seen that foil covered material used with pretty good success on the AK and AD trucks. I have a new seat I need to swap out also, it's from a Suburban 3rd row seat.
I have so much stuff to do on my truck, I wonder if I'll ever be driving it merely...Previously I converted my truck to 12v, now pretty glad I did as that will help out with a radio.
You make an XLNT point on the sound deadening. Adding that to the list.
I'm lucky: for me working on it is almost as much fun as driving.
I do enjoy tinkering on it, I will admit. I'm not a professional wrench by any means, nor have I had too much experience with wrenching on trucks, unfortunately I didn't have a Dad to teach me wrenching...I just try to take it slow and listen to guys like you. I am looking forward to the day all this stuff is done, to enjoy the fruits of the labor so to speak, but I am enjoying the process...
The few cordless tools I've purchased recently are really a game changer, especially the 1/2" cordless high output impact wrench! (1400 ft.lbs. of torque)
I am learning, but I am making some mistakes...no worries, my ego's been bruised before. The pickup is pretty simple/small compared to some of my projects...
The pickup is certainly involved in the big picture, as I just kinda see myself puttering around the lake down to the hardware store in town to get some hardware/materials/etc...
So I don't need a bigger more powerful engine, yet I do need some of the creature comforts I've grown used to...stereo, navigation, cup holder! Those are all fixable in the pickup.
I can certainly understand how a hot rod can become addicting...guess that's why there's so many customs...I'm trying to keep it original looking if I can on this one (not a hot rod).
3) Navigation. This pertains to Music as well, since I will be using a CarPlay device so I can play music from my iphone as well as use Maps for navigation.
Follow up to this, still not decided but think I have narrowed down a CarPlay unit to this type, there are a couple companies that have this style.
My plan is to mound this in the glove box on a bracket that will allow it to swing out to face the unit towards the driver.
This is about the smallest I could find that would do CarPlay. This is only about 2-1/2" thick and it has solid looking unit that can mount to the sides.
Just don't use it to get you through the mountains when the major roads are closed. They were still pulling stranded people out a couple of days ago from the last round of storms and the idiocy they create. My 2007 Silverado had a Pioneer AVH-P1400DVD in it when I got it. I found a copy of the 110 page owner's manual, each page more confusing than the previous page. Some features include SAT Radio Ready, Bluetooth, iPod-iPad, DIVX,DVD, Dolby Digital HD Radio, reverse cam......... I've only had the truck a few months but have already learned to turn the radio on & off, control the volume, and switch between 2 FM stations. LINK
Ok, after more searching I wasn't sure if the previous unit was using WinCE for the system or not, as I saw another that appeared to have the same body which runs on WinCE.
I then found this last night, which could have Linux in the system, and it does support Linux storage which is great for me. This is the new contender.
Just don't use it to get you through the mountains when the major roads are closed. They were still pulling stranded people out a couple of days ago from the last round of storms and the idiocy they create.
No, actually I'm fairly lucky as I haven't hit any snow, even going over the hills during this brisk winter. 175 had one section where rocks were falling and workers were cleaning up, but no snow.
Originally Posted By: Beater of the Pack
My 2007 Silverado had a Pioneer AVH-P1400DVD in it when I got it.
Those are nice, and I would rather have a Pioneer, price is also good. However the size would make it more difficult to mount on some type of arm as it's 6" deep. The one I just posted above in this post has only a small portion, it might even be possible to mount that under the dash with the touch display sticking up, I need to look at that and see. Either way the Linux storage is a huge plus for me as I keep all videos and images on Linux.
NOTE: although I am looking for a stereo to eventually put in my '46, I don't think I'll buy it until I get my drive train conversion done, no reason to.
That looks like a good choice for you. A good price also.
Mine was the choice of the last owners. It had miles of wire for remote speakers and screens. They must have been in charge of entertainment at the job site. I'm figuring it out slowly. I carry the manual in the truck. I just ordered a new backup cam & harness for my model. These guys may have worked construction but they were not electricians.
That looks like a good choice for you. A good price also.
Currently it's my plan to get that unless I see something better. I like that it has a remote available for the steering wheel, since I kinda feel it's a distraction even for the radio/player to fumble with captive touch screen, just less so than a phone.
The backup camera is a plus to, just running a couple wires from the camera under and along the chassis...
The '46 is my toy pretty much, something I've longed to want...it's gonna take some work but will always be a 70+ year old truck. I don't want to cobble it together if I can help it, but it is tempting. I will go out of my way to mount this in a way that it is the most usable without destroying the original looks of the interior, which is why I'm been thinking of an swing arm inside the glove box. Could also be a floor mount such as a post, that could work and be able to remove in a pinch.
Starting to look at resurrecting this project, doing the rest of the cleaning in my office/handwork-shop where I am rebuilding the T5 today, I still have about half left to move out to the garage and figure out where to stack/store. I used to do reloading on the metalworking bench, so have a ton of equipment just piled up in boxes with cartridges, bullets, primers, powders, presses, trimmers, et al (this stuff is heavy!), I just need a clean space to startup again. Tomorrow is Spring, so timing couldn't be better...
Spring cleaning to get on with my project once again.
I used to do reloading on the metalworking bench, so have a ton of equipment just piled up in boxes with cartridges, bullets, primers, powders, presses, trimmers, et al (this stuff is heavy!)
Interesting, I currently compete in ELR events myself, been doing it about 4 years now! I'm also prepping to break the current ELR centerfire record.... There needs to a subforum here for guys to talk about non-car related things....
RUSTY BOWTIE has a forum for that kind of thing and also a garage gripes forum. Not a lot of inline stuff though. When I get my shop sorted I'll have to move on to the reloading room.
Interesting, I currently compete in ELR events myself, been doing it about 4 years now! I'm also prepping to break the current ELR centerfire record.... There needs to a subforum here for guys to talk about non-car related things....
That's exactly why I got the 6.5 Creedmoor parts to build a bolt action, quite a bit less powder than 308 and can get out to 2000 yards. I do have another tactical 80% receiver and may try to do a 338, but you know very well, they require a lot of powder...I got to shoot a 50BMG once, we can't own them in Cali anymore, but existing ones were grandfathered in. You wouldn't get very many reloads with a lb. of powder on those...I digress...but the bullets are also pricey for the L338M as well as the match grade cases. I pretty much use match grade with all my supplies. If you're taking the time to reload them yourself, you might as well have the best, IMO.
This is where I'm at, you can see some of the supplies still against the far wall...believe it or not, this is about 1/2 cleaned!
After spending this whole week in the cleanup mode you just don't know how good that picture makes me feel.
Yeah, wasn't too proud of that, but as things evolve over time things just get put in space that was not being used.
Not quite there, but enough for tonight. I made good progress, and if I never stop on another primer in my bare feet for the rest of my life, it will be too soon. I have no idea where they all came from, but I kept finding empty brass cases and those damn primers hurt when they're turned with cup up...
Pretty much ready for work also,
I know you're probably wondering what the woodworking bench looks like on the left side of the office and it's still a mess, but will have more to move to the garage...that will need to wait. What I needed mostly I got, a clean desk for work and a clean enough bench to finish the T5 and rear carrier rebuild.
What a big improvement! I've never been barefoot around primers but I put a rusty nail all the way through my boot & foot when I was a kid. My folks were rooting for lockjaw. I worked all day yesterday sorting tiny bits from 160 little plastic drawers. The results were hardly noticeable. Probably could have thrown it all in the trash and in a week forgot I ever had it. This is a holdover from being raised by depression era parents, the original preppers. "You might need that! " With a 30 mile round trip to the hardware store + gas prices they may be right.:D
What a big improvement! I've never been barefoot around primers but I put a rusty nail all the way through my boot & foot when I was a kid. My folks were rooting for lockjaw.
Damn, those Z Parents are tough on the kids...
Since my wife is Japanese we don't wear shoes in the house, and I always leave my sandals at the door. I have a about an 8' commute to work, and keep a pair of old sandals to walk across the deck I built between the master bedroom and office. The door in my master bedroom is the only thing not permitted on my house. The shop, electrical, foundation, et al were all permitted and inspected. The office started out as an office/music-study, but it turned into yet another shop to do handwork. Hence, the wood and metal which I desperately try to keep separated.
Originally Posted by Beater of the Pack
I worked all day yesterday sorting tiny bits from 160 little plastic drawers. The results were hardly noticeable. Probably could have thrown it all in the trash and in a week forgot I ever had it. This is a holdover from being raised by depression era parents, the original preppers. "You might need that! " With a 30 mile round trip to the hardware store + gas prices they may be right.:D
My take, I'm lightening up my life. This goes for supposed <cough> "friends" that I hung out with occasionally that didn't think the same way. I don't need any extra baggage in my life. The reason I started to realize that the Inliners will only be a time suck if I am to keep pursuing to change it. Do I need that in my life? Nope, I don't. The Inliners had their chance, they should have taken me up on it. My local chapter you might ask? I do go sometimes, but honestly they're more interested in going to a car show...car shows keep my interest for about 5, maybe 10 minutes, so I think the problem is me, not them. I wanna get greasy, I want get together and wrench with guys, talk about making mods on my truck, stuff like that...I'm different than the members in the Bay Area Inliners.
Originally Posted by CNC-Dude #5585
That's good progress right there....!
You probably never stepped on a primer either... Honestly I don't know how so many of them got under/behind boxes, behind stuff I swept up, etc...the small primers especially, I can barely see them on the dark floor but I can hear them...this is not to mention how much reloading supplies I acquired when I was shooting regularly. I just put the last of the loaded ammo in the safe with the receivers. I know nothing, I see nothing, I hear nothing, I am nothing. Molon Labe!
So, all that said guys, my '46 pickup is a part of that "make my life simpler" plan, it's so simple compared to modern cars and trucks. No computer, no ECU, no fuel injection. I don't even have a radio in it! ( but that will change, you can bank on it! ) When I'm at the lake for good (will be a few years most likely), I will be puttering down to Kelseyville Lumber to pick up some hardware and building material, and most everyone else can leave me alone.
EDIT: Scott, Tom, do either of you have a 6v car/truck that you would use a 6v-12v converter? Handy for a cigarette lighter to charge/run your phone. I will even pay the shipping for either of you if you can use it. I have since converted my '46 to 12v so there's no going back. Brand new Chinesium.
No 6-12V converter here either. I have stepped on a few primers before, it is surprising how they end up in the most obscure places when you are prepping brass.
If my wife made me take my boots off our hardwood floors would not need the work they do.
If I didn't take my shoes off, I'd get my head beat in...j/k It is something do like, I'm a barefoot kinda guy, and don't like socks unless I wear my boots. This can be a problem working metal in the garage, small chips will get dragged into the house by the garage door / family room, so I try to sweep up occasionally while I'm working and going in/out, but I have gotten them in my feet. My wife less as she wears a pair of crocs (indoor ONLY) when she works in the kitchen.
Originally Posted by Beater of the Pack
All my vehicles are 12V now.
Originally Posted by CNC-Dude #5585
No 6-12V converter here either.
I'll stick it in the classified section, if someone wants to pay the shipping.
Originally Posted by CNC-Dude #5585
I have stepped on a few primers before, it is surprising how they end up in the most obscure places when you are prepping brass.
I never remember dropping so many, but in the past I have found a lot of them cleaning up. I try to keep plastic tubes on the press so they don't fall on the floor when de-priming, I have 3 or 4 cutters I use on the mill also from Giraud for 45ACP, 5.56, 308, possibly one more. These size the neck properly to keep everything consistent. I use a wet tumbler with Lemi-Shine. Some folks use stainless pins in the wet tumbler but I find they come out spanky with nothing but water/Lemi-Shine and brass. With the Dillon 650 I used to own I could reload about 800 rounds in 2 hours. I've heard they can do 700/hr, but I never do that much of one size, my 800 with be 2 sizes at min, more often 3. I have only moved all the heavy bullets and supplies into the garage, need to figure that out still, but...
With all of this out of the way, I will finish the bench and get the T5 spread out for identification/replacement with my parts kit I have from Transparts Warehouse. I have all the parts together, the adapter plate I had Vintage Metalworks make for me, the modified tail shaft cover by Dan up in WA, the bearings for the rear axle and carrier. Carrier is about half done, has the 3.38:1 ring gear, I need to put the pinion in it, and I have a gasket kit for that. Those outside bearings were tough to find as were the inner carrier bearings. Hopefully all are correct size.
I'm pretty sure I'll need to remove the old leaf spring mounts and re-weld them on at the correct angle, but that will be after I get the rear axle rebuilt entirely. Beater, you can barely see, but behind the tail shaft cover is the Rust Doctor I bought. Still not sure if I will use that on the axle or not, but I do like the looks of it.
Question for either of you. When you do a rebuild for part, say a trans, carrier, or even an engine, do you lay the parts out and organize the replacements with them, or have you done it enough that you know where most parts go anyway? I'm trying to understand the best way to approach this, I am planning to lay everything out in 2 different area, so that I keep all the original parts together, and use the replacements as I put each section back together. Any brilliant tips on organizing and keeping track of everything? I try to use ziplocs to hold small parts together. But cleaning the old parts is where quite a bit of time is spent for me.
See if you can find a good exploded view line drawing you can enlarge and print off. When you disassemble large assemblies like the main shaft, take pics with your phone as a backup incase the drawing isn't good quality. You can layout long pieces of cardboard to lay the pieces on in the order you take them off the shaft. With a sharpie, you can number them left to right or vice versa, then take a pic of that disassembled and laid out. The shifter rail can be tricky, they often have detent pins that are spring loaded and can blast off if you remove a rail too quickly before you realize they are there. Take plenty of pics to aid in reassembling...
I was an expert with '39 Ford trannys when I had an Olds in my '38 coupe. The first Morris Minor trans I took apart scattered it's self all over the shop. What Scott said, Exploded views & lost of pictures. A service manual is good and online videos are a great help (usually). Lots of room & a clean workplace.
I couldn't agree with both of you more, and will say that I do have XLNT online videos I'm referring to from the gent I bought most of the sealants, and a couple parts to upgrade, such as a front bearing retainer that is milled from solid material. The original allows the bearing to float inside a cover over it, but under hi stress the shaft can move and/or deform things. Before either of you laugh, cause I know my pee-cup is never gonna see that type of torque that a racer is gonna see, but it is a better part and the cost is minimal in the overall picture. I don't plan to rebuild this transmission ever again. Since this is a World Class T5 the overhaul kit includes all replaceable parts including the syncros and needle bearings. Again, I don't need the WC T5, but I got it and see nothing wrong with having best in class in my pee-cup!
BTW, I have mentioned this tech tip previously, and will mention it again. You can get boxes for free at the USPS, and you can have them deliever packs of 2 dozen to your mailbox, in my case it's at my front door. they will leave them at my front door, it don't get easier than that! I use them to layout stuff when I do a project like that, cause yeah, I do look for diagrams and such, and the guy I bought some parts from does sell a rebuild book for the T5, but I see no reason to spend the $35 to buy it when he did a video on YT and another with EricTheCarGuy. And quite honestly the guy is a real pr!@$ to hobbyist like me cause I bought his retainer and not his book. I don't need any signed book, I need a rebuilt T5 done properly. Also, I think it really upsets him that I bought the anerobic gasket maker from him as I don't need it either, I just think it works better and mostly easier to clean up. I'm trying to simplify my life!
As you can kind of see I have the carrier parts on the right side, and the T5 parts on the left. A couple small parts need cleaning still, but most of the T5 parts are cleaned, and I have the sealers, anerobic gasket maker, assembly lube and even a free tub of Anti-seize because PaulC sent me the wrong product. That's the only nice thing with him.
This last pic is for Scott...the damn stuff just never ends...found 8 boxes of 308 ammo on the shelf, along with a bunch of magpul parts and a few gunsmith tools for triggers and adjustments, a set of lock rings for my reloading presses, etc...and I found some scope founds and 2 80% receivers that are already milled. My State claims the residents must apply and get a serial number if we want to build our own firearms. These were milled before that law applied so they go in the safe and those pukes can drink off my sweaty 'nads. Got a nice set of scope mounts. Those will come in handy when I build the bolt action!
And thankfully, I think I've cleaned all the primers away from harms feet, not a single primer did I step on today!
That ammo was a good find considering today's market. Fortunately our laws here in the South are a lot more forgiving than in other places. We had a guy join our company that relocated here from Cali 7 years ago now. He has several AR's that he was required to do that special mag release button swap on. We just shook our heads at all the freedoms that state has taken away from people in regard to firearms. We keep teasing him and saying that before long Cali may require AR owners to do a bolt action conversion or a flintlock conversion....
It's called a "Bullet Button", the idea is you use the bullet of a round to press the button to release the mag, that's what makes it legal. I have 3 that are "featureless", meaning they don't have the evil features which include pistol grip, adjustable stock, no vertical foregrip. I use the Thordsen FRS gen II stocks, it's pretty comfortable and is not considered a pistol group. There are some with fins on the rear of the pistol grip to allow you to hold it from the front so it can't be considered a pistol grip. And there are various wrist supports and short devices to get around the pistol law, Cali doesn't allow any AR pistols. I have a few, but none are assembled. I milled them prior to pistols being illegal.
We should take this to the off topic forum when it gets setup.
This post has as much to do with a forum on Truck Talk and inline engines as your post. The diatribe below doesn't belong here and neither does any ruminating about your personal life and habits.
If you want to talk about yourself and other non-inline interests, take it to the Bench Racing forum and start a thread there. Quit mucking up technical threads with ramblings about yourself.
In getting the bipartisan Brady Law passed in 1993, Jim and Sarah Brady accomplished the inconceivable. But there�s more work to be done � and only when we work together will we solve this problem. In order to do that work, we must accept these three truths about America�s gun violence epidemic: 1) Gun ownership demands responsibility; 2) Those empowered to do so must uphold existing gun laws; and 3) Gun violence is a uniquely American problem that impacts all races and ethnicities in the country, but nonetheless exacts a particular toll on Black and Brown communities.
A problem with so many root causes, requires us to address it from all angles. Brady therefore emphasizes education, litigation, and legislation to ensure that every community is safe, not only from mass shootings, but also from the daily toll of gun homicide, domestic violence, suicide, unintentional shootings, and police violence that plagues so many communities.
It�s time we unite people of all races and ethnicities from coast to coast, progressive and conservative, young and old, fed up and fired up, to work with us and end what is taking so many lives. It's in our hands.
DONATE TO BRADY
Brady�s lifesaving work in congress, the courts, classrooms, and communities across the country is made possible thanks to you. 100% of your donation goes to fight gun violence.
These donations support the Brady Campaign, Brady�s 501(c)(4) organization, and are not tax-deductible as a charitable contribution or business expense.
If you�d like to make a tax-deductible donation to the Brady Center, Brady's 501(c)(3) organization, please visit this page https://www.bradyunited.org/donate/tax


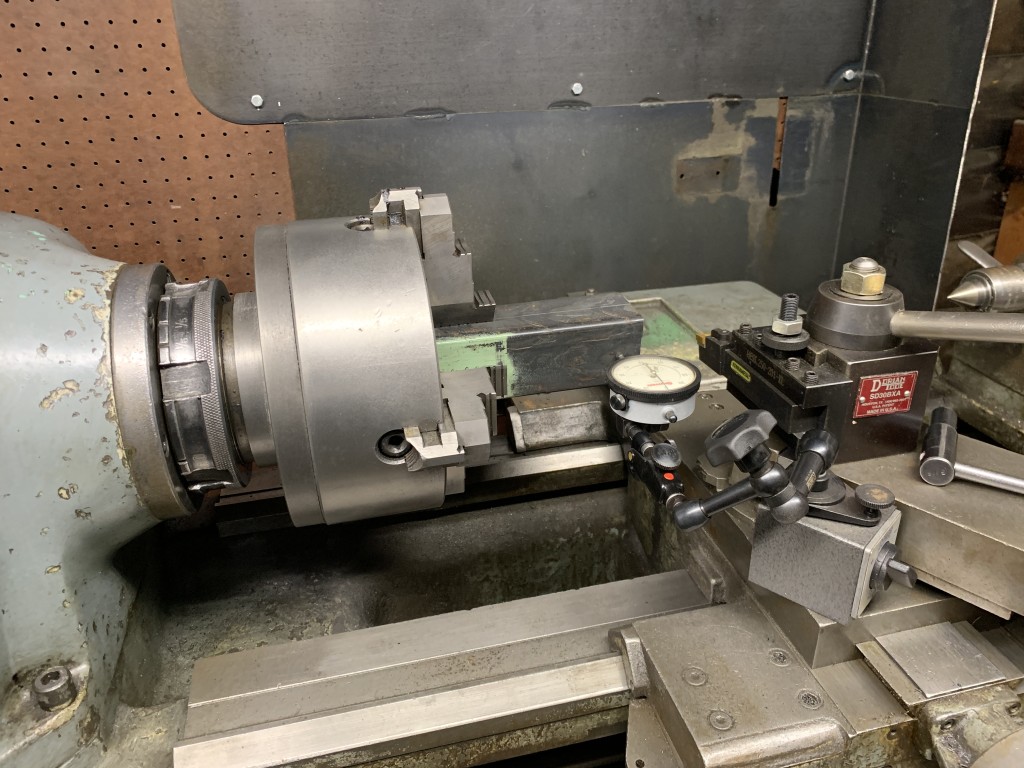
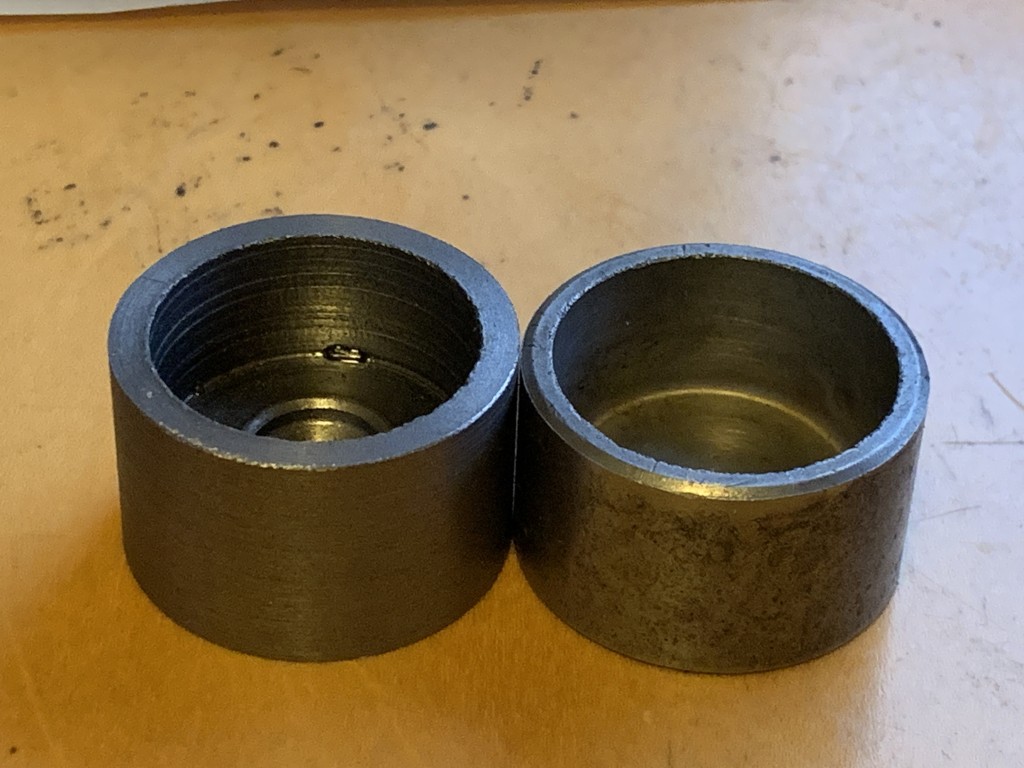


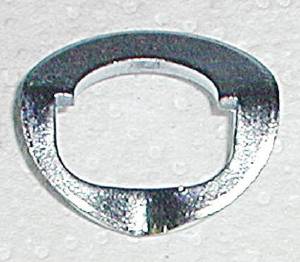


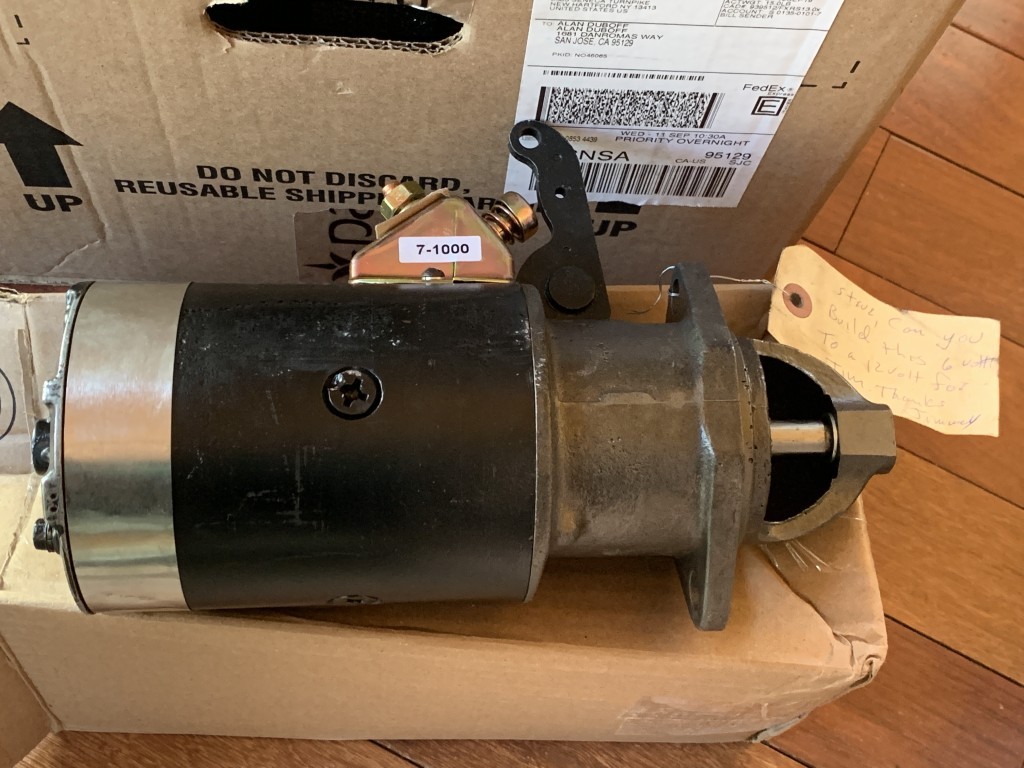
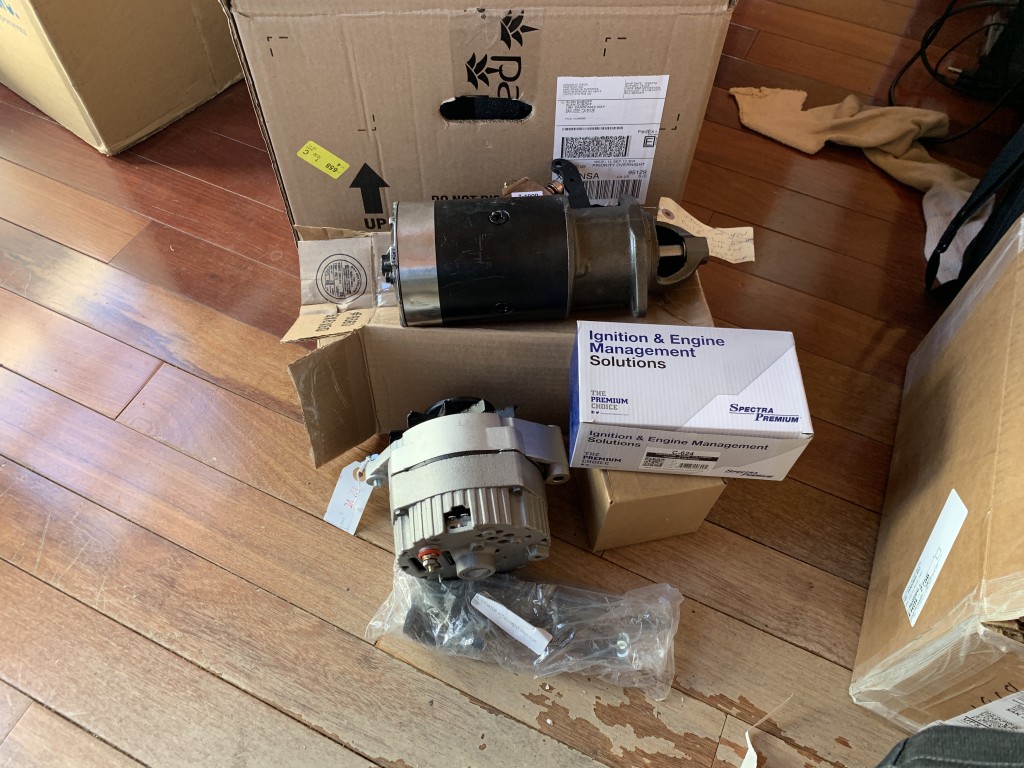


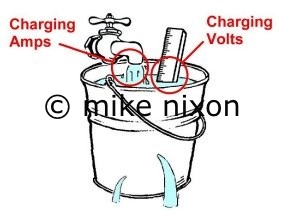
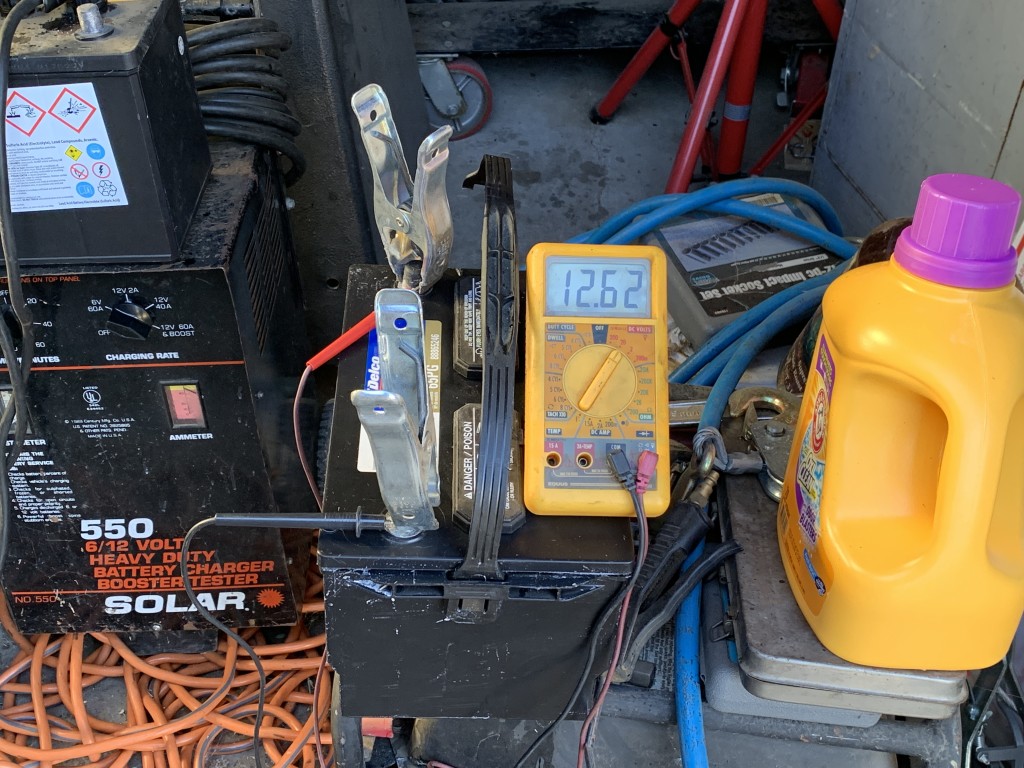
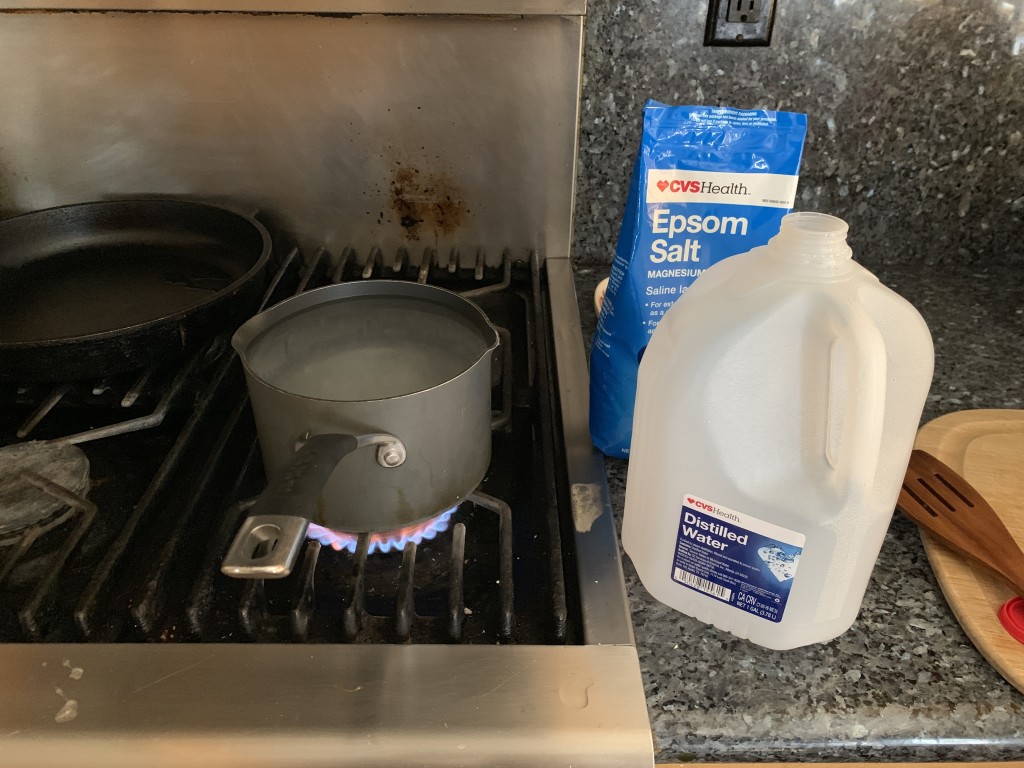
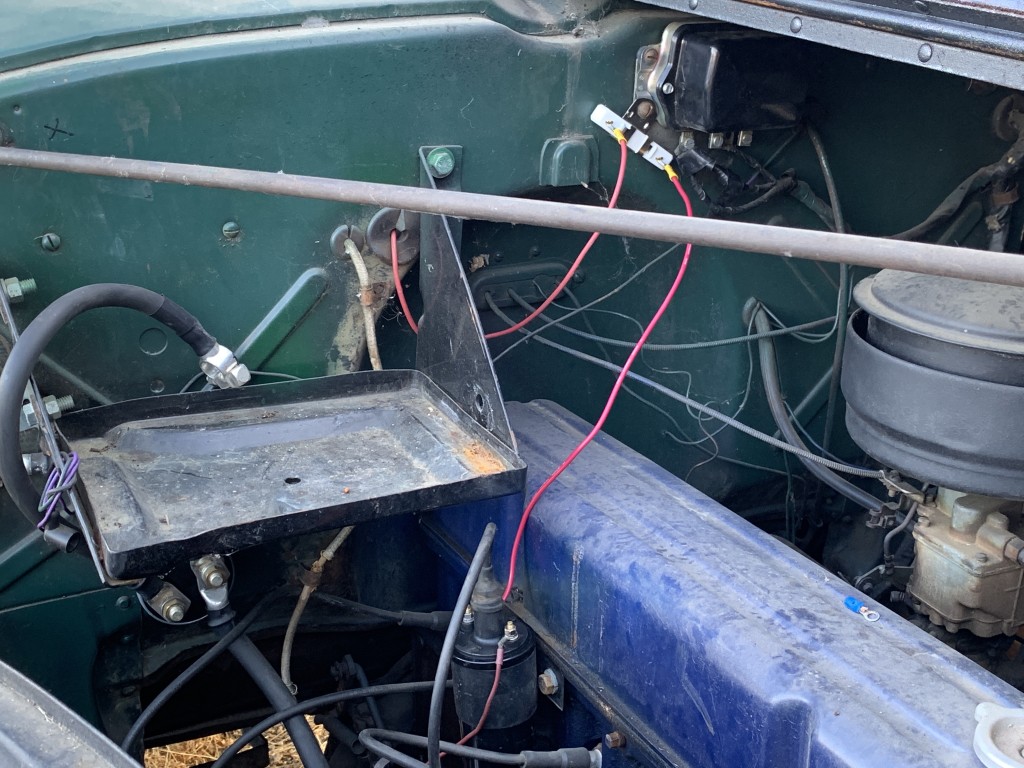

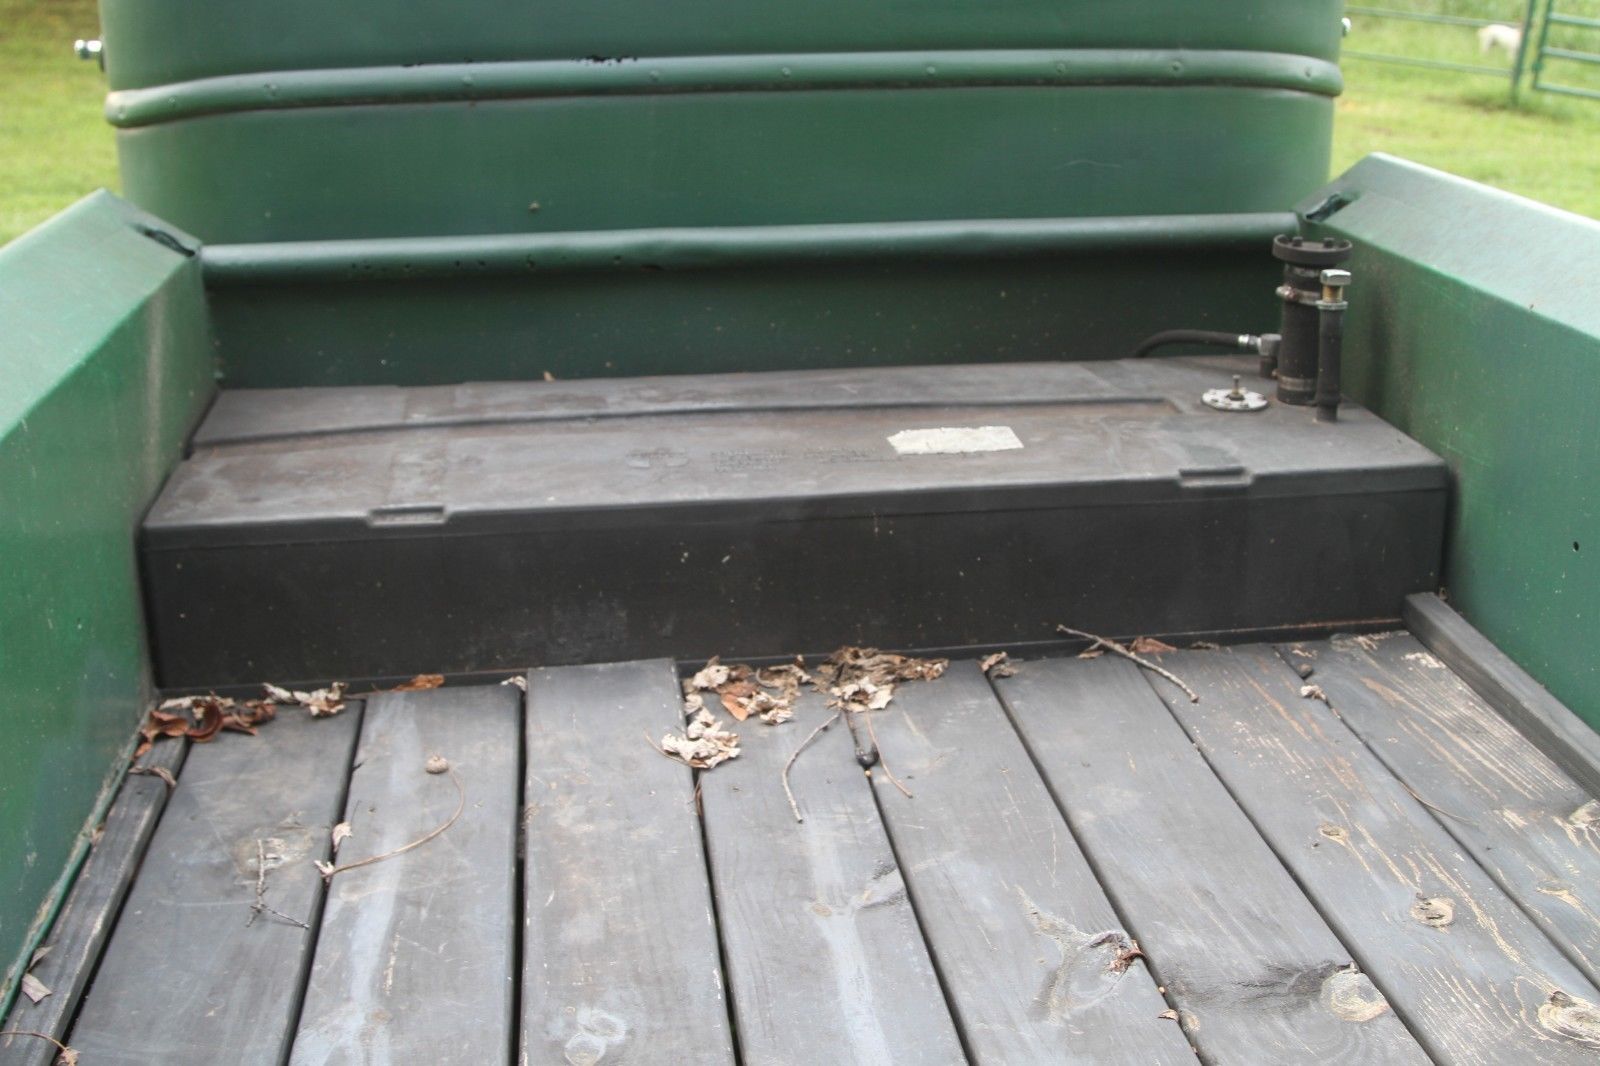


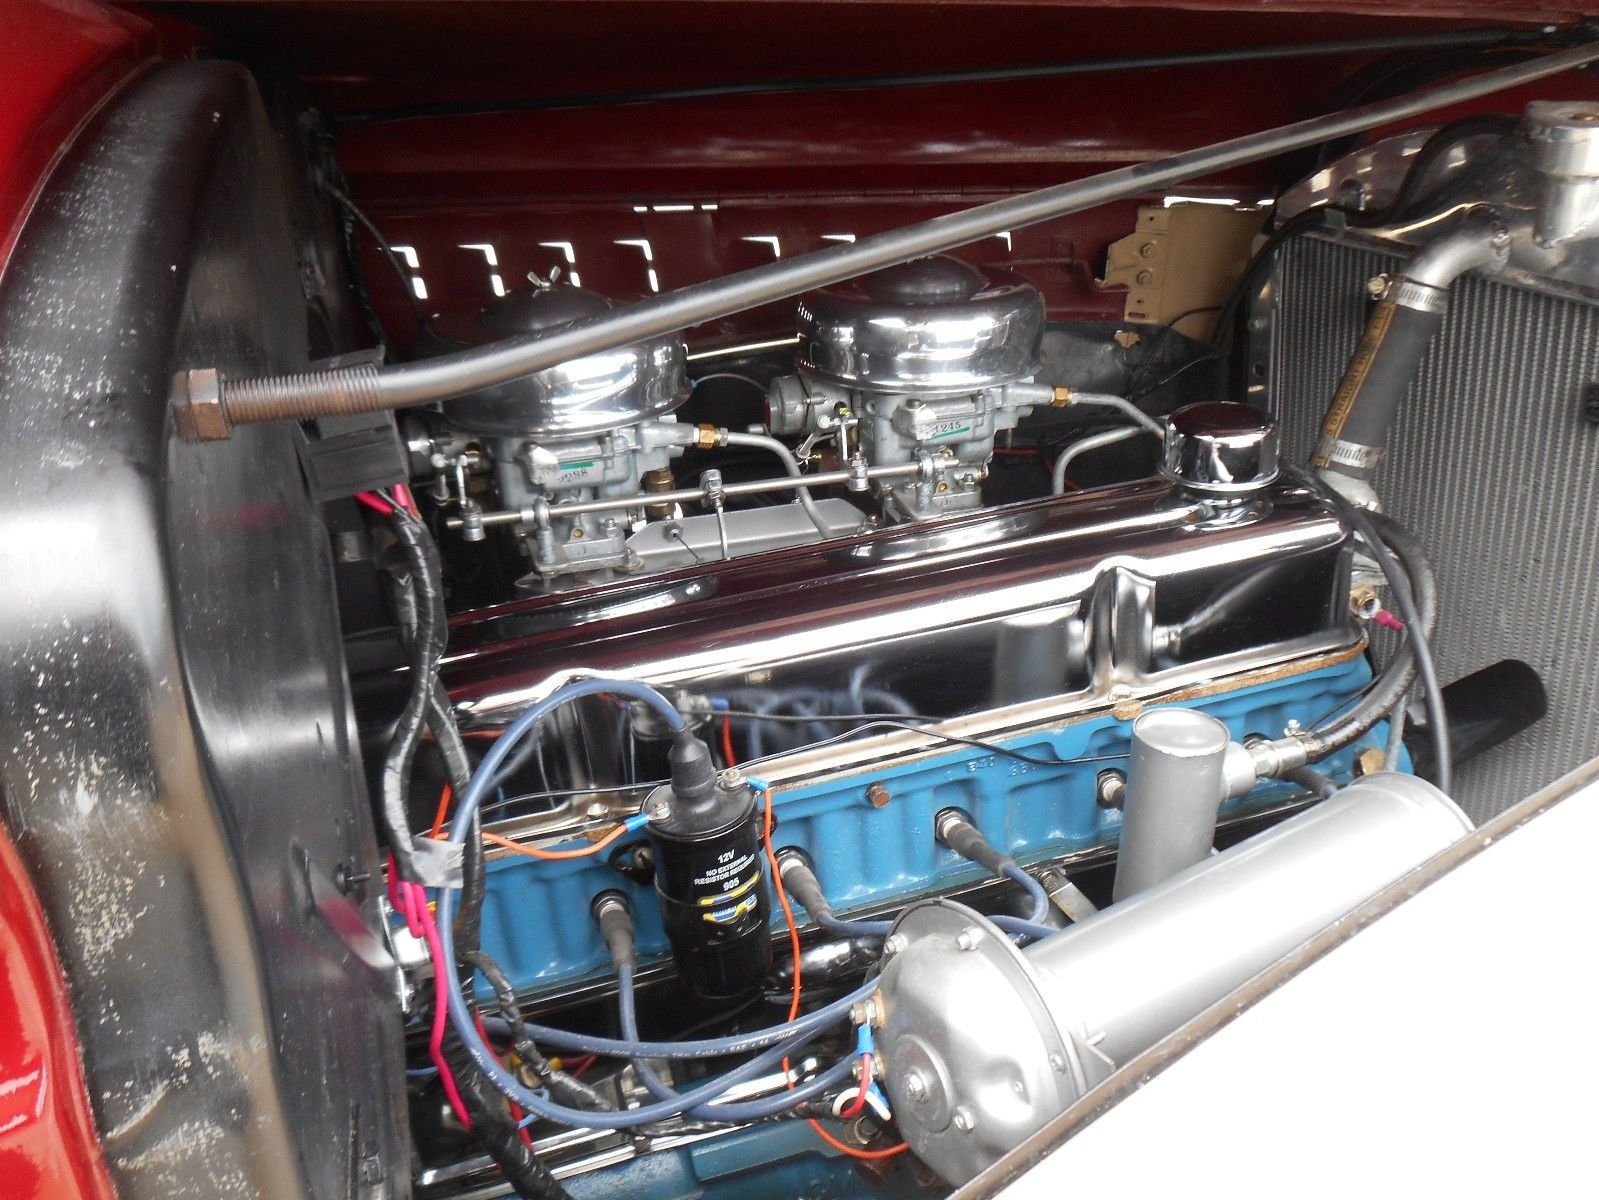
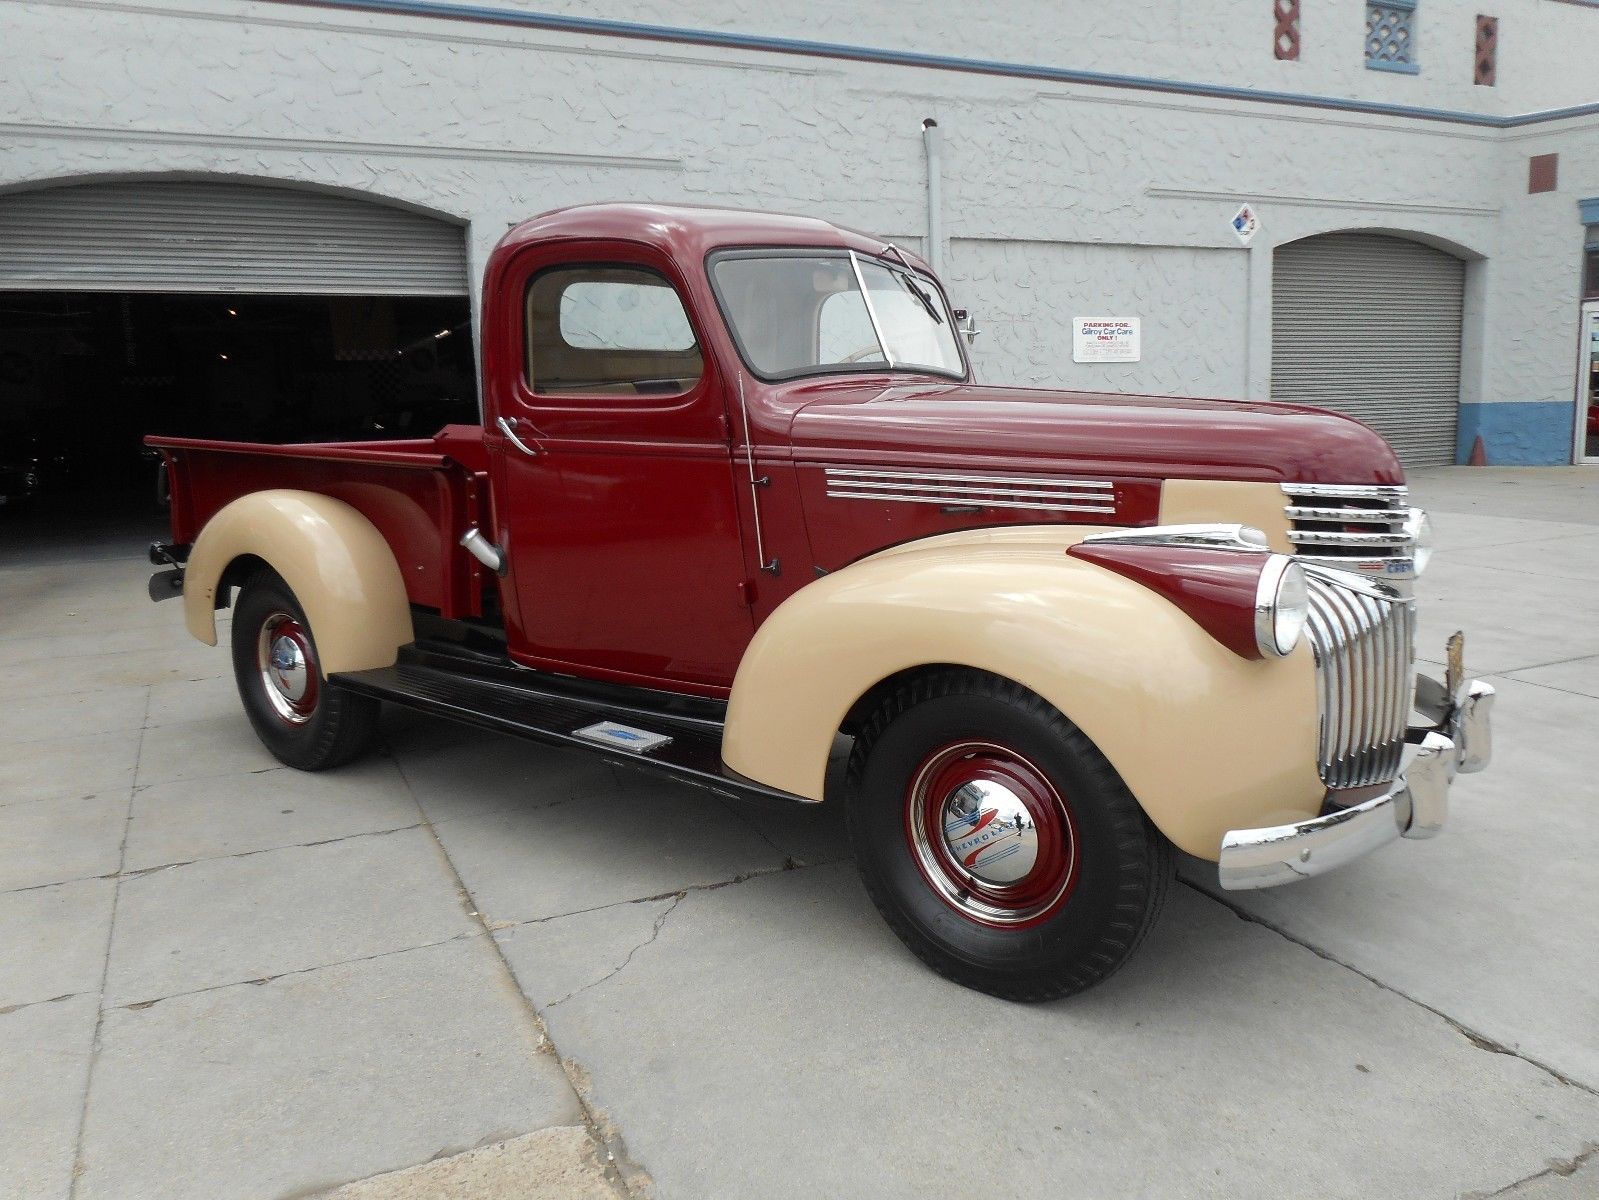
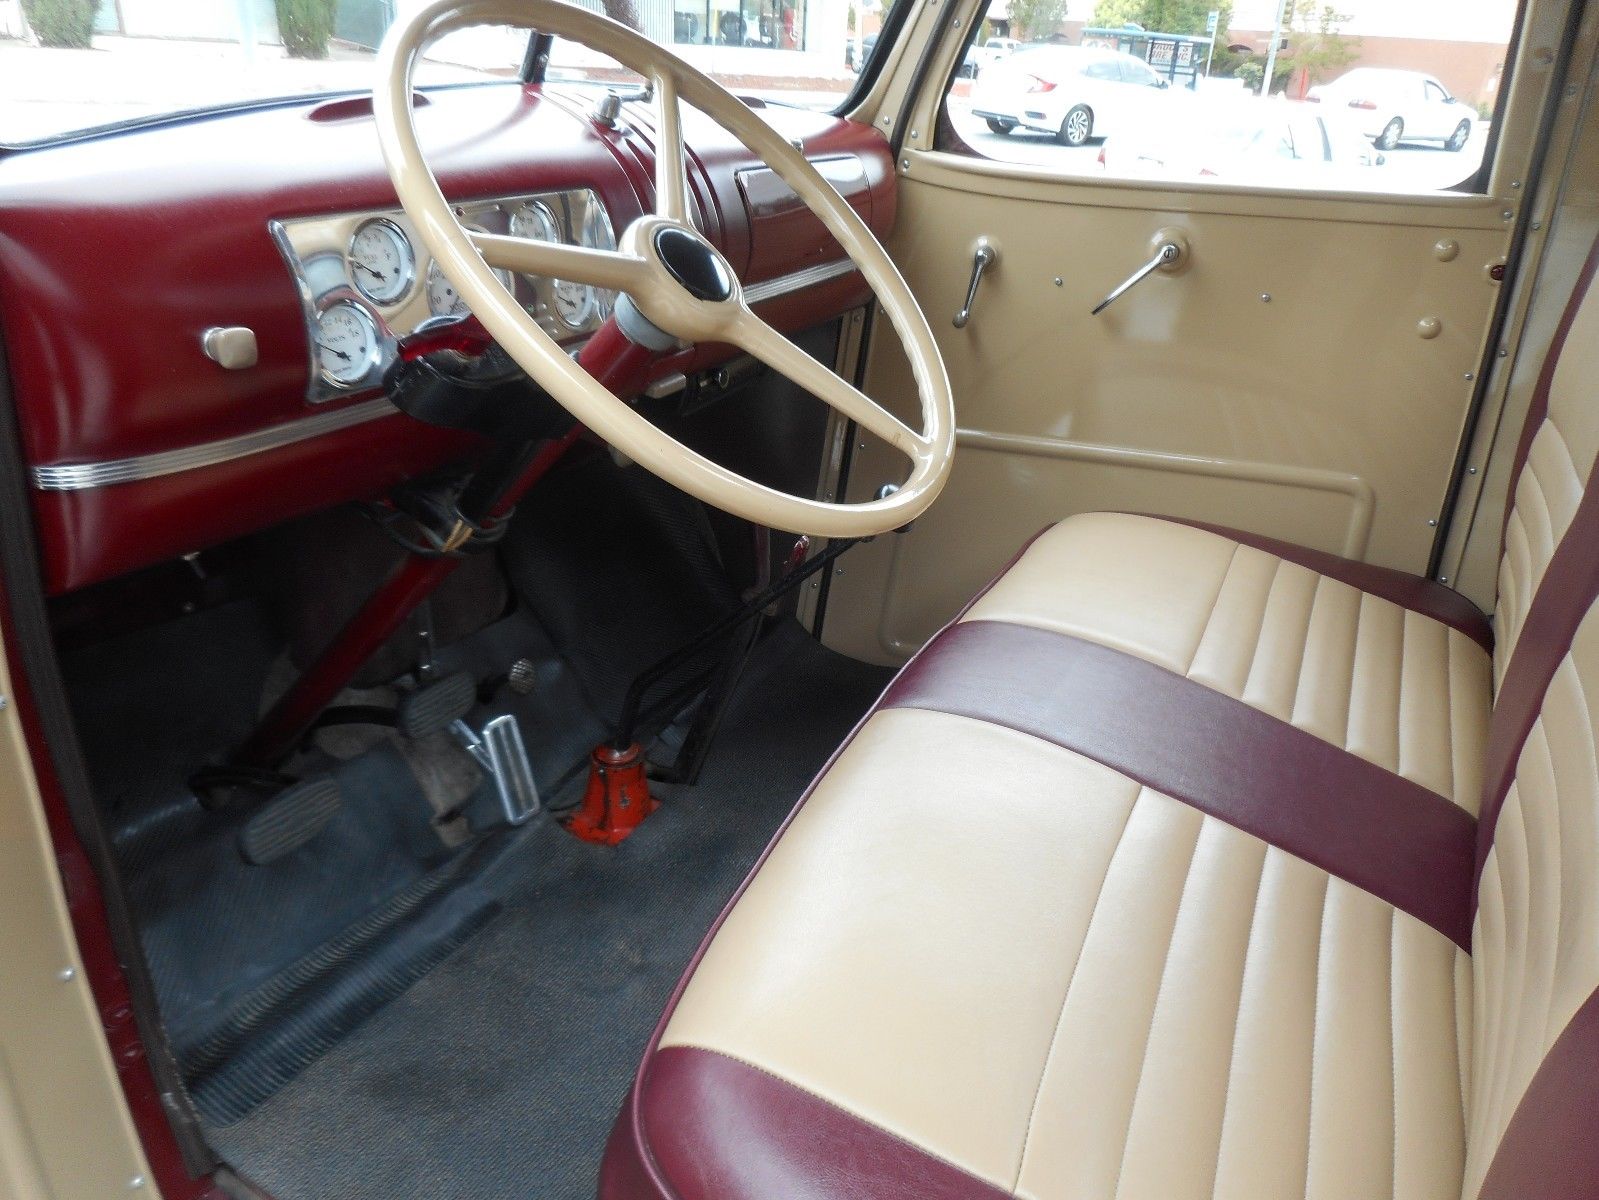


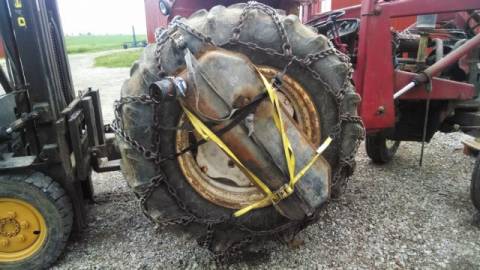

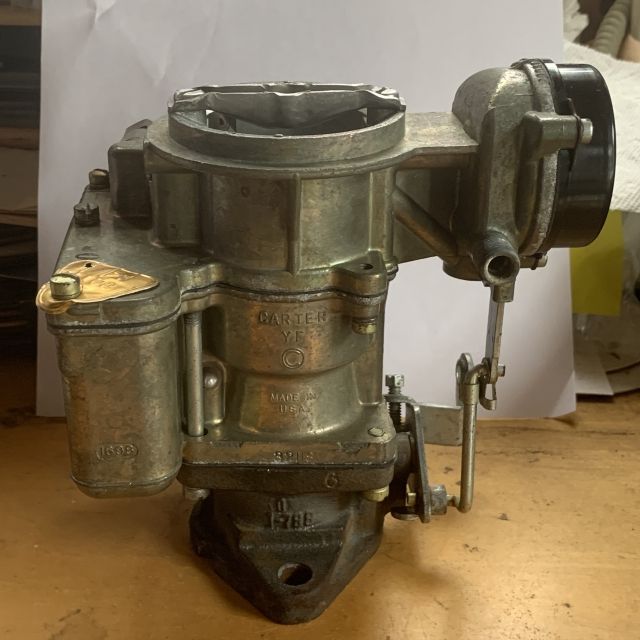
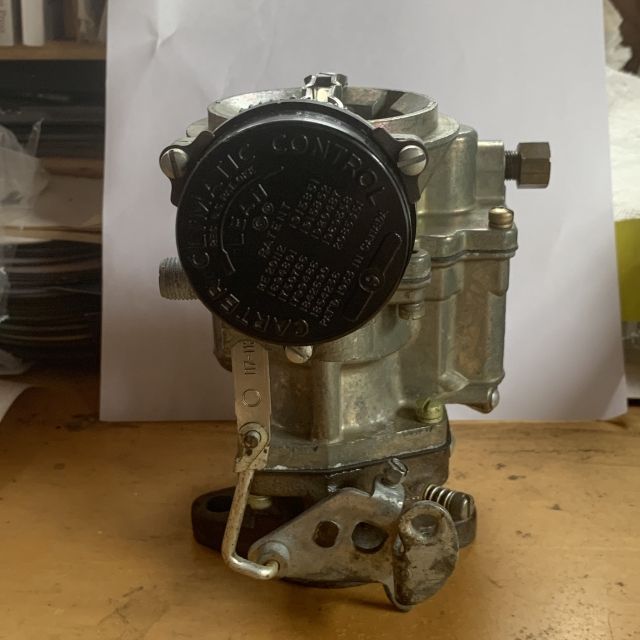
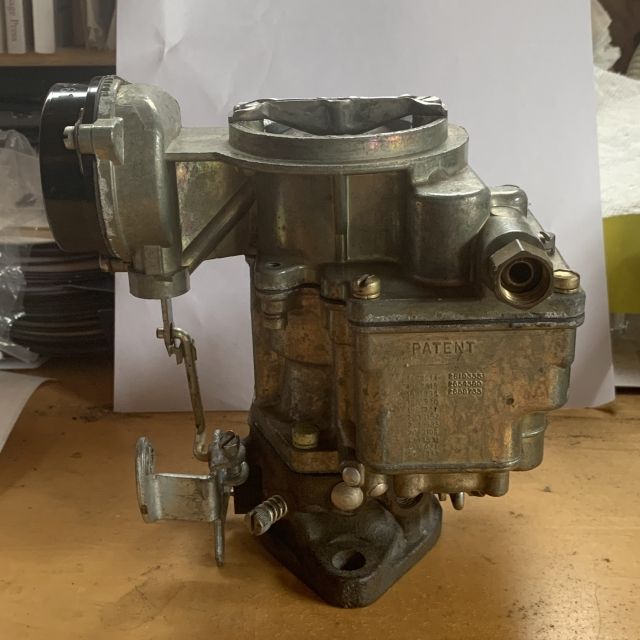
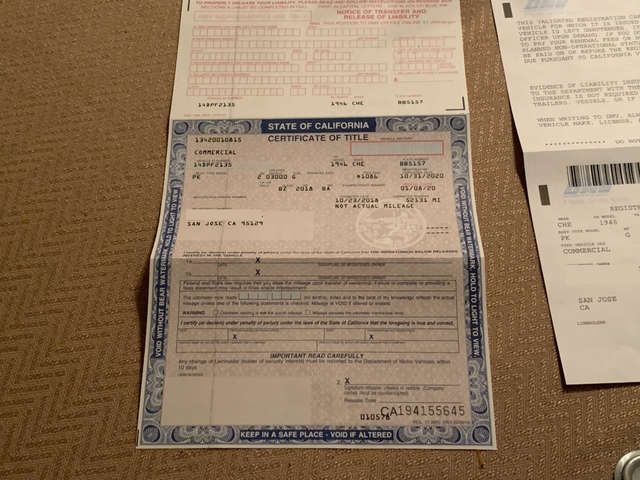
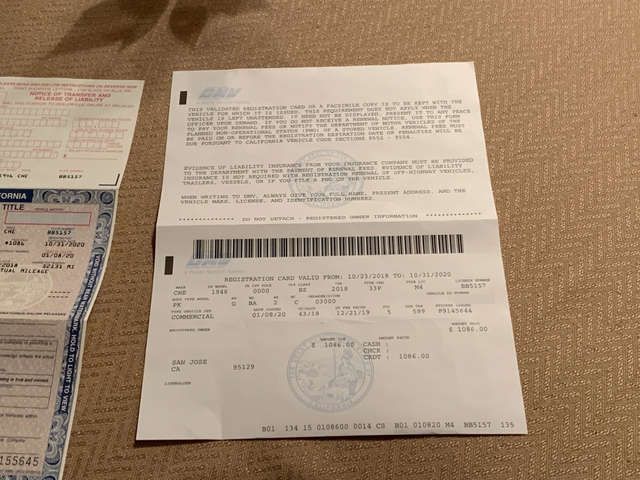

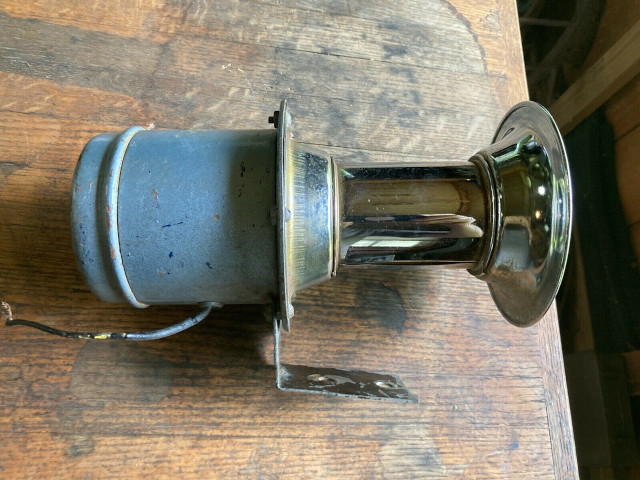
![[Linked Image]](https://www.inliners.org/ubbthreads/ubbthreads.php?ubb=download&Number=619&filename=office-mw-bench-getting-cleared.jpg)
![[Linked Image]](https://www.inliners.org/ubbthreads/ubbthreads.php?ubb=download&Number=620&filename=mw-bench-after-spring-cleaning.jpg)
![[Linked Image]](https://www.inliners.org/ubbthreads/ubbthreads.php?ubb=download&Number=621&filename=desk-after-spring-cleaning.jpg)
![[Linked Image]](https://www.inliners.org/ubbthreads/ubbthreads.php?ubb=download&Number=640&filename=IMG_4901.JPG)
![[Linked Image]](https://www.inliners.org/ubbthreads/ubbthreads.php?ubb=download&Number=641&filename=IMG_4902.JPG)
![[Linked Image]](https://www.inliners.org/ubbthreads/ubbthreads.php?ubb=download&Number=642&filename=IMG_4903.JPG)