|
|
Joined: Feb 2014
Posts: 505
Major Contributor
|
OP

Major Contributor
Joined: Feb 2014
Posts: 505 |
I'm new to the forum and thought I would post my plan for my 1978 250cid in my Camaro. I found a 45k mile garage stored non-running '78 base model Camaro in bright red with a 250cid L6 and 3spd. My plan was to just swap out a 350cid and 4spd into it and store the L6 for rebuilding and putting back in someday to keep it original. But I noticed the rubber fuel lines were rotted, negative battery cable was frayed, spark plug wires were on the wrong cylinders and a few other things which got it running again. So after a hard last year and a half financially, I've decided to cut my costs and just keep the L6 in there and make some budget upgrades to make a nice street level daily driver that goes hard from stoplight to stoplight and can cruise at highway speeds. Plus, I hate to take the L6 out and loose the attention that it gets online and around town when people notice something other than a small block in a second gen Camaro.
I've been reading all the chevy L6 websites and got Leo Santucci's book researching what upgrades can be made. I obviously want to keep it as low budget as possible and match the components to each other and the intended use. I can also do the build in stages so I can afford it as I go along. Here's the overall evolving plan for the end product:
Carb: Holly #8006 390cfm with electric choke and vacuum secondaries
Air filter: 9" with 2" filter (until a ducted fresh air intact can be fabricated)
Intake manifold: Offenhauser 5416-LK
Cylinder head: pre-1975 open chamber, screw in studs, hardened exhaust valve seats added, 4 angle + valve job, back cut valves, clean up casting flash, blend throat to .274" less than valve size, polish chamber and exhaust port (may upgrade to 1.84"/1.6" valves, remove head bolt bosses, install intake lumps and port match if funds allow)
Gaskets: Fel-Pro 8006 with 0.40" thick with 3.875" bore and 9786 intake/exhaust seem like the only choice
Camshaft: hydraulic with between .450" and .500" lift, price-wise Comp Cams cam & lifter kit, springs, and keepers/locks seem like the best buy
Pistons: stock for now, the short block is low mileage and in good shape, so I'd rather not rebuild it yet (later on probably 307cid flat tops for proper quench and tailoring the dynamic compression with cam, head chamber and deck height)
exhaust: 292cid heavy tuck exhaust manifold with 2.5" outlet, 2.5" single exhaust and muffler
Ignition: stock HEI with some an Accel Super Coil, replacement cap and rotor, spring kit and 8mm wires
That's parts and work list, but as I said it's evolving with new knowledge. I'm trying to get the most bang for the fewest bucks.
|
|
|
|
|
Joined: Oct 2007
Posts: 5,015 Likes: 47
1000 Post Club
|
|
1000 Post Club
Joined: Oct 2007
Posts: 5,015 Likes: 47 |
That sounds like a good plan for a fun, reliable, peppy, daily driver. Some here can not let go of their inner racer. They will be here soon to complicate things. Please don't mention a 194 head. 
"I wonder if God created man because he was disappointed in the monkey?" Mark Twain
|
|
|
|
|
Joined: Feb 2014
Posts: 505
Major Contributor
|
|
OP
Major Contributor
Joined: Feb 2014
Posts: 505 |
That sounds like a good plan for a fun, reliable, peppy, daily driver. Some here can not let go of their inner racer. They will be here soon to complicate things. Please don't mention a 194 head. That's why I said open chamber for the cylinder head. That's the recommendation I keep seeing to avoid valve shrouding, better to start open and mil the head. I forgot to put my pictures up, here's my before when I bought it:  And after I degreased and did some painting: 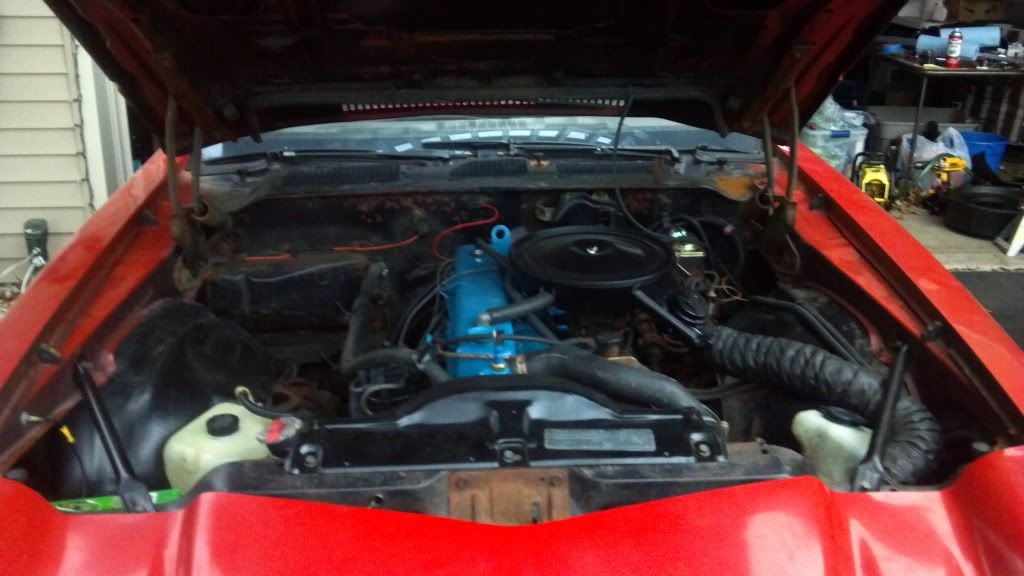
|
|
|
|
|
Joined: Feb 2014
Posts: 505
Major Contributor
|
|
OP
Major Contributor
Joined: Feb 2014
Posts: 505 |
I forgot to mention ARP cylinder head studs on my list, both because they are recommended for cylinder head durability and because I will probably take it off at least once during the upgrades and the studs will pay for themselves at that point over using bolts.
|
|
|
|
|
Joined: Aug 2013
Posts: 78
Active BB Member
|
|
Active BB Member
Joined: Aug 2013
Posts: 78 |
looking good! Standing by for more detail and progress!
Last edited by moregrip; 02/19/14 03:48 AM.
|
|
|
|
|
Joined: Nov 2013
Posts: 482
Contributor
|
|
Contributor
Joined: Nov 2013
Posts: 482 |
Thats what under the hood of my Nova looks like! What kind of gas mileage do you get ? When you pull the head will you measure and post how far down the hole the piston is at tdc please? Jay 6155
|
|
|
|
|
Joined: Feb 2014
Posts: 505
Major Contributor
|
|
OP
Major Contributor
Joined: Feb 2014
Posts: 505 |
Thats what under the hood of my Nova looks like! What kind of gas mileage do you get ? When you pull the head will you measure and post how far down the hole the piston is at tdc please? Jay 6155 Yes, the Camaro and Nova, kissing cousins. My first car was a 1976 Camaro and the owners manual was a combination for both the Nova and Camaro. I figured out my mileage and posted it at nastyz28.com awhile back. I'll have to go reread my thread to find out what I got. But it's a bit low. The previous owner had decided to sawzall the catalytic converter off and replace it with a turbo muffler, so the lack of exhaust back pressure makes it impossible to fully tune it. I've got a shop who is going to replace the entire exhaust pipes with 2.5" single system and performance muffler. Then I should be able to get it properly tuned and find out its real baseline. I discovered the half exhaust manifold on the integrated head has the exit in the same place as the HD truck 292 manifold and has a three stud connector, so I can put the exhaust pipes on it now that I'm going to be running with the eventual manifold swap. Yes, my 43k mile 250 is untouched since it was first assembled, so it's like an archeological dig when I start to take the top end off. I plan to CC the heads and piston tops to see what the factory specs were, take a micrometer to what I can recover from the head gasket, and measure the deck height. I've been playing around with a dynamic compression calculator trying to guess what the factory combo was to get the 8.1:1 static compression ratio, so I can start imputing changes to the cylinder head and cam in an attempt to get it as close to 8.5:1 DCR as I can without having to pull the short block to deck it and replace pistons yet. The Fel-Pro 8006 0.040" thick head gasket is really making it tough to keep the CR up, but I don't know of any thinner ones that are available. When the temperature warms up again, I'd like to get out in the garage with TDC gauge and try to estimate the ABDC for the stock cam too.
|
|
|
|
|
Joined: Aug 2006
Posts: 232
Contributor
|
|
Contributor
Joined: Aug 2006
Posts: 232 |
[quote=intergrated j 78]..... The previous owner had decided to sawzall the catalytic converter off and replace it with a turbo muffler, so the lack of exhaust back pressure makes it impossible to fully tune it..... Just a general comment on this concept of "lack of exhaust back pressure" causing a problem. This statement is not uncommon on the internet, though not technically correct. Lower pressure at the exhaust port when the exhaust valve is opening and closing is desirable, with some qualifications. Exhaust pressure is affect by 1) quantity of flow, 2) pressure pulses communicating from other exhaust ports (a good example is on oem cast iron exhaust manifolds), and 3) pressure pulses reflected back from the end of transitions (exhaust runner terminations at collectors or mufflers or catalytic converters). Removing the catalytic converter may have negatively impacted the tuning of the exhaust system, probably altering the timing of the positive and negative pressure pulses at the exhaust ports, but not because it reduced general back pressure.
Last edited by Winter; 02/20/14 11:50 AM.
|
|
|
|
|
Joined: Feb 2014
Posts: 505
Major Contributor
|
|
OP
Major Contributor
Joined: Feb 2014
Posts: 505 |
One part of my build that I'm questioning is the carb and intake manifold. The 390cfm Holley is the smallest 4 barrel to fit on the Offenhauser, but when you run the math on it the max RPM that would justify that size is closer to 6,000 rpm. So I'm wondering if even the 390cfm is over carbed for a street build? I know I see a lot of guys throw 750cfm carbs on a small block Chevy for the street, which makes more peak power but at the expense of power for everything below that. I'd rather have as much power off idle on up and a lower peak power, because for a street driven car that is just more fun. Am I better served with a 2 barrel? If you use a 2 barrel, should the stock truck intake manifold just be used?
|
|
|
|
|
Joined: Feb 2014
Posts: 505
Major Contributor
|
|
OP
Major Contributor
Joined: Feb 2014
Posts: 505 |
[quote=intergrated j 78]..... The previous owner had decided to sawzall the catalytic converter off and replace it with a turbo muffler, so the lack of exhaust back pressure makes it impossible to fully tune it..... Just a general comment on this concept of "lack of exhaust back pressure" causing a problem. This statement is not uncommon on the internet, though not technically correct. Lower pressure at the exhaust port when the exhaust valve is opening and closing is desirable, with some qualifications. Exhaust pressure is affect by 1) quantity of flow, 2) pressure pulses communicating from other exhaust ports (a good example is on oem cast iron exhaust manifolds), and 3) pressure pulses reflected back from the end of transitions (exhaust runner terminations at collectors or mufflers or catalytic converters). Removing the catalytic converter may have negatively impacted the tuning of the exhaust system, probably altering the timing of the positive and negative pressure pulses at the exhaust ports, but not because it reduced general back pressure. I'm not sure if I was clear on the state of my exhaust, everything from the catalytic converter on back was removed, and then the header pipe just has a muffler on it, so there's not much exhaust left which I'm sure affects the tune of the exhaust pretty negatively. I can put the idler screw all the way in with the HEI vacuum plugged, and I can't get it to go below 1k or 1.1k rpm to get to the recommended 800 rpm idle on the first step on the engine tuning decal. It just races at idle. My assumption is that the lack of exhaust is the problem, so I'm going to get that fixed for that reason and just to make it sound like a grown-up's car. If I can tune it after that, I found the problem, if not I guess I'll keep digging.
Last edited by Lifeguard; 02/20/14 02:43 PM.
|
|
|
|
|
Joined: Feb 2014
Posts: 505
Major Contributor
|
|
OP
Major Contributor
Joined: Feb 2014
Posts: 505 |
One part of my build that I'm questioning is the carb and intake manifold. The 390cfm Holley is the smallest 4 barrel to fit on the Offenhauser, but when you run the math on it the max RPM that would justify that size is closer to 6,000 rpm. So I'm wondering if even the 390cfm is over carbed for a street build? I know I see a lot of guys throw 750cfm carbs on a small block Chevy for the street, which makes more peak power but at the expense of power for everything below that. I'd rather have as much power off idle on up and a lower peak power, because for a street driven car that is just more fun. Am I better served with a 2 barrel? If you use a 2 barrel, should the stock truck intake manifold just be used? After I posted this I saw CNC-Dude's post about producing a 2 barrel manifold. I suppose that might be an option too. Although it won't fit the Holley 2300 350cfm won't fit the initial manifold design. It also uses the 5 1/8" air filter. Since the factory thermal air filter uses a 10"x2" filter which the math says is plenty of diffuser for intake, and it has a cold air ducting already, I'm thinking it would be a budget friendly option to use it with a 2 barrel that will fit it. So the Holley wouldn't be able to use it. Unless a smaller 4 bbl Thermac air cleaner was used on V8s or V6s that could be swapped in and use the factory ducting. With the Camaro the stock air cleaner is just barely clearing under the hood, and there's not much clearance between the outside edge and the valve cover either, which really limits air cleaner options.
|
|
|
|
|
Joined: Sep 2008
Posts: 3,669 Likes: 42
1000 Post Club
|
|
1000 Post Club
Joined: Sep 2008
Posts: 3,669 Likes: 42 |
I've thought about making a 2 bbl intake for the larger Holley 2300 series carbs also. There are so many possiblities for new and much needed intakes for these engines.
Class III CNC Machinist/Programmer
|
|
|
|
|
Joined: Feb 2014
Posts: 505
Major Contributor
|
|
OP
Major Contributor
Joined: Feb 2014
Posts: 505 |
I've thought about making a 2 bbl intake for the larger Holley 2300 series carbs also. There are so many possiblities for new and much needed intakes for these engines. Yeah the Holley 2300 is an option, with the vacuum choke kit it is a little cheaper than the 4160 350cfm 4 bbl. I don't know much about the Rochester 2G and Dualjet to know if they are possible low buck alternatives too, but my stock air cleaner with ducting would fit them and cut costs further.
|
|
|
|
|
Joined: Nov 2013
Posts: 482
Contributor
|
|
Contributor
Joined: Nov 2013
Posts: 482 |
I think I might be able to help with the idle problem. Idle speed is controled by the electric solenoid. The speed is set in two ways. One is the allen screw in the back and the other is turning the whole thing with a 9/16 wrench. One way is with it unplugged and the other with it plugged in. I forget which is which. Just unplug it with the engine running and find out. The idle MIXTURE screw pointing to the front of the car is for rich/lean at idle speed. Mine is loose and wore out. You also may have a vacum leak or two. Jay 6155
|
|
|
|
|
Joined: Feb 2014
Posts: 505
Major Contributor
|
|
OP
Major Contributor
Joined: Feb 2014
Posts: 505 |
I think I might be able to help with the idle problem. Idle speed is controled by the electric solenoid. The speed is set in two ways. One is the allen screw in the back and the other is turning the whole thing with a 9/16 wrench. One way is with it unplugged and the other with it plugged in. I forget which is which. Just unplug it with the engine running and find out. The idle MIXTURE screw pointing to the front of the car is for rich/lean at idle speed. Mine is loose and wore out. You also may have a vacum leak or two. Jay 6155 Yeah, i hadn't played with the solenoid yet, that could be it. I swapped out all the vacuum hoses to get rid of any rot, and verified all the attachment points with the assembly manual (two were actually switched, as were the #3 and #4 spark plug wires). But there could be a leak elsewhere. I'd like to get a complete exhaust on it first before I tinker some more. I'd like to drive down the road in it with deafening pedestrians and myself.
|
|
|
|
|
Joined: Feb 2014
Posts: 505
Major Contributor
|
|
OP
Major Contributor
Joined: Feb 2014
Posts: 505 |
Thats what under the hood of my Nova looks like! What kind of gas mileage do you get ? When you pull the head will you measure and post how far down the hole the piston is at tdc please? Jay 6155 I totally forgot to go back and check my project thread at NastyZ28.com: http://www.nastyz28.com/forum/showthread.php?t=2133641978 was the first year for EPA fuel economy ratings. The L6 Camaro with 3spd was rated at 18mpg city and 28mpg highway, with an average of 21mpg and $500 annual fuel cost. I calculated mileage for two fill ups and got 15.6mpg and 16.0mpg for all in town driving. That's with tuning it or a complete exhaust. I will probably have a new low flow exhaust on it in March, along with some ignition upgrades and tune up. I already have a K&N filter on it, and I need to flush the radiator and change the oil too. Then I can do some driving and see what the mileage is then.
|
|
|
|
|
Joined: Nov 2013
Posts: 482
Contributor
|
|
Contributor
Joined: Nov 2013
Posts: 482 |
I gor 22.5 mpg driving the car home on the freeway. After plugs, wires,cap and a new water pump,pulley and the addition of a clutch fan I got 23.5 mpg mostly on the open highway. Jay 6155.
|
|
|
|
|
Joined: Feb 2014
Posts: 505
Major Contributor
|
|
OP
Major Contributor
Joined: Feb 2014
Posts: 505 |
I gor 22.5 mpg driving the car home on the freeway. After plugs, wires,cap and a new water pump,pulley and the addition of a clutch fan I got 23.5 mpg mostly on the open highway. Jay 6155. I was thinking of replacing my standard non-clutch fan with an electric. And I don't know how old the spark plug wires are, so I may swap them out for some new 8mm spiral core wires, and a new cap and rotor. Maybe a supercoil too, for best possible spark. Tune it, and then that should get me the best possible stock mpg. I noticed from Deuce's tests that the 390cfm Holley on an Offy intake did beat the monojet for fuel economy too.
|
|
|
|
|
Joined: Feb 2014
Posts: 505
Major Contributor
|
|
OP
Major Contributor
Joined: Feb 2014
Posts: 505 |
I had the Camaro out in the driveway today trying to tune it up as best as possible, but the battery won't hold a charge so I see a trip to the battery shop tomorrow. I had trouble reading my tune-up decal which seems to be bubbling between the two layers. I haven't been able to find a replacement from Camaro suppliers online. They don't seem to have L6 stickers for after '76 available. Anyone know a good supplier of reproduction tune-up/emissions decals for '78 inline 6? 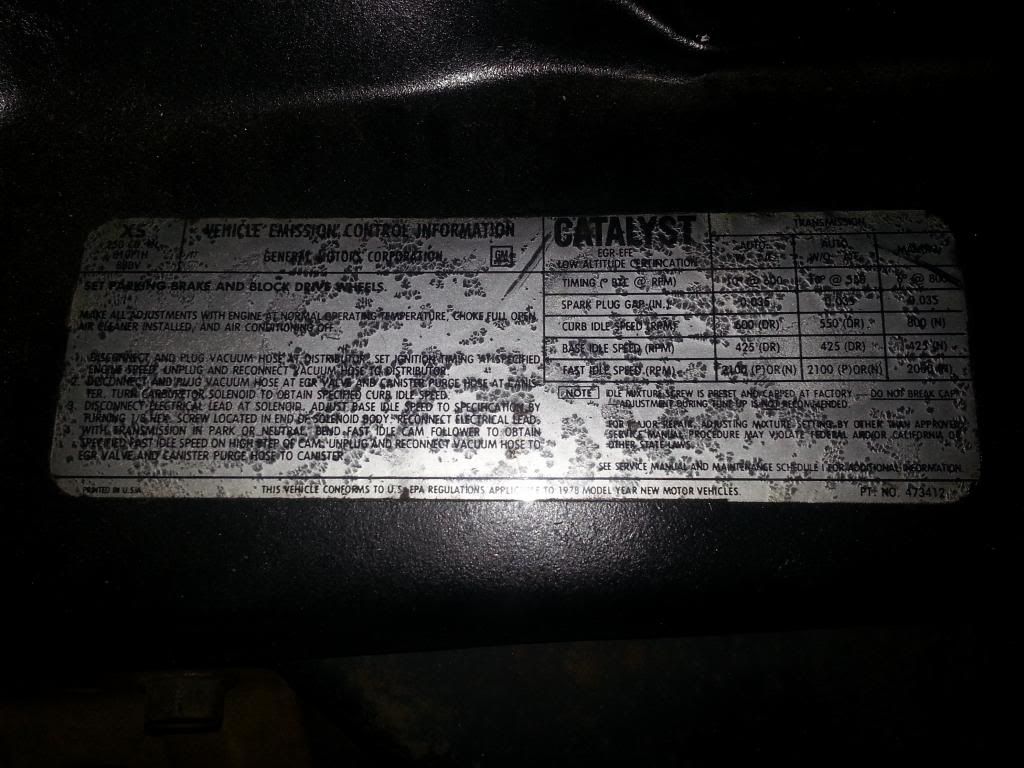
|
|
|
|
|
Joined: Sep 2004
Posts: 5,839 Likes: 1
1000 Post Club
|
|
1000 Post Club
Joined: Sep 2004
Posts: 5,839 Likes: 1 |
12 port SDS EFI 
|
|
|
|
|
Joined: Feb 2014
Posts: 505
Major Contributor
|
|
OP
Major Contributor
Joined: Feb 2014
Posts: 505 |
Yeah, that's a '72. They seem to reproduce the L6 decals up to '76 and V8s only after that. The '77, '78 and '79 L6 owners are out luck?
|
|
|
|
|
Joined: Nov 2013
Posts: 482
Contributor
|
|
Contributor
Joined: Nov 2013
Posts: 482 |
Lifeguard, here is the info off my 78 Nova sticker. Spark plug gap .035. timing, 10@600rpm for auto w a/c 10@550rpm for auto w/o a/c 6@800 rpm for manual. Base idle speed 425 with soloniod unpluged 2100rpm fast idle for auto trans 2000 fast idle for manual trans. I set my own timing at 12 @ ~600 rpm. Made sure it was idling slow enough not to start the mechinical advance. Hope this helps. Jay 6155
|
|
|
|
|
Joined: Jan 2010
Posts: 493
Contributor
|
|
Contributor
Joined: Jan 2010
Posts: 493 |
here's a suggestion--have ol' "Intergrated j 78" take a digital photo of his "decal" (if its good) and email it to you and either make your own sticker or have the six-year old next door do it for you, and replace your old one. Keep it cheap, and inline.
|
|
|
|
|
Joined: Nov 2013
Posts: 482
Contributor
|
|
Contributor
Joined: Nov 2013
Posts: 482 |
If Lifegaurd wants to try it I'll do my best. My sticker is not perfect but looks better than his. Jay 6155
|
|
|
|
|
Joined: Feb 2014
Posts: 505
Major Contributor
|
|
OP
Major Contributor
Joined: Feb 2014
Posts: 505 |
Lifeguard, here is the info off my 78 Nova sticker. Spark plug gap .035. timing, 10@600rpm for auto w a/c 10@550rpm for auto w/o a/c 6@800 rpm for manual. Base idle speed 425 with soloniod unpluged 2100rpm fast idle for auto trans 2000 fast idle for manual trans. I set my own timing at 12 @ ~600 rpm. Made sure it was idling slow enough not to start the mechinical advance. Hope this helps. Jay 6155 Are those the auto or with AC specs, because mine is a manual and those are different from the specs I was able to finally read off of it a flashlight and magnification? The sticker on my '78 is a silver finish with black ink printed on it and a clear layer on top, so at some point they changed from the old white decals that my '76 Camaro had. So to replicate with an ink jet is a little more challenging. The silver backing of the decal seems to be progressively breaking down. I could make a white backing decal on my inkjet and replace, and most people probably wouldn't know the difference. I also need to replace my cowl tag with a reproduction due to it rusting out. VIN number is still good and I haven't looked for the build sheet yet. My tune-up instructions on the decal are to plug the HEI vacuum and adjust the timing to 6 degrees at 800rpm. Then to hook the HEI back up, unhook the EGR and Evap canister vacuum, and adjust the solenoid to 800 rpm idle. Since I couldn't get the engine to idle at 800 rpm while I set the timing, I just adjusted the solenoid with HEI plugged and was able to get to idle at 800 rpm with a look of turns of the solenoid. I'll try timing it with that change tomorrow (my battery has some bad cells and needs to be replaced under warranty, and I knocked my timing light clamp into the fan and shredded it, so I just got a new timing light). I took all my plugs out and gapped them to make sure they were .035" and while they are out I will try to find TDC.
|
|
|
|
|
Joined: Feb 2014
Posts: 505
Major Contributor
|
|
OP
Major Contributor
Joined: Feb 2014
Posts: 505 |
Oh, and there were two other steps. The third is to then adjust the 1/8" hex screw in the solenoid to 425 rpm. Then finally to bend the fast cam idle follower to get it on the high point of the cam at 2000 rpm, and then reconnect the EGR and Evap hoses. There are no instructions on the idle mixture knob, but my old Chilton's guide says to tighten it until seated and then back it off two turns.
|
|
|
|
|
Joined: Nov 2013
Posts: 482
Contributor
|
|
Contributor
Joined: Nov 2013
Posts: 482 |
On my sticker there is no difference for manual trans with or without A/C. The only difference for auto trans cars is a slight increase in idle speed. I also looked up the the specs for the amount of vacum and mechinical advance for 1978 nova and camaro. Both cars use the same part number and advance curves for auto OR manual trans. In other words you could run 10 degrees of of advance to start and if it doesn't ping it would be no difference in total advance from an automatic trans car.(a very tame curve IMHO)
|
|
|
|
|
Joined: Feb 2014
Posts: 505
Major Contributor
|
|
OP
Major Contributor
Joined: Feb 2014
Posts: 505 |
On my sticker there is no difference for manual trans with or without A/C. The only difference for auto trans cars is a slight increase in idle speed. I also looked up the the specs for the amount of vacum and mechinical advance for 1978 nova and camaro. Both cars use the same part number and advance curves for auto OR manual trans. In other words you could run 10 degrees of of advance to start and if it doesn't ping it would be no difference in total advance from an automatic trans car.(a very tame curve IMHO) I was misreading your post, the numbers are a little confusing in sentence format versus table format. Yeah, that's what my numbers for auto and auto/AC are too. The change from year to year, but seem to be the same for all models with the same engine during a model year. Working on timing today with my new timing light, after I pick up a warranty replacement battery. The timing marks on the L6 are a bit different. I'm working off the assumption that the widest V is the zero at the bottom with -4 TDC being the tip above and 4 is the tip below. So I'm adjusting for the bottom of the next cutout for 6 degrees. I should clean it up more to see if I can find some numbers. 
|
|
|
|
|
Joined: Nov 2013
Posts: 482
Contributor
|
|
Contributor
Joined: Nov 2013
Posts: 482 |
That's correct. Sorry about the format. If you only knew my poor typing skills!! The lower down the tab the more advanced the timing. You can try both 6 and 10 and see what happens. Jay 6155
|
|
|
|
|
Joined: Feb 2014
Posts: 505
Major Contributor
|
|
OP
Major Contributor
Joined: Feb 2014
Posts: 505 |
Thanks, I'm indexing spark plugs right now to make sure they all face the exhaust valve for best ignition. New battery is in, and I tightened the alternator and PS belts. Just picked up oil, filter and coolant for fluid changes. I'm going down the tune up decal to set timing, curb idle, base idle and fast idle. However, the instructions say to plug the EGR and canister purge hose. EGR seems easy, pull the hose off it and plug hose. However the Evap canister on the L6 is quite a bit different from the V8. There are two vacuum hookups with 4 hoses hooked to the manifold and carb. I'm not sure which ones to plug. The hose in the center is the return to the gas tank, so I can eliminate that one. 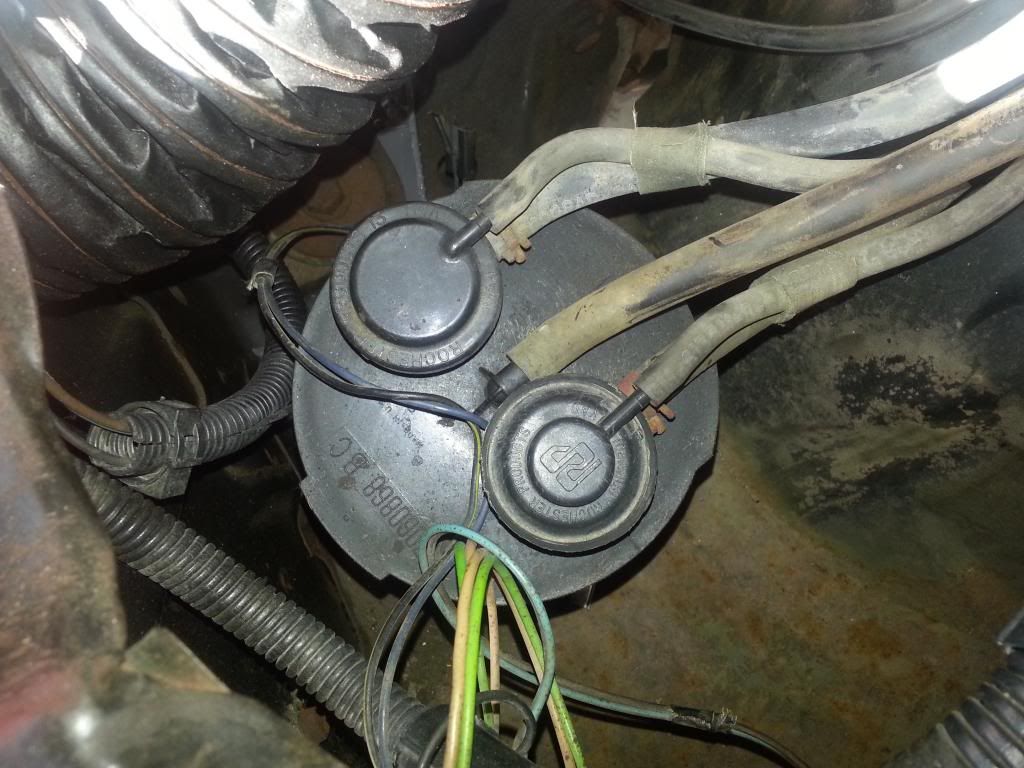
|
|
|
|
|
Joined: May 2011
Posts: 378
Contributor
|
|
Contributor
Joined: May 2011
Posts: 378 |
I didn't think anyone (else) indexes plugs anymore, good job 
|
|
|
|
|
Joined: Feb 2014
Posts: 505
Major Contributor
|
|
OP
Major Contributor
Joined: Feb 2014
Posts: 505 |
Something that I discovered with my L6 Camaro (I'm not sure if Novas or other Chevy's were the same setup) is that the duct for fresh air to the Thermac air cleaner is ducted on the driver side through the front support. 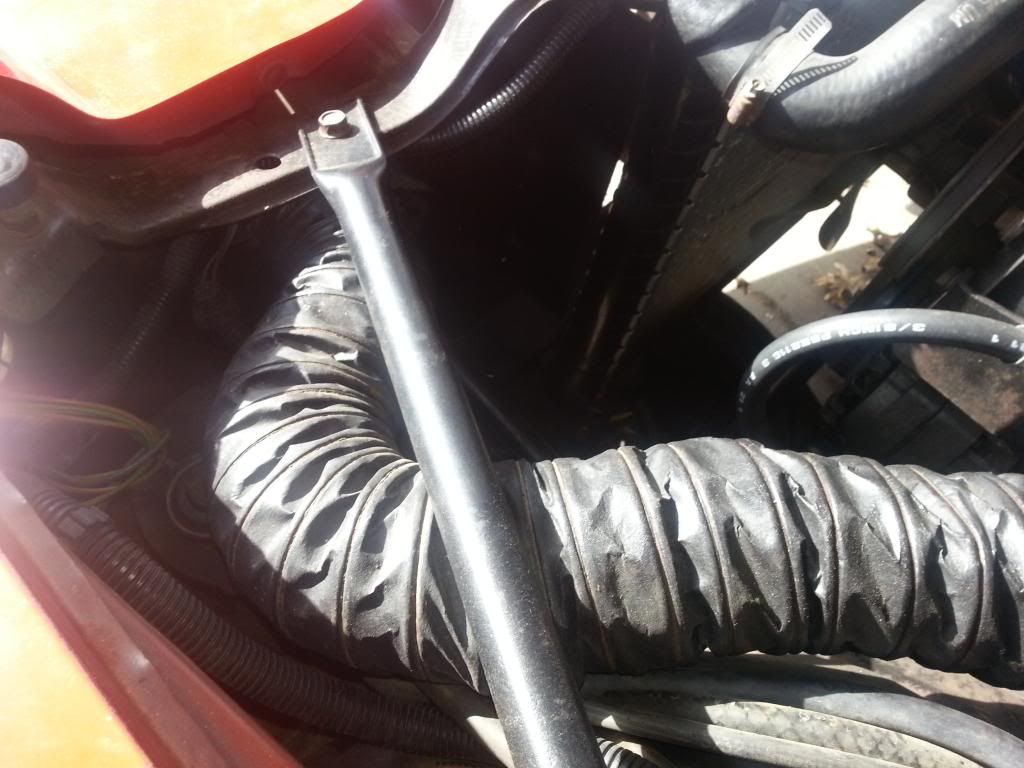 The inlet to this duct is located right behind the front left turn signal: 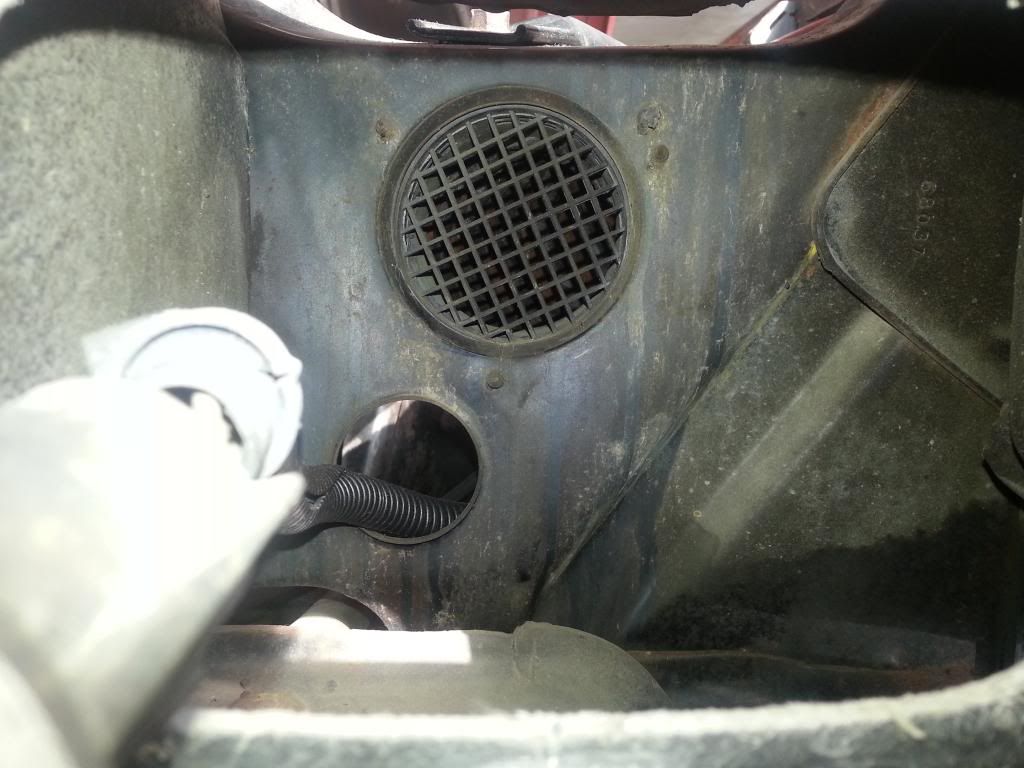 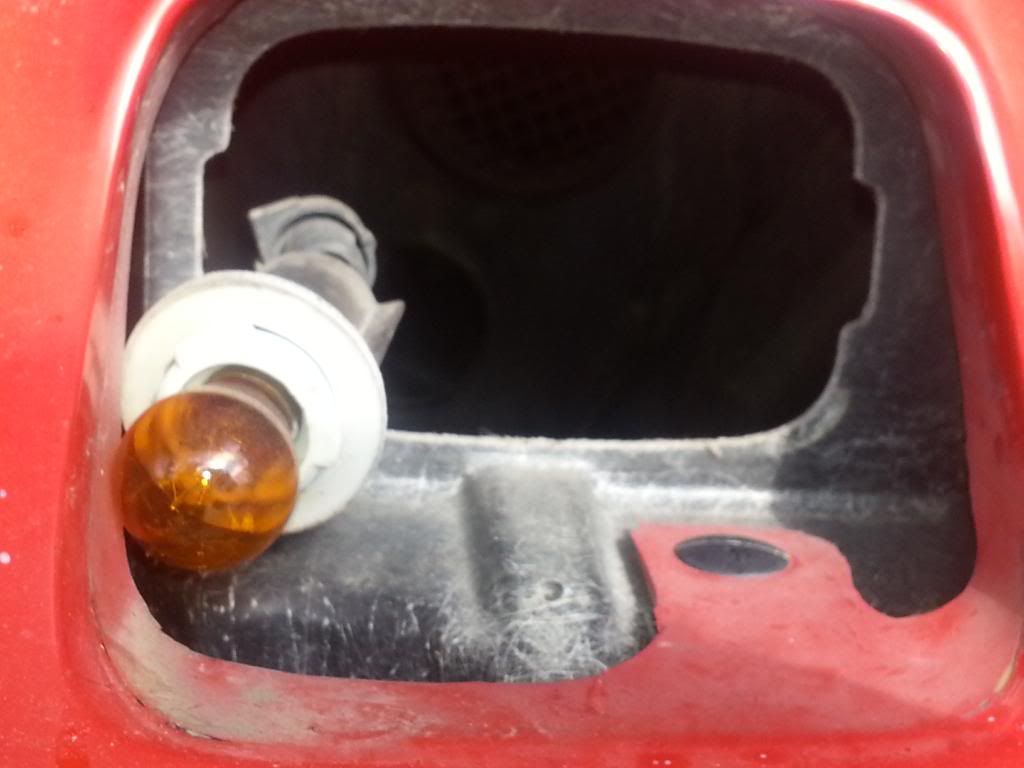 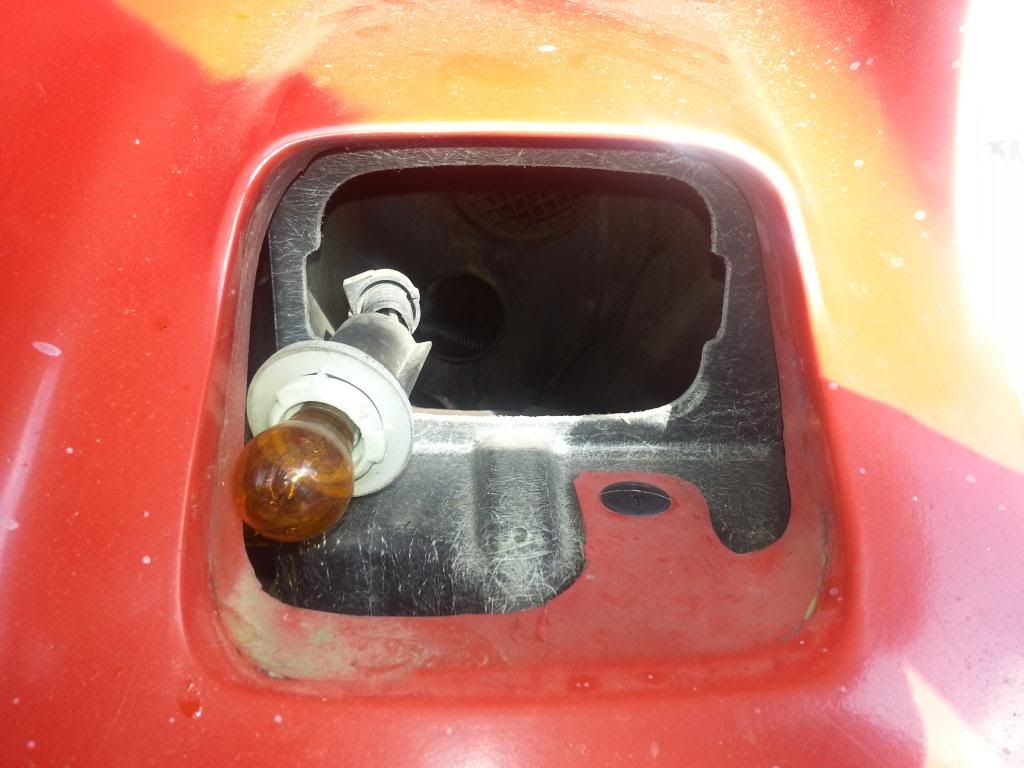 By removing the turn signal lens from the chrome trim bezel, I can turn this into a ram air duct for cool air. And to keep it street legal, offset the turn signal lens or use a smaller lens and bulb in the bottom of the fixture to let air by. 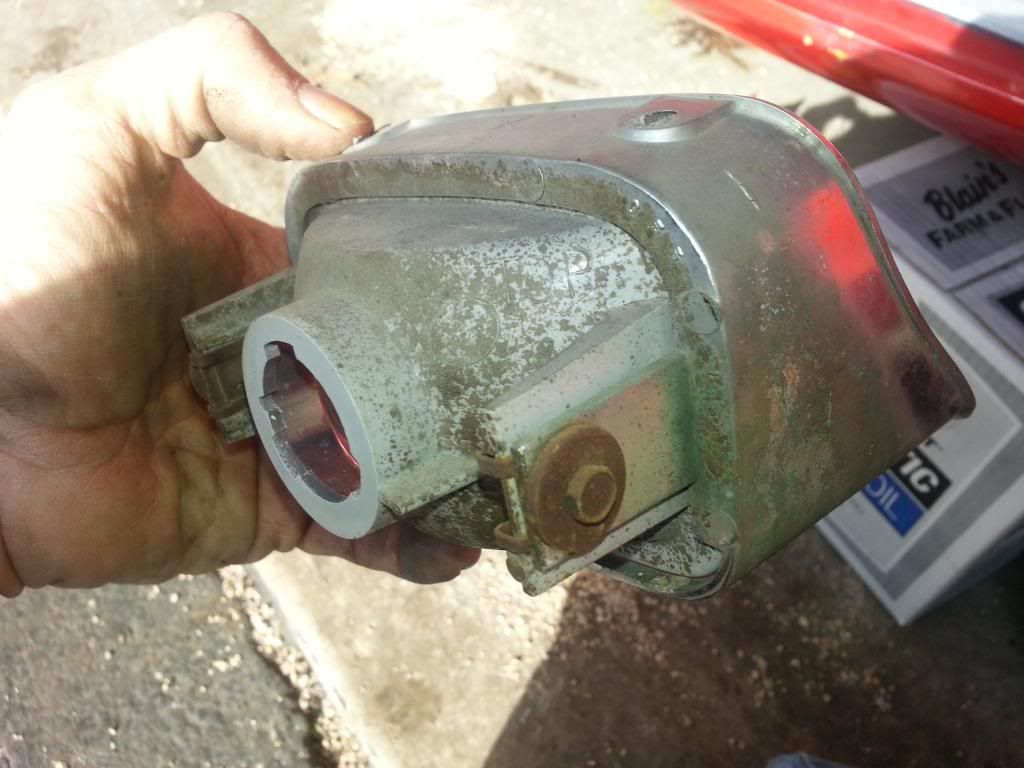 There's also plenty of room in the area by the passenger firewall for a cool can for fuel. So the carb can mixed cool air and cool fuel to maximize the mix.
|
|
|
|
|
Joined: Feb 2014
Posts: 505
Major Contributor
|
|
OP
Major Contributor
Joined: Feb 2014
Posts: 505 |
I didn't think anyone (else) indexes plugs anymore, good job Thanks, it's the little details that give you free horsepower and use less gas to make it.
|
|
|
|
|
Joined: Jul 2000
Posts: 4,585 Likes: 19
1000 Post Club
|
|
1000 Post Club
Joined: Jul 2000
Posts: 4,585 Likes: 19 |
I didn't think anyone (else) indexes plugs anymore, good job I still do when I have the extra plugs to play with and I'm not in a hurry to swap plugs. ( track wise )
Larry/Twisted6 [oooooo] Adding CFM adds boost  God doesn't like ugly.
|
|
|
|
|
Joined: May 2011
Posts: 378
Contributor
|
|
Contributor
Joined: May 2011
Posts: 378 |
I try to optimize everything to squeeze out every last drop of energy and mileage out of the amount of fuel burned, I don't feel like I should leave free horses on the workbench when labor is free.... and I don't have that many ponies to begin with that I could just give them away And simple indexing doesn't require any extra plugs, I don't get that part. Anyone used crush washers with these washer-less plugs to allow for easy indexing? I only used NGK plugs on my other engines that used a crush washer. You get some room to play with them and additional adjustability with extra solid washers.
|
|
|
|
|
Joined: Feb 2014
Posts: 505
Major Contributor
|
|
OP
Major Contributor
Joined: Feb 2014
Posts: 505 |
I try to optimize everything to squeeze out every last drop of energy and mileage out of the amount of fuel burned, I don't feel like I should leave free horses on the workbench when labor is free.... and I don't have that many ponies to begin with that I could just give them away And simple indexing doesn't require any extra plugs, I don't get that part. Anyone used crush washers with these washer-less plugs to allow for easy indexing? I only used NGK plugs on my other engines that used a crush washer. You get some room to play with them and additional adjustability with extra solid washers. I try the plugs in cylinders until i find a cylinder that they face the right direction in. Then I use spacers for the rest if I have to. I haven't finished putting the plugs in yet, so fingers crossed I can do it with just the plugs. Another option is to buy extra plugs individually and try to get them from different batches or different factories, so that the machining on the threads will be different, and then you up your chances of finding plugs that will fit the different cylinders, and some left over for the next plug change. Back in the day when we were running leaded gas and had to change plugs every year, that made more sense then today when the plugs are supposed to go 100k miles plus.
|
|
|
|
|
Joined: Jul 2000
Posts: 4,585 Likes: 19
1000 Post Club
|
|
1000 Post Club
Joined: Jul 2000
Posts: 4,585 Likes: 19 |
Extra plugs just means you don't always have to use the washers.
And I would pre-mark the plugs to the cyl.
Larry/Twisted6 [oooooo] Adding CFM adds boost God doesn't like ugly.
|
|
|
|
|
Joined: Nov 2004
Posts: 1,805 Likes: 1
1000 Post Club
|
|
1000 Post Club
Joined: Nov 2004
Posts: 1,805 Likes: 1 |
If the exhaust is done you could use a stock system from a 1981 Z28 - just install the pipe 42566 that is down stream from the cat flipped. z28 exhaust With all stock parts it should not cost too much. With all the parts you want to buy so far - have you priced them out yet?
Last edited by efi-diy; 03/25/14 08:34 PM.
51 GMC 4.2 turbo
Can't solved today's problems using the same technology/thinking that created them
|
|
|
|
|
Joined: Feb 2014
Posts: 505
Major Contributor
|
|
OP
Major Contributor
Joined: Feb 2014
Posts: 505 |
If the exhaust is done you could use a stock system from a 1981 Z28 - just install the pipe 42566 that is down stream from the cat flipped. z28 exhaust With all stock parts it should not cost too much. With all the parts you want to buy so far - have you priced them out yet? I can't make any changes to the exhaust manifold at this point, because it requires swapping out the integrated cylinder head, manifold and carb in order to install the Langdon cast headers or Clifford shorty headers (their full length headers are for trucks and will not fit the ground clearance of a 2nd gen Camaro). I can't afford that for some time yet. So I have to use a single exhaust from the stock manifold on back to a single muffler and tailpipe. Reversing the Z28 splitter pipe wouldn't seem to fit that exhaust. Since the header pipe was cut, and everything is missing, I don't have to replace the catalytic converter. The shop near my house said they could build a 2.5" signal exhaust for less than $200. I'm not sure what other parts you are asking if I priced?
Last edited by Lifeguard; 03/26/14 11:16 AM.
|
|
|
|
|
Joined: Feb 2014
Posts: 505
Major Contributor
|
|
OP
Major Contributor
Joined: Feb 2014
Posts: 505 |
Stock exhaust layout for the '75 to '79 L6 Camaros with integrated head/exhaust: http://nastyz28.com/2gcog/tech/75796ex.jpgStock exhaust for the '74 and earlier with the non-integrated head: http://nastyz28.com/2gcog/tech/70746ex.jpgThe earlier routing looks like a better flowing design going down the driver's side instead of going under the oil pan and down the passenger's side.
|
|
|
|
|
Joined: Nov 2004
Posts: 1,805 Likes: 1
1000 Post Club
|
|
1000 Post Club
Joined: Nov 2004
Posts: 1,805 Likes: 1 |
Bet you that the converter is in the same place on the I6 and V8 models so that z28 duals would bolt up ..
Just for fun price it out on rockauto
51 GMC 4.2 turbo
Can't solved today's problems using the same technology/thinking that created them
|
|
|
|
|
Joined: Feb 2014
Posts: 505
Major Contributor
|
|
OP
Major Contributor
Joined: Feb 2014
Posts: 505 |
The '75 and later 2nd gens all have the same space added to the passenger floor pan for the catalytic converter, so they are all in the same general location. Looking at the 350/305 intermediate pipe and tail pipe, they are the same part number as the 250 L6. However the Z28 has no parts in common with either, and the 2.25" exhaust pipes and the different catalytic converter number probably mean the Z28 cat-back would not fit the L6 catalytic converter and 2" head pipe. But if a Nova or Camaro owner fabricated a header pipe and used a larger Z28 cat (or eliminated it) they could use the stock Z28 system on back.
The parts for the L6 are:
44676 2" header pipe - NA
50012 catalytic converter - $91.79 (or 50013 $98.79?)
45757 2" intermediate pipe - $33.99
35336 2.25" clamp - $1.31
35183 muffler hanger - $5.62
21807 muffler - $58.79
35408 2" clamp - $0.93
43502 2" tailpipe - $20.79
Total $223.42 (w/ catalytic converter, but w/out header pipe)
Since my header pipe is already cut short, a replacement header pipe is unavailable, my catalytic converter is missing, and my shop has said they can give me a 2.5" single exhaust for less then $200; I'd rather just have my shop make up a 2.5" over trying to fabricate a connection between the stock header pipe and the stock cat-back.
Last edited by Lifeguard; 03/27/14 08:40 PM.
|
|
|
|
|
Joined: Nov 2013
Posts: 482
Contributor
|
|
Contributor
Joined: Nov 2013
Posts: 482 |
Did a little research on Z28 exhaust:
42566 y pipe 67.99
21598 muffler 42.99 each.
43744 and 43745 are 24.79 each
43662 39.79
43663 33.99
There are other pipes listed for "earler" versions of this system at about the same price. The 21907 muffler that you have posted about is the stock 1 pipe in and 2 pipe out for Camaros and Novas of that era. When the Z28 came back out in 1977, I bought one. ( I was only 2 yrs old at the time) This exhaust system was the only real change to the engine, the rest of the engine was stock LM1. The exhaust added ~20 hp over the system that you posted parts for. At the time I took 2 stock exhaust pipes from a Chevelle and ran them from the manifolds to the mufflers,getting rid of both y pipes and the converter. Believe it or not they fit perfectly and I ended up with a true dual exhaust system. I would recomend that you buy the Z28 system starting at the y pipe and have the shop make you a 1 piece 2 1/2 pipe to crossover and hook up to the y pipe. The shop may even be able to get the pipes cheaper than you can. At the very least get the y pipe and go from there. I have been told that the 292 manifold outlet is in the same place as our 1bbl intergrated head. If someone could verify this (TLowe?) then everything would bolt up when the head was changed to non intergrated. Jay 6155
|
|
|
|
|
Joined: Feb 2014
Posts: 505
Major Contributor
|
|
OP
Major Contributor
Joined: Feb 2014
Posts: 505 |
The parts diagram listed that muffler for the single outlet L6 engine exhaust. The V8s had the dual outlet in the late '70s, so maybe they just don't carry the L6 muffler in favor of the V8 muffler.
I can ask my shop on the Z28 parts, but I'm pretty sure a single 2.5" exhaust is cheaper then getting fancy with faux 2.25" dual exhaust in the back. Actually I think the $200 quote was based on his confusion at thinking I had a V8 and he was putting together a dual exhaust, so I think that was on the high side.
I'm the one who pointed out the 2.25" outlet for the integrated 1bbl 250 head was located between cylinders 4 and 5, which is about the same spot as the 2.5" HD outlet for the non-integrated 2bbl 292 head. And they both have a three stud bracket. So an exhaust set up for the integrated 250 should be pretty close to hooking up to 292 manifold in a top end swap to a non-integraded head and manifold. The 250 1bbl non-integraded 2" exhaust outlet is located directly below the carb and has a 2 stud flange.
|
|
|
|
|
Joined: Nov 2013
Posts: 482
Contributor
|
|
Contributor
Joined: Nov 2013
Posts: 482 |
Now I remeber it was you that said that the outlet for the exhaust is the same. I guess thats what happens when you buy a new car at age 2! I would still like to see someone that has both manifolds put the 2 side by side to be sure. After all the 2 might be close,just off enough not to work OR be a perfect match. One nice thing about the Z28 parts is that they just bolt together very easly. It could be that a single 2.5 inch system would be cheaper than the Z28 parts. I did some reaserch a little while ago about the walker 1in and 2out mufflers( Too bad I can't find it now.)for my Nova. There are only about 4 or 5 that will come close to fitting in the stock sideways location. Keep in mind that these are stock mufflers and are fairly quiet. One is for a78 Camaro/Nova that we have allready mentioned. Another is for a 79 El camino with a 350, then there are the mid 90s Camaros both Z28 and not IIRC. There is also a muffler for a Buick Grand National but it is 2in and 2 out. What I am talking about is a OEM high quality part. If you wanted to go single tailpipe then maybe a 454 truck muffler would be right. We put one on my Daughters Trailblazer and it sounded nice. For myself I am trying to make an adapter plate that will let me run the 2bbl dual outlet manifold on the 1bbl head. That way I can have the exhaust system done before I put in the 2bbl engine. It just depends on what kind of sound that is desired. Keep in mind that a low restriction exhaust will make more hp and give better gas mileage than stock. Are you going to put a converter back on? I would think that the car is old enough to be exempt from any possible inspection that your area might have. Please keep us informed as I own a "sister" car and am always looking for ideas. Jay 6155
|
|
|
|
|
Joined: Feb 2014
Posts: 505
Major Contributor
|
|
OP
Major Contributor
Joined: Feb 2014
Posts: 505 |
The 292 HD exhaust manifold and 250 integrated exhaust manifold may not be precisely in the same position, but they are going to be pretty close, probably a fraction of an inch in any direction. So I can get an exhaust for my integrated exhaust, and when I finally can afford to swap the entire top end out, the exhaust pipe will be close enough to be wriggled into place and bolted up. At least enough to get it back to the shop and have them make some mods to fit exactly. I can't do that with the Langdon manifolds or Clifford shorty headers, and I'm not sure they flow significantly better than the 292 HD manifold. Being on an extremely tight budget; with the 292 manifold $169.95, Langdon manifolds for $277 with $30 for manifold heat, and the Clifford shorty headers for $359; you can't beat the 292 manifold.
My shop said if it comes in without a converter, they don't need to put one on. Since I'm doing this on an extreme budget, I can't justify adding a catalytic converter when I can just put a straight exhaust on it. So no converter.
Looking at the exhaust charts for both the regular 350/305 and Z28 350/305 head pipes are both 40471, which is a 2" pipe. The Z28 Y pipe part 42537 appears to be 2" on the resonator end, but I don't know if it is bigger than 2" on the catalytic converter end. Given it is a 2" pipe going into the converter, It's probably 2" coming out of the cat. So the Z28 exhaust will fit both the standard V8s and might fit the L6 catalytic converters as a bolt on. It looks like from the parts chart that the Z28 is only 2.25" on the tailpipes from the resonators on back.
|
|
|
|
|
Joined: Nov 2013
Posts: 482
Contributor
|
|
Contributor
Joined: Nov 2013
Posts: 482 |
The Z28 y pipe is bigger on the converter end than 2". IIRC it's 2.5". The 40471 y pipe is 2" until they merge together into a bigger pipe before the converter. Coming out of the converter is also bigger than 2" I think it's 2.5 also. The y pipe that goes to the 2 "mufflers" splits into 2 2" pipes. The part number that I am talking about is 42566. Where did you find part number 42537? Can you post a link please? I can also tell you for sure that the factory pipe from the engine to the cat on my nova is 2.25. Coming out of the cat is also 2.25 that runs to the muffler. I think when they went to the intergrated head the exhaust side was improved. The camshaft has more lift and duration and the exhaust pipe is bigger. Look at pipes munber 45426 and 45537. They are both 2". The 75 to 79 is 2.25 inch. I know what you mean by a tight budget, I think that the 292 manifold is the way to go in this case. I also agree that there might be enough movement in the exhaust system to bolt up to the 292 manifold when the time comes. I am now thinking of a possible Z28 type system for my Nova thanks to you. Do some research here I think that a member here got the best power out of a 305 by using a short piece of 2" pipe than stepping up to 2.5". Look at posts by Deuce Coupe to start. You could save $$ by buying the Z28 parts starting at the y pipe in front of the mufflers, hang it yourself then have the shop hook it up to what you have left of the old head pipe and make a new head pipe up when the head swap is done later. Just an Idea. Jay 6155
|
|
|
|
|
Joined: Feb 2014
Posts: 505
Major Contributor
|
|
OP
Major Contributor
Joined: Feb 2014
Posts: 505 |
Part numbers are off the NAPA diagrams at NastyZ28.com: http://www.nastyz28.com/2gcog/exhaust.htmlThe NAPA numbers may be different from the Walker part numbers on the RockAuto.com diagrams.
|
|
|
|
|
Joined: Feb 2014
Posts: 505
Major Contributor
|
|
OP
Major Contributor
Joined: Feb 2014
Posts: 505 |
I haven't taken a set of calipers to measure my head pipe, but it does look pretty stout. The common thought on pipe size is Chevy put 2" on their non-performance engines and 2.25" on the performance motors. But this rule probably only applies to the pre-1975 systems. When Chevy added the catalytic converter and L6 integrated head, they probably swapped everything to a 2.25" header pipe which is why the 250 1bbl integrated head had a 2.25" outlet on the exhaust. Looking at the diagram for the L6 & low-perf V8 exhaust, there is a 2.25" clamp on the cat end of the muffler, while the tailpipe end is a 2" clamp. This might mean the intermediate pipe between the cat and muffler is 2.25" too.
The Z28 head pipe is the same as the L6 and low-perf V8s, so the Z28 catalytic converter probably has the same inlet size of 2.25". But if it has a 2.5" outlet to the Y-pipe, it is probably not the same cat from the L6 and low-perf V8s, which the Walker part numbers being different seems to support that. So the Z28 exhaust starts with the cat on back.
So if you have a '75 to '79 1bbl 250 L6, you could swap everything after the header pipe on back with Z28 parts. Or you could delete the cat with a custom 2.25" to 2.5" pipe and hook it up to the cat back of the Z28. Then later if you swapped the integrated head to a non-integrated head with a 292 HD exhaust manifold and just hook the 2.25" header pipe to the new manifold so you can drive it down to the exhaust shop to fabricate a new 2.5" header pipe that can hook up to the Z28 cat-back. The setup would be identical to the '77-'81 305/350 Z28 setup with the same size L6 header pipe bend at the same angles, but it would be even more free flowing for the smaller L6 than the V8.
I could possible set this system up myself on my Camaro as the header pipe is cut with a turbo muffler stuck on the end of it, by adding a 2.25" straight pipe to the end of the muffler and cutting it off where it meets the Y-pipe. But I'm not sure how to connect up a regular 2.25" pipe to one with a 2.5" fitting for a catalytic converter?
The stock 2.25" L6 header pipe is not a great design, as it goes straight down and then under the oil pan at a 90 degree bend and then around the starter back to the catalytic converter. A much better design would be 2.5" pipe going back under the manual linkage and then crossing under the transmission to the Y-pipe if that is possible.
Last edited by Lifeguard; 03/29/14 06:47 PM.
|
|
|
|
|
Joined: Feb 2014
Posts: 505
Major Contributor
|
|
OP
Major Contributor
Joined: Feb 2014
Posts: 505 |
BTW, I noticed that Walker does not have a part number for the intermediate Y-pipe and Rockauto.com doesn't list it. Anyone know where you get the Y-pipe from these days?
|
|
|
|
|
Joined: Nov 2013
Posts: 482
Contributor
|
|
Contributor
Joined: Nov 2013
Posts: 482 |
I agree with you about the L6 head pipe design. How much of the stock pipe from the engine to the cat is left on the car? Are there any of the flanges used for the converter left? If the muffler thats on there now is where the cat used to be than all the muffler shop has to do is make up a pipe with a flange on one end to fit the new y pipe with bolts and slip over the piece of head pipe left after the current muffler is removed. You could even drive the car over to the shop with the Z28 exhaust allready installed by yourself,having them make the new pipe, remove the current muffler, and hook it up. Or you could just bring them the pieces and have them put it all on which will cost more $$$. I would not recomend having them make a new pipe and you put it on because it can be so hard to get the measurements right. Jay 6155
|
|
|
|
|
Joined: Feb 2014
Posts: 505
Major Contributor
|
|
OP
Major Contributor
Joined: Feb 2014
Posts: 505 |
BTW, I noticed that Walker does not have a part number for the intermediate Y-pipe and Rockauto.com doesn't list it. Anyone know where you get the Y-pipe from these days? Oh wait, never mind I saw the part number in the list above and found it on Amazon: http://www.amazon.com/Walker-42566-Exhau...IN%3DB0017LY2OGWhich is really cheap?
Last edited by Lifeguard; 03/29/14 07:08 PM.
|
|
|
|
|
Joined: Feb 2014
Posts: 505
Major Contributor
|
|
OP
Major Contributor
Joined: Feb 2014
Posts: 505 |
I agree with you about the L6 head pipe design. How much of the stock pipe from the engine to the cat is left on the car? Are there any of the flanges used for the converter left? If the muffler thats on there now is where the cat used to be than all the muffler shop has to do is make up a pipe with a flange on one end to fit the new y pipe with bolts and slip over the piece of head pipe left after the current muffler is removed. You could even drive the car over to the shop with the Z28 exhaust allready installed by yourself,having them make the new pipe, remove the current muffler, and hook it up. Or you could just bring them the pieces and have them put it all on which will cost more $$$. I would not recomend having them make a new pipe and you put it on because it can be so hard to get the measurements right. Jay 6155 Looks like it was sawzalled right before the cat bracket. No flanges left, just exhaust pipe. Pipe is in great condition. The muffler fits right in the indentation of the floor pan for the cat. No pipe attached on the other end of the muffler.
Last edited by Lifeguard; 03/29/14 07:19 PM.
|
|
|
|
|
Joined: Feb 2014
Posts: 505
Major Contributor
|
|
OP
Major Contributor
Joined: Feb 2014
Posts: 505 |
I finished indexing my gaped plugs, then set the timing to 6 degrees before adjusting the solenoid to 800 rpm curb idle. But when I followed the tune up decal directions to use the allen wrench to adjust the base idle, the engine dies when the solenoid's electrical lead is disconnected an I can't seem to set the base idle to 425 rpm. I may have to skip that step and move on to adjust the fast idle linkage tomorrow, then change the oil and coolant. I don't have enough left over after annual registration and replacing the battery, to have the exhaust done. Maybe another paycheck or two. While I was working on it I snapped a pic of the state of my exhaust from the driver's side: 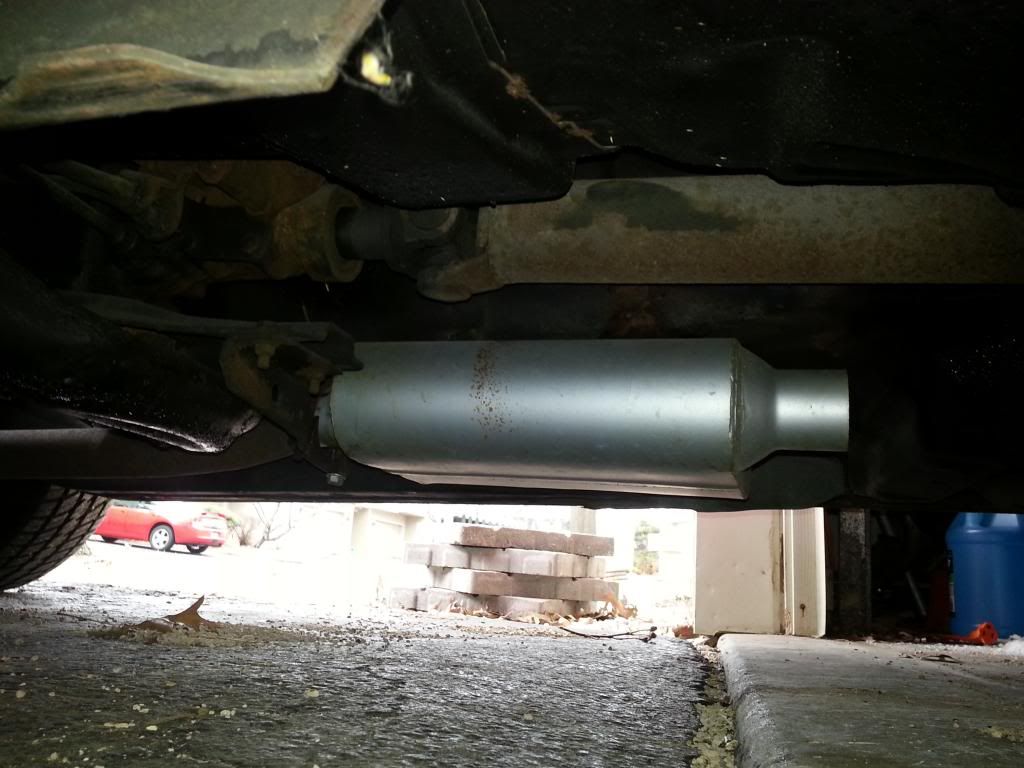
|
|
|
|
|
Joined: May 2011
Posts: 378
Contributor
|
|
Contributor
Joined: May 2011
Posts: 378 |
I haven't followed the whole story here, just happened to see you mention the idle solenoid. If it's anything like mine, sounds like it's working as it should, shutting off the idle fuel feed as soon as power is disconnected. It is to prevent dieseling after you turn the engine off.
The solenoid should get power whenever ignition is on, to enable idle fuel feed. So you adjust idle speed with the solenoid energized. It's supposed to kill the engine when power goes away. It's not a high/low idle speed solenoid.
|
|
|
|
|
Joined: Feb 2014
Posts: 505
Major Contributor
|
|
OP
Major Contributor
Joined: Feb 2014
Posts: 505 |
I haven't followed the whole story here, just happened to see you mention the idle solenoid. If it's anything like mine, sounds like it's working as it should, shutting off the idle fuel feed as soon as power is disconnected. It is to prevent dieseling after you turn the engine off.
The solenoid should get power whenever ignition is on, to enable idle fuel feed. So you adjust idle speed with the solenoid energized. It's supposed to kill the engine when power goes away. It's not a high/low idle speed solenoid. Yeah, the factory tune up decal says to disconnect it and then adjust the base idle to 425 rpm with the 1/8" hex screw in the end of the solenoid. I'm not sure how to accomplish that. Here's the instructions: "1 Disconnect and plug vacuum hose at distributor. Set ignition timing as specified engine speed (6 degrees @ 800 rpm). Unplug and reconnect vacuum hose to distributor." "2 Disconnect and plug vacuum hose at EGR valve and canister purge hose at canister. Turn carburetor solenoid to obtain specified curb idle speed (800 rpm in N)." "3 Disconnect electrical lead at solenoid. Adjust base idle speed to specification (425 rpm in N) by turning 1/8 hex. screw located in end of solenoid body. Reconnect electrical lead." "4 With Transmission in park or neutral, bend fast idle cam follower to obtain specified fast idle speed (2000 rpm in N) on high step of cam. Unplug and reconnect vacuum hose to EGR valve and canister purge hose to canister." I've done steps 1 and 2, but step 3 does not seem possible. I'm not sure what I'm doing wrong?
|
|
|
|
|
Joined: Feb 2014
Posts: 505
Major Contributor
|
|
OP
Major Contributor
Joined: Feb 2014
Posts: 505 |
Here's an old pic I took of my monojet from the passenger side. The solenoid is below the choke, but the vacuum hose is blocking the view of the hex screw in the top and the electrical connection. The 9/16 fitting that you turn with a wrench to adjust curb idle is partially visible. You can also see the follower to the fast idle cam can be see on the backside of the carb to the left right behind the choke in the pic. 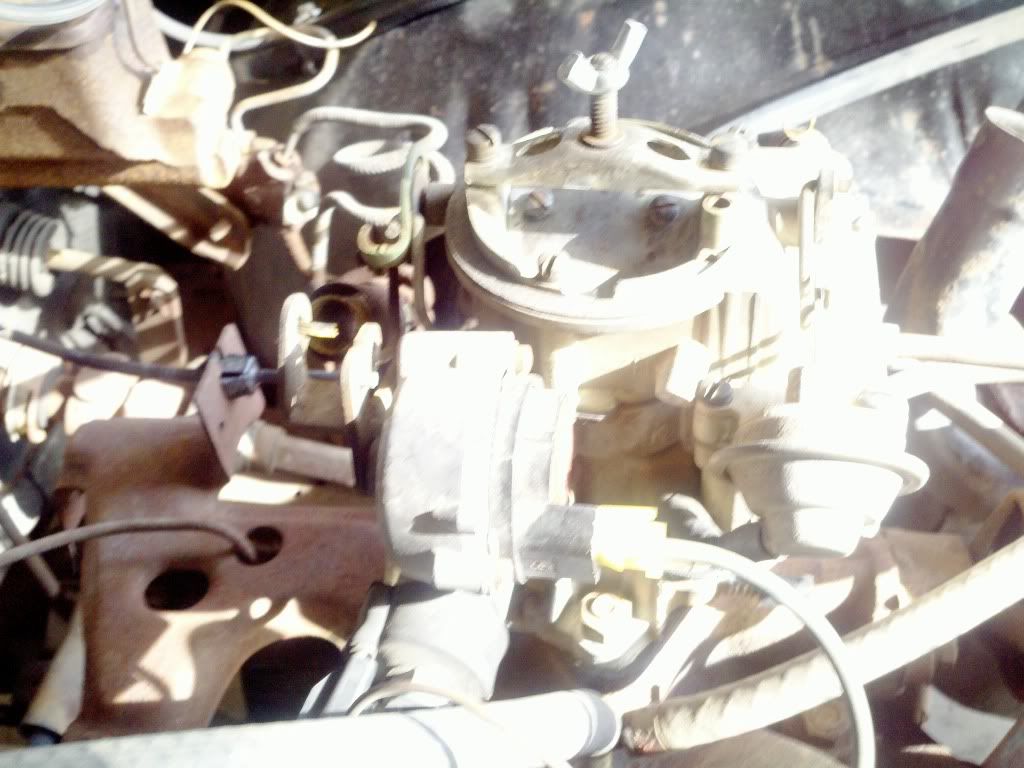
|
|
|
|
|
Joined: Feb 2014
Posts: 505
Major Contributor
|
|
OP
Major Contributor
Joined: Feb 2014
Posts: 505 |
There's also the idle mixture screw in the front of the carb to the left of the fuel line inlet below. But there is not instruction on the tune up decal on adjusting it. 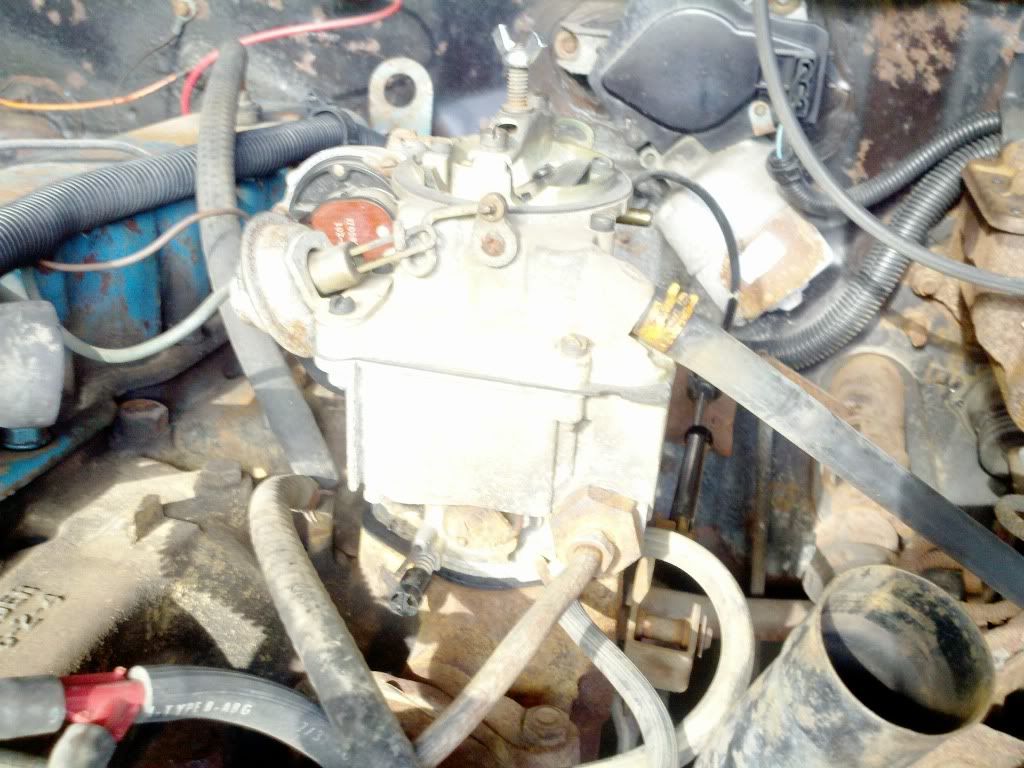
|
|
|
|
|
Joined: May 2011
Posts: 378
Contributor
|
|
Contributor
Joined: May 2011
Posts: 378 |
Thanks,
your solenoid must work differently from mine. Mine is just an on/off switch for idle fuel. Nothing controls it other than ignition key, there is no "slow idle" vs. "high idle" setting to the solenoid. The solenoid on mine is always energized 100% when the engine is running. Different idle speeds (Throttle openings) come from the cam plate the solenoid tip rests against. I suppose I *could* set it to have a high and low idle, but because there is nothing controlling it, it would just stay at high idle all the time, until the engine is turned off, and then it would allow fuel to be drawn in through the idle passage after shutdown and you risk dieseling the engine.
As for idle mixture adjustment: Almost every carb is adjusted with the same principle: idle mixture screw is turned OUT in 1/2 turn increments or so, until idle speed no longer increases. Find the last 1/2 turn that did not cause idle speed to go up, and then go back IN to the previous 1/2 setting and you're done. Close enough for most needs, the rest is 1/4 turn fine tuning. The idea is to find the highest steady idle, but no more.
Idle mixture adjustments affect only idle rpms and slightly off idle throttle, like cruising speeds.
Carb adjustment should be done LAST, after everything else is in good working condition and adjusted right. Point gap, dwell, valve clearances, ignition timing, vacuum leak elimination etc. all come first.
Anyone know better please correct me.
|
|
|
|
|
Joined: May 2011
Posts: 378
Contributor
|
|
Contributor
Joined: May 2011
Posts: 378 |
Also, I have no EGR. Don't know how that changes things.
|
|
|
|
|
Joined: Nov 2013
Posts: 482
Contributor
|
|
Contributor
Joined: Nov 2013
Posts: 482 |
The EGR valve does not open at idle speed so there is no difference in adjusting idle speed. The manual says to disconnect the line to the EGR and the vapor canister. When I worked on these cars at the Chevy garage we never disconected either line.Not just me but no one that worked there. Never had a problem. AS to the low idle 70 Nova has it right, the solonid is "on" any time the key is on run. (some cars are only on when the A/C is turned on) There is a low idle setting so the car will run if the gas pedal is not touched when starting. On my own car the engine won't run at "low" idle. I haven't really tried to set it yet to see what would happen. Jay 6155
|
|
|
|
|
Joined: May 2011
Posts: 378
Contributor
|
|
Contributor
Joined: May 2011
Posts: 378 |
On "other" cars from the same era (dare I say "foreign"), the solenoid is called idle shut off solenoid. Sole purpose being to prevent *any* fuel being drawn in the engine after shutdown, so it wouldn't self ignite after a hard run in the hot combustion chamber. On old american iron, I don't know for sure. What is the purpose of having two idle speeds?
I did check in my old Chilton book and it has a short section on adjusting my '70 230/250. It mentions setting high idle first to 600rpm and finish off with solenoid wire disconnect to set the idle to 400rpm.
Heck I might as well quote the whole section:
With air cleaner in place and engine fully warmed up, "fuel tank" line disconnected from the vapor canister (EEC). Distributor vacuum line disconnected.
a. turn in the mixture screw until it gently seats, then back out the screw FOUR turns.
b. Adjust the solenoid screw to obtain 830rpm for manual transmissions (in neutral) or 630rpm for automatics (In Drive).
c. Adjust the mixture screw to obtain 750rpm for manual transmission (In neutral) or 600rpm for automatics (in Drive).
d. Disconnect the solenoid wire and set the idle speed to 400rpm, then reconnect the wire.
e. reconnect the distributor vacuum line.
I have no vapor canister, thus no fuel tank line to disconnect from it.
Glad I checked, now I know. Still, I can't see why I need two idle speeds and potential dieseling. I use the solenoid to prevent dieseling as I explained above. Yes it won't start or idle unless I tap on the gas pedal once after ignition is turned on. The solenoid is not strong enough to open the throttle from closed position when energized.
|
|
|
|
|
Joined: Feb 2014
Posts: 505
Major Contributor
|
|
OP
Major Contributor
Joined: Feb 2014
Posts: 505 |
Sorry, my laptop and smartphone both died within 24 hours of each other and I've been working on replacing the HD and recovering the OS, so I missed several posts. I can't seem to figure out how to set base idle with the hex screw on the inside of the end of the solenoid. Here's a pic of it: 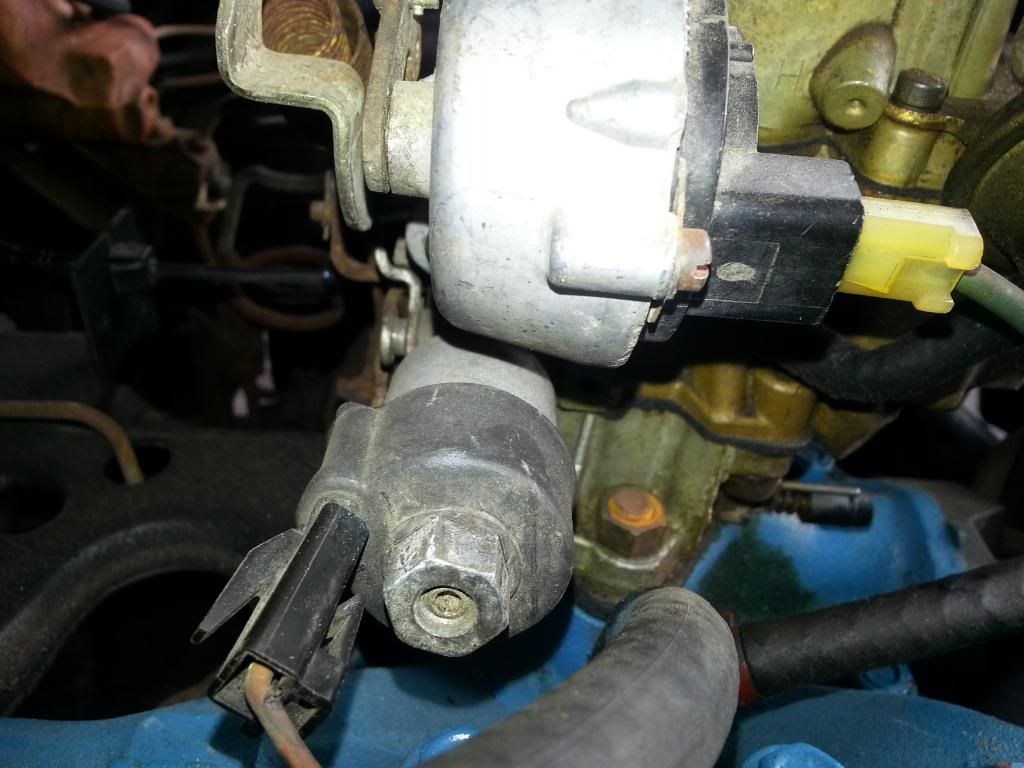 So I skipped that step and just went on to setting the fast idle follower at 2000rpm, after I set the timing for 6 degrees at 800rpm and idle at 800rpm. Then I set the Changed out some 10W-30 synthetic and a filter. And just finished up flushing the cooling and added 50/50. Then I put a 2.25" short straight pipe on the end of muffler and that really helped quiet it down a bit. Just needs a bath and a little more underhood detailing and it runs almost like a real car. Here's what I've done so far of what I call Phase 0: * replaced stock steel/brass radiator with lighter replacement plastic/aluminum (already done when I bought it) *run synthetic energy saver oil * gap and indexed spark plugs * added inline fuel filter before fuel pump * K&N air filter * opened up driver side turn signal to create ram air scoop And my list of updates for the rest of Phase 0 as I get the funds: * replace plug wires with 8mm * replace cap and rotor on HEI * replace vacuum advance on HEI with adjustable Accel * replace coil with Accel supercoil * replace exhaust (probably 2.25" single system, but looking at other options) * replace pulley fan with electric fan * install a cool can in the fuel line I will probably check on my fuel mileage in city as I drive it the next few weeks. I need to invest in a vacuum gauge and an adapter for my compression gauge so it will fit my spark plug threads. In the future phase 1 will be the top end swap, phase 2 a cam swap, and eventually phase 3 will be a short block rebuild with flat tops. Again, as funds allow.
Last edited by Lifeguard; 04/03/14 09:25 PM.
|
|
|
|
|
Joined: Feb 2014
Posts: 505
Major Contributor
|
|
OP
Major Contributor
Joined: Feb 2014
Posts: 505 |
Took some shots of my exhaust: My integrated head exhaust manifold 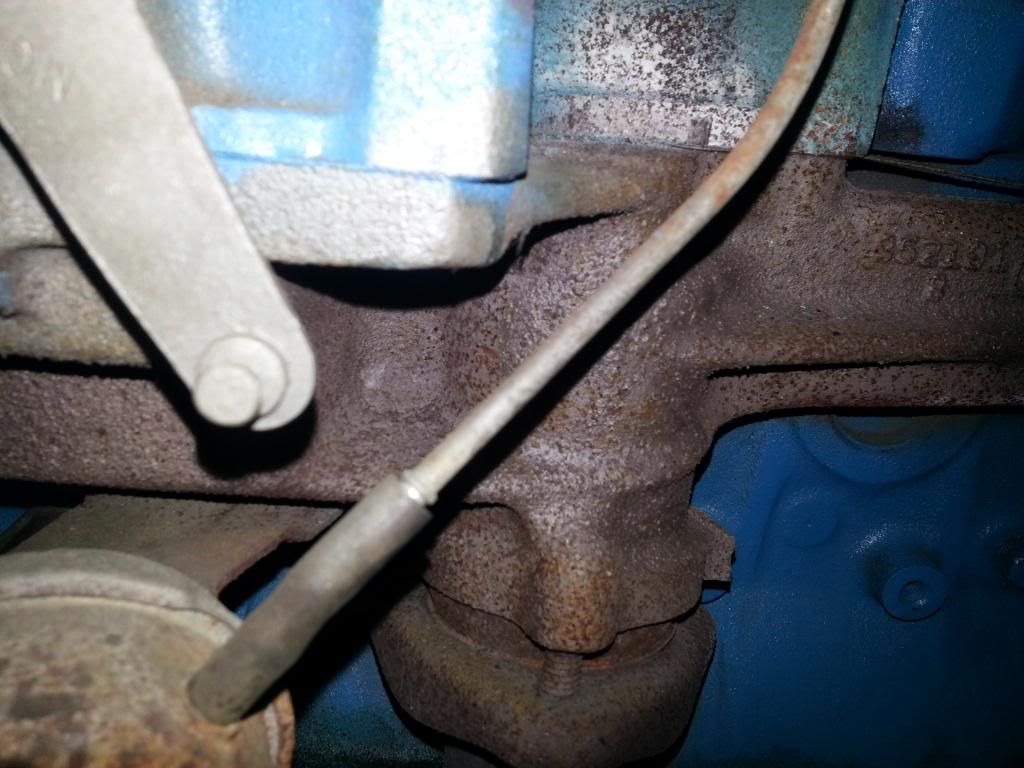 From underneath: 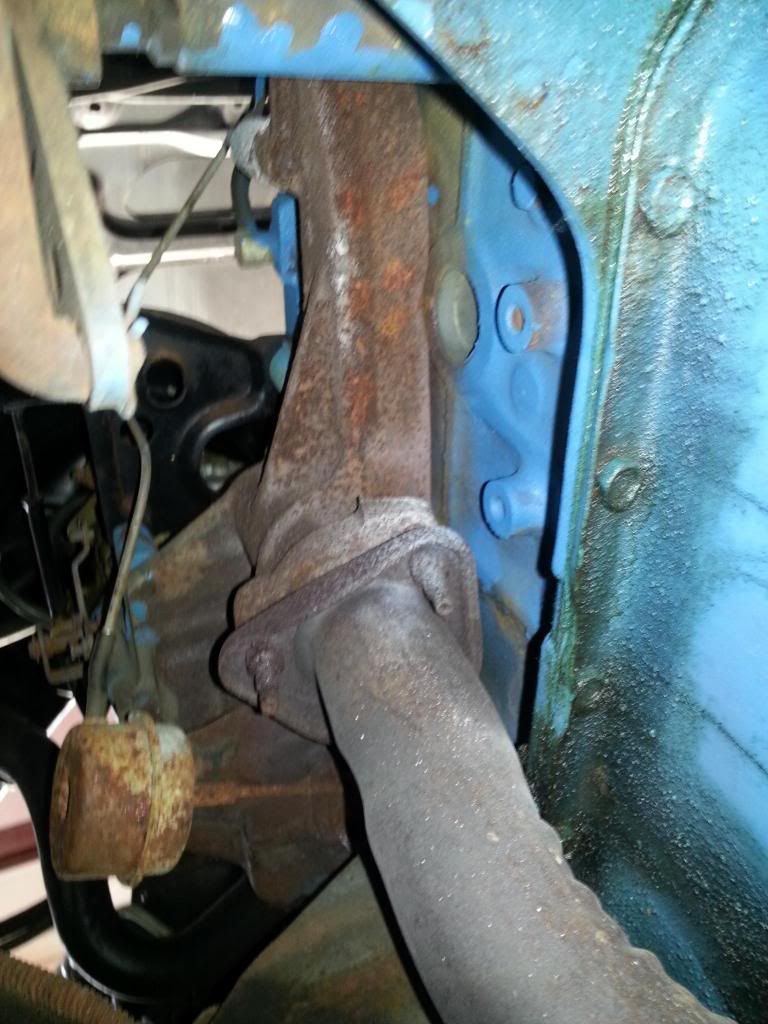 Around the oil pan to the passenger's side: 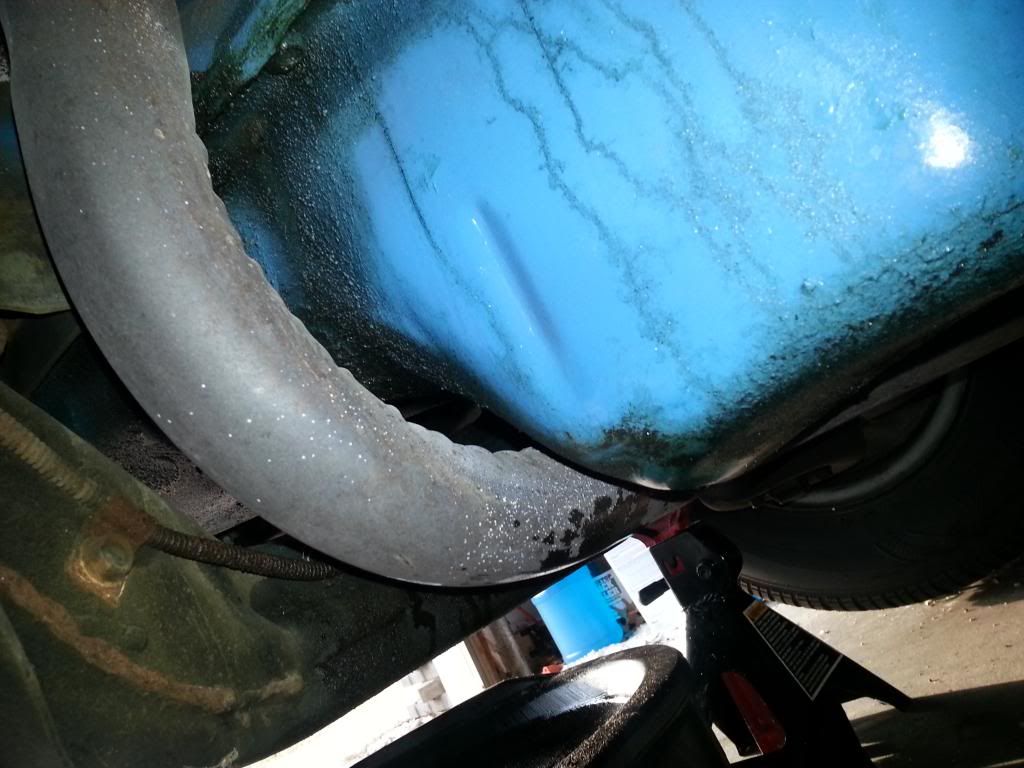 And to the muffler, which is where the catalytic converter would have been: 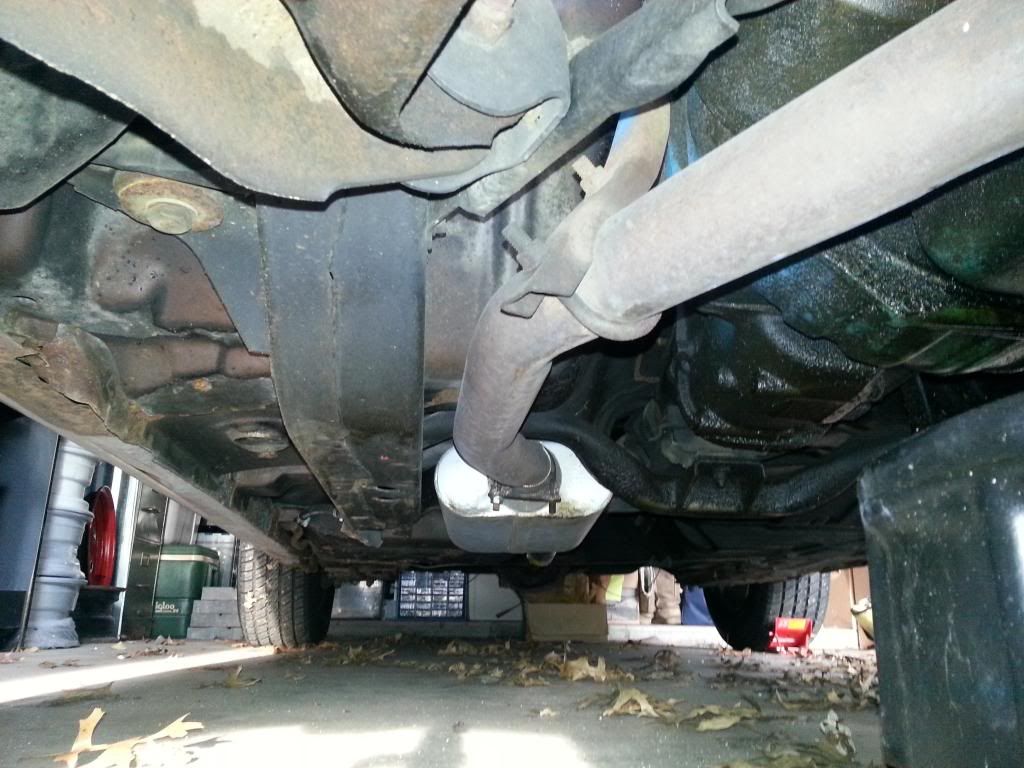
Last edited by Lifeguard; 04/03/14 11:53 PM.
|
|
|
|
|
Joined: Feb 2014
Posts: 505
Major Contributor
|
|
OP
Major Contributor
Joined: Feb 2014
Posts: 505 |
Crap, in the process of flushing the cooling system my water pump started leaking. I guess it's time to replace that too. The pulleys were wobbling and noisy, so that was probably why. The pump is a little different from a small block pump, but it looks like 4 bolts hold it in. Hopefully they'll come out OK. While I have the fan and pulley off, I might take the opportunity to replace it with an electric fan to make it quieter and free up some HP and fuel economy.
|
|
|
|
|
Joined: Nov 2013
Posts: 482
Contributor
|
|
Contributor
Joined: Nov 2013
Posts: 482 |
My Grandson and I had to replace the water pump also. The fan blade would move over an inch when wiggeled and the pump was noisy. I could not believe that it did not leak! We also changed to a 3 blade clutch fan from a 350 chevy truck. The car is much more quiet without that 4 blade fan roaring and sucking up horsepower. You should change fan type for sure. If you go with a factory clutch fan make sure it turns the correct direction. Jay 6155
|
|
|
|
|
Joined: Sep 2008
Posts: 3,669 Likes: 42
1000 Post Club
|
|
1000 Post Club
Joined: Sep 2008
Posts: 3,669 Likes: 42 |
I built a killer 440 Chrysler for a guy one time. He complained it was running hotter than it did before, and kept on and on about it. Finally, he called me soon after that and told me he found out why. He said he went to the parts store and his aftermarket electric fan kicked on as he was walking in front of the car and it blew his skirt up....DOH! He didn't realize he mounted it on the wrong side of the radiator.It was a pusher instead of a puller. It happens a lot i'm sure.
Class III CNC Machinist/Programmer
|
|
|
|
|
Joined: May 2011
Posts: 378
Contributor
|
|
Contributor
Joined: May 2011
Posts: 378 |
..blew his skirt up? Anyhoo, I found one like that once too, never expected that. Took a while to figure it out, and even then it was sheer luck. I just installed an electric fan in front of my new radiator, and the instructions said it could be run either way. Had to quadruple check to make sure I got it right 3-row radiator replacing a stock 2-row, no room for stock fan.
|
|
|
|
|
Joined: Feb 2014
Posts: 505
Major Contributor
|
|
OP
Major Contributor
Joined: Feb 2014
Posts: 505 |
..blew his skirt up? Anyhoo, I found one like that once too, never expected that. Took a while to figure it out, and even then it was sheer luck. I just installed an electric fan in front of my new radiator, and the instructions said it could be run either way. Had to quadruple check to make sure I got it right 3-row radiator replacing a stock 2-row, no room for stock fan. It's a kilt, and if you call it a skirt you'll get kill't!!! Picked up my 16" Imperial electric fan and wiring relay kit from Advanced Auto Parts (my cousin is a regional manager for them). It should be puller right out of the package, otherwise there's a slip connector on the fan axle you pull and turn the blades around. Pretty straight forward, wiring is only somewhat more challenging. I need to figure out what to hook the ignition on wire to still, but the rest of the wires are pretty straight forward. Here's my parts: 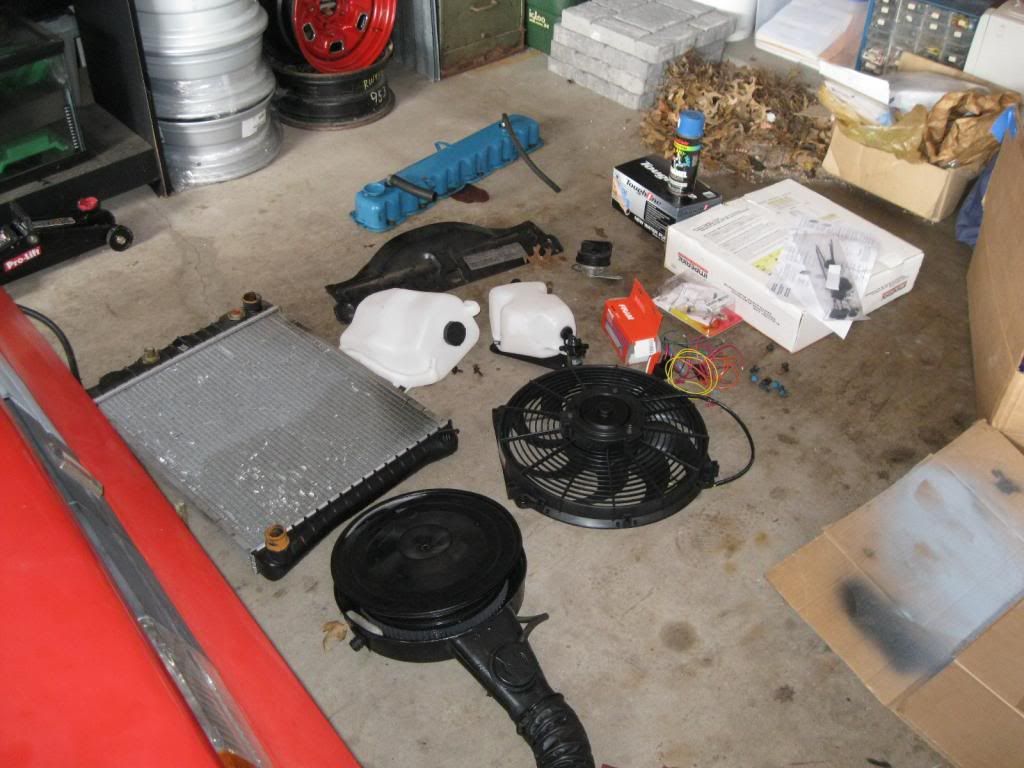 I took the spark plugs out and did a compression test on all cylinders. They all pulled 190 on at least one of the the three bumps I gave each of them. 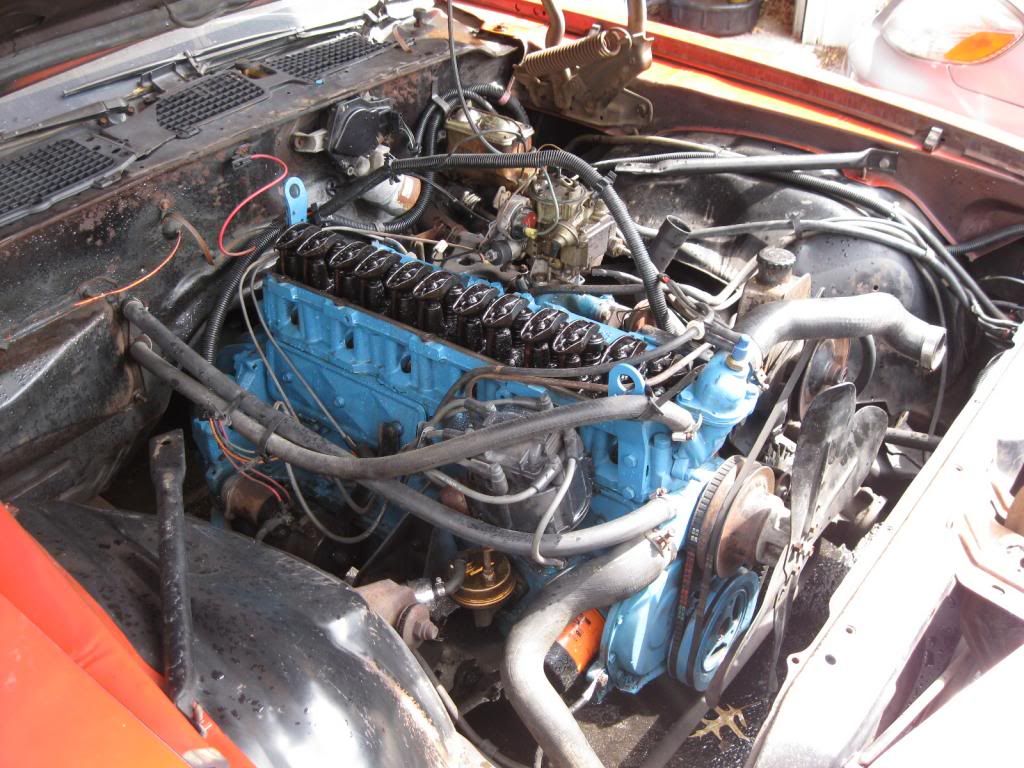 I've got the radiator out, washer/coolant bottles off, spark plugs and valve cover off so far. I'm checking the cam opening and closing points, before I pull the water pump and fan off and don't have the fan to turn the crank over with anymore. I got my feeler gauges to check to see when the intake and exhaust open and close, but can't find the specs on what the stem to rocker clearance should be. I'm also detailing the hard to get to areas while the parts are off so I can clean and paint before putting the parts back on. 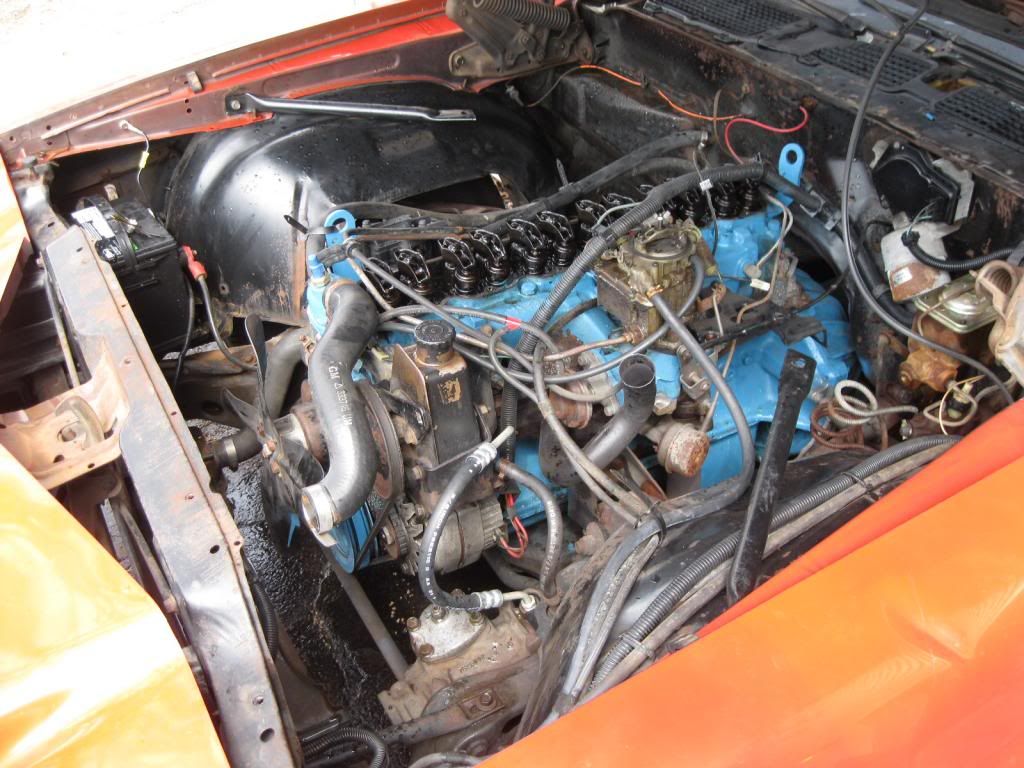
|
|
|
|
|
Joined: Nov 2013
Posts: 482
Contributor
|
|
Contributor
Joined: Nov 2013
Posts: 482 |
Stem to rocker clearanc is 0. Car has hyd. cam. Looks nice under the hood. Please post pics of the fan when it's done. Thanks Jay 6155
|
|
|
|
|
Joined: Feb 2014
Posts: 505
Major Contributor
|
|
OP
Major Contributor
Joined: Feb 2014
Posts: 505 |
Stem to rocker clearanc is 0. Car has hyd. cam. Looks nice under the hood. Please post pics of the fan when it's done. Thanks Jay 6155 OK, that explains why I couldn't fit even a 0.01 feeler gauge in between the rocker and valve stem. I was trying to detect movement of the rockers by using a feeler gauge, but that wasn't working so I just eyeballed the rockers on the #1 cylinder. I made marks every 5 degrees on the flywheel and used the timing pointer to read the marks as I saw the valve open or close. This is not exact, but after spinning the engine over a few dozen times I got these numbers off the stock cam: intake open: 15 degrees intake close: 75 degrees exhaust open: 265 degrees exhaust close: 350 degrees 180 degrees is one turn of the balancer/flywheel, two turns for a full 360. Now I need to figure out how to convert these to ATDC, BBDC, BTDC, and ABDC. The inliner cam chart list the specs for the integrated head cam as: duration @ 0.050": 172 / 188 degrees lift: 0.389" / 0.406" lobe sep: 102 degrees
|
|
|
|
|
Joined: Feb 2014
Posts: 505
Major Contributor
|
|
OP
Major Contributor
Joined: Feb 2014
Posts: 505 |
I've been playing around with these numbers for awhile now trying to convert them into proper valve timing on the camshaft, but so far they make no sense? The intake valve should start to open before TDC, but I observed it 30 degrees of flywheel (or about 15 degrees of cam) after TDC. The same thing is true of the exhaust closing which was 20 degrees of flywheel (10 degrees of cam) before TDC instead of after. Now there is probably some degree of exhaust closing and intake opening between those points that I can't see with my bare eye but probably would show up on a dial caliper, and that should be added on. And maybe the slow turning of the crankshaft is causing the hydraulic lifters to absorb some of the lift on the opening and closing, restricting the opening and closing I can observe. I'm not sure how many degrees to add to the timing of each event to get the proper cam timing numbers?
Also I mentioned above that I hooked up my compression gauge to each cylinder, and they all delivered between 180 and 190 psi on multiple turn overs each. My concern with swapping to a non-integrated head is the thick .040" replacement head gasket that is the only commonly available option. Without a lot of chamber reduction from decking, and/or advancing the stock cam, the cylinder pressure is going to really drop.
Last edited by Lifeguard; 04/16/14 01:52 PM.
|
|
|
|
|
Joined: Sep 2008
Posts: 3,669 Likes: 42
1000 Post Club
|
|
1000 Post Club
Joined: Sep 2008
Posts: 3,669 Likes: 42 |
You'll have to use a degree wheel and a dial indicator to do this correctly and accurately. As you pointed out, the initial opening and closing events are happening quicker than your eye can detect. And the lifters being preloaded is also causing errors in your readings. You also have to have light tension checking springs in place of the valve springs as well or you'll never get there.
Class III CNC Machinist/Programmer
|
|
|
|
|
Joined: Feb 2014
Posts: 505
Major Contributor
|
|
OP
Major Contributor
Joined: Feb 2014
Posts: 505 |
You'll have to use a degree wheel and a dial indicator to do this correctly and accurately. As you pointed out, the initial opening and closing events are happening quicker than your eye can detect. And the lifters being preloaded is also causing errors in your readings. You also have to have light tension checking springs in place of the valve springs as well or you'll never get there. So I really can't read the stock cam until I do a head swap on it and can swap out the check springs during an initial install of the head (using ARP head studs), and can check the cylinder pressure and cam timing then. At that point I can disassemble it and advance the cam if I need to, and put the stock springs back in for final install of the head/intake/carb/exhaust.
|
|
|
|
|
Joined: Sep 2008
Posts: 3,669 Likes: 42
1000 Post Club
|
|
1000 Post Club
Joined: Sep 2008
Posts: 3,669 Likes: 42 |
You can read it at an time, but you will end up doing a lot of back and forth swapping of incidental parts to do it. Just wait until you swap heads then you can only do it once and make the necessary adjustments as needed.
Class III CNC Machinist/Programmer
|
|
|
|
|
Joined: Feb 2014
Posts: 505
Major Contributor
|
|
OP
Major Contributor
Joined: Feb 2014
Posts: 505 |
You can read it at an time, but you will end up doing a lot of back and forth swapping of incidental parts to do it. Just wait until you swap heads then you can only do it once and make the necessary adjustments as needed. Yeah, that was my thought. If I gotta swap out springs, that's a lot tougher with the head on. And putting a degree wheel on it will require taking other parts off too. Just easier to do all at once with the top end swap. I'll also be able to inspect the original head gasket at that time and see how thick it is from the factory, and the deck clearance on the pistons too. The bottom end is pretty solid and low mileage, and I'm on a shoestring budget. So I'm not touching the pistons, zero deck and rebuilding the short block until I have to.
Last edited by Lifeguard; 04/16/14 04:35 PM.
|
|
|
|
|
Joined: Nov 2013
Posts: 482
Contributor
|
|
Contributor
Joined: Nov 2013
Posts: 482 |
Ok you got to me. I adjusted the carb on the Nova for low and high idle speed. Turning the allen head screw in speeds up the engine when the wire to the solonid is unplugged. Mine was so loose that I am surprised that it didn't fall out. All is good now,just bump the key (when the engine is warmed up) and it starts easily without touching the pedal. May I suggest milling the "new" head for a compression increase with the stock bottom end. Also consider replacing the stock cam at the same time with something a little hotter. Jay 6155
|
|
|
|
|
Joined: Feb 2014
Posts: 505
Major Contributor
|
|
OP
Major Contributor
Joined: Feb 2014
Posts: 505 |
Ok you got to me. I adjusted the carb on the Nova for low and high idle speed. Turning the allen head screw in speeds up the engine when the wire to the solonid is unplugged. Mine was so loose that I am surprised that it didn't fall out. All is good now,just bump the key (when the engine is warmed up) and it starts easily without touching the pedal. May I suggest milling the "new" head for a compression increase with the stock bottom end. Also consider replacing the stock cam at the same time with something a little hotter. Jay 6155 OK, I'm not sure how you got it to do that? When I unplug my solenoid, the engine stops dead. Were you starting it after unplugging? Mine is cold starting hard and bogging until warmed up, so I would like to be able to adjust this. Yeah, milling the head is required, but doing the math it seems that even milling the head down to 70cc won't make up for the compression lost to the 0.040" replacement gasket. So my piddly 8.1:1 CR will drop even further. Of course I won't know for sure the stock ratio or effect of changes, until I crack open the top end and can CC the integrated head and pistons, measure gasket thickness and check the closing point of the intake valve on the cam. I presume the intake ABDC closing point of the stock integrated cam is going to be the earliest of all possible cam swaps. Comp Cams' two mildest cams 240XE and 252XE both have an intake closing of 48 degrees ABDC, so I'm assuming the stock cam is less than 48 degrees. And if the static compression ratio decreases, a hotter cam is just going to decrease the dynamic compression ratio even less than keeping the stock cam or advancing the stock cam. I'm also assuming that after I invest near $1000 in a replacement head, manifold, carb, and 2.5" 292 HD exhaust manifold; I'm not going to have the funds for a new cam at the same time. Cam swap would probably need to be a stage 2 upgrade by itself, or part of the eventual bottom end rebuild when it can be matched to the final static CR when flat tops are installed and block zero decked. If I match a cam up for best DCR with stock bottom and modified top, it probably will be too little cam when the bottom end is upgraded and will need to be swapped again at that point. But again, I'll have a better idea of how that will work when I pop the top off and do all the measurements. Right now is just guesswork. Also the 180psi to 190psi I'm getting off the cylinders leaves me a little more confident that the stock CR is a little higher than advertised, and will make the stage 1 swap power gain possible without having to swap the cam.
Last edited by Lifeguard; 04/17/14 12:21 PM.
|
|
|
|
|
Joined: Feb 2014
Posts: 505
Major Contributor
|
|
OP
Major Contributor
Joined: Feb 2014
Posts: 505 |
I had to replace my valve cover gasket again once the valve cover was off. The cork came apart while trying to remove it. I bought a new one, but opened it up and found it had 7 bolt holes instead of 11: http://shop.advanceautoparts.com/p/felpr...ve+cover+gasketThe only other gasket with the correct number of holes has a weird bit of extra gasket sticking out on the intake side: http://shop.advanceautoparts.com/p/felpr...ve+cover+gasketThe gasket will work if you cut off the extra side bits, but I don't know what they are for? There's nothing on that side of the valve cover to utilize them? I went back and looked at pictures of non-integrated heads and counted the valve cover holes and saw the non-integrated were 7 bolts for the valve covers. So I guess I have to get another valve cover when I get a non-integrated head, as the integrated head valve cover is different.
|
|
|
|
|
Joined: Nov 2013
Posts: 482
Contributor
|
|
Contributor
Joined: Nov 2013
Posts: 482 |
To keep the engine from stalling when you pull the wire off the carb turn in the allen head screw first before unplugging the wire. Start with about 1 full turn in from where it is now. Yes there are more bolts on our valve cover than the non intergrated head. That "extra" gasket is for 75-76 heads that use a wider valve cover. Just cut it off. Jay 6155
|
|
|
|
|
Joined: Feb 2014
Posts: 505
Major Contributor
|
|
OP
Major Contributor
Joined: Feb 2014
Posts: 505 |
Cool, I'll give that a try when I finish reassembling the cooling system. I've been busy detailing the engine bay, and just now getting everything back together.
Ok, so there have been three different valve covers for the Chevy L6, and two types of integrated head with minor differences. Good to know why shopping for a valve cover for a non-integrated head so I don't end up with the wrong one.
|
|
|
|
|
Joined: Feb 2014
Posts: 505
Major Contributor
|
|
OP
Major Contributor
Joined: Feb 2014
Posts: 505 |
Still cleaning and detailing all the parts I have access to. I installed the new coolant and windshield washer bottles too. Plugs and valve cover are back on. I've decided while I have the '78 radiator hoses off, I should just replace them just in case. I was already replacing the heater hoses. I still have some of the original tower style hose clamps, but I have no idea how to tighten these. I did break a bolt on the water pump while reinstalling it, but it didn't snap until I took it out again so I don't need to retap it. Gotta wait to get replacement bolts after the hardware store opens after Easter Sunday. 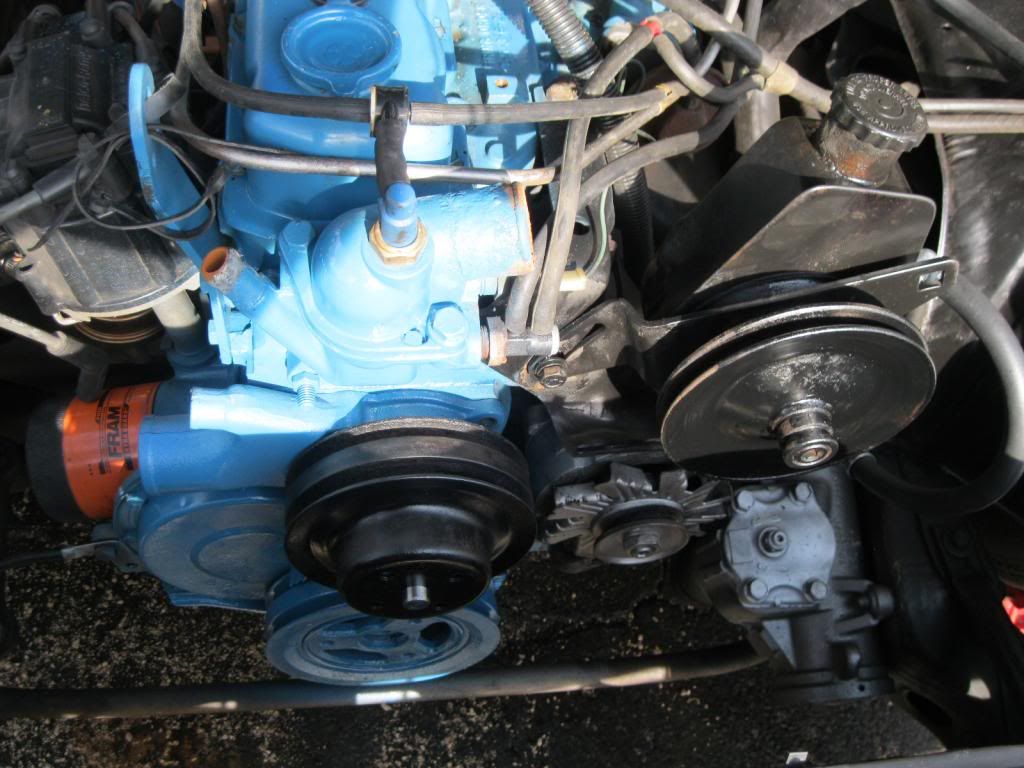 
|
|
|
|
|
Joined: Nov 2013
Posts: 482
Contributor
|
|
Contributor
Joined: Nov 2013
Posts: 482 |
Looks nice. Wish I could get a new overflow bottle for the Nova. Asfar as I know none are made. We got a better bottle out of the junkyard for $5. Haven't installed it yet, still working on cleaning the inside of the junkyard find. Where did you get the new bottles for the Camaro? Jay 6155
|
|
|
|
|
Joined: Feb 2014
Posts: 505
Major Contributor
|
|
OP
Major Contributor
Joined: Feb 2014
Posts: 505 |
Looks nice. Wish I could get a new overflow bottle for the Nova. Asfar as I know none are made. We got a better bottle out of the junkyard for $5. Haven't installed it yet, still working on cleaning the inside of the junkyard find. Where did you get the new bottles for the Camaro? Jay 6155 I got them from Fbody Warehouse. I haven't ordered from them in awhile, and just went to their site and get an error message. I hope they didn't go out of business. Their last tech video was uploaded a year ago: https://www.youtube.com/user/Fbodywarehouse1/videoshttps://www.youtube.com/watch?v=QdIlyskfR_Q
Last edited by Lifeguard; 04/21/14 09:49 AM.
|
|
|
|
|
Joined: Feb 2014
Posts: 505
Major Contributor
|
|
OP
Major Contributor
Joined: Feb 2014
Posts: 505 |
For some reason now I can get into the site. Must have been a glitch: http://www.fbodywarehouse.com/fbw/home.php?cat=364http://www.fbodywarehouse.com/fbw/home.php?cat=355My coolant bottle that was in my Camaro when I bought it (I presume factory original) didn't have the vented cap they offer, it had the same cap as the bottle came with. My washer bottle also didn't have the cap mounted hose connector, it came out of the bottom from the motor.
|
|
|
|
|
Joined: Feb 2014
Posts: 505
Major Contributor
|
|
OP
Major Contributor
Joined: Feb 2014
Posts: 505 |
Well I've got upper and lower radiator hoses coming on Wednesday, and I bought all new bolts for the water pump today. I've installed the pump and took the bolts down to snug and then some since I can't really find a torque spec for them anywhere. So while I'm waiting for hoses, I assembled everything that could be be put together. Hoses, pulleys, air cleaner, and I installed brand new heater hoses. I'm using newer style hose clamps, because I can't figure out how to tighten the vintage tower clamps. The heater hoses came extra long, so I routed them around onto the wheel well versus the old hoses which were cut down and running right alongside the HEI and straight back to the heater core. I'm now working on the electric fan installation. Trying to find a switched electric signal to hook the relay up to. Here's a few pics I snapped with only the radiator, fan, hoses and bracket left to go: 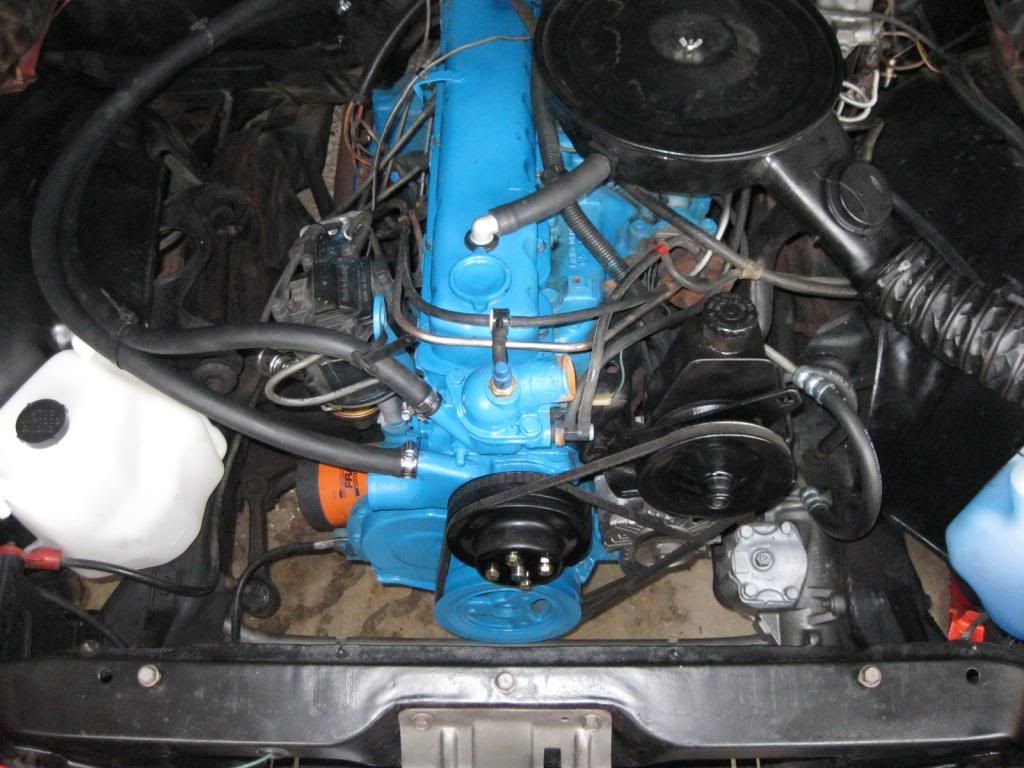 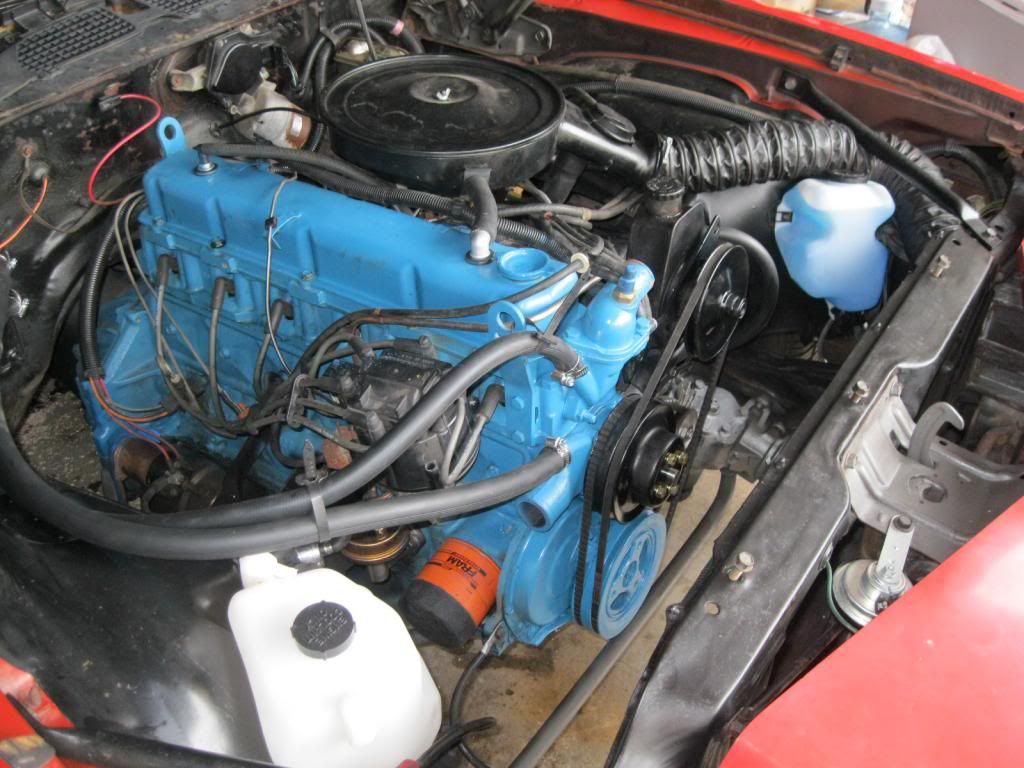 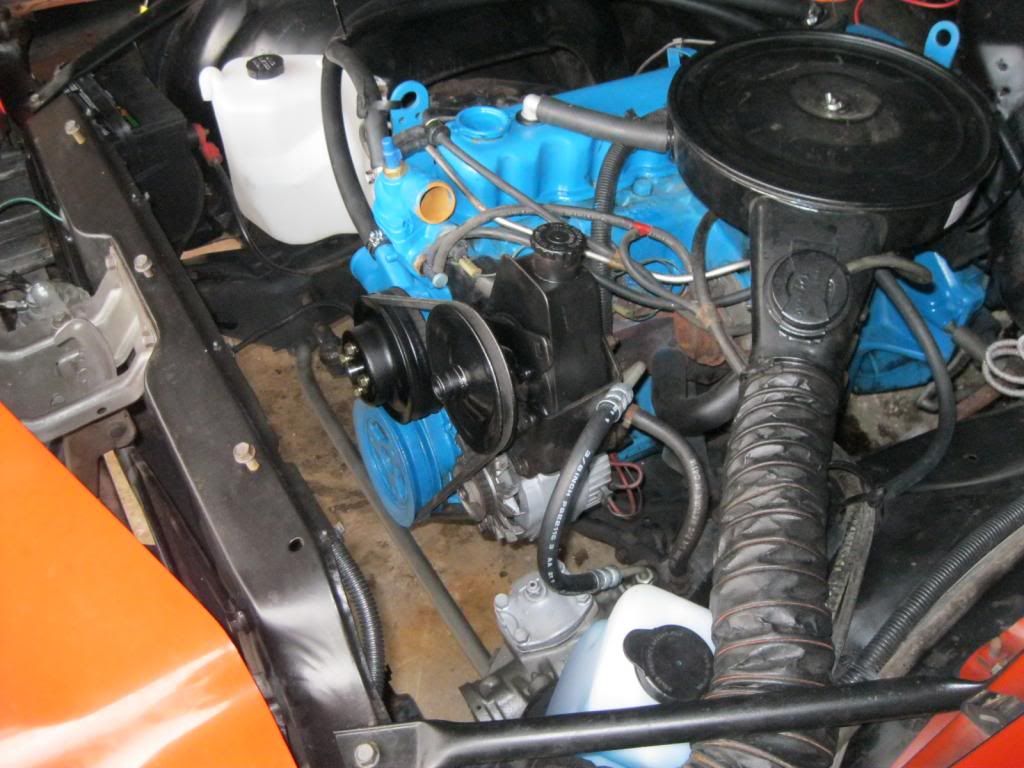
|
|
|
|
|
Joined: Feb 2014
Posts: 505
Major Contributor
|
|
OP
Major Contributor
Joined: Feb 2014
Posts: 505 |
Did a little research on Z28 exhaust:
42566 y pipe 67.99
21598 muffler 42.99 each.
43744 and 43745 are 24.79 each
43662 39.79
43663 33.99
There are other pipes listed for "earler" versions of this system at about the same price. The 21907 muffler that you have posted about is the stock 1 pipe in and 2 pipe out for Camaros and Novas of that era. When the Z28 came back out in 1977, I bought one. ( I was only 2 yrs old at the time) This exhaust system was the only real change to the engine, the rest of the engine was stock LM1. The exhaust added ~20 hp over the system that you posted parts for. At the time I took 2 stock exhaust pipes from a Chevelle and ran them from the manifolds to the mufflers,getting rid of both y pipes and the converter. Believe it or not they fit perfectly and I ended up with a true dual exhaust system. I would recomend that you buy the Z28 system starting at the y pipe and have the shop make you a 1 piece 2 1/2 pipe to crossover and hook up to the y pipe. The shop may even be able to get the pipes cheaper than you can. At the very least get the y pipe and go from there. I have been told that the 292 manifold outlet is in the same place as our 1bbl intergrated head. If someone could verify this (TLowe?) then everything would bolt up when the head was changed to non intergrated. Jay 6155
With the cooling system finished this week, my next project may be moving along to the ignition system and upgrading the coil, cap/rotor, and plug wires. But I'm thinking about the exhaust and maybe trying the Z28 cat-back setup. Attaching it to my existing 2.25" header pipe like was suggested with a pipe going from 2.25" with adapter to the 2.5" on the Y-pipe. Then when I make the exhaust manifold swap to the 292 HD 2.5" one, I can just hook the 2.25" header pipe to it and get it running down to the exhaust shop to replace everything from the Y-pipe forward with 2.5".
|
|
|
|
|
Joined: Feb 2014
Posts: 505
Major Contributor
|
|
OP
Major Contributor
Joined: Feb 2014
Posts: 505 |
Here's a few pics of the '77-'81 Z28 exhaust from my assembly manual. The 2.25" intermediate pipe coming out of the resonator and the 2.25" tailpipe are actually one continuous pipe from the factory. I also noticed that the assembly manual calls for painting the pipe from the hanger on back with a black high temp paint. The L6 and other V8 exhaust plans don't call for the painting of the tailpipes. Probably done on the Z28 to match all the black trim and look good when you put chrome tailpipe covers on it.  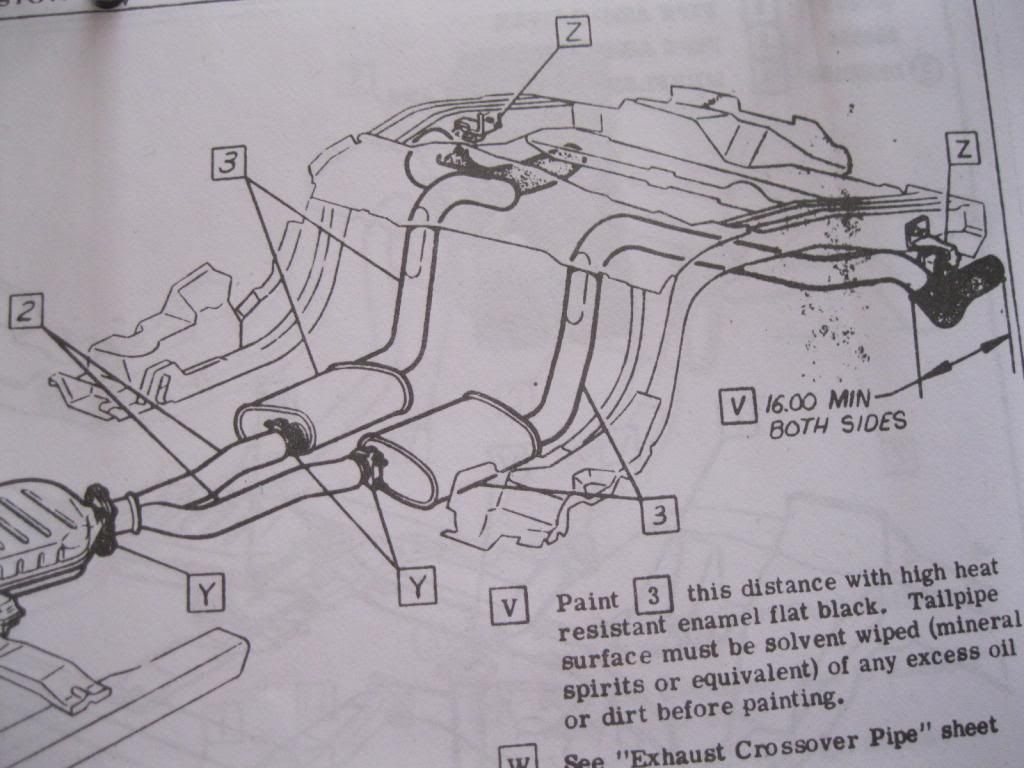
|
|
|
|
|
Joined: Feb 2014
Posts: 505
Major Contributor
|
|
OP
Major Contributor
Joined: Feb 2014
Posts: 505 |
Here's some pictures of the fan install. I went with an Imperial 16" fan, which covered more of the radiator surface but ended up having a dimple that interfered with the the water pump pulley. Since it was already set up as a pusher out of the box, and I had plenty of room in front, I decided to front mount it instead. Looking at the specs, the 10" and 14" Imperial fans should be able to mount behind the radiator and can be flipped to turn them into puller fans. 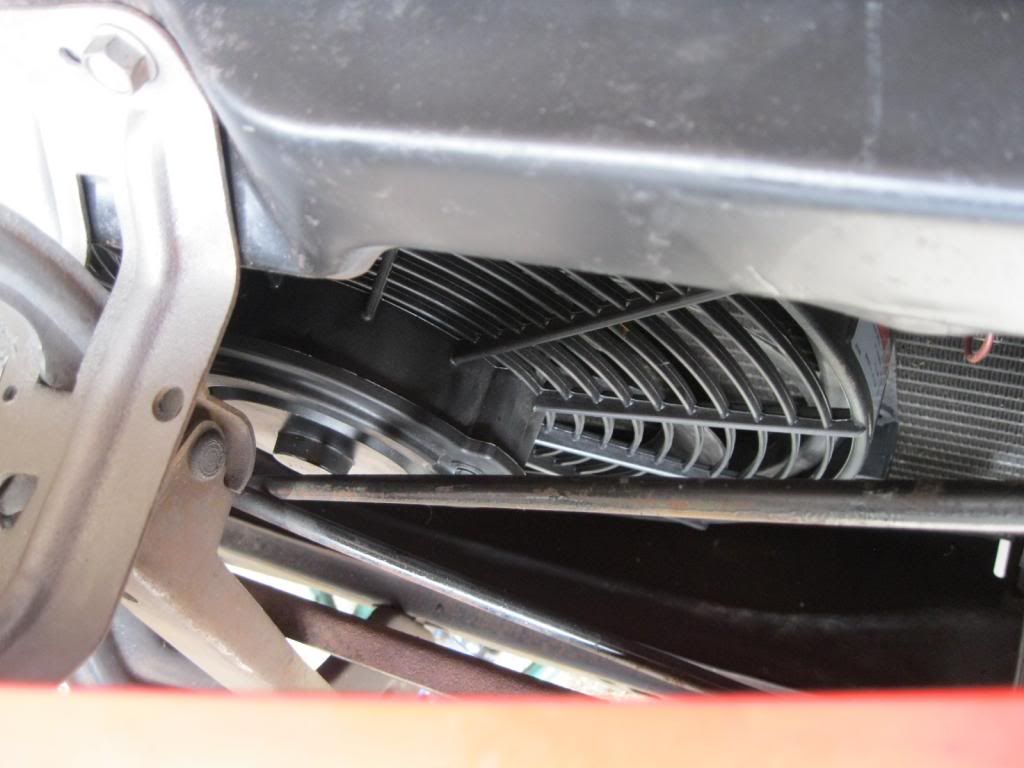 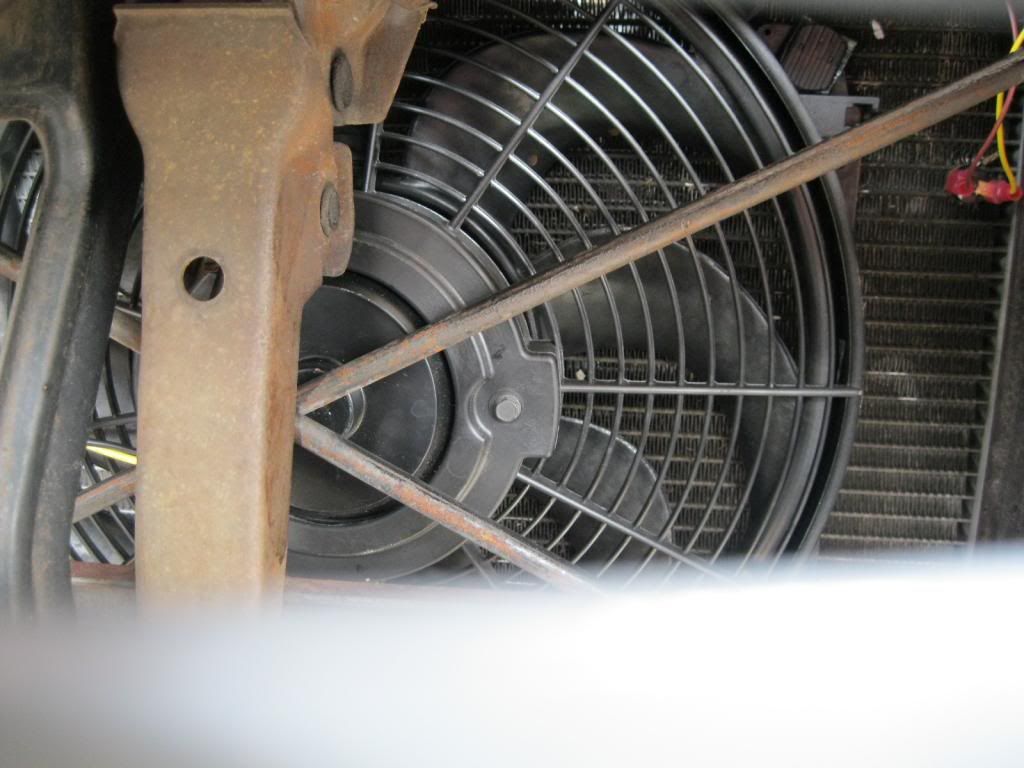 I got a relay kit to go with the fan and set up the sensor a few inches below the top hose inlet: 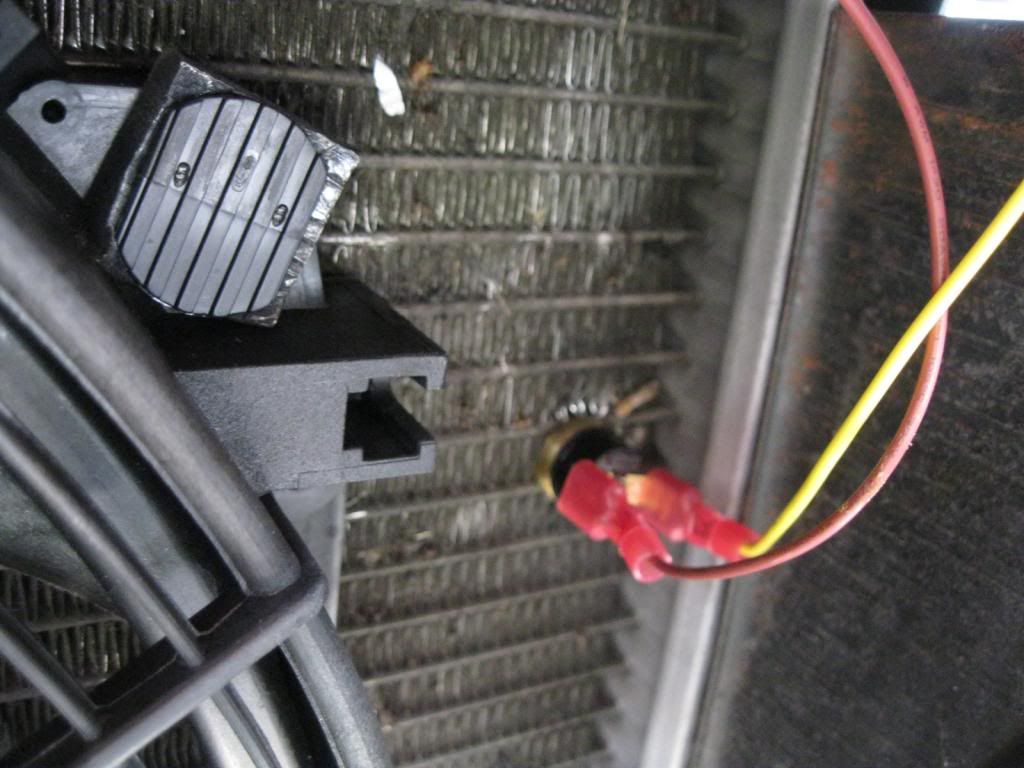 And mounted the relay using an existing hole in the front radiator support right next the passenger side of the radiator and battery: 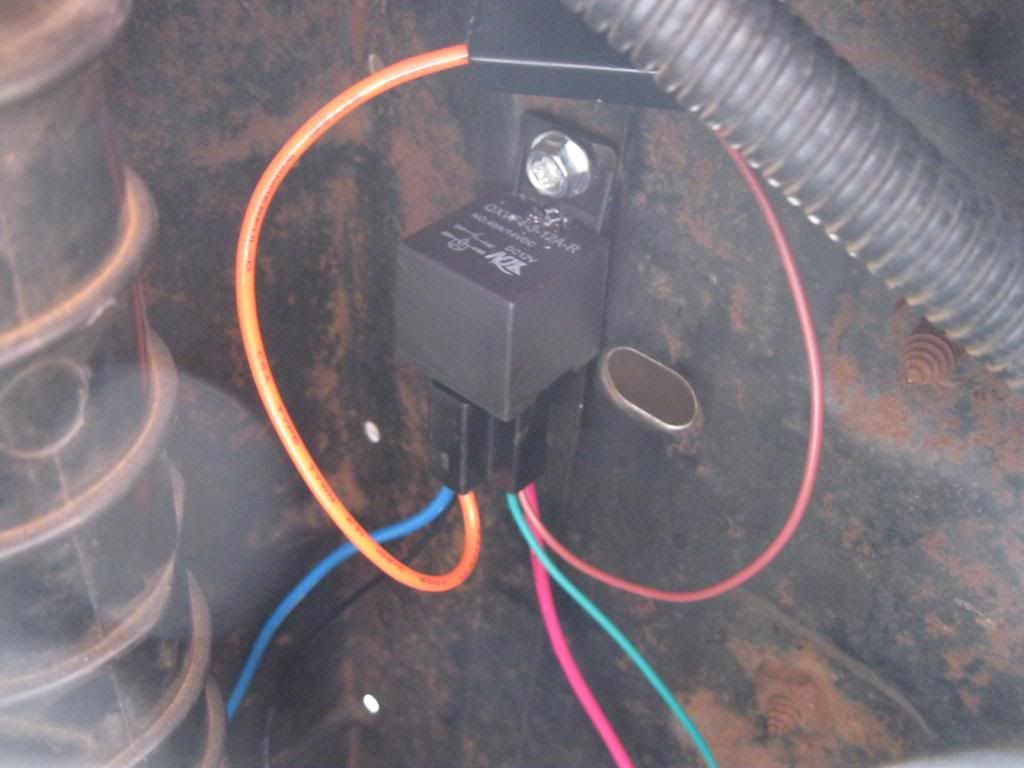
|
|
|
|
|
Joined: Feb 2014
Posts: 505
Major Contributor
|
|
OP
Major Contributor
Joined: Feb 2014
Posts: 505 |
I also took a few snapshots with the radiator bracket and hoses in place. You really can't see if the belt driven fan is present or not with the top cover bracket in place. 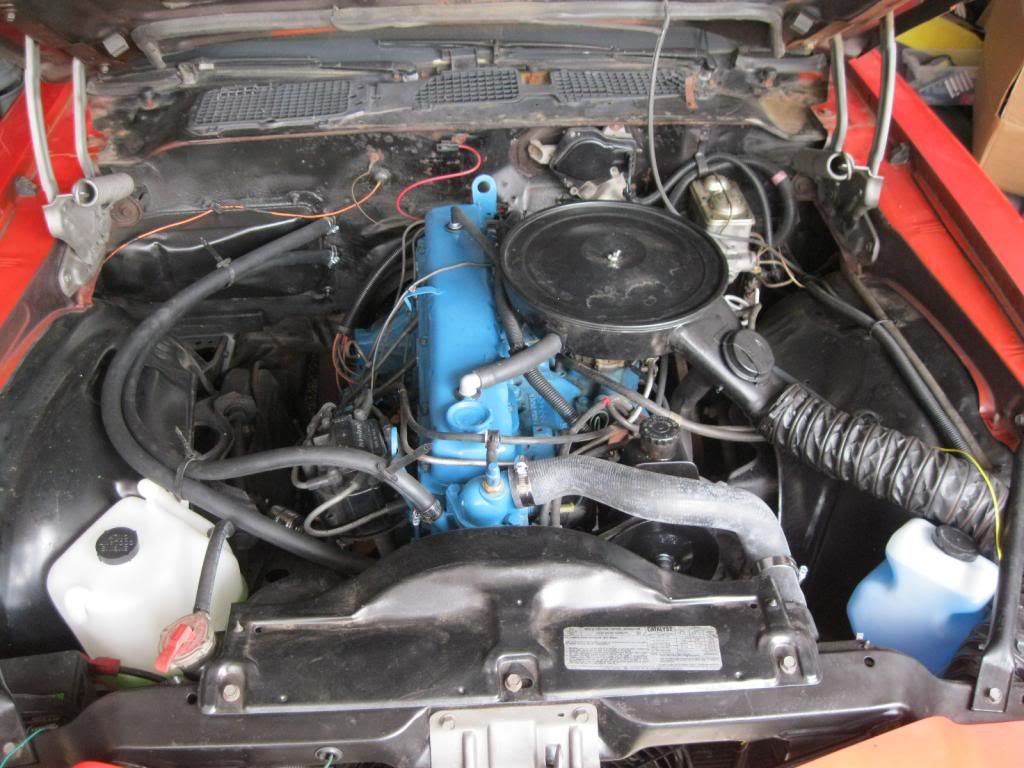 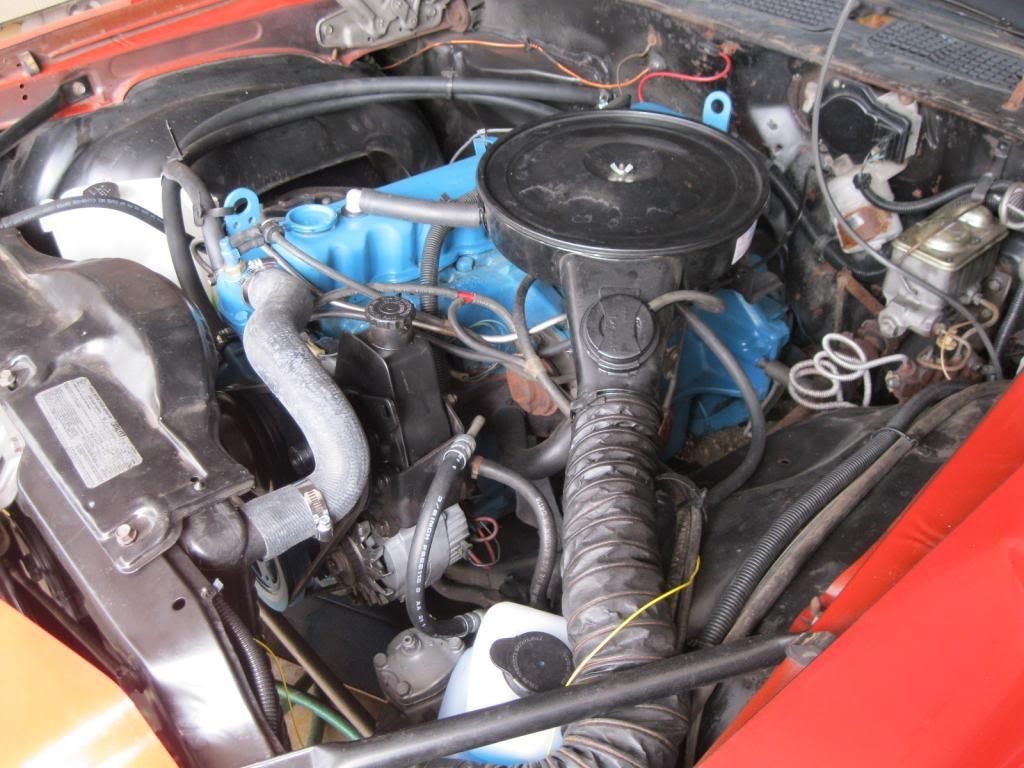 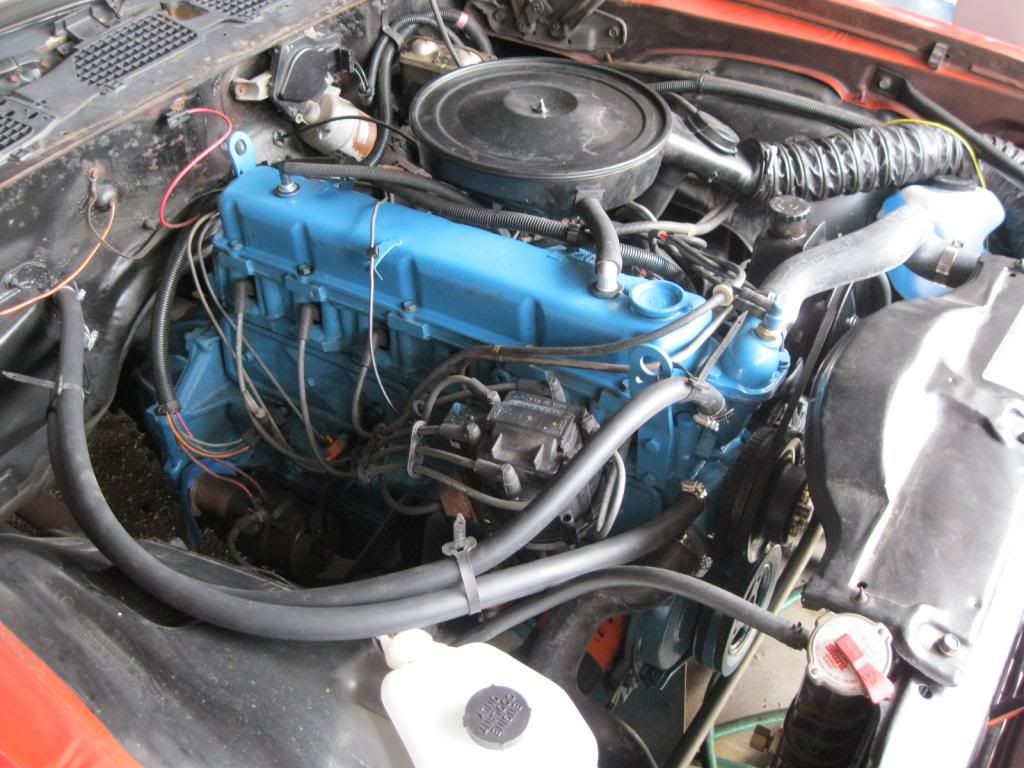 Hmmmm....air cleaner and radiator cover are still a bit dirty after I washed last night. Better sponge them off to look good with all the other newly painted parts.
Last edited by Lifeguard; 04/23/14 08:29 PM.
|
|
|
|
|
Joined: Feb 2014
Posts: 505
Major Contributor
|
|
OP
Major Contributor
Joined: Feb 2014
Posts: 505 |
I've been pricing the Z28 exhaust to see what is most affordable. I've got a 20% off I got from Advanced that's good for another 3 days. So I priced the resonator back system from both Rockauto and Advanced. Rockauto is cheaper, but there was extra for shipping while Advanced offered free shipping over $75. I broke down the prices to see which combo was the cheapest overall:
Pipes & hangers: Rockauto: $165.69 Advanced: $155.15
Resonators & clamps: Rockauto: $100.06 Advanced: $129.89
Y-pipe: Amazon: $75.79
I think I'm going to get the pipes and hangers from Advanced now and use the driver side tailpipe that I can hook to my pipe I added to the current muffler position. Then I can get the resonators from Rockauto later, when I can also order the Y-pipe from Amazon and I can have my shop connect it all. I won't need the clamps at that time, because my shop will weld the pipes all up, cut the bracket off the Y-pipe and make a custom pipe from my 2.25" head pipe to the 2.5" Y-pipe flange. Should all be done by summer, and then I'll move on to the ignition system.
|
|
|
|
|
Joined: Nov 2013
Posts: 482
Contributor
|
|
Contributor
Joined: Nov 2013
Posts: 482 |
I really like the way that you cleaned and detailed the underhood and engine.I think the Z28 system will be great on that Camaro. Shop around more for the Y pipe I think that I saw it cheaper but can't rember where. Jay 6155
|
|
|
|
|
Joined: Feb 2014
Posts: 505
Major Contributor
|
|
OP
Major Contributor
Joined: Feb 2014
Posts: 505 |
Thanks. I've been googling the hell out of it, but $75 is the best I've seen with shipping. I'll definitely keep checking for sales and jump when I see one extra cheap. Grocery shopping took priority, so I'm just getting the driver side pipes for now, and hook it up to what I got now. Then using my $25 coupon from Advanced to get the other half before the end of the month.
|
|
|
|
|
Joined: Feb 2014
Posts: 505
Major Contributor
|
|
OP
Major Contributor
Joined: Feb 2014
Posts: 505 |
New water pump has no leaks, so I put in new coolant and the new electric fan is working great. It's not as noisy at idle without the belt driven fan, but the belts and alternator are still a little noisy.
I've been trying to get the low idle adjusted to properly tune it up all day, and I've had little success with it. Don't know what I'm doing wrong. When warm the engine doesn't want to start without revving it and doesn't like to take idle, and I'd like to fix that. Cold starts are pretty hard, and it dies in idle until it is warmed up too. I'll review the instructions again and try early tomorrow to get it adjusted.
|
|
|
|
|
Joined: Apr 2004
Posts: 3,555 Likes: 34
1000 Post Club
|
|
1000 Post Club
Joined: Apr 2004
Posts: 3,555 Likes: 34 |
Give it a little more timing.
Inliner Member 1716 65 Chevelle Wagon and 41 Hudson Pickup Information and parts www.12bolt.com
|
|
|
|
|
Joined: Feb 2014
Posts: 505
Major Contributor
|
|
OP
Major Contributor
Joined: Feb 2014
Posts: 505 |
Give it a little more timing. More than 6 degrees BTDC? That's the factory recommendation, but I'll give that a try after I use some of integrated's suggestions. Thanks.
|
|
|
|
|
Joined: Feb 2014
Posts: 505
Major Contributor
|
|
OP
Major Contributor
Joined: Feb 2014
Posts: 505 |
I followed Jay's instructions and was able to get the low idle tuned. I took it out for a drive, then came back and checked to make sure it was still idling at 800rpm. Then tightened the adjustment hex screw all the way in and disconnected the wire to the solenoid, and it stayed running. Then I backed it out until it hit a stumbling 425 rpm, then plugged it back in and it leapt right up to 800rpm again. Then did a few half turns of the idle mixture screw until it stopped raising rpm (about one turn away from the screw backing all the way out) and back in a half turn. Then repeated with the solenoid again. It's not exactly stock idle smooth, still stumbles a little bit on idle, but it's the best I've gotten out of it.
In the meantime I found out the instructions of my electric fan were wrong, it is a puller out of the box, not a pusher. So I need to take the fan apart and reverse the blades. Back to the parts store to get new zip fasteners for it.
Also had the back end up on ramps and rolled under with an adjustable wrench, hammer and a can of PB Blaster. After some soaking, banging and wrenching; I got the two brackets off that held the last pieces of the muffler in place. I got a 35% off deal from Advanced, so my brackets and tailpipes are on the way. The resonators were still cheaper thru Rockauto, so I'm waiting on ordering those for the paycheck after Memorial Day. In the meantime, I'm going to try to hook up the driver side tailpipe to the muffler and 2.25" pipe I added to it. Hopefully I can stabilize that muffler and keep it from banging against the floor pan (which is annoying) in the meantime. I ordered the hangers for the stock muffler, which I realized will fit the tailpipes too: 35358 and 35183. That way there will be two attachments on the tailpipe to hold it in place even if it's not hooked up to the rest of the exhaust.
Still deciding on whether I will go with single slanted chrome tips on the tailpipes, or go with the dual side by side outlet tips?
|
|
|
|
|
Joined: Feb 2014
Posts: 505
Major Contributor
|
|
OP
Major Contributor
Joined: Feb 2014
Posts: 505 |
My driver side tailpipe and hangers arrived yesterday. I still need to get some bolts for the hangers from the hardware store. I did put the Z28 detail of painting the tailpipe with black header paint. The tailpipe outlet is cut at an angle, but not like the stock chevy pipe which is a greater angle and leaves a flat bit at the end. I'm putting a chrome exhaust tip on it anyway, so I'm leaving it as is. 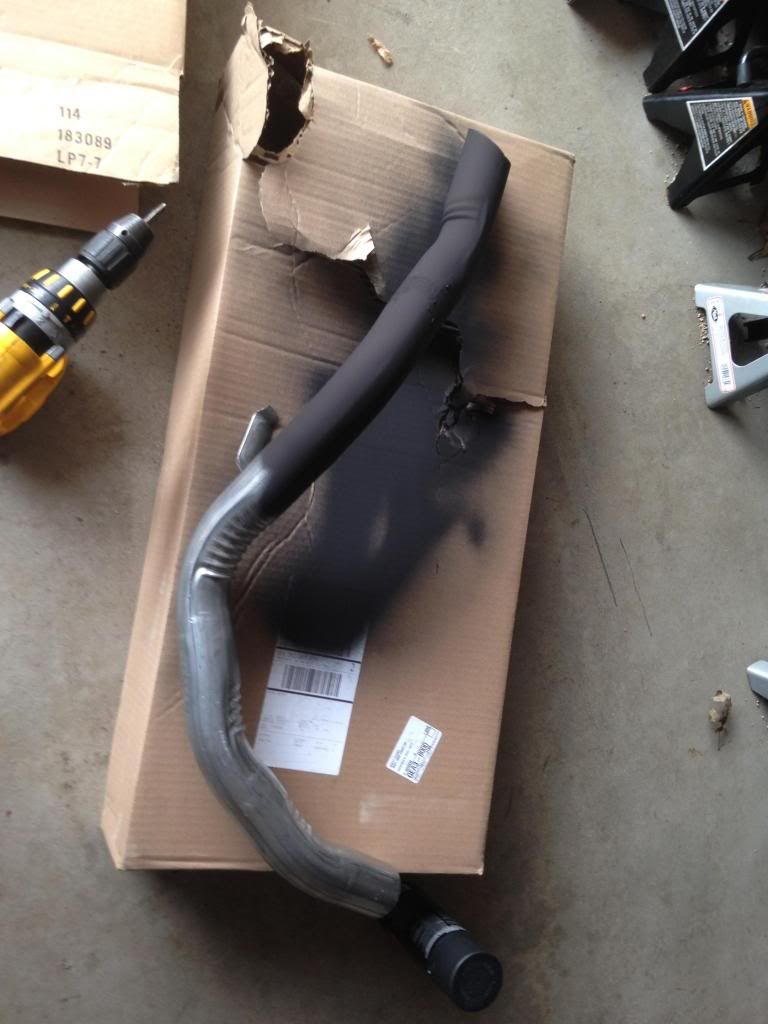  I should also mention that these two pipes are actually one piece when installed at the factory. But Walker by offering the 2.25" tailpipe end separately, makes it easier for people to upgrade with a transverse muffler and dual 2.25" tailpipes over the stock 2" tailpipes.
Last edited by Lifeguard; 05/08/14 03:00 PM.
|
|
|
|
|
Joined: Feb 2014
Posts: 505
Major Contributor
|
|
OP
Major Contributor
Joined: Feb 2014
Posts: 505 |
Snapped some shots as I assembled my Z28 driver side tailpipe. Here's the bracket that attaches to the frame to hang the tailpipe from: 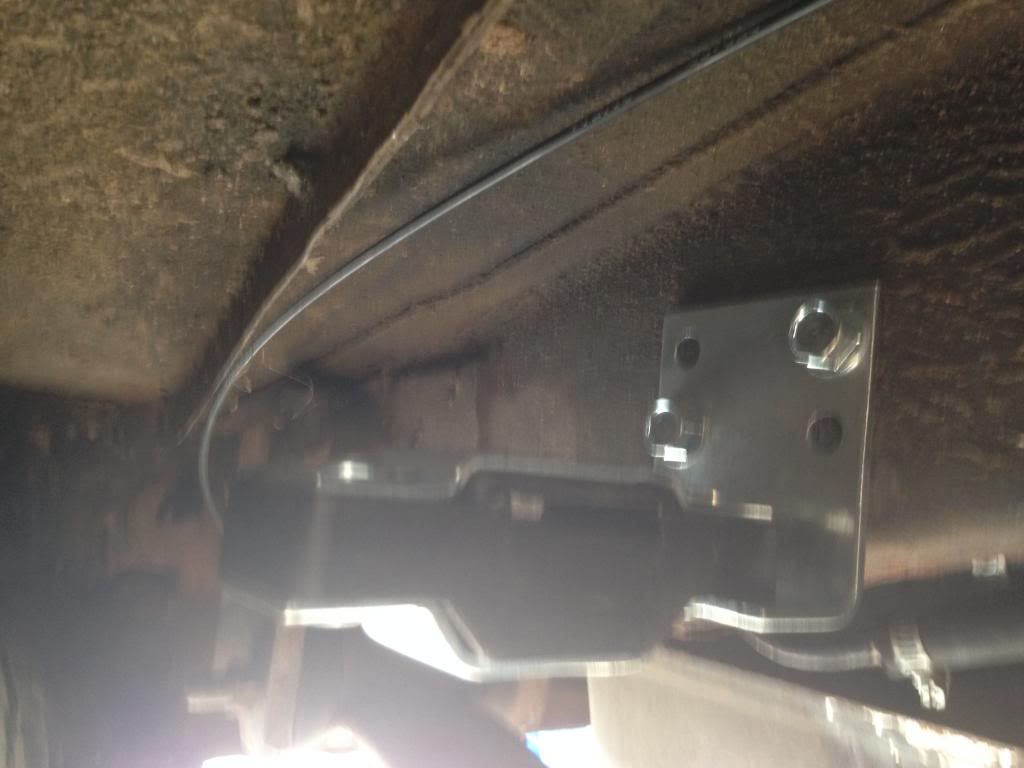 And the tailpipe attached on the driver's side: 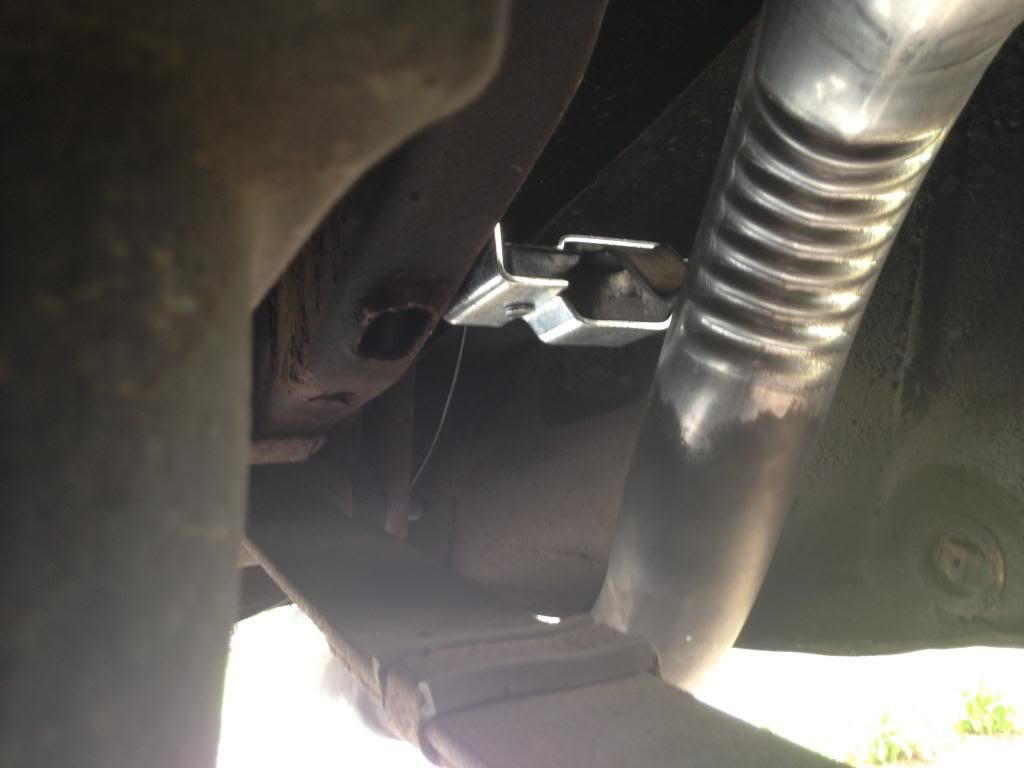
|
|
|
|
|
Joined: Feb 2014
Posts: 505
Major Contributor
|
|
OP
Major Contributor
Joined: Feb 2014
Posts: 505 |
Last edited by Lifeguard; 05/10/14 09:50 PM.
|
|
|
|
|
Joined: Feb 2014
Posts: 505
Major Contributor
|
|
OP
Major Contributor
Joined: Feb 2014
Posts: 505 |
|
|
|
|
|
Joined: Feb 2014
Posts: 505
Major Contributor
|
|
OP
Major Contributor
Joined: Feb 2014
Posts: 505 |
So the tailpipe in place, it was just a matter of hooking the muffler attached to the 2.25" stock L6 header pipe up to the tailpipe:  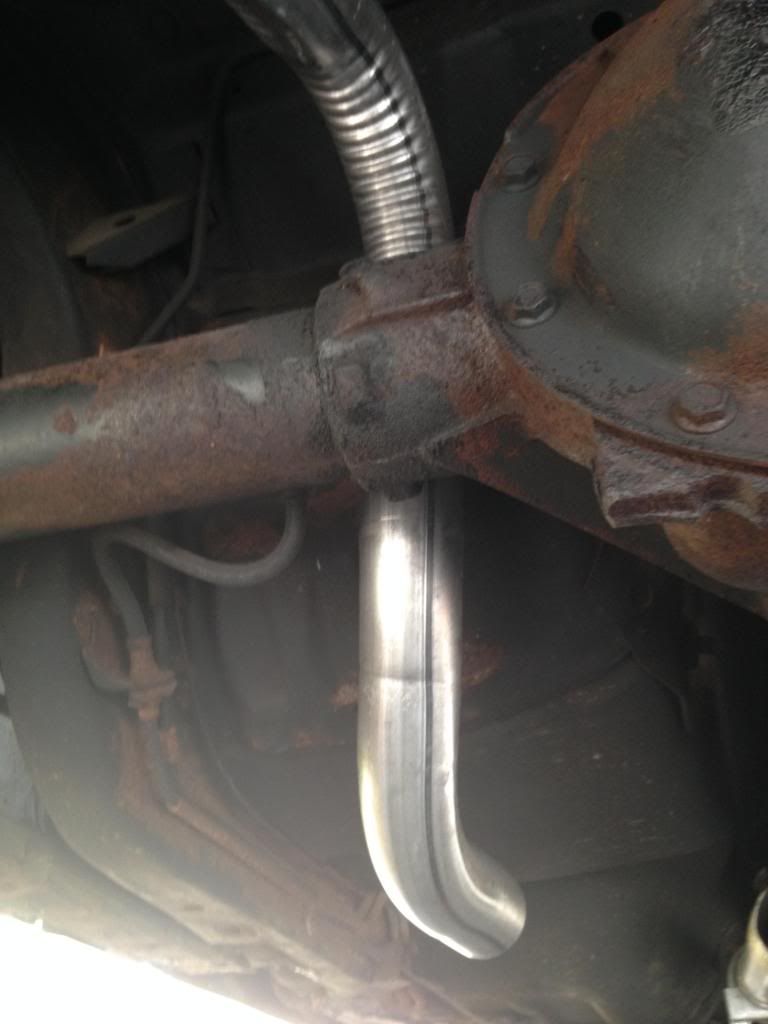 So I added four 60* angle pipes to run from muffler to tailpipe for a temporary solution until I can afford to finish off the dual resonator setup and get a custom connection between the header pipe and the Y-pipe. 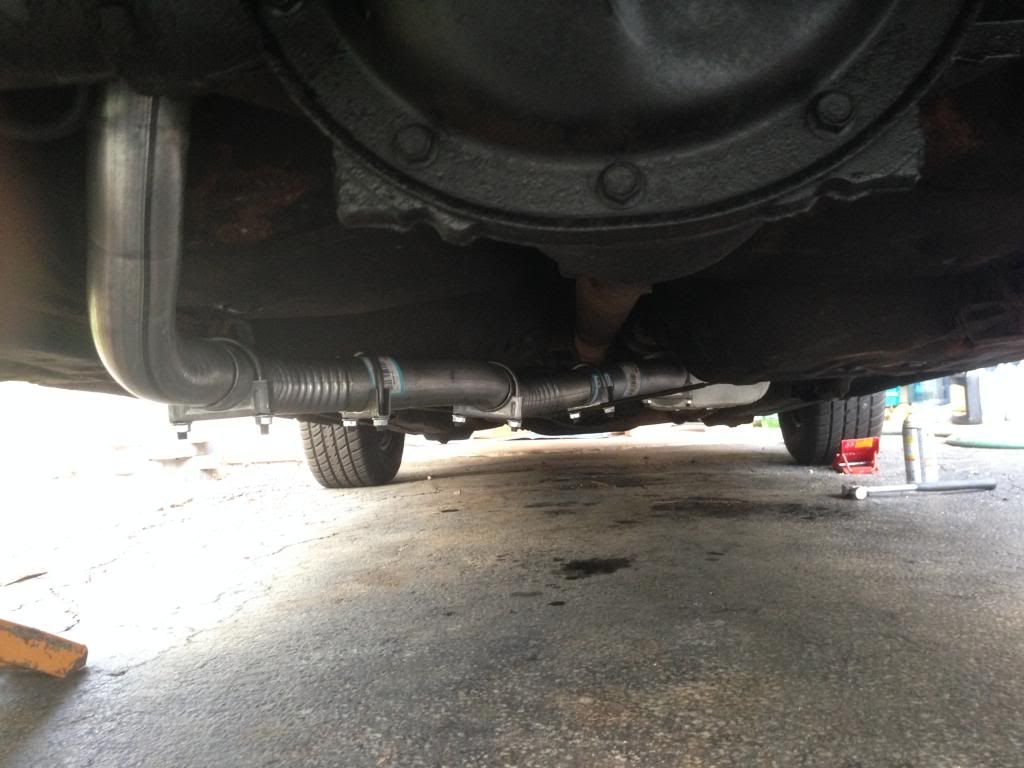
Last edited by Lifeguard; 05/10/14 09:55 PM.
|
|
|
|
|
Joined: Nov 2013
Posts: 482
Contributor
|
|
Contributor
Joined: Nov 2013
Posts: 482 |
I think just a short piece of pipe and that would be out the side like stock it I did that on my nova. Jay 6155
|
|
|
|
|
Joined: Feb 2014
Posts: 505
Major Contributor
|
|
OP
Major Contributor
Joined: Feb 2014
Posts: 505 |
Drove around 60 miles today in the Camaro. Tailpipe rubs on the quarter panel on and off, which sounds nasty......back under to do some adjustments to center it between the leaf spring and the panel. Still having a rough time getting started with a cold engine until it hits temperature. I'm going to try a little more timing and see if that helps.
|
|
|
|
|
Joined: Feb 2014
Posts: 505
Major Contributor
|
|
OP
Major Contributor
Joined: Feb 2014
Posts: 505 |
Give it a little more timing. OK, I've given it an extra two degrees of initial timing from 6* factory recommendation to 8*. We'll see if that helps out on cold starts and initial warm up. Test driving it warmed up around the block seemed to have a little more get up and go to it. I readjusted the solenoid idle to 800rpm and the low idle screw to about 450rpm before it wanted to stop. When adjusting the solenoid for idle, should the low screw be tightened all the way each time before setting the normal idle? I did it without tightening the screw down, and it took a lot to get to 800rpm, then when I set the screw it stayed at the low idle. Then I tried it by tightening the screw first and then set the idle, before setting the low idle and that worked. It was too damn hot in that area to try setting the mixture screw again after the idle. So I'll do that later. Now I'm going to fiddle with the tailpipe to center it so it doesn't rub.
|
|
|
|
|
Joined: Feb 2014
Posts: 505
Major Contributor
|
|
OP
Major Contributor
Joined: Feb 2014
Posts: 505 |
Fixed the tailpipe rub, but the muffler still keeps hitting the floor pan. Will fix that when exhaust is done.
Idle is a tiny bit rough, not stock smooth, which is odd because other then the exhaust it is a stock engine. Starts cold no problem. And occasional stutter at times, with no consistency to it.
I'm wondering if even in its stock configuration, I shouldn't get some new springs for the HEI centrifugal advance and tune it to bring the advance in sooner?
|
|
|
|
|
Joined: Sep 2004
Posts: 5,839 Likes: 1
1000 Post Club
|
|
1000 Post Club
Joined: Sep 2004
Posts: 5,839 Likes: 1 |
The centrifugal advance mechanism is probably stuck & or really sticky & does not work.
Would need to clean it up & reapply grease to the affected components.
A spring & weight kit always helps.
MBHD
12 port SDS EFI
|
|
|
|
|
Joined: Feb 2014
Posts: 505
Major Contributor
|
|
OP
Major Contributor
Joined: Feb 2014
Posts: 505 |
The centrifugal advance mechanism is probably stuck & or really sticky & does not work.
Would need to clean it up & reapply grease to the affected components.
A spring & weight kit always helps.
MBHD Yeah, I was starting to think that too after reading up on adjusting centrifugal and vacuum advance, and reading how it gets gummed up over time. I guess a little HEI disassembly is in order. I wish I had some cash to to get a new cap and rotor to swap out too. Hopefully Memorial Day weekend will be a windfall, and I can just invest in finishing off the exhaust and ignition updates all at once.
|
|
|
|
|
Joined: Feb 2014
Posts: 505
Major Contributor
|
|
OP
Major Contributor
Joined: Feb 2014
Posts: 505 |
I reread Santucci's chapter on ignition, it's a short one. He was recommending for "street/mild strip" 10* initial advance with full advance at 3k rpm, and total timing at 32*-38*. He also suggests widening spark plug gap to between 0.050" and 0.080". I'd like to achieve maximum mpg in this stock configuration, so I wonder how much I should deviate from the factory recommendations?
|
|
|
|
|
Joined: Sep 2008
Posts: 3,669 Likes: 42
1000 Post Club
|
|
1000 Post Club
Joined: Sep 2008
Posts: 3,669 Likes: 42 |
You'll have to pick either economy or performance and tune for one of them. Trying to maximize for economy isn't going to provide the maximum performance and vice versa. When it comes to timing, that is one of those areas where it should be best said, "That your results will vary!" To try and give a blanket statement that will apply to a large majority of applications isn't realistic. You'll just have to tinker with your combo because too many variables are going to affect it from external conditions like outside temp and quality of gas you run, to internal engine components like camshaft, carb and other engine mods and how well they interact together. Its just difficult for achieving optimum economy to expect optimum performance to exist at the same time.
Class III CNC Machinist/Programmer
|
|
|
|
|
Joined: Feb 2014
Posts: 505
Major Contributor
|
|
OP
Major Contributor
Joined: Feb 2014
Posts: 505 |
As long as the mono jet, integrated head and cam are still on the engine, I might as well tune for economy. Once I do a top end swap, then I can tune for performance. I'm using it as a daily driver until we replace the 4wd SUV that was totaled last winter, so easy on fuel would be nice at this point. So just keep trying different combinations of advance and check against miles at each fill-up to see which works best, keeping notes on all of them?
|
|
|
|
|
Joined: Sep 2008
Posts: 3,669 Likes: 42
1000 Post Club
|
|
1000 Post Club
Joined: Sep 2008
Posts: 3,669 Likes: 42 |
You could also see gain/lose from plug gap as well, so a lot of things to test out and try.
Class III CNC Machinist/Programmer
|
|
|
|
|
Joined: Feb 2014
Posts: 505
Major Contributor
|
|
OP
Major Contributor
Joined: Feb 2014
Posts: 505 |
You could also see gain/lose from plug gap as well, so a lot of things to test out and try. Yeah, 4 variables to adjust. That creates a lot of combinations.
|
|
|
|
|
Joined: Sep 2008
Posts: 3,669 Likes: 42
1000 Post Club
|
|
1000 Post Club
Joined: Sep 2008
Posts: 3,669 Likes: 42 |
Tlowe got 20+ MPG on a pretty mild 250 build with a 2 bbl in a Chevy II wagon. So a lot can be gained by tinkering.
Class III CNC Machinist/Programmer
|
|
|
|
|
Joined: Feb 2014
Posts: 505
Major Contributor
|
|
OP
Major Contributor
Joined: Feb 2014
Posts: 505 |
Tlowe got 20+ MPG on a pretty mild 250 build with a 2 bbl in a Chevy II wagon. So a lot can be gained by tinkering. I mentioned earlier in the thread that 1978 was the first year for EPA mileage listings and the '78 Camaro L6 was rated 18mpg in the city and 28mpg on the highway, with an average of 21mpg. I checked mine two years ago and it was about 16mpg with half the exhaust and no tuning in city driving. That's with a 3speed manual and 2.73:1 open rear end. Integrated-J-78 said he was able to get 23.5mpg on mostly highway. I think I'll get a highway route from a gas station going out to an ice cream shop and back to the same gas station again, and use that to measure best fuel economy along with a drive with the wife for a treat once a week. I already have new plugs indexed and gapped to factory recommendation. So I'll clean up the HEI, add a new cap and rotor, and 8mm wires. Then put a timing tape on the balancer and reuse the 36 year old springs and see what the factory vacuum and centrifugal advance are at and have a baseline to work from. Then I can start playing with different advance combos and see how it changes. It will be an all summer job, but I probably can't afford a top end swap until next year anyway.
Last edited by Lifeguard; 05/14/14 04:43 PM.
|
|
|
|
|
Joined: Feb 2014
Posts: 505
Major Contributor
|
|
OP
Major Contributor
Joined: Feb 2014
Posts: 505 |
Just counting the years in my head and I realized I haven't had a carbureted and HEI engine since summer of 1990, and that was an Olds Delta 88 with an Olds 350 in it that my Grandfather gave me (used car salesman). I had two '76 Camaros prior to that with small block Chevys. Every other car or truck of mine since then has been computer controlled fuel injection. Now I'm back to my roots.
|
|
|
|
|
Joined: Feb 2014
Posts: 505
Major Contributor
|
|
OP
Major Contributor
Joined: Feb 2014
Posts: 505 |
Opened up the top of my HEI to see what it looks like. Pretty clean with some surface rust on the parts of the centrifugal advance. The bushings look tight. I took the advance apart and cleaned the parts a little. The advance turns out but seems sluggish coming back, not very snappy. There's a tiny bit of up and down play on the shaft, I don't know how much until I remove and measure it. The vacuum advance says 19-24 on it. I don't know why it has a range? I think the distributor just needs to be taken apart and cleaned.
I'm thinking about replacing parts with these two kits:
Accel 31035 adjustable vacuum advance
Accel 31041 advance curve kit for HEI w/ vacuum
Will those work with the L6 HEI?
The other parts I'm going to be swapping out when I can afford it:
Accel 8129 Cap & rotor
Accel 4021 8mm SS plug wires
Accel 140003 Supercoil
I'm not sure about the Accel 35361 module? I've read that replacing the stock module on a stock/street build doesn't make any difference. Then again, having new parts can't hurt.
Last edited by Lifeguard; 05/15/14 03:07 PM.
|
|
|
|
|
Joined: Sep 2004
Posts: 5,839 Likes: 1
1000 Post Club
|
|
1000 Post Club
Joined: Sep 2004
Posts: 5,839 Likes: 1 |
Just as I thought, the advance is not working & the original grease is all gummed up. Need to take apart the shaft clean, grease & reassemble. If the advance kits are for a SBC, those will work. It's always good to have an extra module just in case. Stock one works the same. I used to go to junkyards just to have spares. Accel super coil ,good. Any cap with brass terminals are usually better than stock. Accel products are usually OK, but there are better IMO. http://shop.advanceautoparts.com/p/bwd-s...distributer+capSorry wrong style, http://shop.advanceautoparts.com/p/bwd-s...distributor+capMBHD
12 port SDS EFI
|
|
|
|
|
Joined: Feb 2014
Posts: 505
Major Contributor
|
|
OP
Major Contributor
Joined: Feb 2014
Posts: 505 |
Just as I thought, the advance is not working & the original grease is all gummed up. Need to take apart the shaft clean, grease & reassemble. If the advance kits are for a SBC, those will work. It's always good to have an extra module just in case. Stock one works the same. I used to go to junkyards just to have spares. Accel super coil ,good. Any cap with brass terminals are usually better than stock. Accel products are usually OK, but there are better IMO. http://shop.advanceautoparts.com/p/bwd-s...distributer+capSorry wrong style, http://shop.advanceautoparts.com/p/bwd-s...distributor+capMBHD Yeah, taking it out and cleaning over the weekend. I'll see if I need to shim it when I check it. Is the distributor shaft greased with motor oil? I'm most familiar with the Accel parts, that's what a lot of people were using from what I recall during the '80s. The Accel tan and Supercoil gray with yellow wires is period correct for aftermarket parts. So that's why I was thinking about them if I have to deviate to any color other than stock black and gray.
|
|
|
|
|
Joined: Feb 2014
Posts: 505
Major Contributor
|
|
OP
Major Contributor
Joined: Feb 2014
Posts: 505 |
Had some time tonight so I yanked the HEI and started taking it apart (engine stopped with the rotor pointing directly forward, made it easy to index). Took springs and weights off and I'm soaking them in rust evaporator to clean them up. Module and vacuum advance off. The oil pump shaft came out attached to the base of the distributor, a little different from the small block HEI. The cap and rotor are really clean inside. I measured the end play at the cam gear and came up with 0.097", although the distributor housing is not flat on the bottom with some raised teeth around the bottom.
I'm having trouble with the press pin connecting the gear and shaft. What size is it? What's the best method of removing it?
I've looked around and some sites say to use wheel grease and others say white lithium grease?
|
|
|
|
|
Joined: Feb 2014
Posts: 505
Major Contributor
|
|
OP
Major Contributor
Joined: Feb 2014
Posts: 505 |
Found a posting that the roll pin requires a 1/8" punch to tap it out. I'll stop by the hardware store tomorrow, and also the auto store to get some wheel bearing grease for top. I did loose one of the small clips on the center weight...launched across the garage, so I'll need to pick up a replacement too.
|
|
|
|
|
Joined: Feb 2014
Posts: 505
Major Contributor
|
|
OP
Major Contributor
Joined: Feb 2014
Posts: 505 |
Took some quick shots of my HEI on the way out the door this morning: 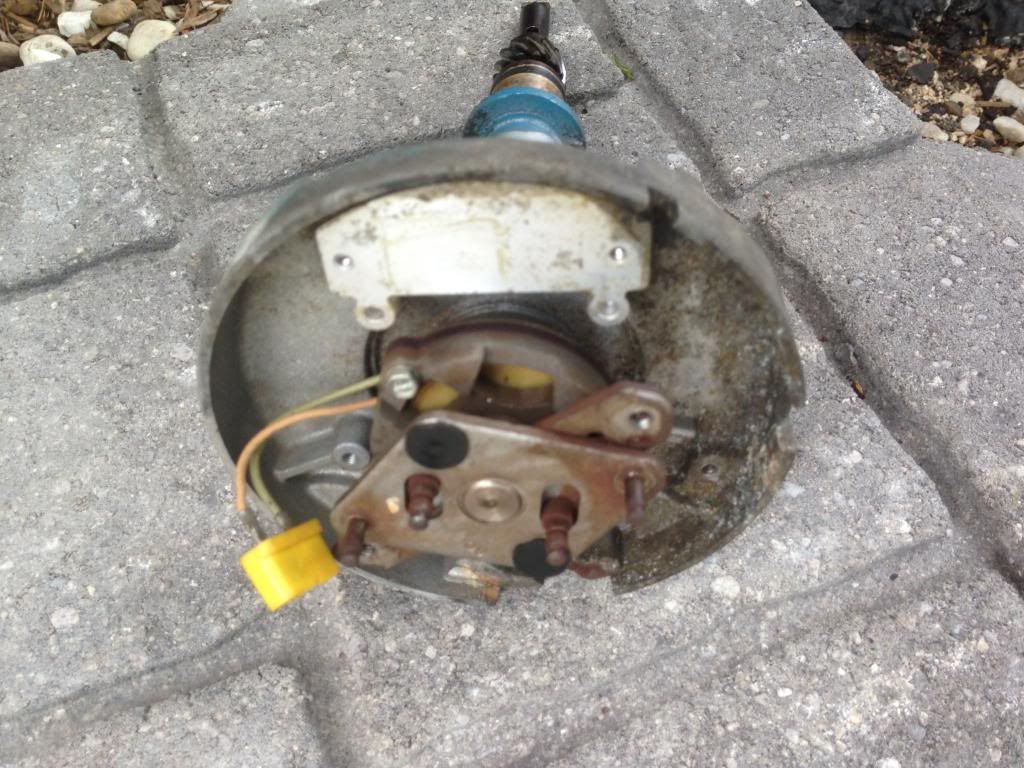 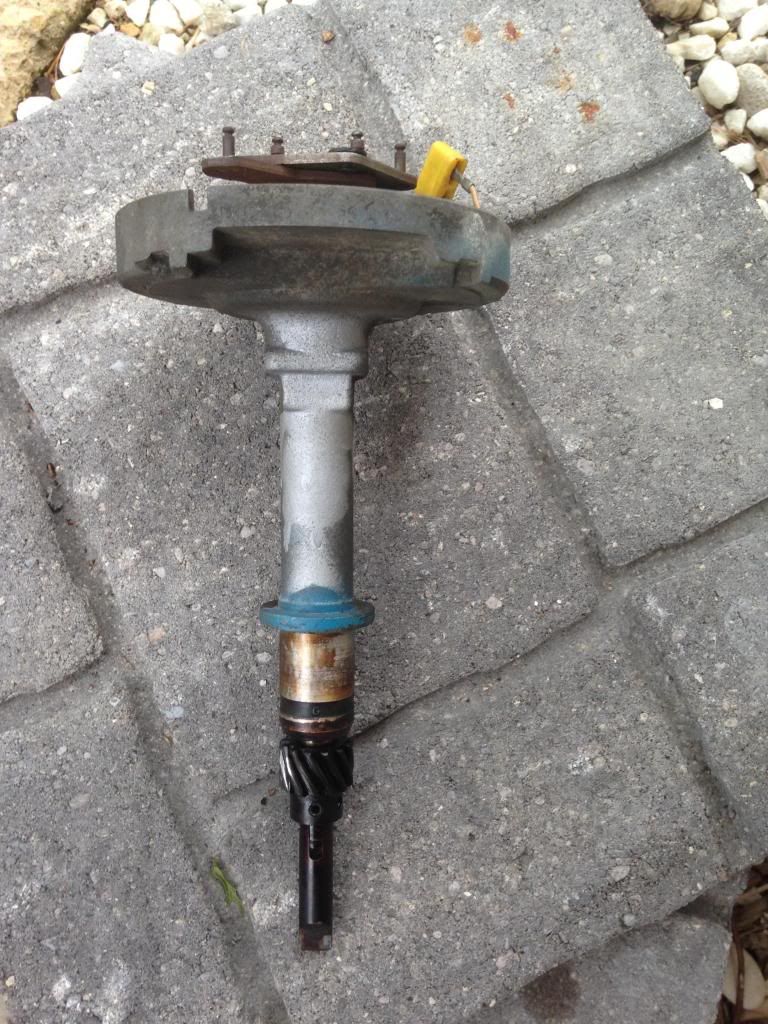
|
|
|
|
|
Joined: Sep 2004
Posts: 5,839 Likes: 1
1000 Post Club
|
|
1000 Post Club
Joined: Sep 2004
Posts: 5,839 Likes: 1 |
Cool,
just need to knock out the gears roll pin & clean up all that gunk between the shaft & the advance mechanism.
Another two piece distributer shaft, nice!
MBHD
12 port SDS EFI
|
|
|
|
|
Joined: Feb 2014
Posts: 505
Major Contributor
|
|
OP
Major Contributor
Joined: Feb 2014
Posts: 505 |
Got the distributer apart, soaked parts in Rust Evaporator to remove the surface rust, cleaned up the housing and painted it with Alumi-blast to detail it. I reassembled most of it, but I didn't have a gasket for it and had to order it. I also put the gear on and partial tapped the roll pin in and measured it again. I came up with 0.086" gap, which was still pretty wide. So I ordered shims too along with a timing tape. The Camaro is idle in the driveway until I get the parts. After I took wheel bearing grease and filled the reservoirs and replaced the plastic cover, I greased the centrifugal parts and shaft. Once the springs were installed it is tough to advance and snaps right back when released. Huge improvement. Once I get the distributer back in, I'm going to set it back to the factory 6* initial advance and check the vacuum advance timing to see what it is working at. Then I'm going to check the centrifugal advance and see what the stock curve maps out to. Then I'll have a baseline to make changes from.
|
|
|
|
|
Joined: Feb 2014
Posts: 505
Major Contributor
|
|
OP
Major Contributor
Joined: Feb 2014
Posts: 505 |
Here's what my distributor looked like when I took everything out: 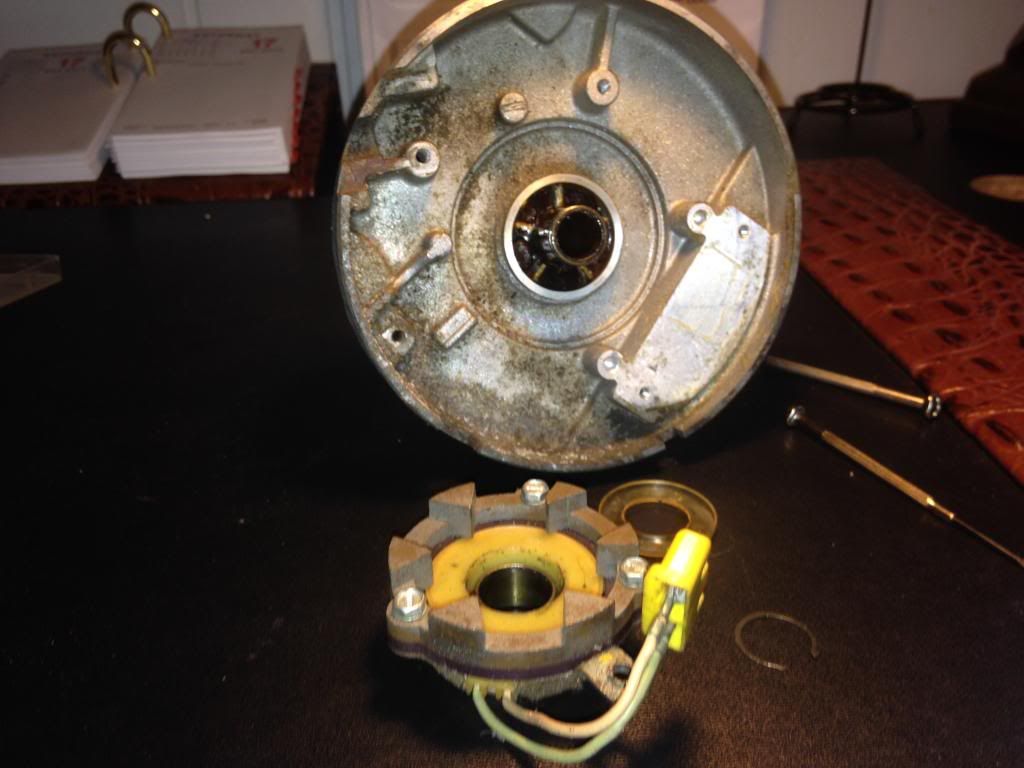 And here's what the 36 year old grease looked like: 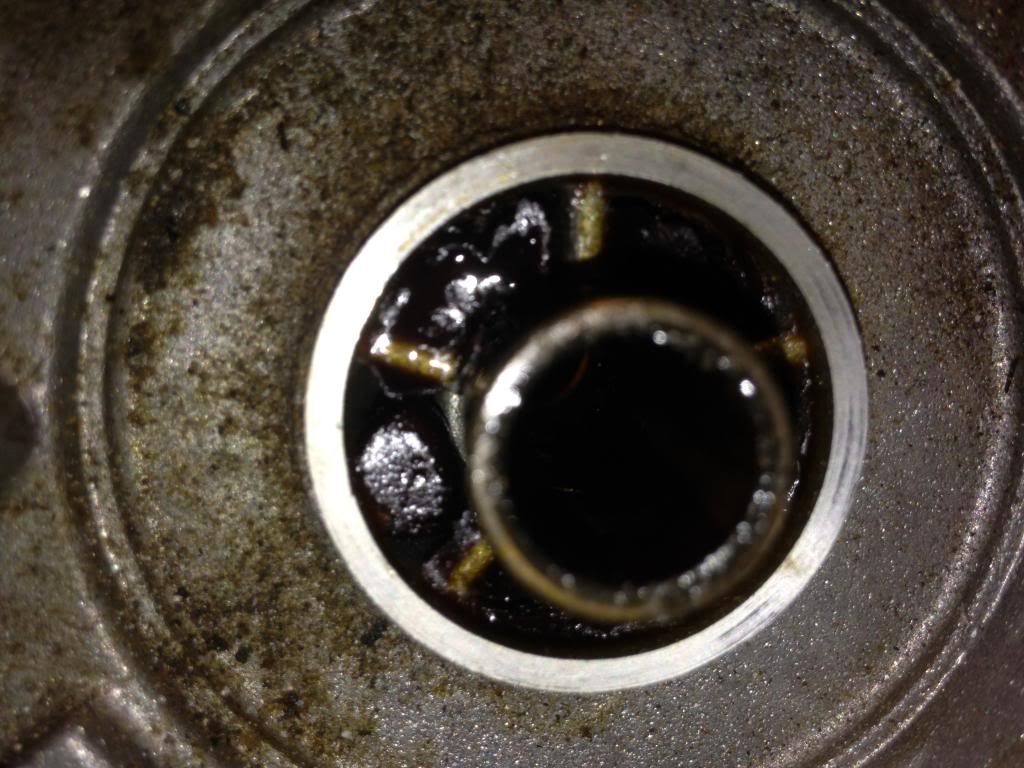 So I painted up the housing with Alumi-Blast to detail it: 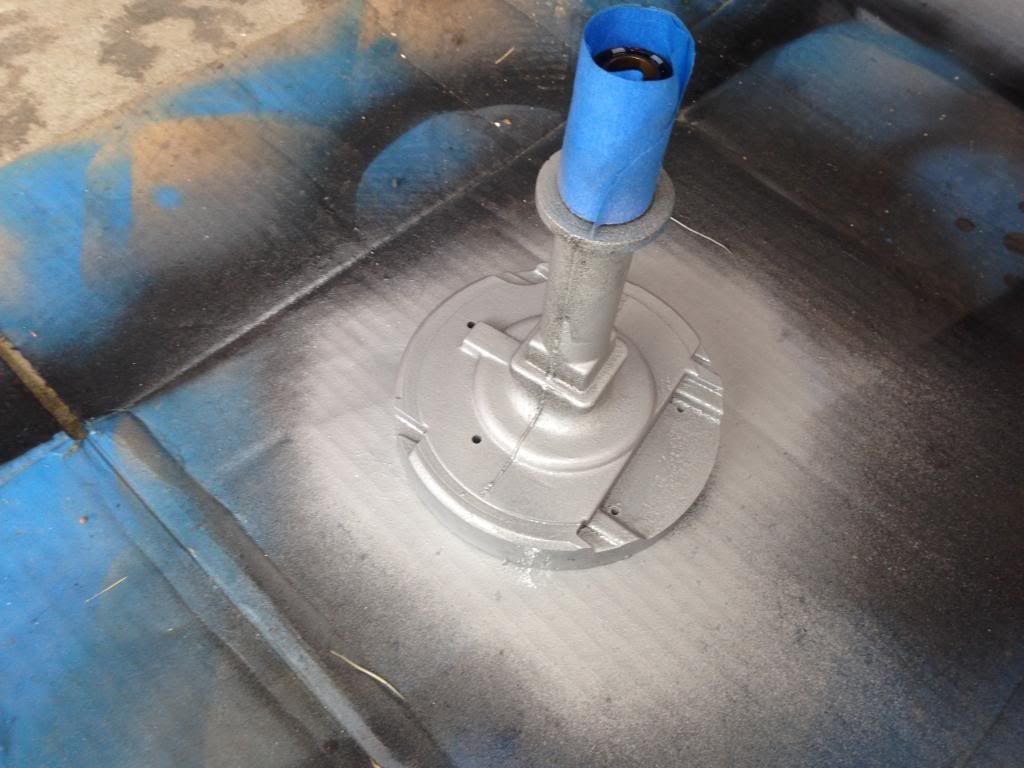 And here's all the parts of the centrifugal advance cleaned, greased and reassembled: 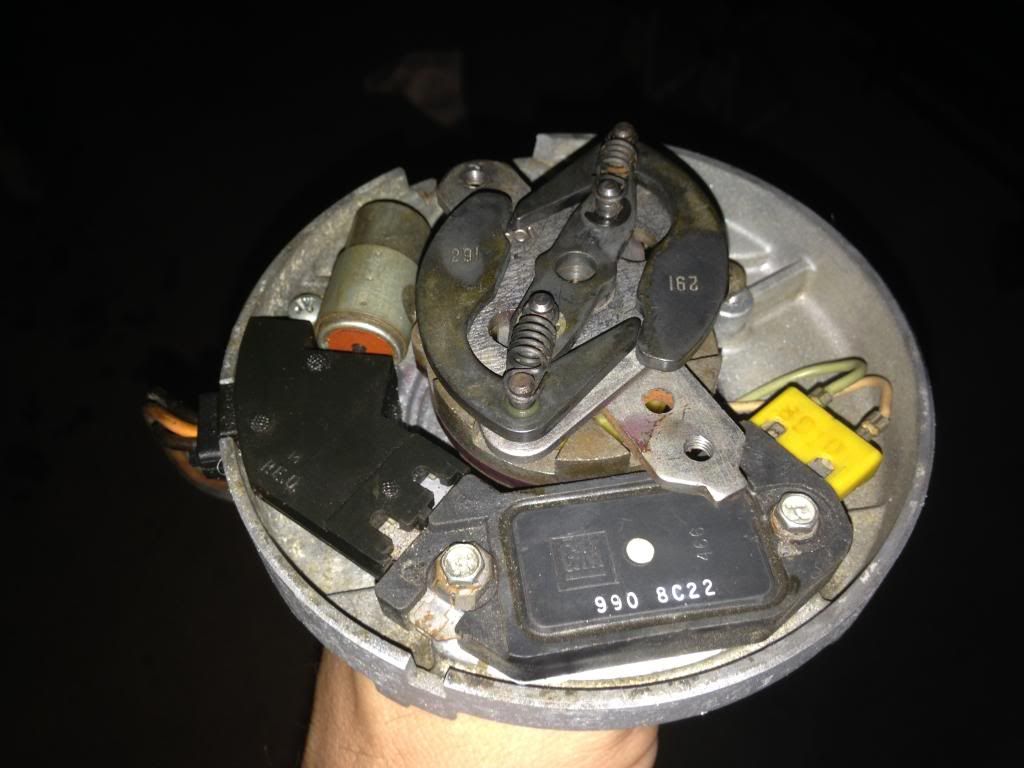 I also had to go to Radio Shack and get a tube of heat sink grease to coat underneath the module with.
Last edited by Lifeguard; 05/18/14 12:16 AM.
|
|
|
|
|
Joined: Feb 2014
Posts: 505
Major Contributor
|
|
OP
Major Contributor
Joined: Feb 2014
Posts: 505 |
Not much going on while I wait for parts. I got a couple of parts today, but not all of them to finish the distributor: 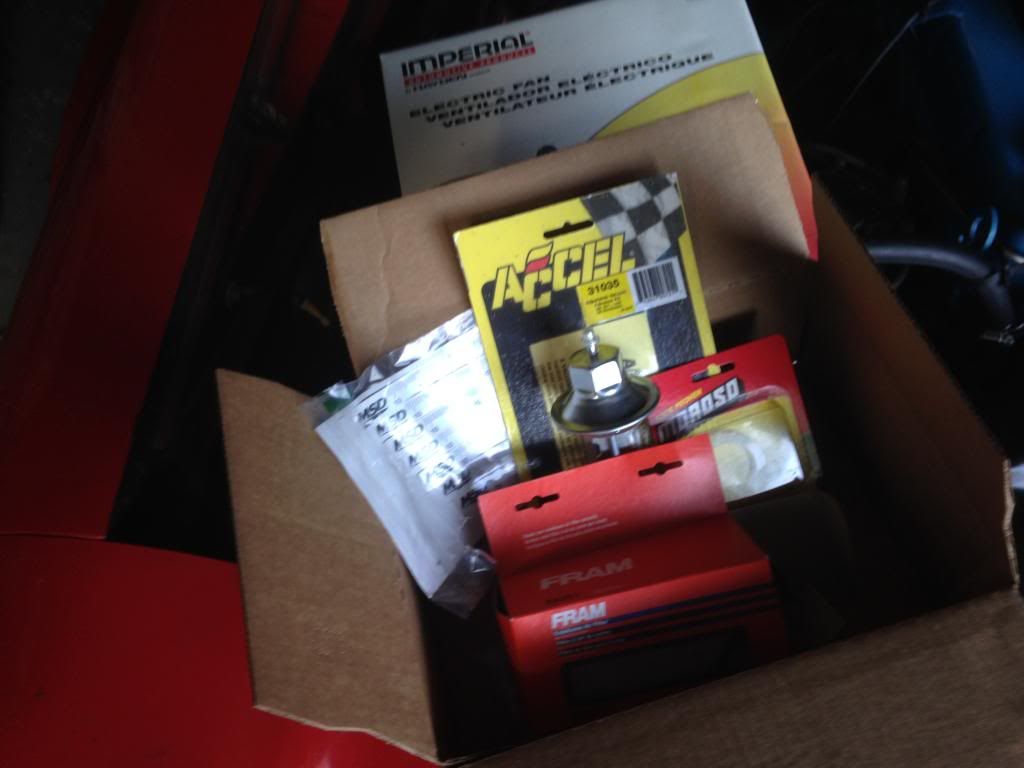 I did get the rust of the vacuum advance and I see it reads 619-24, which means its 24 degrees advance: 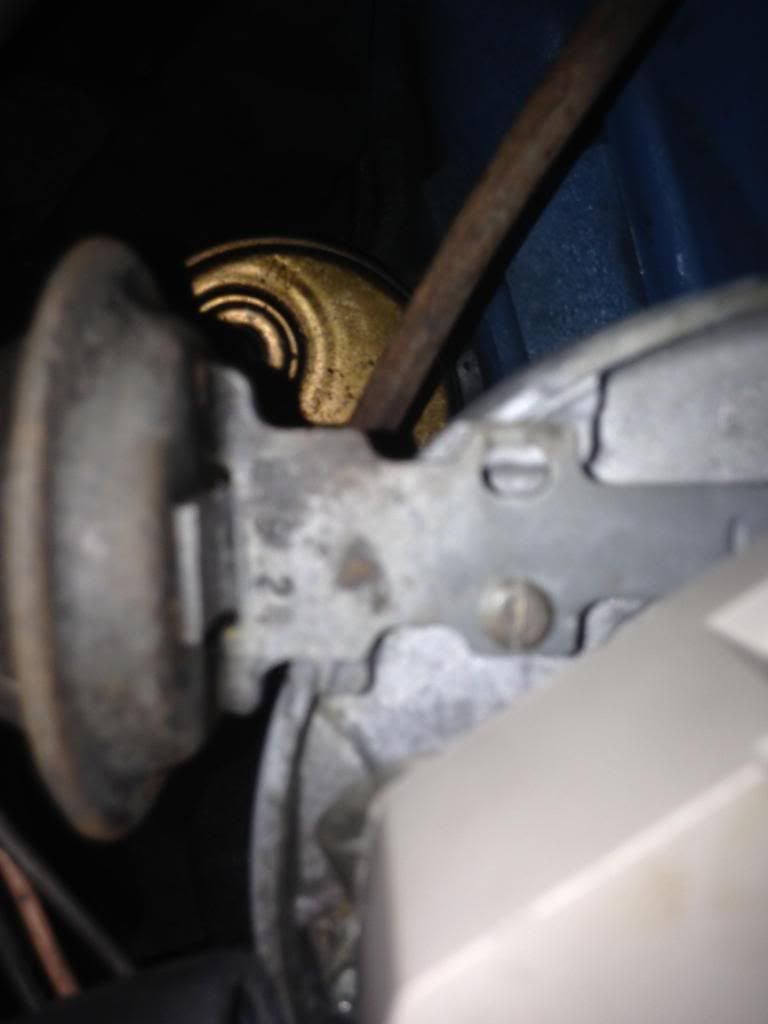 While I had nothing to do and the Camaro was laid up, I decided to improve the tailpipe. I need to get the heat gun out and get that decal off tho: 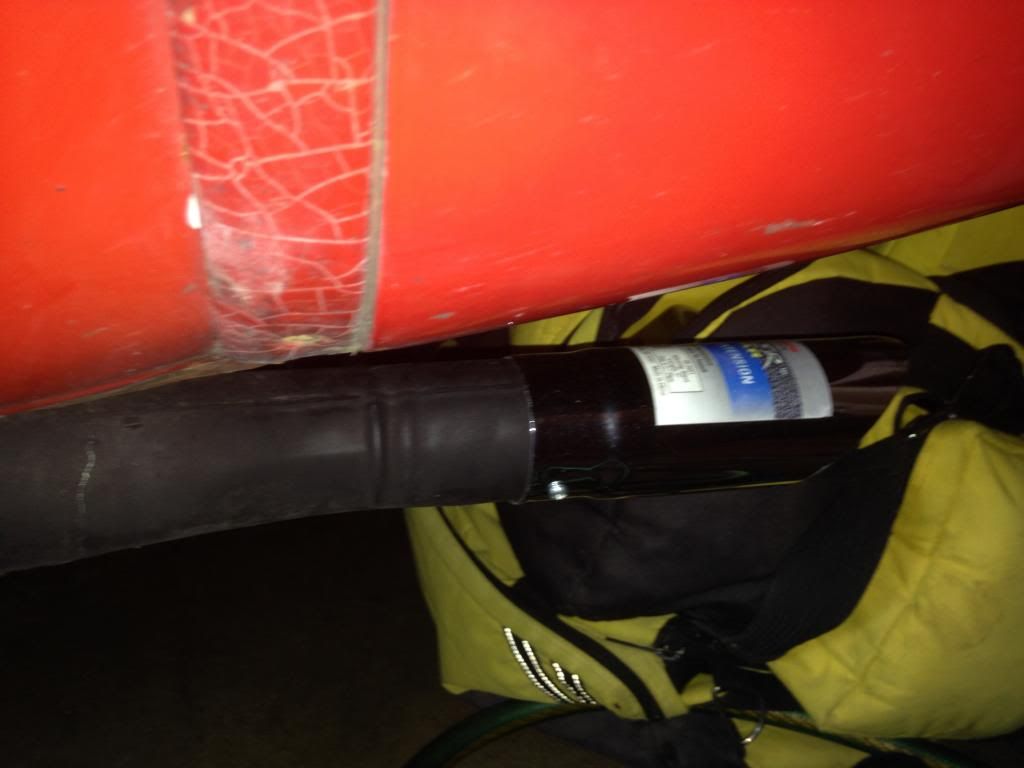
|
|
|
|
|
Joined: Feb 2014
Posts: 505
Major Contributor
|
|
OP
Major Contributor
Joined: Feb 2014
Posts: 505 |
Y-pipe for the exhaust came today. Still need the resonators and the other tailpipe and I can take it in to have the exhaust put together and welded. 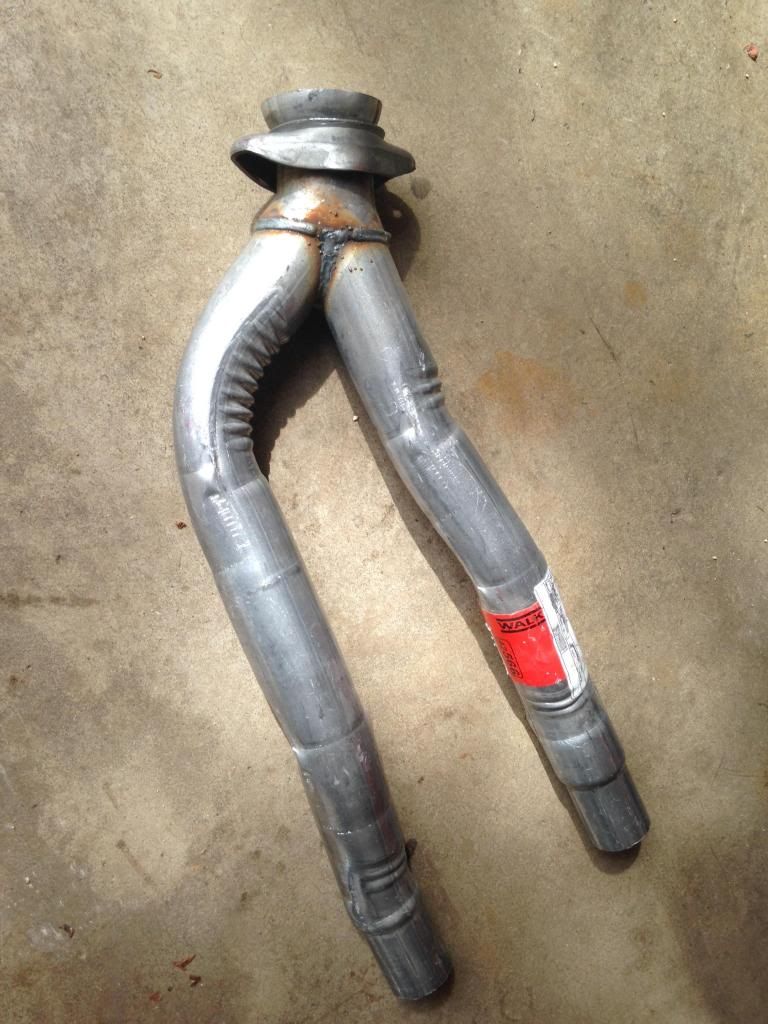 But my shims for the HEI are still AWOL. Hopefully tomorrow.
|
|
|
|
|
Joined: Nov 2013
Posts: 482
Contributor
|
|
Contributor
Joined: Nov 2013
Posts: 482 |
I know of a nova that needs one of those!!! Something to watch out for on the HEI is where the white and green wires go into the coil sometimes after being twisted back and forth a million times with the vacum advance the wire will break inside likr a coat hanger bent over and over. The ones that I have seen go bad the insulation is still good on the wire. Jay 6155
|
|
|
|
|
Joined: Feb 2014
Posts: 505
Major Contributor
|
|
OP
Major Contributor
Joined: Feb 2014
Posts: 505 |
Yeah, I was thinking about replacing those given their location. They seem OK, but it is a moving part.
|
|
|
|
|
Joined: Apr 2004
Posts: 3,555 Likes: 34
1000 Post Club
|
|
1000 Post Club
Joined: Apr 2004
Posts: 3,555 Likes: 34 |
The shims are not needed on the 6 cyl HEI. They won't hurt either.
Inliner Member 1716 65 Chevelle Wagon and 41 Hudson Pickup Information and parts www.12bolt.com
|
|
|
|
|
Joined: Feb 2014
Posts: 505
Major Contributor
|
|
OP
Major Contributor
Joined: Feb 2014
Posts: 505 |
The shims are not needed on the 6 cyl HEI. They won't hurt either. So the six cylinder HEI doesn't ride up in the cam gear like the V8 HEI, causing timing variation? I was surprised at the amount of slack in the unit from the factory.
|
|
|
|
|
Joined: Sep 2004
Posts: 5,839 Likes: 1
1000 Post Club
|
|
1000 Post Club
Joined: Sep 2004
Posts: 5,839 Likes: 1 |
I usually shim up the distributer,, just don't shim it too tight.
MBHD
12 port SDS EFI
|
|
|
|
|
Joined: Feb 2014
Posts: 505
Major Contributor
|
|
OP
Major Contributor
Joined: Feb 2014
Posts: 505 |
I'm at 0.086", and the recommendations you always see are 0.020" to no less than 0.010". I'll probably shoot for from 0.015" and 0.020".
|
|
|
|
|
Joined: Sep 2004
Posts: 5,839 Likes: 1
1000 Post Club
|
|
1000 Post Club
Joined: Sep 2004
Posts: 5,839 Likes: 1 |
.020" sounds good to me.
MBHD
12 port SDS EFI
|
|
|
|
|
Joined: Feb 2014
Posts: 505
Major Contributor
|
|
OP
Major Contributor
Joined: Feb 2014
Posts: 505 |
Shims came today, I shimmed it to .020". I'm not sure if I need to shim the base of the distributor too or just use the replacement gasket?
|
|
|
|
|
Joined: Sep 2004
Posts: 5,839 Likes: 1
1000 Post Club
|
|
1000 Post Club
Joined: Sep 2004
Posts: 5,839 Likes: 1 |
A gasket should do it.
MBHD
12 port SDS EFI
|
|
|
|
|
Joined: Feb 2014
Posts: 505
Major Contributor
|
|
OP
Major Contributor
Joined: Feb 2014
Posts: 505 |
Tuned it all up to factory specs yesterday and drove it about 50 miles yesterday and filled it up. Last fill up was in March, so I totaled the miles and I got 16.9mpg. A lot of that gas was used sitting in the driveway running while I tuned and troubeshooted it, so that was a little on the low side. Using the stock settings (and hopefully get the rest of the exhaust on and replace the plug wires and coil), I'm going to drive this tank down with some mixed mainly city driving and see what the mileage is then. Then maybe do a highway run to get the max mpg out of it. Although the speed limit is 70mph here now, which is probably not peak for fuel efficiency for the 2.73:1 axle in third gear.
|
|
|
|
|
Joined: Sep 2004
Posts: 5,839 Likes: 1
1000 Post Club
|
|
1000 Post Club
Joined: Sep 2004
Posts: 5,839 Likes: 1 |
Did you install the light weight springs in the distributer?
If it is not pinging, you could possibly advance the timing more. That should net you more MPG's.
At 70 MPH, what RPM does it turn at?
MBHD
12 port SDS EFI
|
|
|
|
|
Joined: Feb 2014
Posts: 505
Major Contributor
|
|
OP
Major Contributor
Joined: Feb 2014
Posts: 505 |
No I put the stock weights back and I'm checking their advance curve so I have a baseline to make adjustments to. I have a spring kit and an adjustable vacuum advance, so I have full adjustability. It's not pinging that I know of, but under load the exhaust tends to bang against the bottom of the floorboards so it makes it hard to hear for sure. But it's stock settings, so it should be nowhere close on the 8.1:1 CR with 87 octane.
I don't have a tach in the dash, so I don't know what it reads at 70mph. But the math says:
(70mph x 2.73 ratio x 336) / 26.5" tire diameter = 2,423rpm
Last edited by Lifeguard; 05/27/14 12:36 AM.
|
|
|
|
|
Joined: Sep 2004
Posts: 5,839 Likes: 1
1000 Post Club
|
|
1000 Post Club
Joined: Sep 2004
Posts: 5,839 Likes: 1 |
With the stock springs & weights, the advance comes in way too late. Plus your mileage will suffer also.
2423 RPM is a little past the efficiency range to get mileage.
MBHD
12 port SDS EFI
|
|
|
|
|
Joined: Feb 2014
Posts: 505
Major Contributor
|
|
OP
Major Contributor
Joined: Feb 2014
Posts: 505 |
Yeah, I was figuring on changing the springs after I map out the stock advance curve and did some driving to figure the stock mpg. Then start experimenting with initial and mechanical advance to find the best combo. Keeping initial and vacuum advance at a total of 30 degrees. I still need to finish my exhaust, and replace the cap, rotor, plug wires and add a supercoil.
55mph was the national speed limit in '78, so i figure the gearing was set up to get best mileage at that speed or under:
(55mp x 2.73 ratio x 336) / 26" stock tire diameter = 1,940 rpm
|
|
|
|
|
Joined: Feb 2014
Posts: 505
Major Contributor
|
|
OP
Major Contributor
Joined: Feb 2014
Posts: 505 |
I should also get a vacuum gauge to get a better idea of what the changes are doing, besides just listening for the pinging and then dialing back.
|
|
|
|
|
Joined: Feb 2014
Posts: 505
Major Contributor
|
|
OP
Major Contributor
Joined: Feb 2014
Posts: 505 |
Damn, battery developed a bad cell. Two now in the last few months. I'm thinking I need to swap out the original alternator. Yet another expense.
|
|
|
|
|
Joined: Feb 2014
Posts: 505
Major Contributor
|
|
OP
Major Contributor
Joined: Feb 2014
Posts: 505 |
The alternator made a big difference. Bearing was shot, that really quieted everything under the hood down. I gotta get the timing tape on the balancer and check the vacuum advance and the centrifugal advance curve to see my baseline. Also need to check my tuning, still starts hard on cold starts, and dies at stops until warmed up.
|
|
|
|
|
Joined: Sep 2008
Posts: 3,669 Likes: 42
1000 Post Club
|
|
1000 Post Club
Joined: Sep 2008
Posts: 3,669 Likes: 42 |
Timing is still a little low if its only at 30° total, that could be the reason for hard starting also because the initial could also be proportionally low. Make sure the carb isn't losing its prime when sitting overnight or for long periods.
Class III CNC Machinist/Programmer
|
|
|
|
|
Joined: Feb 2014
Posts: 505
Major Contributor
|
|
OP
Major Contributor
Joined: Feb 2014
Posts: 505 |
Yeah, that's the factory timing, which might be why late '70s cars were such hard starters. Now the vacuum advance has a thermo-valve plugged into the water neck in the middle of the vacuum line. I'm not sure how that works, if it opens up at a certain temperature, or closes off. I had replaced that valve a few years back.
I'll check the prime, but the new fuel pump I installed a year ago so it should be in good shape. Carb side might be an issue on the prime.
|
|
|
|
|
Joined: Sep 2008
Posts: 3,669 Likes: 42
1000 Post Club
|
|
1000 Post Club
Joined: Sep 2008
Posts: 3,669 Likes: 42 |
You might also find that many of the OEM carb and timing settings will no longer apply today because of the differences in today's gas being blended with alcohol, and having totally different characteristics than back in the early 70's from which those specs are largely based. So trying to use outdated specs may end up being futile for providing accurate fine tuning.
Class III CNC Machinist/Programmer
|
|
|
|
|
Joined: Feb 2014
Posts: 505
Major Contributor
|
|
OP
Major Contributor
Joined: Feb 2014
Posts: 505 |
Good point. It might be beneficial to desmog the Monojet too, as all the adjustments for the late '70s carbs are set at the factory and then caped. I should maybe read up on my carb and figured out what plugs to drill out and start making adjustments to try to optimize for modern 87 octane.
|
|
|
|
|
Joined: Feb 2014
Posts: 505
Major Contributor
|
|
OP
Major Contributor
Joined: Feb 2014
Posts: 505 |
The passenger tailpipe came, and I fitted it up and put my exhaust tips on them:  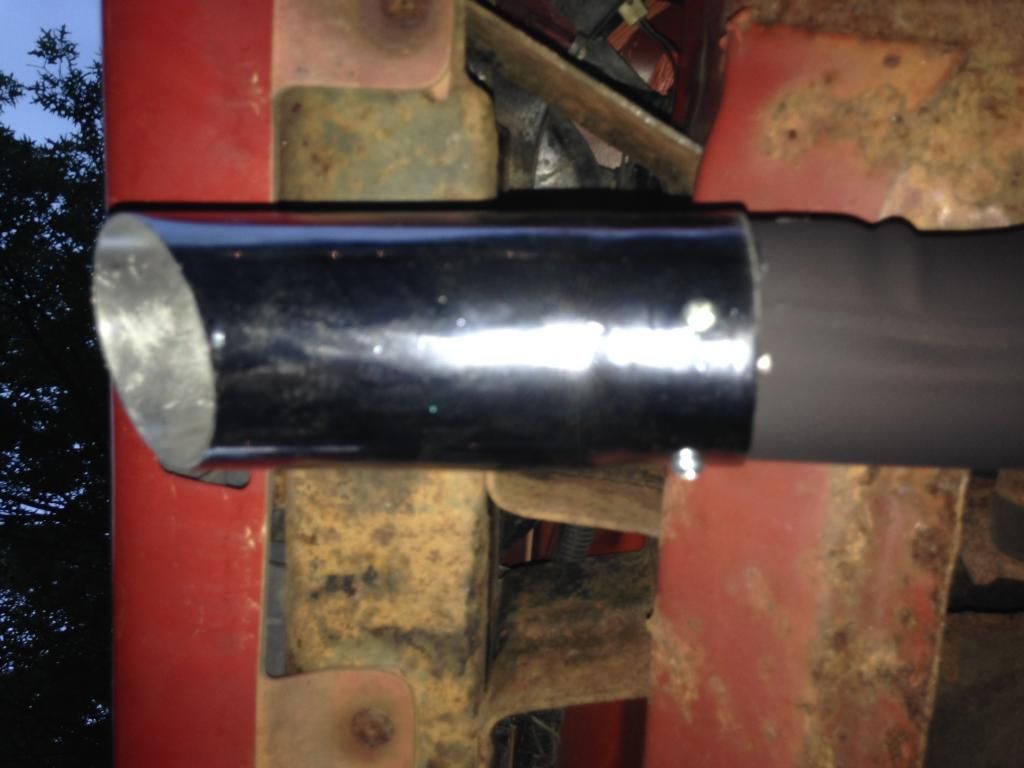 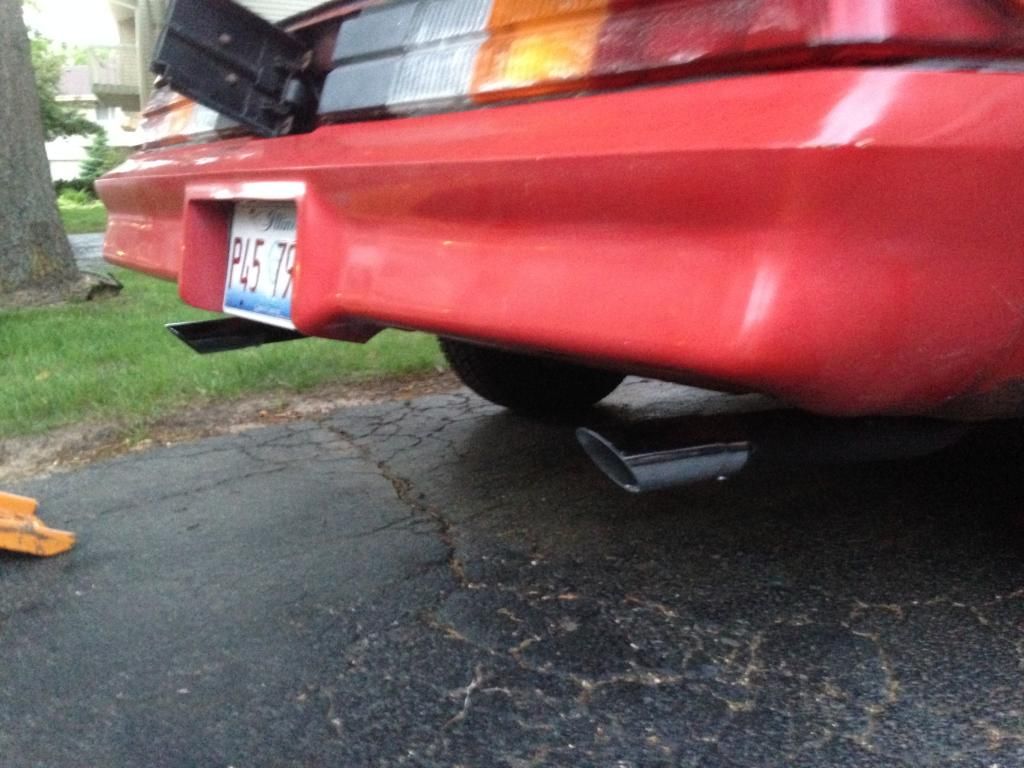 Just waiting on resonators and I can take it into my shop and have the custom pipe made from header pipe to Y-pipe, and have it all welded up. Still playing with the timing. The vacuum advance was right on at 24 degrees (+6* initial advance = 30* idle advance). But my new adjustable vacuum advance says that it only goes to 20*, so I'll have to back it all the way out and see what it does, and may have to adjust the initial up to maintain the 30* total. I gotta get the wife out to help with the centrifugal advance. She'll hold the timing light and watch the tape, while I watch the tach and adjust the throttle to map out the advance for a baseline. Then I can finally play with my new springs.
|
|
|
|
|
Joined: Sep 2004
Posts: 5,839 Likes: 1
1000 Post Club
|
|
1000 Post Club
Joined: Sep 2004
Posts: 5,839 Likes: 1 |
I believe the resonators are just going to restrict the exhaust even more. Unless you just want it quieter? Less performance? There is no reason to even mess w/the stock centrifugal advance springs, they are good for smog & passing lower emissions. I would just throw in the aftermarket springs & do adjustments from that point. You are just going to end up using those aftermarket springs & not even use the stock springs, the stock springs are too stiff. They will not give you enough advance & the advance you will get will come in way too late. Just trying to save you some time & not bother your wife. (unless she likes doing that type of stuff?) Just my two cents. http://temp.corvetteforum.net/c3/joeveto/Vacuum_Advance_and_Recurve.shtmlMBHD
12 port SDS EFI
|
|
|
|
|
Joined: Feb 2014
Posts: 505
Major Contributor
|
|
OP
Major Contributor
Joined: Feb 2014
Posts: 505 |
Thanks. I'm just doing a baseline measurement with the stock springs so I know what the factory did, and so I have an idea of how much I am changing things. Also so I can report my results and help others who are tuning.
Yes I do need quiet, I live in a condo association and can't run a straight exhaust or glass packs.
|
|
|
|
|
Joined: Sep 2004
Posts: 5,839 Likes: 1
1000 Post Club
|
|
1000 Post Club
Joined: Sep 2004
Posts: 5,839 Likes: 1 |
I understand what you are doing.
Nobody ever keeps the stock distributer springs, unless they just want it stock.
Worse mileage, less performance. Don't think anyone wants those two items.
I do not think anyone wants to know what the stock distributer springs advance does, but, could be wrong I guess.
Have fun in your quest.
MBHD
12 port SDS EFI
|
|
|
|
|
Joined: Feb 2014
Posts: 505
Major Contributor
|
|
OP
Major Contributor
Joined: Feb 2014
Posts: 505 |
Agreed, the stock springs will go before the next fill up.
|
|
|
|
|
Joined: Nov 2012
Posts: 551
Major Contributor
|
|
Major Contributor
Joined: Nov 2012
Posts: 551 |
Lifeguar you do what you want get all the info you can it could never hurt
Josh
72 gmc lwb air ride 5 speed (soon) turbo 292 II# 6102
|
|
|
|
|
Joined: Feb 2014
Posts: 505
Major Contributor
|
|
OP
Major Contributor
Joined: Feb 2014
Posts: 505 |
Lifeguar you do what you want get all the info you can it could never hurt That's my training as a scientist. Always measure and document.
|
|
|
|
|
Joined: Feb 2014
Posts: 505
Major Contributor
|
|
OP
Major Contributor
Joined: Feb 2014
Posts: 505 |
|
|
|
|
|
Joined: Feb 2014
Posts: 505
Major Contributor
|
|
OP
Major Contributor
Joined: Feb 2014
Posts: 505 |
And here's a couple of shots of the passenger side intermediate and tailpipe installed. They didn't turn out well, there's a glare on them: 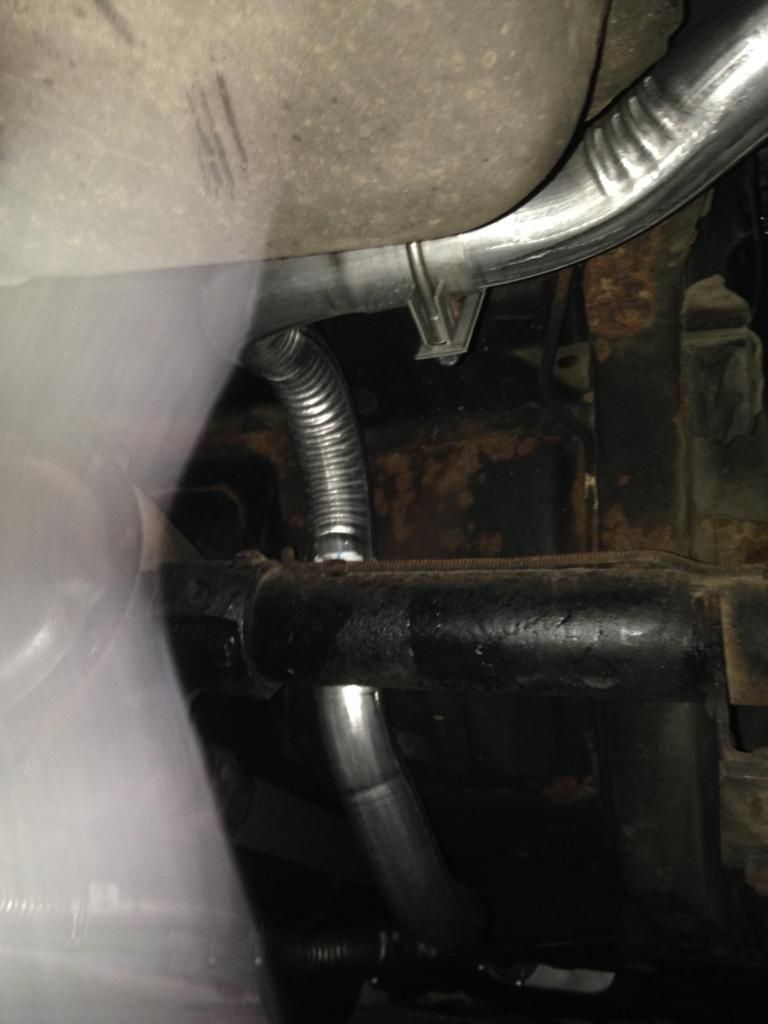 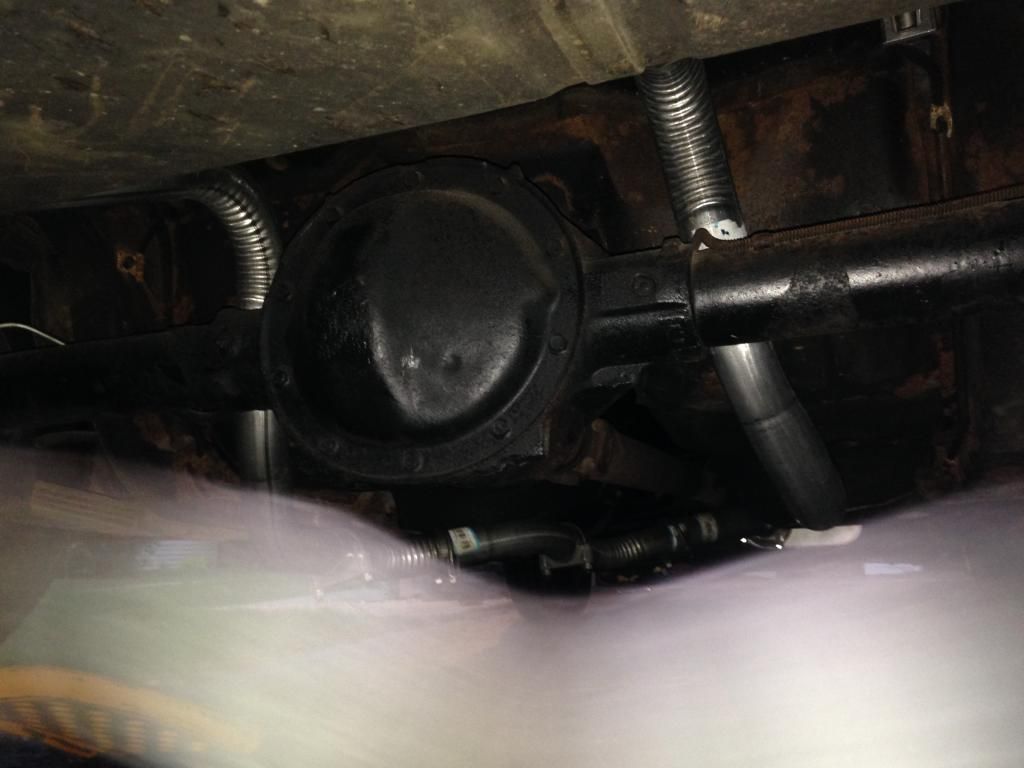
|
|
|
|
|
Joined: Nov 2013
Posts: 482
Contributor
|
|
Contributor
Joined: Nov 2013
Posts: 482 |
Thanks a lot. Looks like the pipes will work on the nova. Jay 6155
|
|
|
|
|
Joined: Feb 2014
Posts: 505
Major Contributor
|
|
OP
Major Contributor
Joined: Feb 2014
Posts: 505 |
Should. Underneath, they're the same car.
|
|
|
|
|
Joined: Feb 2014
Posts: 505
Major Contributor
|
|
OP
Major Contributor
Joined: Feb 2014
Posts: 505 |
Just filled up the tank tonight after many of my upgrades or reconditioning. It was right on "E" and it took a little over 18 gallons, while the specs say the tank is 21. I got 20.3 mpg in mostly highway driving. And that's without finishing the exhaust, replacing the distributor cap/rotor or springs yet.
|
|
|
|
|
Joined: Sep 2004
Posts: 5,839 Likes: 1
1000 Post Club
|
|
1000 Post Club
Joined: Sep 2004
Posts: 5,839 Likes: 1 |
Sounds great!
How are you calculating your mileage?
MBHD
12 port SDS EFI
|
|
|
|
|
Joined: Feb 2014
Posts: 505
Major Contributor
|
|
OP
Major Contributor
Joined: Feb 2014
Posts: 505 |
I fill it to the top at the same gas station each time, then take the miles driven and divide by the number of gallons I put in until full. BTW, I don't know who recommended the BWD distributor cap and rotor, but I ordered them along with the a plug wire retainer and coil cover. The coil cover and retainer are factory black, but the cap and rotor were the same gray that the factory rotor was molded in. The picture was black like the stock cap, but the part is actually factory rotor gray. Looks different from stock, but doesn't shout aftermarket part. 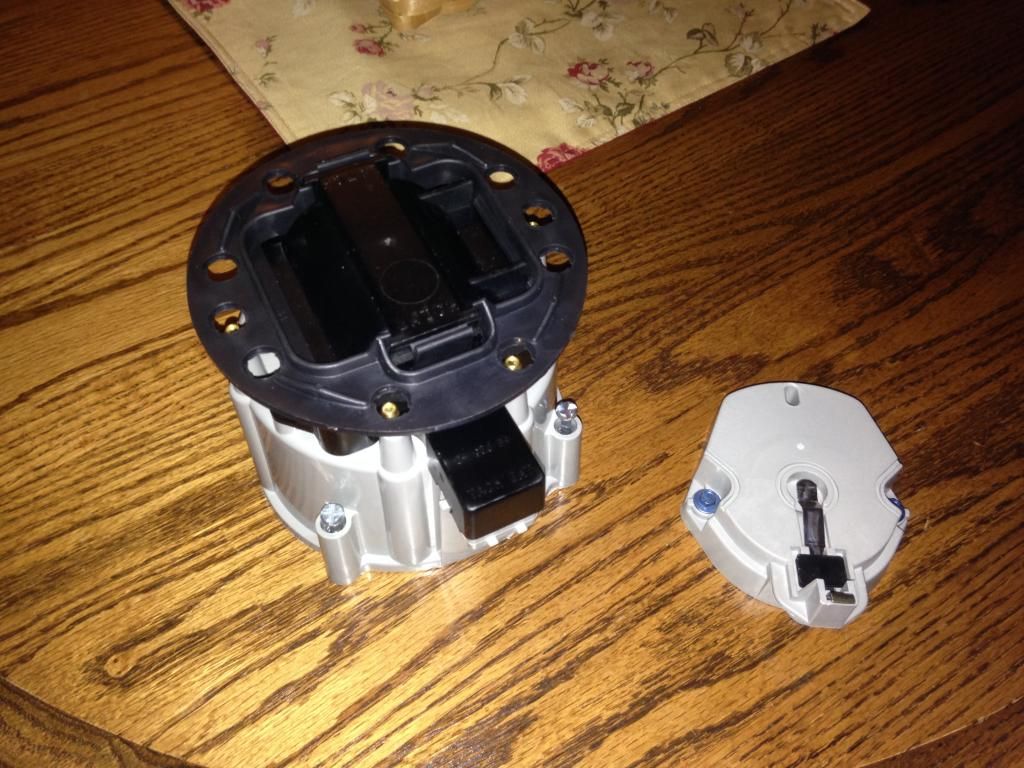
Last edited by Lifeguard; 06/10/14 01:52 AM.
|
|
|
|
|
Joined: Sep 2004
Posts: 5,839 Likes: 1
1000 Post Club
|
|
1000 Post Club
Joined: Sep 2004
Posts: 5,839 Likes: 1 |
I recommended the cap, sorry on the color, I just said to get one w/brass terminals. When you glance at the cap pic it does look black, but if you look at it a bit longer you can see it's actually grey. http://shop.advanceautoparts.com/p/bwd-s...distributor+capGuess you could paint it? MBHD
12 port SDS EFI
|
|
|
|
|
Joined: Feb 2014
Posts: 505
Major Contributor
|
|
OP
Major Contributor
Joined: Feb 2014
Posts: 505 |
S'okay, looks kind of cool. It would look odd if it were one of the bright red or bright blue aftermarket caps on an otherwise stock engine. I'm also going for a resto-mod look too, so it wouldn't be period correct for the bright colored caps as I remember them first popping up around in the '90s. They may have been introduced in the '80s, but I don't remember seeing any of them back then. I'm waiting on my 8mm spark plug wires still, so I'll put it all on at once when they come.
|
|
|
|
|
Joined: Feb 2014
Posts: 505
Major Contributor
|
|
OP
Major Contributor
Joined: Feb 2014
Posts: 505 |
After talking with Jay, he convinced me that my stock coil should be serviceable and should supply plenty of spark for a street application. So I switched it into the new cap. Here's what it looked like: 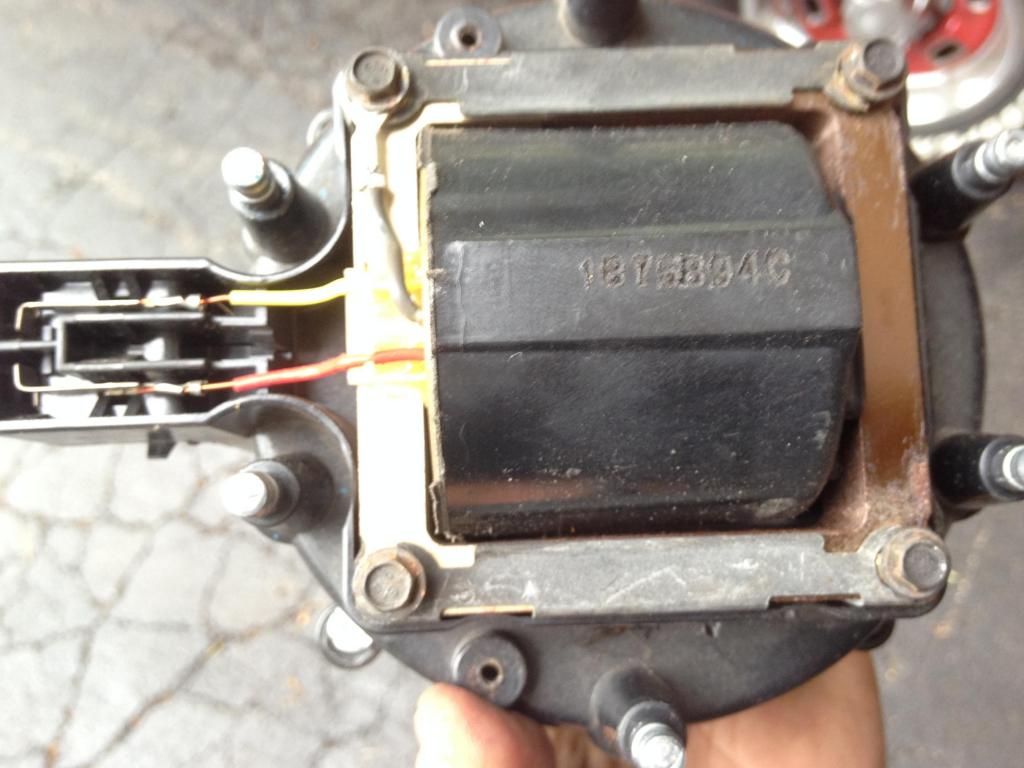 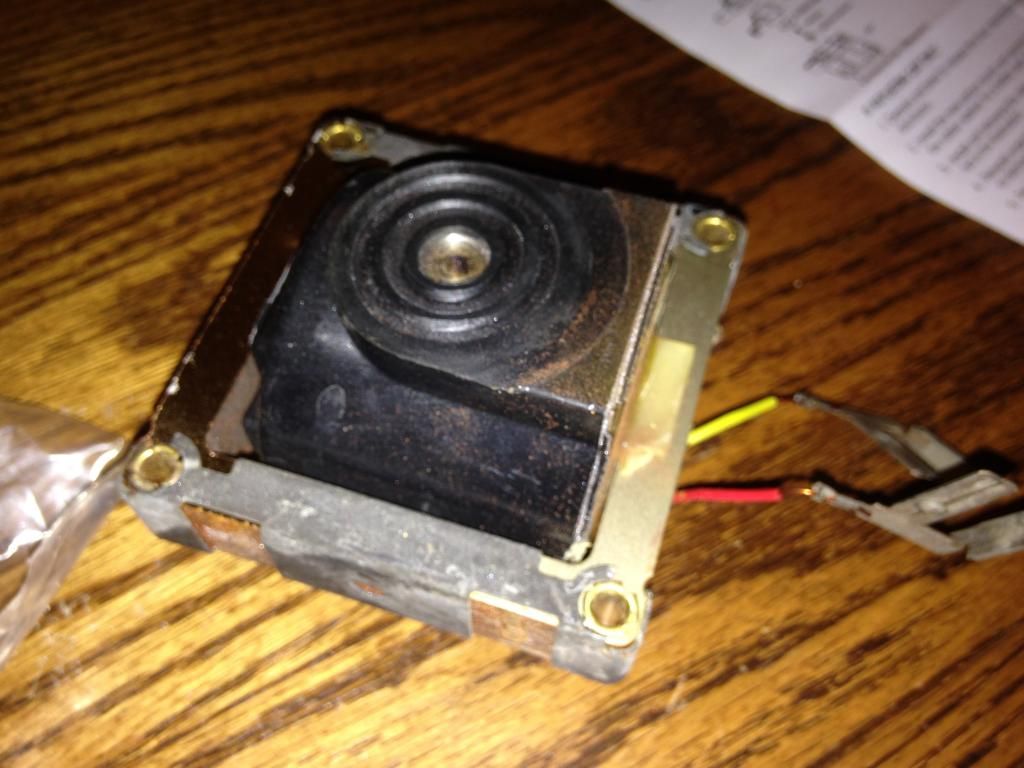
|
|
|
|
|
Joined: Feb 2014
Posts: 505
Major Contributor
|
|
OP
Major Contributor
Joined: Feb 2014
Posts: 505 |
New cap/rotor, coil cover, wire retainer, plug wires, and wire looms (spark plugs were already gapped and indexed) on my rebuilt distributor. Haven't had time to experiment with installing new springs and vacuum advance yet. 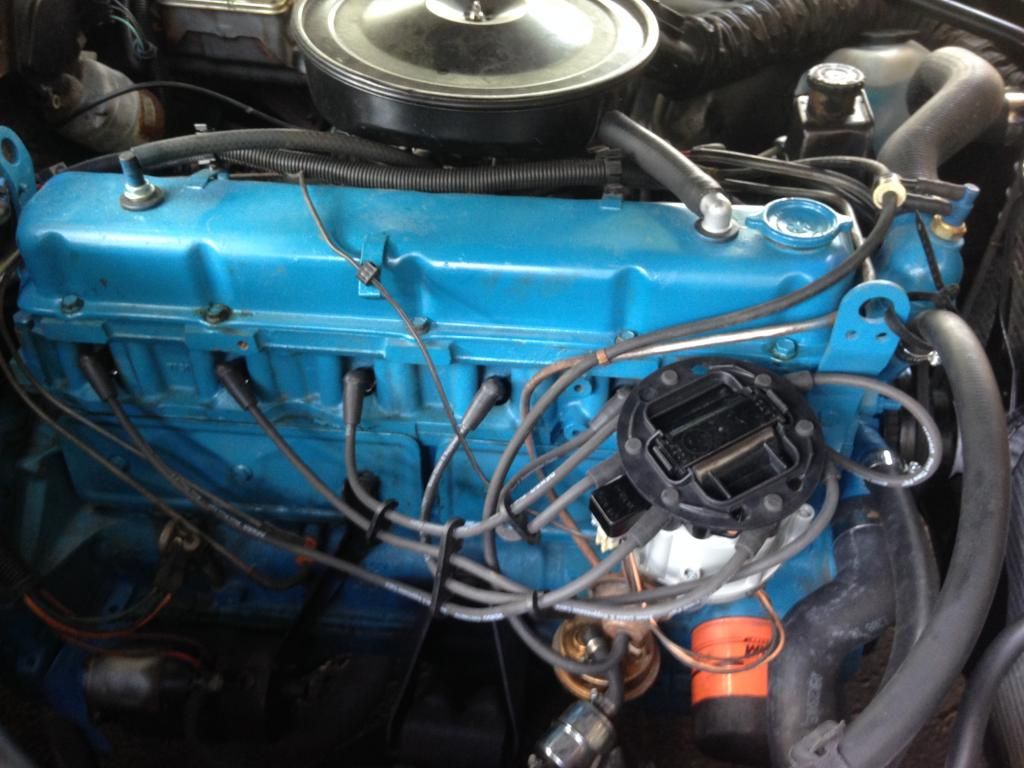
|
|
|
|
|
Joined: Sep 2004
Posts: 5,839 Likes: 1
1000 Post Club
|
|
1000 Post Club
Joined: Sep 2004
Posts: 5,839 Likes: 1 |
Looking sharp!  MBHD
12 port SDS EFI
|
|
|
|
|
Joined: Feb 2014
Posts: 505
Major Contributor
|
|
OP
Major Contributor
Joined: Feb 2014
Posts: 505 |
Looking sharp! MBHD Thanks, just going for restored stock look for now so I can pop the hood and not be embarrassed by a rusty greasy mess underneath. Only items under the hood I haven't replaced or rebuilt now are the starter, power steering, EGR, EFE and the engine itself. I'm going to be playing around with advance settings and plug gap to see what is optimal. I may look into changes I can make to the mono-jet besides idle mixture as well.
|
|
|
|
|
Joined: Nov 2013
Posts: 482
Contributor
|
|
Contributor
Joined: Nov 2013
Posts: 482 |
That looks great! I am getting inspired to clean and paint also! It looks so nice when the hood is open. Jay 6155
|
|
|
|
|
Joined: Nov 2012
Posts: 98
Active BB Member
|
|
Active BB Member
Joined: Nov 2012
Posts: 98 |
Clean look under that hood. Nice. Your mileage is about what I got on the highway in my truck, right at 20 MPG.....but if I decided to go much above 55, it dropped off.
'71 Chevy Shortbox 250ci
'99 Jeep TJ 242ci
Inliner #5787
|
|
|
|
|
Joined: Feb 2014
Posts: 505
Major Contributor
|
|
OP
Major Contributor
Joined: Feb 2014
Posts: 505 |
Clean look under that hood. Nice. Your mileage is about what I got on the highway in my truck, right at 20 MPG.....but if I decided to go much above 55, it dropped off. Well mine was 20 mpg in mainly city driving, I haven't checked highway driving yet. I'm figuring that will be better yet. But I suppose the aerodynamics and weight of the truck versus the Camaro make a difference. 55mph makes sense, that was the national speed limit then and the gearing and tire size would have been designed to make peak efficiency around that speed. It's 70mph in Illinois now, so the 2.56:1 rear ratio (which they used in the smaller V8s with TH350 in '80 & '81 too) that was used on the last year of the 250 in '79 (which switched to the 292 SD head & intake/exhaust too) would be more efficient at the modern highway speed. I read an interesting series of articles on the "deadly sins" of GM on the cars that lead to its decline. I think it was the Vega article where the author described the super wide range 3spd manual (3.50 1st, 1.89:1 2nd) as an overdrive 5spd manual with 2nd and 4th gear missing. That kind of makes sense from my experience with it, as first gear gets you across the intersection, but it bogs a bit if shifted to the 1.00:1 ratio before 40mph. With the 2.73:1 high ratio in the rear end, the overall drive ratios are similar the T5 in 1st (with 3.42:1 rear ratio), while the third gear falls somewhere between the 4th & 5th OD gears. So my seat of the pants experience kind of agrees with that author.
Last edited by Lifeguard; 06/18/14 10:28 AM.
|
|
|
|
|
Joined: Nov 2012
Posts: 98
Active BB Member
|
|
Active BB Member
Joined: Nov 2012
Posts: 98 |
Yeah, I am running a 3.73:1 rearend. It was awesome for hammering it while cruising in 3rd at 50mph and feeling it pull like it had a purpose. I got a free '71 2spd slushbox from a nova which I'm going to use until I get bored and go back to a manual. My saginaw was tired and shifting on the column was killing me. A freebie was just what the doctor ordered.
'71 Chevy Shortbox 250ci
'99 Jeep TJ 242ci
Inliner #5787
|
|
|
|
|
Joined: Feb 2014
Posts: 505
Major Contributor
|
|
OP
Major Contributor
Joined: Feb 2014
Posts: 505 |
Yeah, I am running a 3.73:1 rearend. It was awesome for hammering it while cruising in 3rd at 50mph and feeling it pull like it had a purpose. I got a free '71 2spd slushbox from a nova which I'm going to use until I get bored and go back to a manual. My saginaw was tired and shifting on the column was killing me. A freebie was just what the doctor ordered. Ah, column shifter. Mine is on the floor. I've never had a manual on the column, only automatics. What a pain.
|
|
|
|
|
Joined: Nov 2012
Posts: 98
Active BB Member
|
|
Active BB Member
Joined: Nov 2012
Posts: 98 |
Does it have a stock knock sensor?
'71 Chevy Shortbox 250ci
'99 Jeep TJ 242ci
Inliner #5787
|
|
|
|
|
Joined: Feb 2014
Posts: 505
Major Contributor
|
|
OP
Major Contributor
Joined: Feb 2014
Posts: 505 |
Does it have a stock knock sensor? Knock sensor? Not on a second gen Camaro. I think the first knock sensor on a Camaro was with the third gen '83 L69 engine (maybe the '82 LU5 first). I also just changed out my stock HEI advance springs with the Accel white springs after the last fill up. Noticeably peppier. I filled up today and it was 20.2mpg. That's with the stock fan reinstalled while I work out electrical issues with the electric fan. The previous upgrades are a K&N air filter, ram air intake, performance HEI cap with rotor, 2.25" exhaust with turbo muffler and catalytic converter removed.
|
|
|
|
|
Joined: May 2014
Posts: 25
Active BB Member
|
|
Active BB Member
Joined: May 2014
Posts: 25 |
do you have a part number on that coil?
|
|
|
|
|
Joined: May 2014
Posts: 25
Active BB Member
|
|
Active BB Member
Joined: May 2014
Posts: 25 |
do you have a part number on that coil?
|
|
|
|
|
Joined: Feb 2014
Posts: 505
Major Contributor
|
|
OP
Major Contributor
Joined: Feb 2014
Posts: 505 |
do you have a part number on that coil? No, that's the factory coil. It has a number stamped on the top of it, but that doesn't appear to be a part number.
|
|
|
|
|
Joined: Feb 2014
Posts: 505
Major Contributor
|
|
OP
Major Contributor
Joined: Feb 2014
Posts: 505 |
Haven't done a project update in awhile. Finances put it all on hold for a few years. I have my '77-'81 Z28 cat-back exhaust for awhile now, but I only hooked one tailpipe up to the muffler that the previous owner stuck on the header pipe. This temporary setup fell apart last year, and I've got the full cat-back installed now, but I'm still having difficulty getting the old muffler off, and looks like I will have to rent a saw-zall and cut it off. Then add the 2.25" to 2.5" adapter to the 2.5" pipes I have to take the place of the missing catalytic converter. The Y-pipe on the Z28 system is meant to bolt to a bracket on the catalytic converter with a gasket, so I haven't decided yet how to connect the pipe to it.
|
|
|
|
|
Joined: Feb 2014
Posts: 505
Major Contributor
|
|
OP
Major Contributor
Joined: Feb 2014
Posts: 505 |
Got the muffler off now. On the side facing up was the stamped Thrush logo, so it was a nice muffler but I was unable to save it. It was stuck on the old header pipe and I had to cut it off with a Saw-zall. Unfortunately I had already installed the Z28 cat-back pipes and resonators, so now trying to fit the connector pipe between the stock header pipe and the Y-pipe connect is tough. I'm waiting until light tomorrow to try and scissor both ends together with the pipe in-between. (And waiting for the feeling in my arms to come back.) When I get it done, I will try to post a video to show how it sounds.
I put a 3-blade clutch fan off a truck 250/292 on the water pump for a temporary fix while I finish wiring for the electric fans. Put a new battery in it too.
|
|
|
|
|
Joined: Apr 2016
Posts: 384
Contributor
|
|
Contributor
Joined: Apr 2016
Posts: 384 |
I haven't taken the time to read all five pages of this thread, but I'm a litle curious. Do you still have the 3 speed trans in the Camaro?
Formerly known as 64NovaWagon.
|
|
|
|
|
Joined: Feb 2014
Posts: 505
Major Contributor
|
|
OP
Major Contributor
Joined: Feb 2014
Posts: 505 |
I haven't taken the time to read all five pages of this thread, but I'm a litle curious. Do you still have the 3 speed trans in the Camaro? Yeah, I don't blame you. A lot of it is speculation and throwing ideas around, and some of it is correcting errors, so it's not really worth reading all of it. i should post another summary of what I've done and what I plan to do. Yes, the stock '78 3.50:1 Saginaw 3spd is still in place. I've been shopping for a Saginaw 4spd and will probably stick with a 3.50:1 1st gear. i definitely need the extra gear in there. 1st gets you across the intersection, but 2nd is a huge kick from that, then it revs pretty high before I hit cruising speed at 35 to 45mph when I can then settle into the direct drive gear. Splitting that middle gear into two would really smooth out the acceleration steps.
|
|
|
|
|
Joined: Feb 2014
Posts: 505
Major Contributor
|
|
OP
Major Contributor
Joined: Feb 2014
Posts: 505 |
Sorry, my smartphone died over a week ago, and I couldn't get a video of the new exhaust up. I'm adding an adjustable vac-adv and up the initial from 6 to 10 degrees. So I will probably shoot the exhaust vid after I tune everything.
|
|
|
|
|
Joined: Jan 2015
Posts: 376
Contributor
|
|
Contributor
Joined: Jan 2015
Posts: 376 |
Motor looks sharp! Hope to see a video of the new exhaust sometime.
|
|
|
|
|
Joined: Feb 2014
Posts: 505
Major Contributor
|
|
OP
Major Contributor
Joined: Feb 2014
Posts: 505 |
Tuned up the Camaro after installing the Accel adjustable vacuum advance and setting initial advance to 10 degrees, up from stock 6 degrees. Got about 20"HG on vacuum when adjusting the idle speed screw. So I did some video with my new cat back dual resonators: [img]http://i1109.photobucket.com/albums/h434/Lifeguard2005/th_IMG_0302_zpsezapjrww.mp4[/img] Then took if for a ride in the rain. As I put new wipers on, replaced the washer motor, and sealed up some rust holes in the header panel vent that was leaking inside. So it is now rain and car wash proof: 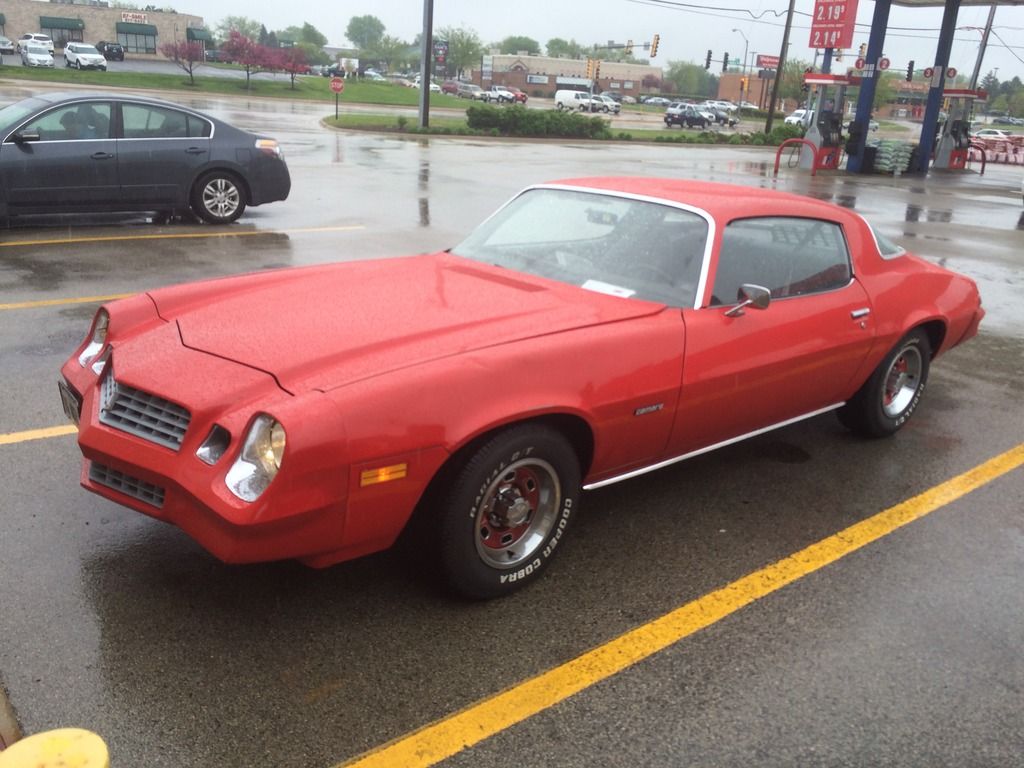 Will probably play with timing with the new adjustable vacuum advance. And I need to change all fluids and oil filter.
Last edited by Lifeguard; 05/12/16 06:29 AM.
|
|
|
|
|
Joined: Feb 2014
Posts: 505
Major Contributor
|
|
OP
Major Contributor
Joined: Feb 2014
Posts: 505 |
List of what I've done so far:
Stock 250cid with integrated head, stock 3.50:1 3spd, 2.73:1 open rear gear.
Stock 2.25" exhaust to cat, 2.5" straight and flex pipe for cat replacement, 2.5" to dual 2" pipe with dual resonators and dual 2.25" tailpipes '77-'81 Z28 stock cat-back exhaust.
New HEI cap and rotor with spark plug wire cap retainer, 8mm replacement wires.
Properly gapped and indexed spark plugs.
red springs from Accel HEI distributor spring kit.
Adjustable vacuum advance with maximum 20 degrees of advance.
Upped mechanical advance to 10 degrees initial advance.
three blade later model Chevy truck 292 clutching fan (replacing with electric fans soon)
new battery
K&N air filter in stock air cleaner
New plastic duct work added to opening directly behind the left turn signal and giving it a secret Ram Air Intake.
Last edited by Lifeguard; 05/12/16 04:28 PM.
|
|
|
|
|
Joined: Jan 2015
Posts: 376
Contributor
|
|
Contributor
Joined: Jan 2015
Posts: 376 |
|
|
|
|
|
Joined: Feb 2014
Posts: 505
Major Contributor
|
|
OP
Major Contributor
Joined: Feb 2014
Posts: 505 |
A little side by side with yesterday and on the car lot when I first saw it: 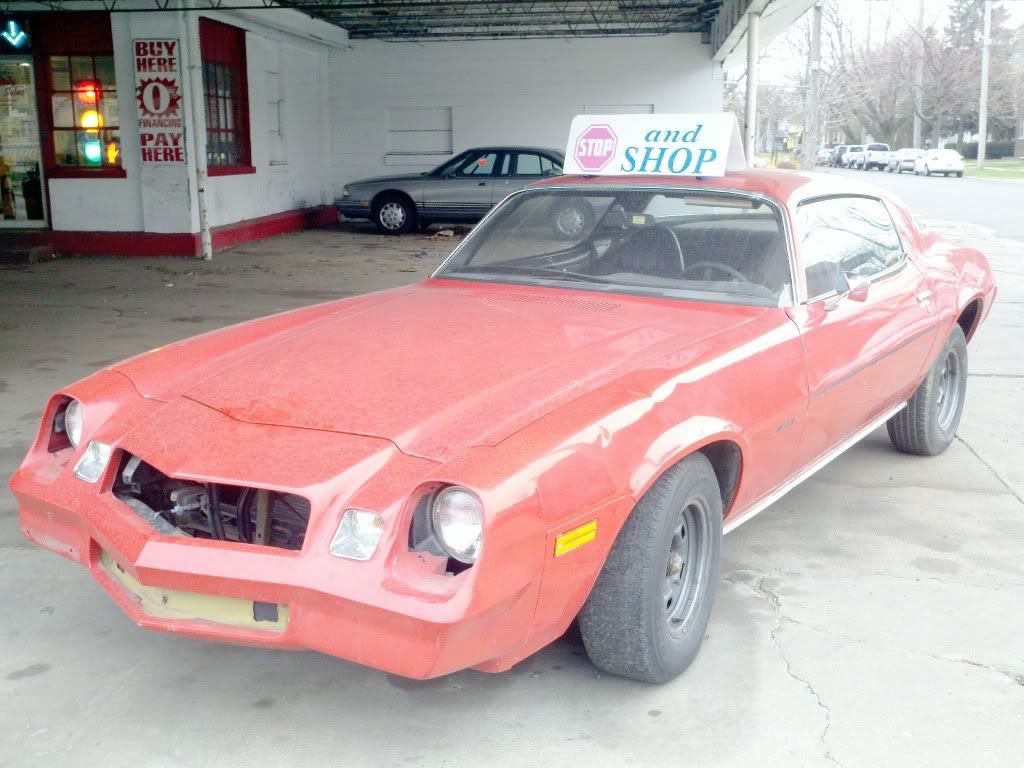 I've got another video of the idling that is longer and Photobucket doesn't seem to like it so I'm trimming it to get it uploaded and shared. BTW, stock SAE-net horsepower is 110hp @ 3800rpm, and 195ft-lbs @ 1600rpm. The Z28 numbers with the exhaust is 15hp over the LM1 option, and 10ft-lbs more torque. So maybe I'm at 125hp SAE-net and 205ft-lbs now. Or maybe more with the intake and ignition timing changes, along with the clutch fan. 
Last edited by Lifeguard; 05/12/16 06:43 PM.
|
|
|
|
|
Joined: Feb 2014
Posts: 505
Major Contributor
|
|
OP
Major Contributor
Joined: Feb 2014
Posts: 505 |
Oh, finally got the next two parts up:
[files deleted]
It's glitching for me, won't play without pausing every second. I s it doing that for others or is that just me?
Ok, I just deleted them, it wasn't just me they definitely were corrupted. I'll re-trim and post them again.
Last edited by Lifeguard; 05/12/16 11:00 PM.
|
|
|
|
|
Joined: Feb 2014
Posts: 505
Major Contributor
|
|
OP
Major Contributor
Joined: Feb 2014
Posts: 505 |
|
|
|
|
|
Joined: Feb 2014
Posts: 505
Major Contributor
|
|
OP
Major Contributor
Joined: Feb 2014
Posts: 505 |
|
|
|
|
|
Joined: Feb 2014
Posts: 505
Major Contributor
|
|
OP
Major Contributor
Joined: Feb 2014
Posts: 505 |
Driving around with the red springs in the HEI, I didn't have any issues so tomorrow I think I will try one red and one blue. I just saw on the packaging that they recommended red springs for big blocks, blue springs for V6 and small block, and the white springs for racing.
now that i have the initial advance adjusted to 10 degrees like the automatic, and I have the adjustable vacuum advance on, I can start turning it in little by little until I get some pinging and rattling. Starting at full out, 20 degrees advance, no issues yet.
Spark plug gap will be played with too.
Not sure if there is any advantage to adjusting initial idle speed on the carb from 800rpm up or down? The auto equipped 250cid had a lower idle speed with a higher initial advance.
Last edited by Lifeguard; 05/16/16 01:57 AM.
|
|
|
|
|
Joined: Feb 2014
Posts: 505
Major Contributor
|
|
OP
Major Contributor
Joined: Feb 2014
Posts: 505 |
|
|
|
|
|
Joined: Feb 2014
Posts: 505
Major Contributor
|
|
OP
Major Contributor
Joined: Feb 2014
Posts: 505 |
Apparently Photobucket no longer lets you post your pics from there on forums ("3rd party hosting) unless you pay them $400 per year. Not going to happen, so all my pics from this thread and any others I posted in are inaccessible. I am looking for another pic hosting site, and will try to re-post anything I posted before. This is why if a forum allows storing pics on there, I've done that in the past. What a pain.
|
|
|
|
|
Joined: Aug 2013
Posts: 78
Active BB Member
|
|
Active BB Member
Joined: Aug 2013
Posts: 78 |
looking forward to the re-posted pics and videos. I'm using flickr for pics now if that helps.
|
|
|
|
|
Joined: Feb 2014
Posts: 505
Major Contributor
|
|
OP
Major Contributor
Joined: Feb 2014
Posts: 505 |
looking forward to the re-posted pics and videos. I'm using flickr for pics now if that helps. Yeah, I was waiting until I finished all the maintenance and repairs on it currently before giving it a wash and polish for some new pics. Then making a new thread to post from my new pic account. Start fresh.
|
|
|
|
|
Joined: Apr 2003
Posts: 1,537 Likes: 15
1000 Post Club
|
|
1000 Post Club
Joined: Apr 2003
Posts: 1,537 Likes: 15 |
Apparently Photobucket no longer lets you post your pics from there on forums ("3rd party hosting) unless you pay them $400 per year. Not going to happen, so all my pics from this thread and any others I posted in are inaccessible. I am looking for another pic hosting site, and will try to re-post anything I posted before. This is why if a forum allows storing pics on there, I've done that in the past. What a pain. Indeed. They sprung this change on their users last summer - lots of forums and web commerce sites have been affected: BBC News Apparently their advertising dollars are drying up. Nothing is really 'free' . . . You should check with your ISP. Mine is with earthlink. Each email-box includes 10MB of webspace - with up to 8 email profiles (on the master account) that's 80MB. It's not alot but if one takes the time to crop images and lower the resolution one can get photos down to 50-100K each. And it's a paid service so images are online until one chooses to take them down.
|
|
|
|
|
Joined: Feb 2014
Posts: 505
Major Contributor
|
|
OP
Major Contributor
Joined: Feb 2014
Posts: 505 |
Indeed. They sprung this change on their users last summer - lots of forums and web commerce sites have been affected: BBC News Apparently their advertising dollars are drying up. Nothing is really 'free' . . . You should check with your ISP. Mine is with earthlink. Each email-box includes 10MB of webspace - with up to 8 email profiles (on the master account) that's 80MB. It's not alot but if one takes the time to crop images and lower the resolution one can get photos down to 50-100K each. And it's a paid service so images are online until one chooses to take them down. Yeah, I got another pic hosting site right afterwards. I forgot the name of it. I'm waiting until the snow melts this week and I finish getting all my little things done and a bath to do some fresh pics and make a new update. Most of the forums I post on will host pics and I should have used that before now.
|
|
|
|
|
Joined: Oct 2007
Posts: 5,015 Likes: 47
1000 Post Club
|
|
1000 Post Club
Joined: Oct 2007
Posts: 5,015 Likes: 47 |
Almost all of my pictures here went away when Picasa (Google) did the same thing. The pics are still there but not where I posted them. The HAMB apparently does it's own hosting. You can post there from your desktop. That would be a good feature for the new website. Thanks for the ISP tip.
"I wonder if God created man because he was disappointed in the monkey?" Mark Twain
|
|
|
|
0 members (),
108
guests, and
55
robots. |
|
Key:
Admin,
Global Mod,
Mod
|
|
|
|