|
|
Joined: May 2011
Posts: 378
Contributor
|
OP

Contributor
Joined: May 2011
Posts: 378 |
Fired it up for a couple of seconds today after work  Car has not been driven since 2011. I still need to hook up the radiator and put water in it before I can start it and let it run for the break-in. https://youtu.be/J5JuQFkKD3s9.5:1, lumps, zero deck, Comp H268 cam. Stock intake and exhaust for now. Exhaust was still disconnected in this video. At the end my phone fell off the fender :P 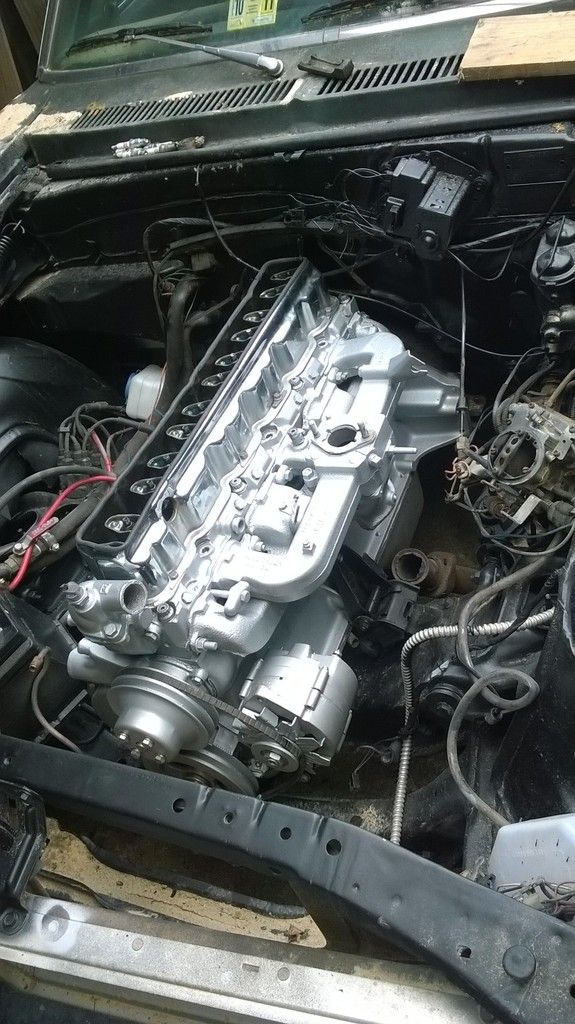
|
|
|
|
|
Joined: May 2011
Posts: 378
Contributor
|
|
OP
Contributor
Joined: May 2011
Posts: 378 |
Yee-haww! 
|
|
|
|
|
Joined: Sep 2004
Posts: 5,839 Likes: 1
1000 Post Club
|
|
1000 Post Club
Joined: Sep 2004
Posts: 5,839 Likes: 1 |
That's what I'm talking about!!!!!!  MBHD
12 port SDS EFI 
|
|
|
|
|
Joined: Oct 2007
Posts: 5,015 Likes: 47
1000 Post Club
|
|
1000 Post Club
Joined: Oct 2007
Posts: 5,015 Likes: 47 |
Good work! It sounds good.
"I wonder if God created man because he was disappointed in the monkey?" Mark Twain
|
|
|
|
|
Joined: Dec 2010
Posts: 46
Active BB Member
|
|
Active BB Member
Joined: Dec 2010
Posts: 46 |
|
|
|
|
|
Joined: Dec 2006
Posts: 48
Active BB Member
|
|
Active BB Member
Joined: Dec 2006
Posts: 48 |
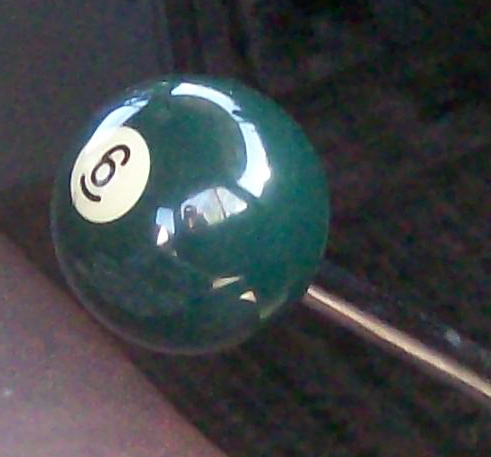
Who makes that 2 piece valve cover?
68 Camaro 250 Clifford intake headers Holly 700r4 3:08 Cruiser I.I.3241
|
|
|
|
|
Joined: May 2011
Posts: 378
Contributor
|
|
OP
Contributor
Joined: May 2011
Posts: 378 |
Me Its just a cheap chrome cover that I cut the top off, to be able to adjust the rockers while the engine is running, and hopefully not make a mess. To keep myself from cutting my fingers on the sharp edge, I covered it with a piece of vacuum hose. I also wanted to see how much oil pools under the valve cover at various rpms. I have a high volume pump and I tried to improve drain back a little, but I didn't hog out the drain holes. Just cut some reliefs and grooves here and there to help drainage, guiding the oil towards the holes and away from the edges.
|
|
|
|
|
Joined: Jan 2015
Posts: 376
Contributor
|
|
Contributor
Joined: Jan 2015
Posts: 376 |
Awesome! I'm glad you'll be putting a bigger carb and headers on though...that's a lot of cam for a wee bit of air and gas. lol Sounds tough! I'm using that exact cam for my 292.
|
|
|
|
|
Joined: May 2011
Posts: 378
Contributor
|
|
OP
Contributor
Joined: May 2011
Posts: 378 |
I have a 2bbl ready to go, just haven't decided on what to do about intake. Modify mine and lose the original, or get a junkyard stock manifold and modify that, or get a new 2bbl intake. Also have not decided on exhaust yet. First I need to see that it runs good enough to warrant any more spending.
|
|
|
|
|
Joined: Jan 2015
Posts: 376
Contributor
|
|
Contributor
Joined: Jan 2015
Posts: 376 |
Issue is with that small carb your starving the engine for fuel so you Won't get the best performance out of it. You have opened up the engine to breathe better but its still starved and the exhaust has a good amount of back pressure. It'll run good for sure, but it won't be to its best by any means. 2 barrel intakes are not available, but you Can get an adapter to adapt a 350/500 cfm holley two barrel to the stock manifold. That and Langdon's headers would make a good difference from stock. A 500 cfm edelbrock mounted on either an offy or clifford with Langdon or cifford headers will make the best difference. But whatever you decide will be cool anyhow. Good luck to ya!
Last edited by TJ's Chevy; 07/02/15 11:01 AM.
|
|
|
|
|
Joined: May 2011
Posts: 378
Contributor
|
|
OP
Contributor
Joined: May 2011
Posts: 378 |
Yea I know all that.. just need to figure out what I want for the next step There is a 2bbl manifold out there. There's a twin 2bbl one too, I was wondering if that would be too much, to run two progressive webers.... maybe a single simultaneous 2bbl would suffice, the Rochester I already have. Weber is 32/36, Rochester is 36/36. I'll definitely get headers too, but again I need to find out what would work best for me. I don't like the idea of running one carb in the middle of a loooong head. I'm used to one throat feeding one intake, with no plenum. This is a different beast and to me, a compromise. I can't afford 3 sidedraft webers and intakes for them 
Last edited by 70Nova; 07/02/15 11:23 AM.
|
|
|
|
|
Joined: Jan 2015
Posts: 376
Contributor
|
|
Contributor
Joined: Jan 2015
Posts: 376 |
I think twin Weber 32/36's would work nicely. Those are the one's Langdon sells.
|
|
|
|
|
Joined: Apr 2006
Posts: 534
Major Contributor
|
|
Major Contributor
Joined: Apr 2006
Posts: 534 |
70nova,
I ran a few numbers on your (233cid?) engine in the Gonkulator, just to give an idea:
As in in the video:
Torq 225 at 3400
Powr 168 at 4900
That assumes you can richen that MV carb enough to be happy.
Add Langdon dual exhaust iron
Torq 240 at 3400
Powr 180 at 4900
Now some intake choices -
First the Offy 4bbl intake with a Rochester 2gc on there, the little 283/195hp carb:
Torq 246 at 3600
Powr 211 at 5200 (a big improvement but there's more)
Or the Offy 4bbl, 390 Holley, a classic small engine combo
Torq 253 at 3800
Powr 236 at 5400 (wow, a big kick)
Or, the pair of 32/36 webers
Torq 256 at 3900
Powr 249 at 5700
That is well over 1 HP per inch out of an "old school" setup, no Street Outlaws ProCharger, no Fast&Furious NOSS, just good old hot rodding, from the good old days.
|
|
|
|
|
Joined: May 2011
Posts: 378
Contributor
|
|
OP
Contributor
Joined: May 2011
Posts: 378 |
Thank You!
Really intrigued by the twin 32/36 webers, progressive to help cruising and part throttle, but opens up for more when needed. I would assume vacuum would stay somewhat reasonable with just the primaries opening at part throttle.
These webers used to be everywhere, hard to get rid of. Now I don't have one,but looks like a friend is going to let me have one plus a jetting kit for a song. (Name your price, I need it gone).
So I would need a second one and the (Clifford I think?) intake...
Jan
|
|
|
|
|
Joined: May 2011
Posts: 378
Contributor
|
|
OP
Contributor
Joined: May 2011
Posts: 378 |
Ran it some more, I now have the (flushed) radiator hooked up. Didn't get to break it in properly, temperature went above 220 and I turned it off. It wouldn't idle, like it did at first when it had not warmed up yet, and it didn't take throttle as well. I could tell it was a bit too hot. Lots of loose ends to tie, but the basics are there.
|
|
|
|
|
Joined: Apr 2006
Posts: 534
Major Contributor
|
|
Major Contributor
Joined: Apr 2006
Posts: 534 |
It might have liked the choke if it was on when cold. When warmed up if it lost the choke it might have got too lean and/or had a vacuum leak.
Also (hard to do) but make sure it has plenty of timing, that will keep it cool, hook the vac advance up too.
I always fill the rad with the heater hoses OPEN so you don't get air bubbles in the system. Or, the water temp sender in the head would be good to leave out.
Make sure a cool 160F or so thermostat is in there and actually OPENS at 160-170F, hen shut the cap so the system pressures up to avoid air pockets.
My other trick is to run the garden hose as high as it will go without spraying all over the fan, to keep the rad cool, run it right over the top of the rad.
Now that the cam lube is wiped off, I would fire it up again and finish the cam breakin soon as you can so the lobes don't get dried out.
|
|
|
|
|
Joined: May 2011
Posts: 378
Contributor
|
|
OP
Contributor
Joined: May 2011
Posts: 378 |
Choke was not on. Water temp sender was out until water came out the hole. I'll see how it runs today, I might be able to get a t-stat or just leave it out or gut the old one to leave a little restriction.
|
|
|
|
|
Joined: Apr 2006
Posts: 534
Major Contributor
|
|
Major Contributor
Joined: Apr 2006
Posts: 534 |
I gut the centers out of the thermostat. Leaving it out altogether is not good - you want that point to be the bottleneck to keep pressure in the block higher so don't form steam pockets.
But gutting the center out, buys you time for breakin, flows the most water, runs the coolest. During breakin that is the ideal setup.
Hard to figure it running rougher hotter if the choke was off the whole time. Sometimes on warmup the hot exhaust iron will push the whole manifold away from the head, creating an intake leak. But usually not with an iron intake.
|
|
|
|
|
Joined: May 2011
Posts: 378
Contributor
|
|
OP
Contributor
Joined: May 2011
Posts: 378 |
Gutted the thermostat, ran it again, until it started making a noise that resembles rod knock a little too much so I turned it off and drained the oil. Massively discouraged and disappointed.
Temperature seemed to stay under control but I didn't get enough run time to really tell. It go to about 190F before the knocking started. Checked torque converter bolts (well just one) and it was still tight. Knocks more when on throttle, less at idle speed.
I dunked the old thermostat in boiling water before gutting it, and it opened up. It was a 180F stat.
I'd say total run time is maybe 15 minutes, split in two about equal long stints. Wonderful oil pressure. Did not rev it up very high, did not let it idle either. Guessing 1500-2500 rpms, no tachometer.
Wondering if there's still a damn stink bug in the oil gallery somewhere, starving a rod. I bent over backwards to clean the engine block and kept all holes taped up until parts were bolted on
|
|
|
|
|
Joined: May 2011
Posts: 378
Contributor
|
|
OP
Contributor
Joined: May 2011
Posts: 378 |
New ARP rod bolts and crank journals machined. Stock rods. New bearings. In case anyone was wondering.
Spark plugs were a bit sooty, definitely did not run lean, I raised the float level in the carb to fatten it up a hair for the break-in. I never put the engine under load, just ran it in park.
No foreign particles in oil, very little fine stuff got stuck on a magnet as expected, and a couple of tiny flakes of paint. Nothing solid or hard. No bearing shavings. I'll drop the oil pan and take a look. Shit. It's a pain in the ass to remove in my car.
Last edited by 70Nova; 07/05/15 02:26 PM.
|
|
|
|
|
Joined: Apr 2006
Posts: 534
Major Contributor
|
|
Major Contributor
Joined: Apr 2006
Posts: 534 |
I've never tried this but......
Possible way to check the rods -
Pull each rod cap (and inspect of course)
Then, immerse the oil pump in a bucket of oil, spin up the distrib shaft, and watch what happens (besides making a mess).
Oil should squirt out the crank at the con rod hole of course.
If it doesn't you can do like Winnie The Pooh and say "Ah_HAH!"
You might need a BIG drip pan under the motor though, never done it so not sure. I'd just inspect all the rod caps first.
I hate noises.
|
|
|
|
|
Joined: May 2011
Posts: 378
Contributor
|
|
OP
Contributor
Joined: May 2011
Posts: 378 |
Good idea. I'll pull one at a time to test and see how good it flows. Then put it back and check the next one. if this trick works. I should see damage to the bad bearing easily, if that's what it is
|
|
|
|
|
Joined: May 2011
Posts: 378
Contributor
|
|
OP
Contributor
Joined: May 2011
Posts: 378 |
Update. Pulled the oil pan and rod end caps. All nuts were too loose, and #1 rod nuts I actually removed with my bare fingers. No bearing damage. I turned it off in time. WHY this happened, I don't fully understand, I know I torqued them down. One explanation we came up with, is the ARP studs had not been fully seated and the fairly low torque spec was not enough to pull them all the way through. OR they stretched. As I recall the instructions said not to use Loctite. Not sure anymore. None was used, I think I will this time. Walking away from it for now to do some research Edit: Yep ARP says only use their thread lube and torque to 47ft-lbs or stretch spec. I went with the torque number.
Last edited by 70Nova; 07/05/15 08:05 PM.
|
|
|
|
|
Joined: Apr 2004
Posts: 3,555 Likes: 34
1000 Post Club
|
|
1000 Post Club
Joined: Apr 2004
Posts: 3,555 Likes: 34 |
Wow, You are one lucky man with good ears! I torque mine down to 45. Do not use locktite.
Inliner Member 1716 65 Chevelle Wagon and 41 Hudson Pickup Information and parts www.12bolt.com
|
|
|
|
|
Joined: May 2011
Posts: 378
Contributor
|
|
OP
Contributor
Joined: May 2011
Posts: 378 |
Maybe I was being paranoid or "overly" cautious, but yea it paid off. I know what a rod knock sounds like, as well as the sound when the rod exits through the block Done it on purpose too. As soon as I started hearing a similar noise I turned it off. I'm on the fence with Loctite. Used it on my other builds religiously and never a problem. Not sure what to do and why.
|
|
|
|
|
Joined: Apr 2004
Posts: 3,555 Likes: 34
1000 Post Club
|
|
1000 Post Club
Joined: Apr 2004
Posts: 3,555 Likes: 34 |
I'd suggest checking your torque wrench. I have seen weirder things happen.
Last edited by tlowe #1716; 07/06/15 12:10 AM.
Inliner Member 1716 65 Chevelle Wagon and 41 Hudson Pickup Information and parts www.12bolt.com
|
|
|
|
|
Joined: Nov 2004
Posts: 1,805 Likes: 1
1000 Post Club
|
|
1000 Post Club
Joined: Nov 2004
Posts: 1,805 Likes: 1 |
No loctite - ARP assembly lube only and go buy a rod bolt stretch gage - its the only true way to get the right pre-load on the rod bolts. Torque values can be mis-leading for a variety of reasons.
Measure and record the new bolt length using cone tips on a micrometer. Then stretch it as below.
I cycle all my rod bolts at least 5 times using a calibrated torque wrench (I get mine calibrated before every engine build or 24 months which ever comes first) with ARP lube. Then measure the length again - if they have stretched more than 0.002" from the new state then don't stay in the engine. Once I know the bolts are good then the last tighten is done using a rod bolt stretch gage.
On ARP rod bolts typically when installed using the stretch method - the resulting torque is a lot high.
On the next tear down if the bolts have yielded - they get replaced. It costs a bit more to do it this way but the overall cost is peanuts compared too the cost if a rod lets go.
Note - if your replacing std rod bolts (ones with a forged head on them)with ARP ones - I usually install them using a hyd. press after I torque them up and release them - this ensures the bolt is seated in the rod properly. Use a piece of aluminum against the rod split line to protect the face. I suspect that your bolts were not fully seated and once they ran a bit they did so but also lost the applied torque.
Last edited by efi-diy; 07/06/15 01:59 AM.
51 GMC 4.2 turbo
Can't solved today's problems using the same technology/thinking that created them
|
|
|
|
|
Joined: Dec 2010
Posts: 535
Major Contributor
|
|
Major Contributor
Joined: Dec 2010
Posts: 535 |
Wow. It always makes me nervous at how little torque 45lb-ft is. But I've never had a cap in any engine ever come loose.
|
|
|
|
|
Joined: May 2011
Posts: 378
Contributor
|
|
OP
Contributor
Joined: May 2011
Posts: 378 |
|
|
|
|
|
Joined: Sep 2008
Posts: 3,669 Likes: 42
1000 Post Club
|
|
1000 Post Club
Joined: Sep 2008
Posts: 3,669 Likes: 42 |
Even though installing rod bolts seem like a fairly straight forward process, it is not a DIY process that many people can do successfully because it takes specialty equipment to do it correctly. They have to be pressed into the rods so that they do fully seat into the rods. You can actually stretch the threads by using the nuts to tighten and pull them through and ruining the bolts. If you think they were not fully seated in the rods from being installed in this manner, they were also not correctly reconditioned either, and now that they are fully seated you will need to have them reconditioned again or you will have more problems. I can't tell you how many thousands of connecting rods I have reconditioned, but I have seen every problem that can occur from them being installed incorrectly. Stop before you go any further and have them re-examined by your machine shop now that you have found this error.
Class III CNC Machinist/Programmer
|
|
|
|
|
Joined: Nov 2013
Posts: 482
Contributor
|
|
Contributor
Joined: Nov 2013
Posts: 482 |
This is where my lack of experience is showing. If I am going to have new pistons put on, should I get the rods reconditioned? If so should I have arp bolts put in? This 250 is only going to see 5-5200 rpm max. With an auto trans. Thanks for any input. Jay6155
|
|
|
|
|
Joined: Sep 2004
Posts: 5,839 Likes: 1
1000 Post Club
|
|
1000 Post Club
Joined: Sep 2004
Posts: 5,839 Likes: 1 |
Yes, get them resized & new ARP bolts installed.
Stock rod bolts are not that great + how old are your rod bolts?
MBHD
12 port SDS EFI
|
|
|
|
1 members (stock49),
228
guests, and
52
robots. |
|
Key:
Admin,
Global Mod,
Mod
|
|
|
|