|
|
Joined: Dec 2014
Posts: 335
Contributor
|
OP

Contributor
Joined: Dec 2014
Posts: 335 |
Thanks, George! Aye skippy, it is. I got it from Tom Langdon. It is said to come from a 1980's six cylinder. The coil isn't on the block, but is from a Ford to get the cylinder stock look. It looks at first blush like stock, but upon closer inspection you can see differences.
Mark
'67 Camaro L6-250
|
|
|
|
|
Joined: Aug 2014
Posts: 821
Major Contributor
|
|
Major Contributor
Joined: Aug 2014
Posts: 821 |
Ah... I couldn't tell.
HEI really smoothed out my engine. Runs a lot better with it.
|
|
|
|
|
Joined: Dec 2014
Posts: 335
Contributor
|
|
OP
Contributor
Joined: Dec 2014
Posts: 335 |
Attached new 200r4 and torque converter. Almost ready for tomorrow's installation.
Another glitch. Few plate cover is different on the 200r4 than on the powerglide. Gotta find one of those, haven't looked yet.
Mark
'67 Camaro L6-250
|
|
|
|
|
Joined: Dec 2014
Posts: 335
Contributor
|
|
OP
Contributor
Joined: Dec 2014
Posts: 335 |
Spell check got me. Flex plate.
Mark
'67 Camaro L6-250
|
|
|
|
|
Joined: Dec 2014
Posts: 335
Contributor
|
|
OP
Contributor
Joined: Dec 2014
Posts: 335 |
Engine is in! Big problem, though. New cross member for the 200r4 hits exhaust pipe.
Throttle needs to be converted to a cable. Beyond that, just normal stuff.
Hopefully will get pictures posted soon.
Last edited by mshaw230; 02/28/16 10:39 PM.
Mark
'67 Camaro L6-250
|
|
|
|
|
Joined: Aug 2014
Posts: 821
Major Contributor
|
|
Major Contributor
Joined: Aug 2014
Posts: 821 |
You don't need an exhaust. Just run open headers. Problem solved!
Congrats! Can't wait to see the video. I'm very interested in how the 200r4 drives behind the 250!
|
|
|
|
|
Joined: Dec 2014
Posts: 335
Contributor
|
|
OP
Contributor
Joined: Dec 2014
Posts: 335 |
Thanks, funny! But I've got a new G-Force crossmember in shipping, will let you know how it works out. 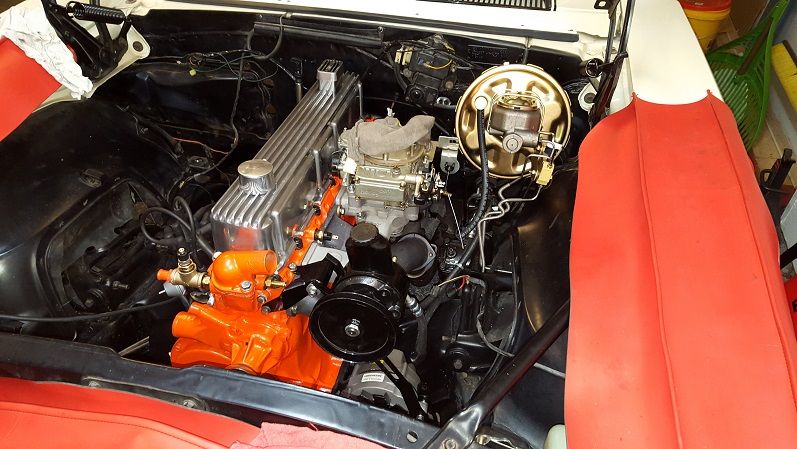
Mark
'67 Camaro L6-250
|
|
|
|
|
Joined: Aug 2014
Posts: 821
Major Contributor
|
|
Major Contributor
Joined: Aug 2014
Posts: 821 |
If you don't mind can you make a list of parts, suppliers and costs for the 200r4 swap? That'd make life a whole lot easier for me... Also I saw this: http://www.jegs.com/i/FITech+Fuel+Injection/546/30003/10002/-1Looks like it'd be perfect for our cars and the price is certainly right. Add in a fuel pump, lines (need a return) and a sending unit from a 69 (there's one that has a return line bung) and you're under a grand for a self-tuning FI system.
|
|
|
|
|
Joined: Feb 2014
Posts: 505
Major Contributor
|
|
Major Contributor
Joined: Feb 2014
Posts: 505 |
Thanks, funny! But I've got a new G-Force crossmember in shipping, will let you know how it works out. Did you have an issue with the PS pump mounting to the new manifolds?
|
|
|
|
|
Joined: Dec 2014
Posts: 335
Contributor
|
|
OP
Contributor
Joined: Dec 2014
Posts: 335 |
If you don't mind can you make a list of parts, suppliers and costs for the 200r4 swap? That'd make life a whole lot easier for me... Also I saw this: http://www.jegs.com/i/FITech+Fuel+Injection/546/30003/10002/-1Looks like it'd be perfect for our cars and the price is certainly right. Add in a fuel pump, lines (need a return) and a sending unit from a 69 (there's one that has a return line bung) and you're under a grand for a self-tuning FI system. Hey George, sure I'll try to pull this together over the next few months. I keep a more in depth log of what I do offline, can add this. Mind you, it's depressing how much I've spent. Mark
Mark
'67 Camaro L6-250
|
|
|
|
|
Joined: Dec 2014
Posts: 335
Contributor
|
|
OP
Contributor
Joined: Dec 2014
Posts: 335 |
Thanks, funny! But I've got a new G-Force crossmember in shipping, will let you know how it works out. Did you have an issue with the PS pump mounting to the new manifolds? Hey lifeguard, no issues. It was constructed new, suppsedly matching an original. It was a tight fit, but didn't obstruct with either the stock or theven Tom Langdon manifold.
Mark
'67 Camaro L6-250
|
|
|
|
|
Joined: Feb 2014
Posts: 505
Major Contributor
|
|
Major Contributor
Joined: Feb 2014
Posts: 505 |
Thanks, funny! But I've got a new G-Force crossmember in shipping, will let you know how it works out. Did you have an issue with the PS pump mounting to the new manifolds? Hey lifeguard, no issues. It was constructed new, suppsedly matching an original. It was a tight fit, but didn't obstruct with either the stock or theven Tom Langdon manifold. Cool. I've heard the bracket for the PS on the integrated head engine needs to be modified and an extra support added when switching head and manifolds out. The earlier bracket for PS may be a better fit.
|
|
|
|
|
Joined: Aug 2014
Posts: 821
Major Contributor
|
|
Major Contributor
Joined: Aug 2014
Posts: 821 |
I had to grind down a bit of my power steering pump bracket to use the stock spreaders with Langdon headers and the Offy intake. It was just about 3/16" or so.
|
|
|
|
|
Joined: Feb 2014
Posts: 505
Major Contributor
|
|
Major Contributor
Joined: Feb 2014
Posts: 505 |
I had to grind down a bit of my power steering pump bracket to use the stock spreaders with Langdon headers and the Offy intake. It was just about 3/16" or so. Ok, similar to what I've heard another guy did with his integrated head bracket. And he used a double eye turnbuckle to replace the attachment point on the manifold.
|
|
|
|
|
Joined: Dec 2014
Posts: 335
Contributor
|
|
OP
Contributor
Joined: Dec 2014
Posts: 335 |
Making slow and steady progress over the weekend... - New crossmember in. Exhaust hits it just a bit, not total obstruction. G-Force with Bowties Overdrive behind 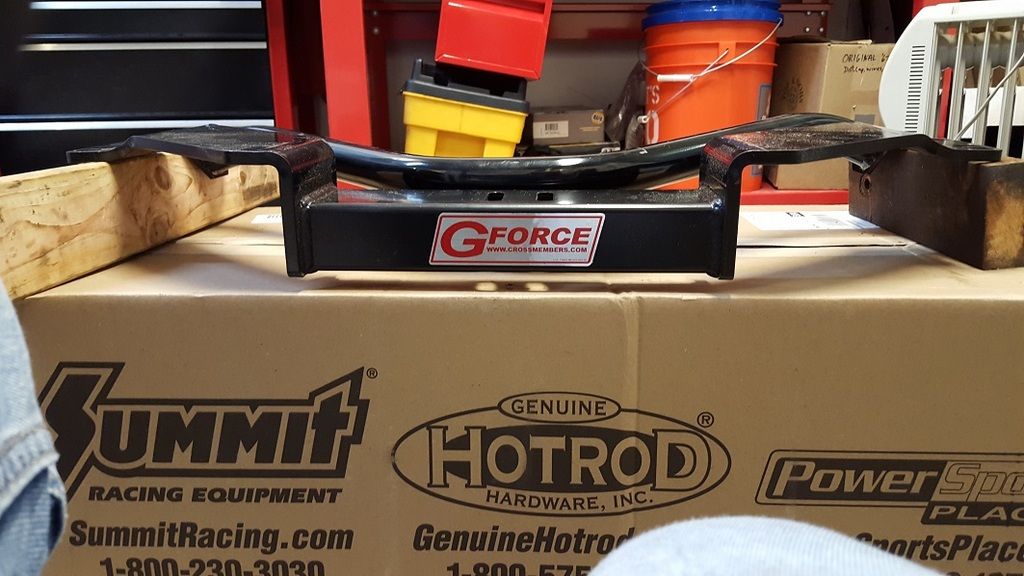 Here's the difference in clearances. Hey George, if you can use the BTO, I'll make you a great deal. Both are really high quality, just more clearance on the G-Force. 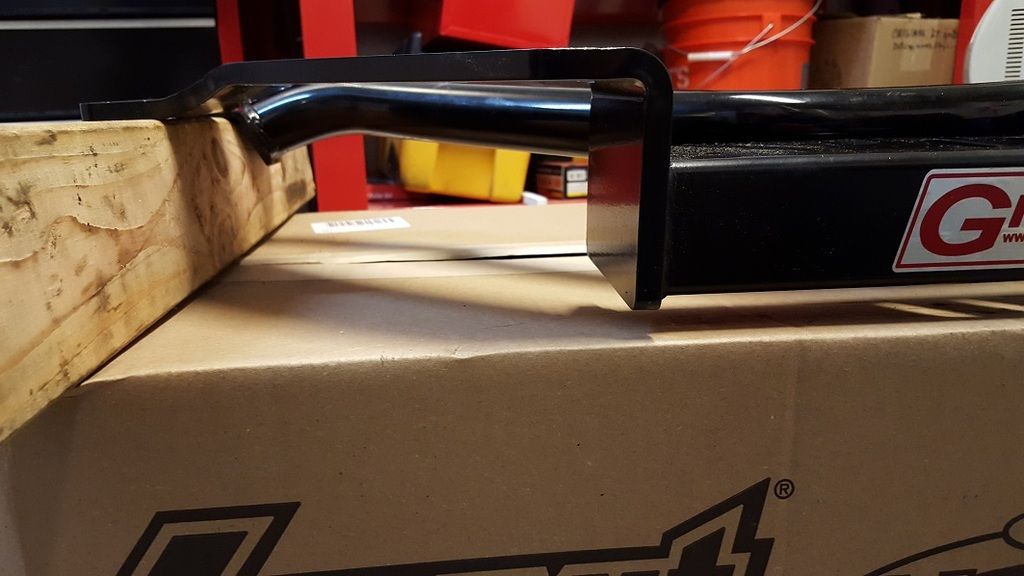 Argh, just a little touch in one spot in the corner. Maybe I can grind a bit off the crossmember. 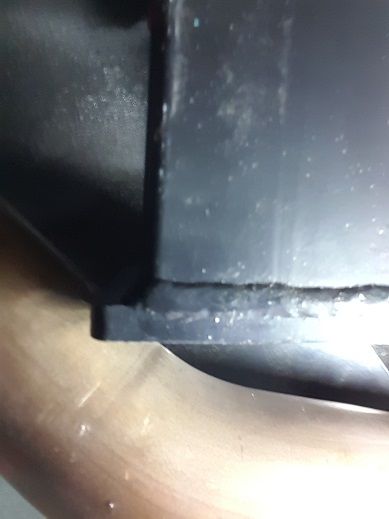 - Transmission linkage added. This took hours and hours to do. I started with a piece of ROMEX to create my first pass at a model. Put the spline onto the transmission before installing the transmission. :-) I bent the rod appropriately to get the right bend. I did two 90 degrees to start with, but it was super squishy so ended up with the angled bend. Once bent and in place, you cut the rod and thread it. Well for me, you end up cutting both ends. Then cut and thread again. So paranoid of making it too short. I had to bend the lever out to prevent obstruction with the bottom of the transmission. They show the bolt on the outside, but then the rod obstructed with the transmission. Bolt on the inside obstructs with the transmission. Tons of trial and error. Got it all in place. Park seems right, Reverse is closer to neutral, but the bottom gears aren't quite on either. Everything seems shifted, but it'll be close enough I hope. The lever is set up for short or long throw. My setup was neither, somewhere in the middle. 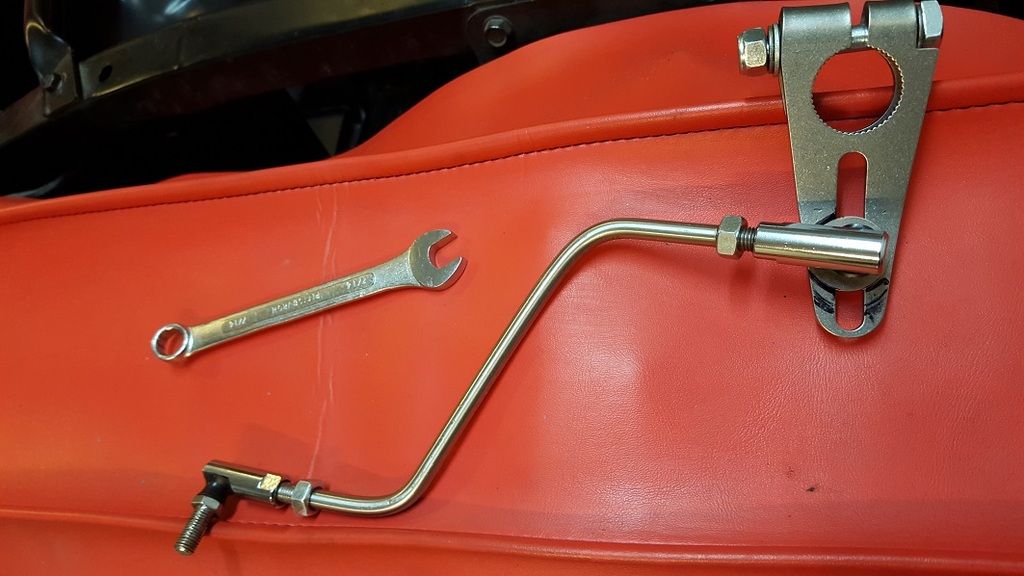 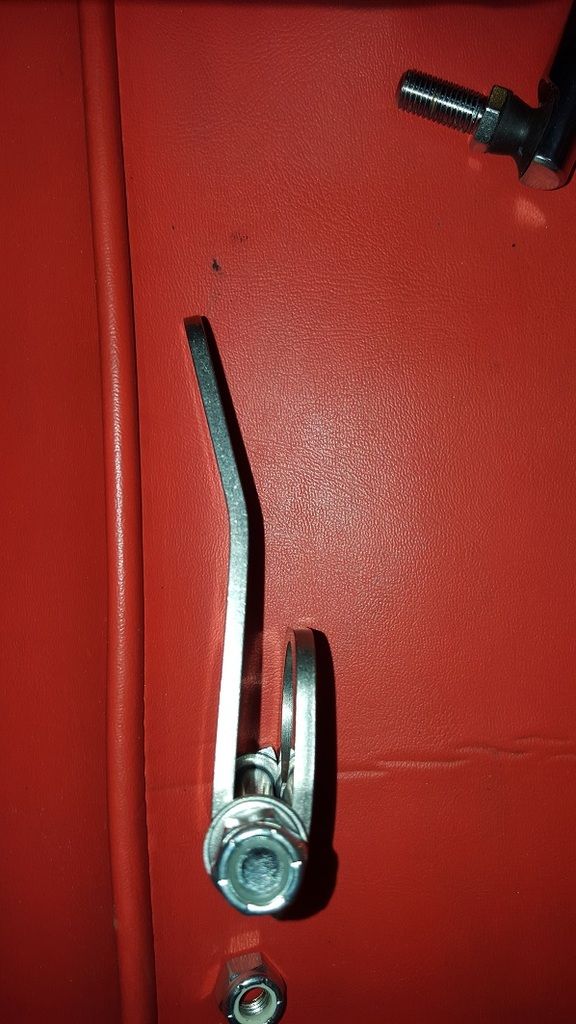 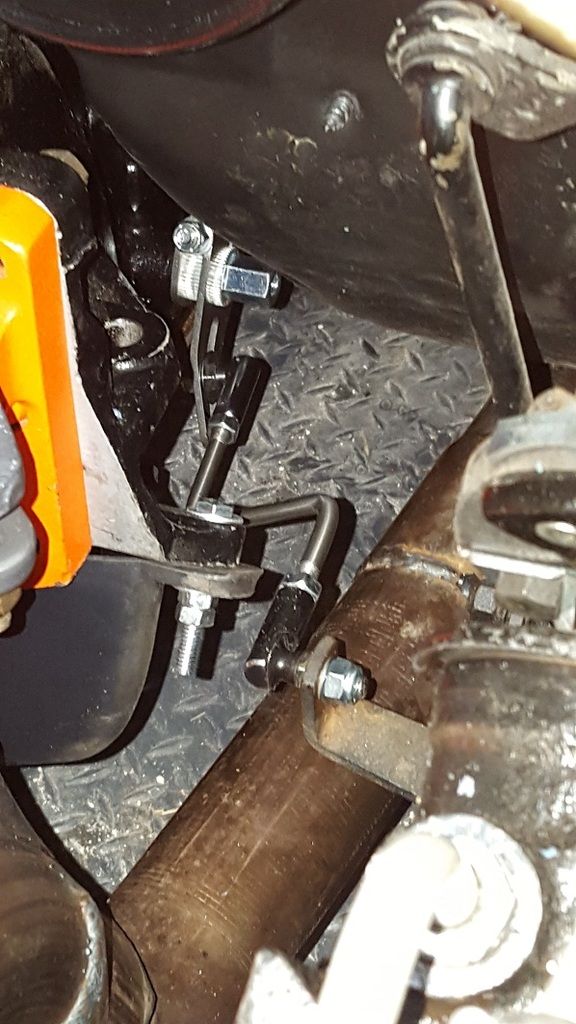 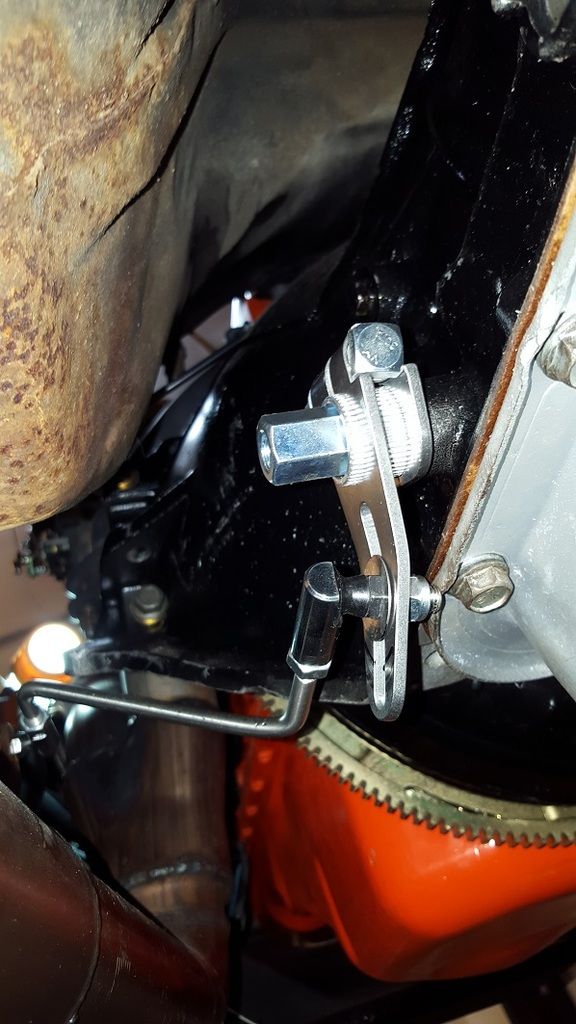 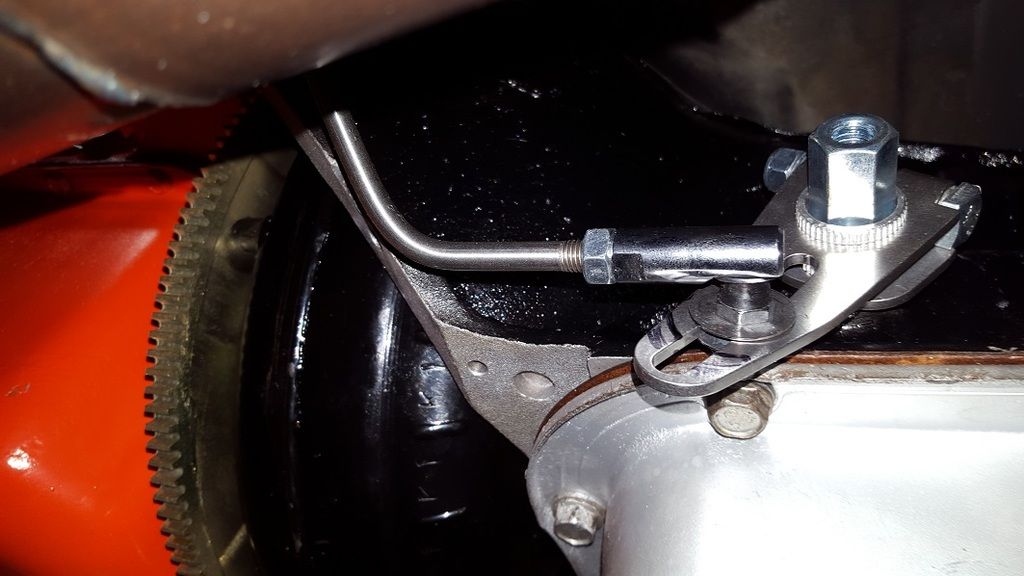
Mark
'67 Camaro L6-250
|
|
|
|
|
Joined: Aug 2014
Posts: 821
Major Contributor
|
|
Major Contributor
Joined: Aug 2014
Posts: 821 |
I believe there are kits for all this...
|
|
|
|
|
Joined: Dec 2014
Posts: 335
Contributor
|
|
OP
Contributor
Joined: Dec 2014
Posts: 335 |
I believe there are kits for all this... Haha, this is the kit.
Mark
'67 Camaro L6-250
|
|
|
|
|
Joined: Jan 2014
Posts: 48
Active BB Member
|
|
Active BB Member
Joined: Jan 2014
Posts: 48 |
You need to play with the slotted adjustment on the arm to get more, or less throw....that is why the gears are not all correct, it should correct the issue.
|
|
|
|
|
Joined: May 2000
Posts: 1,464
1000 Post Club
|
|
1000 Post Club
Joined: May 2000
Posts: 1,464 |
1. Mount the trans lever with a ball socket on it.
2. Start from NEUTRAL and accurately measure the travel of the stud from neutral to each gear.
3. Mount a ball stud on the end of the column shift arm.
4. Repeat the process of measuring the travel from neutral to each shifter quadrant gear location.
5. - TBD. Reconcile the movement of the column with the movement of the shifter lever by lengthening / shortening the throws, re-clocking the splines, or reversing the lever, or any combination of all three adjustment possibilities to make it shift precisely into each gear.
FORD 300 inline six - THE BEST KEPT SECRET IN DRAG RACING!
|
|
|
|
|
Joined: Dec 2014
Posts: 335
Contributor
|
|
OP
Contributor
Joined: Dec 2014
Posts: 335 |
1. Mount the trans lever with a ball socket on it.
2. Start from NEUTRAL and accurately measure the travel of the stud from neutral to each gear.
3. Mount a ball stud on the end of the column shift arm.
4. Repeat the process of measuring the travel from neutral to each shifter quadrant gear location.
5. - TBD. Reconcile the movement of the column with the movement of the shifter lever by lengthening / shortening the throws, re-clocking the splines, or reversing the lever, or any combination of all three adjustment possibilities to make it shift precisely into each gear. Great process, thanks!! Since it appears to be working now, I'll put the adjustment off later. On a 67 Camaro, how does the reverse lights turn on? I didn't see any cables or connectors on the 200r4. The oil cooler lines for 200r4 are said to be bottom on transmission run to bottom on radiator. Hope to hook these up tonight. Thanks, Mark
Mark
'67 Camaro L6-250
|
|
|
|
|
Joined: Aug 2014
Posts: 821
Major Contributor
|
|
Major Contributor
Joined: Aug 2014
Posts: 821 |
I believe there are kits for all this... Haha, this is the kit. Need more kit in your kit? Sounds like I'll have fun when I do mine. Luckily I won't be going it alone. The shop manager at work has a dirt track car that I helped build so he'll help me on the trans swap. We're buds like that.
|
|
|
|
|
Joined: Dec 2014
Posts: 335
Contributor
|
|
OP
Contributor
Joined: Dec 2014
Posts: 335 |
Mark
'67 Camaro L6-250
|
|
|
|
|
Joined: Jan 2015
Posts: 376
Contributor
|
|
Contributor
Joined: Jan 2015
Posts: 376 |
Sounded good once it got going!
|
|
|
|
|
Joined: Jan 2014
Posts: 48
Active BB Member
|
|
Active BB Member
Joined: Jan 2014
Posts: 48 |
Sounds like timing needs adjustment, also, is it just me, or does it sound "tight" once its warmed up? I have the perfect air cleaner for you Mark....pm me about shipping it to you.
|
|
|
|
|
Joined: Dec 2014
Posts: 335
Contributor
|
|
OP
Contributor
Joined: Dec 2014
Posts: 335 |
Sounds like timing needs adjustment, also, is it just me, or does it sound "tight" once its warmed up? I have the perfect air cleaner for you Mark....pm me about shipping it to you. Oh man, I've already got a nice new air cleaner on order. I'll PM you about yours. The initial timing for the start in this video, set by hand by lining up the pickups in the distributor was off, probably 5 degrees retarded. It's just under 10 advanced now. I haven't tuned the idle mixture yet. Set the screws to 1.25 turns open on the bench. I verified that it has the right jets (51? Can't remember right now). The engine does feel tight when warm. The starter has a hard time turning it over. I figure the starter is old, the compression is high, and the new engine a bit tight, so I've got a new starter on order too. Hopefully it's not an issue. Thanks!! Mark
Mark
'67 Camaro L6-250
|
|
|
|
|
Joined: Dec 2014
Posts: 335
Contributor
|
|
OP
Contributor
Joined: Dec 2014
Posts: 335 |
Sounded good once it got going! So sweet it is, thanks! Mark
Mark
'67 Camaro L6-250
|
|
|
|
|
Joined: Jan 2014
Posts: 48
Active BB Member
|
|
Active BB Member
Joined: Jan 2014
Posts: 48 |
Try turning the low sides out to around 2 or 2/12 turns, that will help the starting issue you have when its warm.
|
|
|
|
|
Joined: Dec 2014
Posts: 335
Contributor
|
|
OP
Contributor
Joined: Dec 2014
Posts: 335 |
Maybe the starter is okay after all. The battery drops voltage quickly, to 12.2V overnight. With nothing attached, a charge took many hours and dropped from 14.2V to 13.6v in 15 minutes. The first charge last night was fast. All that cranking was too much. But that wasn't enough cranking to wipe the battery.
I suppose I will put in the new starter as insurance.
Mark
'67 Camaro L6-250
|
|
|
|
|
Joined: Apr 2004
Posts: 3,555 Likes: 34
1000 Post Club
|
|
1000 Post Club
Joined: Apr 2004
Posts: 3,555 Likes: 34 |
If you do change the starter. I always recommend stepping up to a newer GM PMGR (permanent magnet gear reduction) unit.
For the 153 tooth flywheels , I believe it is a 1995 Camaro with 305 starter
For 168 tooth use a 1996 Silverado with 350 starter.
They are a direct bolt in, are high torq and low weight.
Some older engines (pre 74?) will only be drilled for 2 straight across starter bolts, these require the diagonal bolt. It will need to be drilled and tapped. Easy to do.
Inliner Member 1716 65 Chevelle Wagon and 41 Hudson Pickup Information and parts www.12bolt.com
|
|
|
|
|
Joined: Aug 2014
Posts: 821
Major Contributor
|
|
Major Contributor
Joined: Aug 2014
Posts: 821 |
For a baseline I run 52 jets, a 32 squirter and 6.5 power valve on my 390 CFM Holley. Timing at 10-12 degrees advanced. Idle screws: start at 2.5 turns out. Mine is a tad rich but not enough to foul plugs. Plugs read good with this setup.
start with the electric choke vertical and adjust from there. Probably going to be a bit rich when cold. I like to keep it just loose enough to turn it with effort until I get it locked in.
Vac advance is on the lower port on the carb, trans on upper.
Mine is a tad rich but not too bad.
Runs really smooth! Hows the 200r4?
Last edited by gbauer; 03/21/16 10:15 AM.
|
|
|
|
|
Joined: Dec 2014
Posts: 335
Contributor
|
|
OP
Contributor
Joined: Dec 2014
Posts: 335 |
If you do change the starter. I always recommend stepping up to a newer GM PMGR (permanent magnet gear reduction) unit.
For the 153 tooth flywheels , I believe it is a 1995 Camaro with 305 starter
For 168 tooth use a 1996 Silverado with 350 starter.
They are a direct bolt in, are high torq and low weight.
Some older engines (pre 74?) will only be drilled for 2 straight across starter bolts, these require the diagonal bolt. It will need to be drilled and tapped. Easy to do. Hi Tom, did you have to adjust with shims? Mine is 153 tooth, if that matters. Thanks, Mark
Mark
'67 Camaro L6-250
|
|
|
|
|
Joined: Apr 2004
Posts: 3,555 Likes: 34
1000 Post Club
|
|
1000 Post Club
Joined: Apr 2004
Posts: 3,555 Likes: 34 |
Shimming is the same for any starter, shim as required.
The 153 PMGR starter has a straight across bolt pattern.
The 168 PMGR starter is the one with a diagonal bolt pattern.
Inliner Member 1716 65 Chevelle Wagon and 41 Hudson Pickup Information and parts www.12bolt.com
|
|
|
|
|
Joined: Feb 2014
Posts: 505
Major Contributor
|
|
Major Contributor
Joined: Feb 2014
Posts: 505 |
If you do change the starter. I always recommend stepping up to a newer GM PMGR (permanent magnet gear reduction) unit.
For the 153 tooth flywheels , I believe it is a 1995 Camaro with 305 starter
For 168 tooth use a 1996 Silverado with 350 starter.
They are a direct bolt in, are high torq and low weight.
Some older engines (pre 74?) will only be drilled for 2 straight across starter bolts, these require the diagonal bolt. It will need to be drilled and tapped. Easy to do. Did you mean 1992, which was the last year the 305 small block came in the 3rd Gen Camaro? Or is from a different engine?
|
|
|
|
|
Joined: Apr 2004
Posts: 3,555 Likes: 34
1000 Post Club
|
|
1000 Post Club
Joined: Apr 2004
Posts: 3,555 Likes: 34 |
Not sure about the 305, but they used smaller 153 flexplates in cars and the starters were the PMGR type in 1996. Not sure when they started doing them. I stock them.
Inliner Member 1716 65 Chevelle Wagon and 41 Hudson Pickup Information and parts www.12bolt.com
|
|
|
|
|
Joined: Dec 2014
Posts: 335
Contributor
|
|
OP
Contributor
Joined: Dec 2014
Posts: 335 |
Hi Tom, Do you mean like this starter? http://www.summitracing.com/parts/pwm-9502/overview/On my starter, there are three wires. The main 12V and two additional wires that I don't know the purpose for. If you look at this one (and the starter from my spare engine), there is only one wire connection. Do you know what to do with the second wire? Thanks, Mark
Mark
'67 Camaro L6-250
|
|
|
|
|
Joined: Feb 2014
Posts: 505
Major Contributor
|
|
Major Contributor
Joined: Feb 2014
Posts: 505 |
Not sure about the 305, but they used smaller 153 flexplates in cars and the starters were the PMGR type in 1996. Not sure when they started doing them. I stock them. Oh, maybe it was the V6 Camaro starter then. The 4th gen Camaros just had base models with V6 and Z28s with V8s. 1992 was the last year of the 3rd gen with the rare V6 base that was usually upgraded to a 305 V8, and the Z28s which had 305s and optional 350. That was that last of the small block Chevy in the Camaro.
|
|
|
|
|
Joined: Dec 2014
Posts: 335
Contributor
|
|
OP
Contributor
Joined: Dec 2014
Posts: 335 |
Took her out today for a long, 30 mile run. Then moderate acceleration for breakin. I had opened the idle mixture to 2 turns, wary of running rich. Serious hesitation. When cold, stalled when put in gear.
When I had the carb on the bench and pulled a bowl to check the jet size, I accidentally messed up the setting for the accelerator pump. Thought I got it back, b <\ maybe not?
Maybe I need 2.5 turns like others.
Good news is that my 0-60 time has greatly improved to around 14 sec with moderate throttle! It was 19.5 before the overhaul. Yeah!
Mark
'67 Camaro L6-250
|
|
|
|
|
Joined: Apr 2004
Posts: 3,555 Likes: 34
1000 Post Club
|
|
1000 Post Club
Joined: Apr 2004
Posts: 3,555 Likes: 34 |
Great your making progress with getting it out on the road.
Question, why are you opening the idle mixtures so much? Typically they only need to be open 1.5 turns.
Normally the throttle idle screw is turned in to the idle speed you want. Then the idle mixtures are adjusted for the highest idle. Then you readjust the idle speed with the idle throttle screw one last time.
Inliner Member 1716 65 Chevelle Wagon and 41 Hudson Pickup Information and parts www.12bolt.com
|
|
|
|
|
Joined: Dec 2014
Posts: 335
Contributor
|
|
OP
Contributor
Joined: Dec 2014
Posts: 335 |
Great your making progress with getting it out on the road.
Question, why are you opening the idle mixtures so much? Typically they only need to be open 1.5 turns.
Normally the throttle idle screw is turned in to the idle speed you want. Then the idle mixtures are adjusted for the highest idle. Then you readjust the idle speed with the idle throttle screw one last time.
Hi Tom, thanks. Holly says to adjust to highest vacuum, probably same as your process. I started with 1.25 turns. Others do 2.5. Next week I'll get back to it follow your process. I need to check out the accelerator adjustment. Thanks for the tip!
Mark
'67 Camaro L6-250
|
|
|
|
|
Joined: Aug 2014
Posts: 821
Major Contributor
|
|
Major Contributor
Joined: Aug 2014
Posts: 821 |
Accelerator pump: adjust the screws so when the throttle is WOT the pump just has a couple thousandths left before it's fully extended.
Timing: start at 10 or 12 degrees advanced.
Mine: 52 jets, 32 squirter, 6.5 valve.
Idle screws: highest vacuum and both the same.
If it's rich it'll die when going into gear. Also if it's retarded.
Make sure your electric choke engages and disengages with time.
I drove mine from 300 ft above sea level to 3300 feet today. Went to Skyline Drive with the family. I noticed it ran a bit more rich up high. If you're at higher than 1,000 feet your numbers above will be different than mine.
|
|
|
|
0 members (),
244
guests, and
52
robots. |
|
Key:
Admin,
Global Mod,
Mod
|
|
|
|


