Greetings . . .
The car is back on the road now though I am sticking close to home during road tests until things are sorted out and I build some trust in car . . .
As I promised in the last status update heres some details on the last major bit of custom work the exhaust system.
The stock system consists of just three pieces. The head pipe is 1-7/8 diameter feeding into a conventional 3 tube muffler. The mid+tail pipe is 1-3/4 diameter running from the muffler outlet back to and over the axle eventually exiting straight out beyond the rear bumper. Both the head pipe and tail pipe have a series of crush bends in order to wend their way through the rather congested driver side of a 49 Chevy.
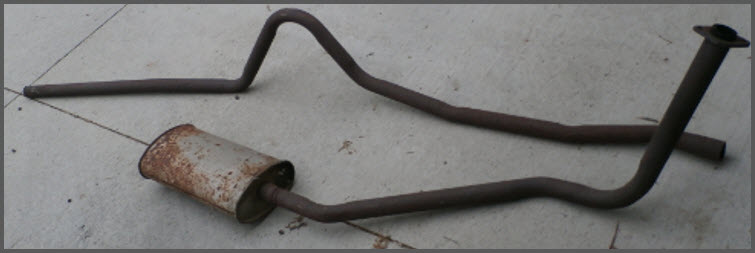
The stock muffler is strategically positioned under the front seat resting on a single frame mount that provides an aggressive upward angle. The inlet hangs low below the cross-member and frame but the aggressive angle places the muffler outlet above the frame yet well clear of the floor.
When I fitted the headers during mock-up I puzzled over exhaust system routing immediately. The driver side of a 49 Chevy is quite busy. There is not much room for a single exhaust pipe let alone two. The stock pipe extends down well below the oil pan the flange angle essentially providing the first bend in the routing. The first crush bend is nearly 90 degrees leading to a short section of pipe that runs straight towards the transmission cross member brace. This first bend is not parallel to the drive line. The second crush bend is in a different plane from the first and is nearly 45 degrees leading to a fairly long section of pipe that parallels the transmission cross member brace routing the pipe under the cross member and well beyond essentially taking the pipe back toward the center-line of the car. The third crush bend is another 45 degree turn in yet another plane which allows it to mate with the muffler which rests angled upward and back toward the frame.
In the entire system there is only one place where the exhaust pipe routing is parallel to the drive-line the very last section of tail pipe running next to the gas tank! I knew one thing for sure I would go insane if I tried to stick build a system that mimicked the stock one . . .
The very first thing I did was to get the mufflers in hand and start working on placement. I went for the original Hollywood muffler Porters:

The objective was to have the mufflers sitting as far forward as possible without interfering with the emergency brake linkage or creating a reflective heat load on the brake lines running along the back of the transmission cross-member. The mufflers ended up very close to where the stock one is located but they are running parallel to the driveline sloping up above the level of the frame at a much gentler angle. This gentle angle also provides clearance for the emergency brake cables running directly above the mufflers.
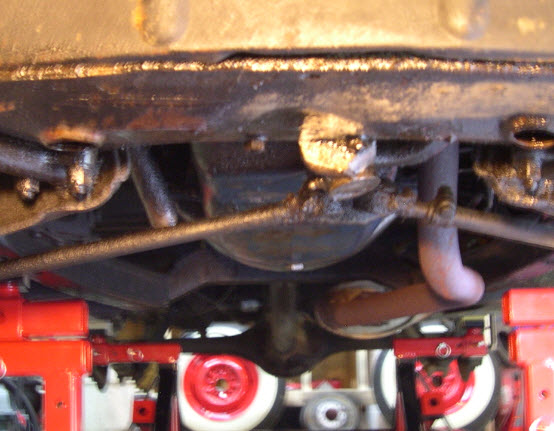
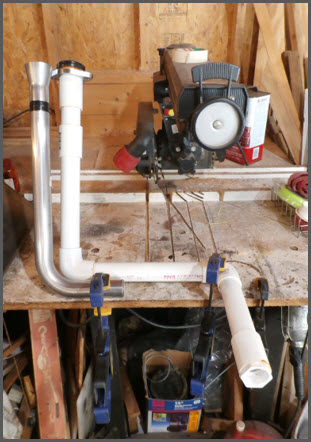
With the mufflers positioned it was clear that the rear-header collector was essentially a straight shot to the drivers side muffler albeit with a few bends to clear the emergency brake linkage and the bell-house inspection cover . . . The routing to the passenger side was less obvious. At first I considered going straight back and underneath the rear head pipe sort of an over-and-under shot gun affair running past the bell-house inspection cover where there is lots of clearance under the gear box to cross over to the passenger side.
I mocked up this first idea in PVC pipe. The front head-pipe ended up hanging really low beyond the inspection cover surely a scrape hazard and it was actually lower than the planned installed height of the mufflers - creating the need for another bend. So I decided instead to go straight down until the pipe was clear of the pan and then 90 degrees straight across to the passenger side directly under the oil pan.
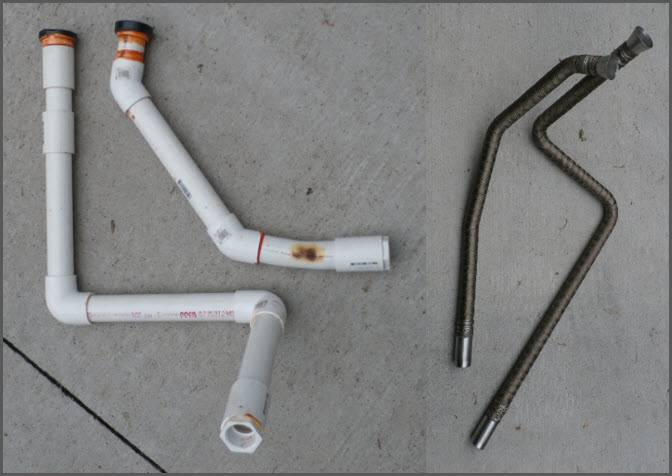
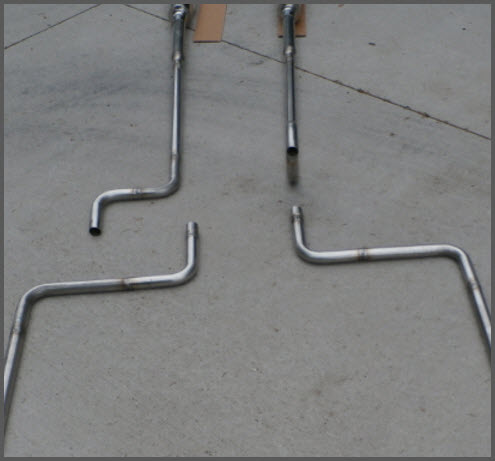
With both pipes mocked up in PVC the basic layout was set. I was then able to order mandrel bends and literally transfer the cut lengths from the PVC template dimensions onto the metal sticks. The bends are made with a short and a long leg. Fit was achieved by simply cutting down either the long or the short leg and then mating with the next stick.
I sent the head pipes off to be welded while I worked on the mid-pipe layout again with the design principle of straight and parallel to the driveline. Once the head-pipes were back from the welder I was able to final fit them and determine final length of the straight sections that would mate with the muffler inlets.
The smallest inlet/outlet offered by Porter is 1-3/4 in spite of the fact that the core of the muffler is just 1-1/2 with stainless steel wool filling the balance of the 3 housing. On the inlet I used DOM tubing (1.5 ID 1.75 OD) as a collar over the 1-1/2 head pipes. The collared head pipe extends all the way into the mufflers inlet resting up against the bulkhead that contains the mufflers steel packing. The collar is welded only on the very end of the head-pipe (to avoid cracking during heat cycles).
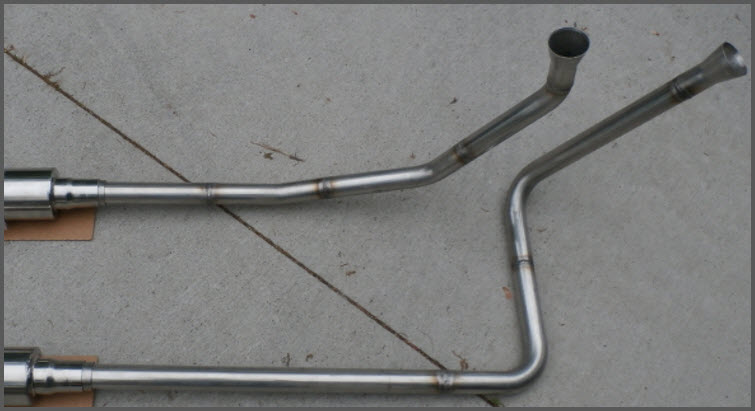
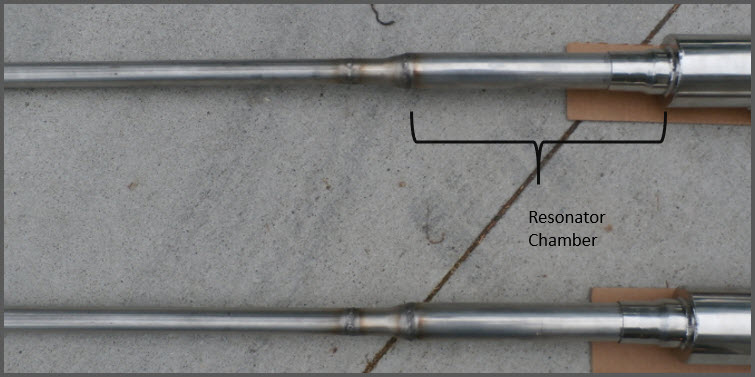
Burns Stainless makes really nice transitions. I used their 2-1/4 to 1-1/2 transitions for the header collectors. The stock Best Gaskets exhaust donuts fit into the large ends nicely. On the outlet side of the muffler I used a 1 section of straight tube as a resonator chamber followed by a 1-3/4 to 1-1/4 transition down to the 1.25 soda-straw mid-tail-pipes. The transition acts as a reflector sending the raspy tones back toward the muffler. The system exhibits the classic stove-bolt Rap but it is subdued.

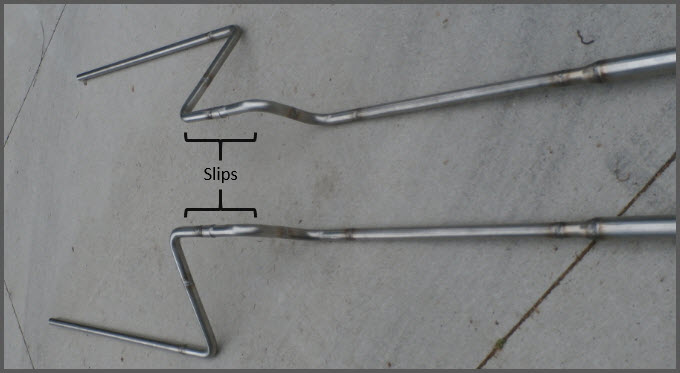
With a slip fit between the mid-pipe and tail-pie and a slip fit at the muffler outlet I was able to twist/clock the pipes into final position and fit hangers. The passenger side is very tight because of the spare tire well. But the soda straw sized pipe tucks nicely between the spring shackles and the tire well.
By approaching the exhaust design around single plane sticks it is easy hand-the-work-off to a professional welder. The welder simply lays the pipe out flat on the welding bench and connects A-to-B-to-C as labeled.
The only exception was the passenger head-pipe which I witness-marked on the bench directly from the PVC template the planes are 30 degrees apart.
The mid-pipes and tail-pipes each made two trips to the welder the first established the length parallel to the drive-line and positioned the first 90 degree elbow. The second trip joined the switch-back legs that run perpendicular to the drive-line.
This is all .065 wall 304 stainless so it should last a good long time . . .
Regards,
Stock49