logo
12 Port News - Features
12 Port History
Casting Numbers
Online Store
Tech Tips
Become a Member
Previous Thread
Next Thread
Print Thread
Rate Thread
Joined: Oct 2007
Posts: 43
C
Active BB Member
OP Offline
Active BB Member
C
Joined: Oct 2007
Posts: 43
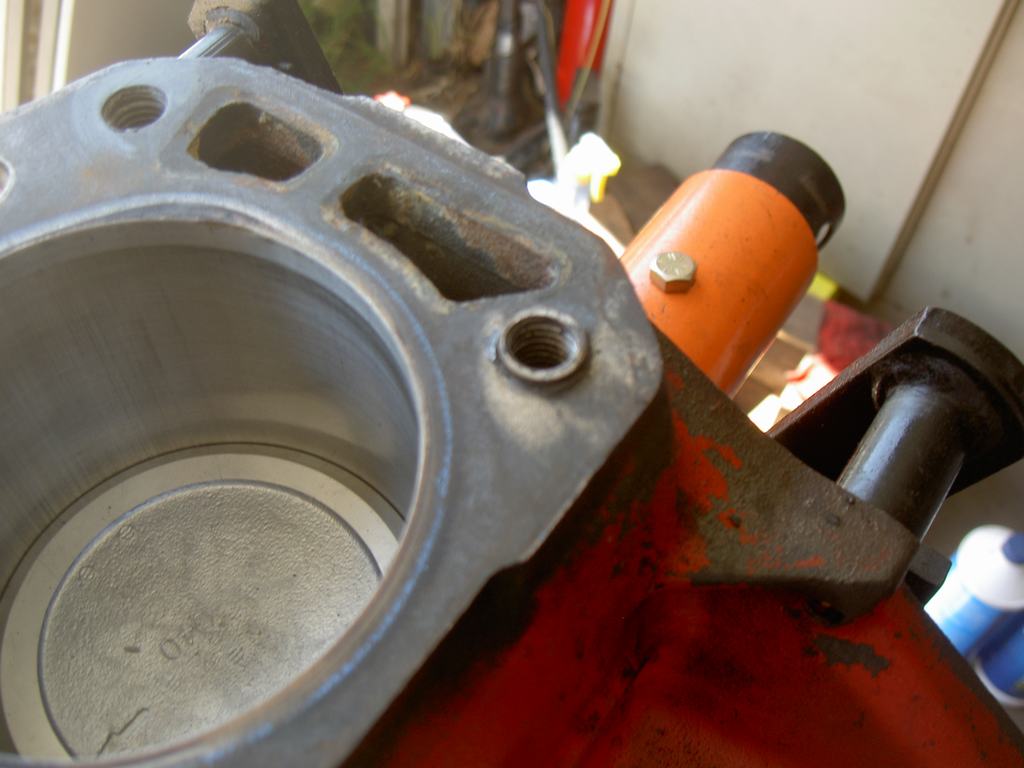
Been doing a bunch of research on threaded inserts since the one that was installed with the rebuild already pulled out leaving a 5/8" hole. There are only a couple options for fixing an already "fixed" hole. Big-sert (made by Time-sert) and E-Z LOC.

Okay, lets check this before I do something stupid. My buddy was able to get me some of the thick wall versions of the E-Z LOK inserts. They use a 7/8-9 external thread versus the standard version 3/4-10 thread. Being .125 larger, I am very concerned about the material that is on the water port side of the hole.

From the edge of the thread to the edge of the water port, it is only .125 wide. Is this enough material to not cause a crack or breakage? Should I go with the 3/4" external thread version, which will give me .0625 more material? Here's a couple pics.

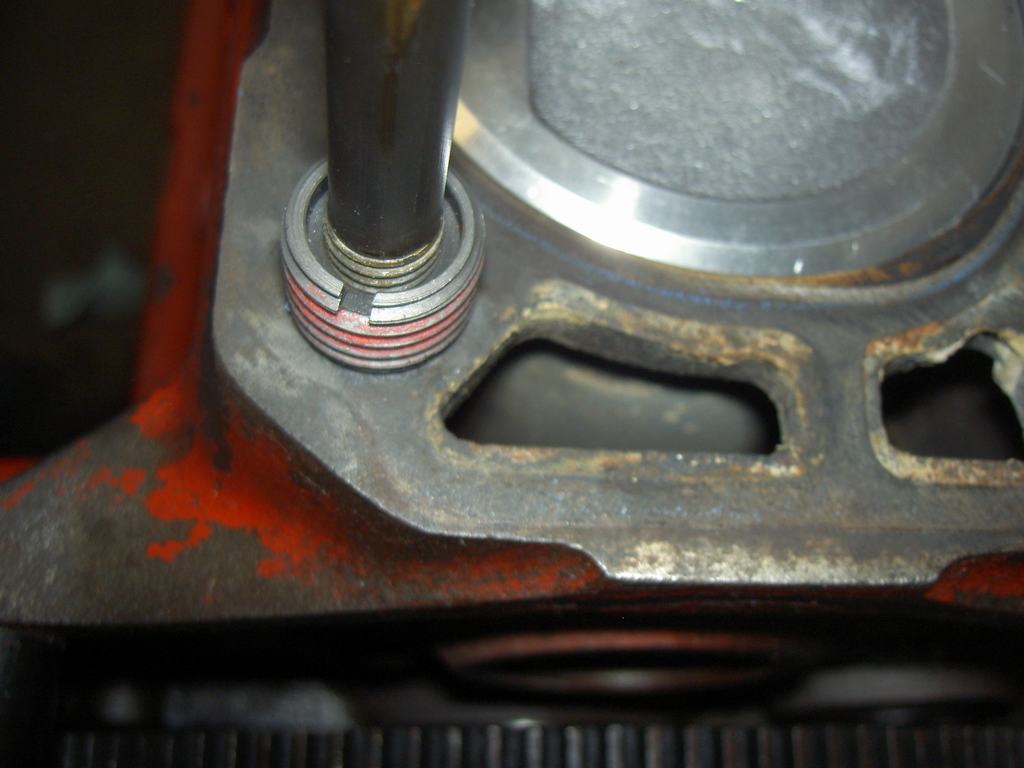
It looks bigger but it measures .125
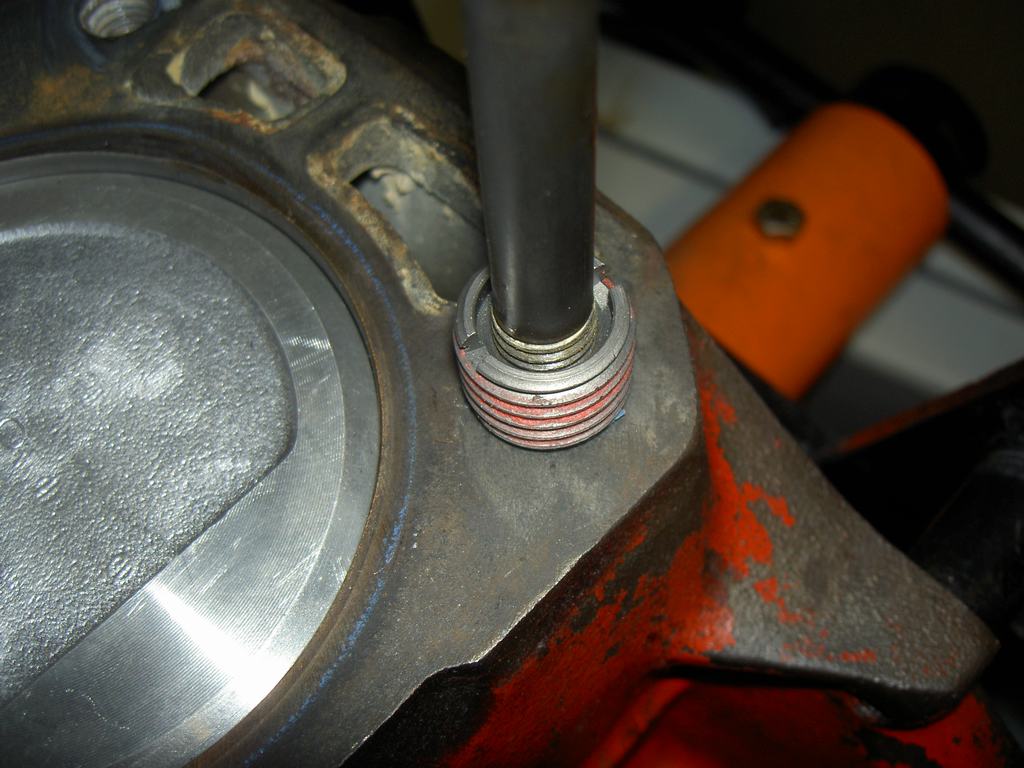

The rest seems okay


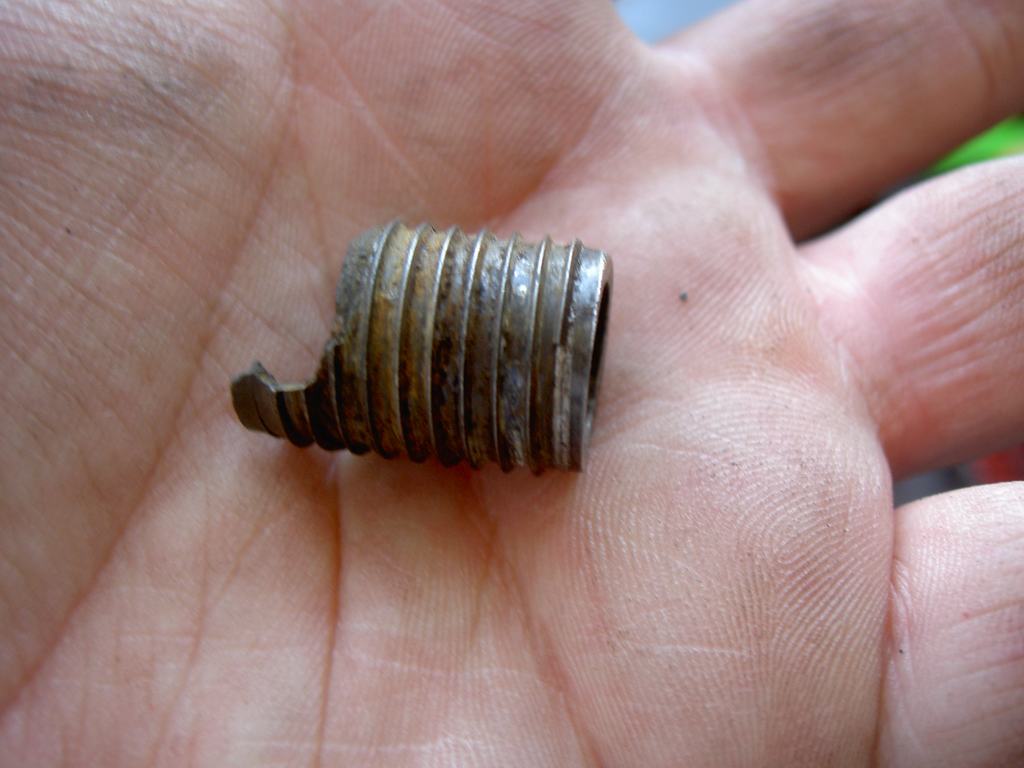
This is what I removed that had pulled out


Joined: Apr 2004
Posts: 3,556
Likes: 35
1000 Post Club
****
Offline
1000 Post Club
****
Joined: Apr 2004
Posts: 3,556
Likes: 35
I'd use the 3/4" version.


Inliner Member 1716
65 Chevelle Wagon and 41 Hudson Pickup
Information and parts www.12bolt.com

Joined: Oct 2007
Posts: 5,015
Likes: 47
1000 Post Club
****
Offline
1000 Post Club
****
Joined: Oct 2007
Posts: 5,015
Likes: 47
If this was mine I would use the 3/4 size. I would figure that I would not use this block again so I would J B Weld the insert in place. I would use studs rather than bolts and I might J B Weld that stud in. I would not tell anyone here that I did that.


"I wonder if God created man because he was disappointed in the monkey?" Mark Twain
Joined: Oct 2007
Posts: 43
C
Active BB Member
OP Offline
Active BB Member
C
Joined: Oct 2007
Posts: 43
Thanks guys. Yeah, other board I am on is also saying the 3/4" version so that's the way I'll go.

I am using studs. The red sealant/locking stuff on the insert, once cured is claimed to seal up to 6000psi. Supposed to be good stuff. Never been a real big fan of JB Weld for stressed applications.

Joined: Feb 2009
Posts: 73
Active BB Member
Offline
Active BB Member
Joined: Feb 2009
Posts: 73
Lock tite also has a green stud lock if you never intend to remove it.

Joined: Oct 2007
Posts: 43
C
Active BB Member
OP Offline
Active BB Member
C
Joined: Oct 2007
Posts: 43
Well this engine drama just continues. Got the smaller size insert. Drilled and tapped the hole. Well, side to side, I am dead on. For and aft, I am off 1 degree from vertical. It's enough that with the head on, the stud is not going to screw in without a lot of force (bad) or with the stud in the block, the head is off just enough that the alignment pins won't allow the head to drop onto the block.

The only thing I can think of is to slightly enlarge the hole in the head. Any thoughts or am I screwed???

Joined: Sep 2008
Posts: 3,669
Likes: 42
1000 Post Club
****
Offline
1000 Post Club
****
Joined: Sep 2008
Posts: 3,669
Likes: 42
Drill the hole in the head larger and you'll be fine.


Class III CNC Machinist/Programmer
Joined: Oct 2007
Posts: 43
C
Active BB Member
OP Offline
Active BB Member
C
Joined: Oct 2007
Posts: 43
Thanks so much for confirming my idea!!! I really want to get this engine back together and it is definitely giving my patience a workout. Sure am glad I am in my mid 40's as back in my twenties, I would have likely beat the crap out of it with a 5 lbs. hammer. LOL Now I know to just walk away and come back again with a clear head.

Joined: Oct 2007
Posts: 5,015
Likes: 47
1000 Post Club
****
Offline
1000 Post Club
****
Joined: Oct 2007
Posts: 5,015
Likes: 47
Keep the hammer close just in case you need it. Sometimes beating something into a tiny ball gives more relief than prayer.


"I wonder if God created man because he was disappointed in the monkey?" Mark Twain
Joined: May 2011
Posts: 378
7
Contributor
****
Offline
Contributor
****
7
Joined: May 2011
Posts: 378
If you can't fix it with a hammer, it's an electrical problem.

Joined: Oct 2007
Posts: 43
C
Active BB Member
OP Offline
Active BB Member
C
Joined: Oct 2007
Posts: 43
Hahahaha... no hammer needed tonight!!!

SUCCESS!!!!! I was able to use an adjustable reamer to open the hole up about .020" and the head fits on correctly!!!! All the studs went in correctly and all the nuts torqued to without any problems. I am so freakin' happy. Started putting the rest of the engine parts on. Hopefully have it ready to go back in next weekend.


Moderated by  stock49, Twisted6, will6er 

Link Copied to Clipboard
Who's Online Now
0 members (), 325 guests, and 48 robots.
Key: Admin, Global Mod, Mod
Newest Members
trustedmedications20, Jsmay101, Paul Mahony, KeithB, Steve83
6,783 Registered Users
Sponsored Advertisement
This Space is Available
Powered by UBB.threads™ PHP Forum Software 7.7.5