|
|
Joined: Aug 2001
Posts: 71
Active BB Member
|
OP

Active BB Member
Joined: Aug 2001
Posts: 71 |
The Carburetor Shop won't sell individual jets separated from a kit. Been there and tried that. The fella who attends the phone will not sell you a jet/kit that isn't listed for your carb #.
I'm running a stock manifold with a partition welded inside the heater box to split the exhaust flow. Two outlets are welded to the manifold at mid point in the two separations of the exhaust manifold. My application needed outlets to the side, but you can cut outlets anywhere you wish.
If you're going to street the engine, heat is nice. My offy manifold is bolted to the functional heater box to utilize the heat.
All B&B's are not created equal. There are many different B&B configurations out there. Two different venturi/butterfly diameters, numerous stock jetting orifices depending on original application, and for reasons beyond my understanding - different spacer plates between the cast butterfly housing and the venturi. In addition: different step up jet spring tensions and accelerator pump CC's. Make sure that your two B&B have matching #'s on the rib extending down from the breather to the fuel bowl, this rib will contain all the numeric data associated with the stock setup on the carb. If they match - you're way ahead. If they don't, you've got some work to do.
All B&B carbs have an external vacuum port located in the cast iron butterfly base. I have mine capped off because I don't run a vacuum advance on my distributor. I would not run a vacuum off any individual carb, instead I would take the plug out of the offy manifold near the rear carb and run my advance from it. Another option I would prefer would be to run an equalization line from each carb and run the advance from a "T".
I may have been hyper-attentive to my little B&B's, but I am getting 6000 rpm out of them.
Hudson
|
|
|
|
|
Joined: Aug 2001
Posts: 63
Active BB Member
|
|
Active BB Member
Joined: Aug 2001
Posts: 63 |
Hudson, you're getting 6,000 RPM from a Dodge 230 ? I've always heard that these motors won't rev. I am getting a '47 Desoto that has the big block 236 motor, I'd like a little more zoom from it.
|
|
|
|
|
Joined: Aug 2001
Posts: 71
Active BB Member
|
|
OP
Active BB Member
Joined: Aug 2001
Posts: 71 |
Yes, the little engine will hit 5000 like a rocket.
On my last pull, I left the line at 3000 rpm and hit 6000 rpm for most of the run. It was one wild ride as the front end never touched dirt again and was steered solely by braking. The hard pitching of the front threw the weights off and they caught under the sled pan increasing the draft. The weights falling off disqualified me and disadvantaged me terribly but the tractor was still only 5 feet from the longest pull against some 300+ cid ohv engines. At the end of the track I had only pulled back down to just below 5000.
Actually, the little engine revs as good as any engine I've messed with. I don't know where all the "they won't rev" stuff came from.
However, I whole heartedly agree with Del - pay close attention to your bottom end. We reworked the crank oiling to get to this point. When we bought the tractor it had a spun bearing on #5 and we diagnosed the shortcoming of the stock oiling system. So, don't expect your stock 230 to handle this rpm or you'll be inspecting #2 and #5 rods from the exterior of your engine.
Hudson
|
|
|
|
|
Joined: Oct 2001
Posts: 90
Active BB Member
|
|
Active BB Member
Joined: Oct 2001
Posts: 90 |
Originally posted by Hudson:
The Carburetor Shop won't sell individual jets separated from a kit. Been there and tried that. The fella who attends the phone will not sell you a jet/kit that isn't listed for your carb #.Hudson My carbs don't have the same number stamped on them! However, I've been in touch with the Carburetor shop, and they tell me that the two numbers I gave them are correct. The castings for the two carbs and some of the fittings (linkages, etc.) are different. The front one has the connection for the dist. adv. vacuum, and the throttle linkage differes, because the choke cable attaches only to it. There is a rod running from it to the other carb that closes the choke on it, but the fast-idle control exists only on thefront one. I'm assuming that the different numbers represent the differences that I see between these carbs, rather than a mismatched set. I'm going to order a manual (or manuals) for these carbs and see if I'm right about that.
|
|
|
|
|
Joined: Aug 2001
Posts: 71
Active BB Member
|
|
OP
Active BB Member
Joined: Aug 2001
Posts: 71 |
Carlo,
Don't get me wrong about the carb shop, what that fella knows is a wealth of info. However, he absolutely will not sell jets separate from a kit and will not sell you a kit that doesn't match your carb #.
This is my first suggestion to your situation, take the two carbs apart and do a little notetaking. Make sure your two venturi bodies are the same diameter: take off the top of the carb (called the air horn in the manuals) and measure the top of the venturi. Next, take the cast iron butterfly body off and measure the butterfly opening. This butterfly housing should have a 3 digit number casted into it and I've only seen two variations. There is a spacer between the venturi housing and the butterfly housing, compare these closely. After you've measured and compared the butterfly housings compare the venturi housings closely by measuring the top and bottom ends, take out the aluminum plug and remove the brass acclerator jet, and reach through the accelerator hole with a drill bit to compare the opening for the venturi fuel port. Measure the fuel port with by inserting different sized bits like a go/no go guage. By the way, you are going to need every size bit you can borrow or buy to measure and standardize the carbs.
As long as your housings are the same dimentions in venturi, spacer, butterfly housing - you are in pretty good shape. One absolutely necessary set of bits to have are the ones used by heating and cooling technicians used for re-sizing orifices. These bits go from .010 to .125". Not only will these bits help you to understand what you have, they will be needed to standardize your carb as I have never seen two different #s have all the same orifice diameters in either the housings or jets. Each # was produced for different applications and cid used for that particular contract.
Take a drill bit set and the orifice drills and measure each jet, air bleed, and vacuum port. Trace all your vaccum porting to make sure they are alike. The only external difference that could cause problems is the length of the throttle arm that the cross linkage attaches to for the dual setup. It sounds like most of the external mechanicals on your setup have already been addressed.
The most important thing here is internal standardization, then let the tuning proceed from there. You need to invest in or borrow a good synchronization gauge to properly get the carbs working together.
Our engine seemed to run fine until we called on it at the track, proper tuning of the carbs is just as responsible for the rpms and revving as the engines ability to withstand it. Now that we've got the tuning on the carbs right, the engine seems altogether different - in a good way.
Hudson
|
|
|
|
|
Joined: Aug 2001
Posts: 30
Active BB Member
|
|
Active BB Member
Joined: Aug 2001
Posts: 30 |
Hudson, did you increase the pressure/volume of your oil system? Also did you do any sump mods? I'm thinking of building a mains girdle that doubles as a windage tray. Also looking at plumbing an inline filter & cooler where the pump mounts to the block posibly on the pick-up side creating a by-pass in that gallery. I may have to increase pressure incase of pressure drop because of filter/cooler.
Hyperutectic pistons are the way to go as opposed to forged. Pistons start off as blanks so a manufacturer should be able to make pistons out of something of a similar size/shape etc. I found some later long motors had 3 ring pistons which are an advantage. My father has Continental pistons in his 230 & had to have the crown skimmed & the bush resized to suit the smaller pin diam.
Also been warned off chrome-moly rings, someone else may have had some experience with these.
Pop-up pistons would be the way to go but I fear there isn't enough meat above the combustion chamber & it has a cross type brace to support it. Knew a guy that did & his head acted like a pump. You can get your bits sonic tested or x-rayed to check for thickness & material inconsistancies.
Had a look at all my 250 blocks & couldn't find any sleeved. I've got marine,industrial,truck & late car & surprisingly enough they're all either standard or at worst .020" oversize in the bore.
I'm going to run twin 94's on an Offy manifold(wish me luck).Also why do most of you use B&B carbs as opposed to Stromberg 1 barrels ? Somewhere I have some flow numbers for the Strombergs.
Anyway something to chew on & at the rate we're going they'll reintroduce the flathead with all our improvements !!!
|
|
|
|
|
Joined: Oct 2001
Posts: 90
Active BB Member
|
|
Active BB Member
Joined: Oct 2001
Posts: 90 |
Thanks for the advise on the carbs, Hudson. I'm having oto much fun, using my car, to feel like taking it down long enough to do all that to my carbs. Later this winter, when it's really too rainy here in Oregon to drive an old car, I'll probably do that. If I have completely different carbs front to back, I'll need to rectify that.
The only reason that I'm using Ball & Ball, is that those are what came with the manifold, and it didn't seem to make any sense after paying $400 for the setup, to just throw away the carbs that came with it.
If I end up having to buy another carb, I may consider a pair of Strombergs, or something else. I'll be in touch with the Carb. Shop to find out what they recomment, if it comes to that.
|
|
|
|
|
Joined: Aug 2001
Posts: 71
Active BB Member
|
|
OP
Active BB Member
Joined: Aug 2001
Posts: 71 |
FlatRam, To answer the oil pressure/volume question. We intentionally left as much stock as possible to "test" the engine's durability. The oil pressure, and because ours are by-pass oilers, also the volume. The large nut on the driver's side was taken off and the by-pass spring was shimmed until we got the pressure we wanted. In fact, we shimmed it up until it locked down and diabled the filter altogether. As we all know, the by-pass filtration is nearly useless anyway. The engine will hold 80 psi with no by-pass at 4000 rpm. Since we've hit 6000 the works in the SW oil gauage have been stretched and we have no idea what it is beyond 4000 rpm. I can say this, the tolerances in the bearings are still good enough to take a good 2 minutes for the pressure to leak down to 0 psi after the engine is shut down. As for volume, I really haven't calculated it. Perhaps someone else has the displacement of the pump and it can be calculated. The sleeve issue is beginning to puzzle me. I know all our engines have sleeves that are standard bore and .090 thick. I'm going to investigate that as time allows. If I can go without them, who needs a long block? I believe you may be correct about the raised pistons and a lack of meat in the head to accomodate an appreciable dome. I'm still working on that too. I still feel as though a head modification would be better than hogging out the block area between the valves and cylinder periphery. Someone else comment on this if they wish. Even better, someone cast a head that is made for a dome piston. About the carbs. I was impressed by the Weber ICH series 1 bbl carbs. Simple and each jetting component is replacable and tunable. 1.75" venturis I believe. They are available new from Clifford for $165 each, that's hard to beat also. With the same Offy manifold I'm using at $145, the total induction system would add up to $475 from Clifford Performance, that aint too shabby. Why the Ball&Ball carbs? They just seem natural. They were created by contract with Carter for Chrysler to be used on these engines specifically. The Carb Shop told me, and they were telling the truth, they are the simplest and cheapest carburetor that could be built and still be dependable. I do not prefer them as I would have had two ICH Webers on this engine if it weren't for the intervention of my Dad. He wanted original, period carburetors on the engine to avoid rules problems and add a bit of authenticity to the tractor. We had two matching # carbs, so why not at least try? They are trickly little buggers, and not the finest examples of fuel delivery nor tunability. However, with a little correction and alot of TLC, I doubt the ICH carbs would have been any better. I have come to terms with them and they are working fine at 6000 rpms now. To relive my entire saga of discovery regarding the B&B, just read the "Ball&Ball woes" thread in this Mopar forum. The link to Clifford Performance : http://www.cliffordperformance.com/home.htm Link to Clifford Performance flathead Mopar data sheets: http://www.cliffordperformance.com/st-msfh218-230-250-264.pdf Weber ICH exploded view: http://www.piercemanifolds.com/34ICHa.pdf Weber ICH parts list corresponding to the exploded view: http://www.piercemanifolds.com/34ICHpl.pdf Hudson
|
|
|
|
|
Joined: Oct 2001
Posts: 52
Active BB Member
|
|
Active BB Member
Joined: Oct 2001
Posts: 52 |
Bo,
I was wrong about the way the fluid drives get oil to the converter on the '52 to '54 Chrysler and DeSoto. After looking at a different more detailed cutaway, the oil from the main oil gallery. I guess they just leave the plug out of the back of the block. The late ones like this use engine oil for the fluid drive. When you change oil in both the engine and fluid drive, you add 10 quarts of oil to the crankcase and fire it up. The oil pump takes care of the rest. In the earlier ones like I have, the fluid drive sump is a self contained unit at the bottom of the bell housing with it's own oil pump.
I'm still rambling on back on the first page if anyone is still paying attention.
Regards,
Del
|
|
|
|
|
Joined: Aug 2001
Posts: 71
Active BB Member
|
|
OP
Active BB Member
Joined: Aug 2001
Posts: 71 |
Del,
Just add what you want to here at the end of the thread. I'd never have known you added anything if you hadn't informed us.
What Del is reinforcing is the fact that little has been done to the engine I'm running. But, what has been done is very necessary to rpms and just makes a good engine better. I am still looking for the weak spot in what we are running from a structural standpoint. I know I can't get enough air into it at present, but the bottom end is holding quite well.
I've stated it several times through this thread in different locations. All that has been done is to rework the oil porting in the crank. Regroove the bearings to allow continuous flow of oil around all rods from all mains. Reworked the rods without any detail undone. The engine was balanced internally. Line honed the main bores. Blueprinted the deck surface clearances. And by all means, and this is no knock on machine shops, but check ALL clearances for yourself before final assembly. Clean everything until you can "white glove" the entire thing. By all means, scrub out the crank oil ports, oil galleys, anywhere oil is conveyed with a gun cleaning kit until NOTHING comes out.
Now here is something I would like to hear some expert comment on. I'm considering adding NOS to the little flattie for next season. I've already decided where I'm going to locate a "plate" in the carb setups. I want to remachine a new spacer plate that fits between the venturi body and the butterfly housing. The current compression ratio and cam in our tractor would be ideal for a little "squeeze" I may need a little more lobe separtion on the cam, but I think we can survive.
Any comments on Nitrous in a flathead? I'm not very nitrous savvy.
Hudson
|
|
|
|
|
Joined: Oct 2001
Posts: 52
Active BB Member
|
|
Active BB Member
Joined: Oct 2001
Posts: 52 |
Hudson,
The biggest worry using nitrous is getting the fuel pressure correct. Nitrous is just an oxygen carrier. You must add additional fuel to get the correct air/ fuel ratio. The biggest downfall for a lot of users is they try to use a stock fuel pump to deliver the extra fuel and it's not up to the task. The result is a leaned out mixture under extreme load resulting in a blown head gasket ( best scenario ) to a groove torched between the cylinders ( worst scenario ). You will definitely need an electric fuel pump and regulator. The less an engine is able to breathe, the better they respond to nitrous, so it would seem like a flathead would be perfectly suited to it. Power levels probably won't be enough really to hurt anything. You might want to consider a rev limiter just in case something breaks elsewhere though.
Regards,
Del
|
|
|
|
|
Joined: Oct 2001
Posts: 52
Active BB Member
|
|
Active BB Member
Joined: Oct 2001
Posts: 52 |
Hudson,
The NOS plate goes under the carb. On the larger systems they have separate nozzles that can be plumbed into the intake runners. Two in each runner, one for fuel and one for nitrous. The plate type system is obviously much simpler.
Regards,
Del
[This message has been edited by DEL (edited 11-12-2001).]
|
|
|
|
|
Joined: Oct 2001
Posts: 52
Active BB Member
|
|
Active BB Member
Joined: Oct 2001
Posts: 52 |
ENGINE BUILDING/ PERFORMANCE RAMBLINGS ( continued from page 1 )
One way to improve performance is to reduce reciprocating weight, primarily the pistons. This contributes to the longevity of a high winder. Pistons can be lightened with a little judicious removal of material under the head and around the pin boss. Again, the particular application must be taken into account because any removal of material can weaken the part for continued use. This step should only be done on forged pistons as cast pistons aren't structurally strong enough ( most have a steel strut inside the pin boss area to help keep hold them rigid where the piston is measured for size ). Drag/ pull motors are the best candidates, while circle track and any other extended hard use must be a little heavier because of the repeated stress. Drag motors can have a head thickness down to about .120 and survive. Street motors generally don't need it because of the typical rpm's they operate. Also, detonation can take it's toll. Lightening pistons on an inline will not upset the balance of anything because of the way inlines are balanced.
Rings are a definite factor in performance. Ring tension should be kept to a minimum for performance use. Ring choice is also critical. For drag/ pull use, a two ring setup ( top and oil ring )with an .043 or pressure backed top ring and gas ported piston is about the ultimate. In limited class racing where you have to run three rings, you can back cut the second ring to relieve tension. This is done by putting the ring in a fixture on a lathe and removing material from the i.d. ( this relieves the radial tension making the ring little more than a spacer along for the ride ). Also, on this setup a pressure backed ( dykes ) top ring is used with a spacer in the top groove ( stock NHRA rules state you must run a stock piston, so you are stuck with the stock ring configuration, but not limited to the use of stock rings ). For street use a 1/16 or 5/64 top and second ring should be used, preferably Moly. Chrome should be avoided since they seem to be nothing but trouble. Given the choice, I would go with a plain iron ring over chrome. Oil rings should be the 3 piece style ( Sealed Power/ Speed Pro SS50U style ) in 1/8" for performance or 3/16" for street. Again, ring tension can be reduced in a performance application by removing the plastic ends on the expander that keep the ends from overlapping and squeezing ( gently ) the expanded segments of the oil ring until an end gap of about .150 is achieved. When the lower end is assembled with the low tension rings ( minus the valvetrain ) you can get the whole works to turn with about 15 pounds of torque or less ( less torque to turn means more torque to the back wheels ), meaning you can turn it with just and end wrench and no breakover bar. Try that with a stock set of rings! For street use, gapless rings are not generally recommended, because a little blowby actually helps in oil control. The biggest problem using the .043 or the pressure backed ring is the finish required when honing. VERY few machinists possess the talent to properly finish the cylinders for the best performance. It requires a Sunnen CK-10 and a LOT of know-how. The cylinder walls look almost burnished, but when you get them in the light there is a very fine hone pattern. And for a final tip on rings and cylinder finish, do not use motor oil on the rings when assembling. Use Type F tranny fluid on the rings and cylinder walls. In fact use Type F for a final cleaning of the cylinder walls. Think they're clean when you get done using soap and water or solvent? Try some Type F on a paper towel and clean the cylinders with it. It's quite an eye opener! Using tranny fluid generally prevents any ring break in problems. They usually seal instantly. One last bit of advice on pistons and rings is don't run the clearance to tight. The clearance is built into the piston but running an extra .001 cleanance ( .031 vs .030 for example ) makes quite a bit of difference in how free they run especially when brand new.
You should check to make sure the oil holes are not partially covered by the main bearing shell. Machining practices in high production leave a little to be desired. If the holes are a little misaligned it can be corrected with a die grinder. The oil galleries can be enlarged a little in some cases. This would require a little judgement, as in some places there isn't a lot of wall thickness where the galleries are. Oil passages can be restricted in some cases to increase flow to other parts. The cam bearings are about the only place on a flathead that can be restricted as they don't have oil galleries for hydraulic lifters. This can be accomplished at home using set screws with an .060 hole drilled thru and tapping the oil galery past the main passage and installing the screws tightly. The oil pump can be blueprinted by tightening up the clearances between the pump body and the cover by a little flat sanding. Stock pressure is usually more than enough for most applications. Screaming small block Chevies get away with about 30/35 lbs @ 9000 RPM. Remember it takes power from the engine to turn the oil pump. Oil control in the pan is very beneficial in gaining power. There can be a lot of power in just an oil pan. you want as deep a sump as you can get away with. Then run the regular amount of oil in it to keep it away from the rotating parts ( windage ). DO NOT run a windage tray. This accomplishes the opposite effect. It's like moving the bottom of the pan up next to the crank. Oil lays on it acting like a brake when the crank runs through it. A screen type device may be alright but do not run the solid type tray used in the 60's and 70'. The idea back when was to keep the crank from whipping up oil from the pan into the crank. The main point in oil control is to keep it away from the rotating parts. A scraper can be fabricated and installed on the passenger side oil pan rail ( under the gasket ) to remove oil from the moving parts and keep it from being slung back up into the motor. It is made out of light gauge sheet metal and made to fit closely to the crank and rods without touching. The only drawback to this could be starving of the cam and lifters because they only rely on splash/ gravity for lubrication. A big kickout on the passenger side of the pan might also prove beneficial as the starter is on the driver side out of the way. This would allow the oil to be slung into the lower right side of the pan preventing splashback. It may sound crazy, but I have seen 15 hp in an oil pan alone compared to regular type pan with a deep sump. Oil itself can provide performance gains. Heavy weight is actually bad. It resists movement ( I don't know if you could exactly call it friction since it is oil ). Several pulls on the dyno showed gains in power without doing anything else. The engine was left to cool and the process was repeated and the same thing happened. As the oil heated up it made more power. All sorts of devices were tried from a magnetic stick on pan heater to spray on insulating foam to try to maintain heat in the pan. The oil was replaced with Mobil 1 synthetic and the result was the same power regardless of temperature change. There is also an argument of pressure vs. flow. If you set up the bearing clearance really tight the engine might have tremendous oil pressure but no flow past the rod bearings resulting in failure. The oil at the source of friction needs to be constantly replaced or it burns up ( think flow ). Conversely, one controversial subject seems to be grooving and/or cross drilling the main journals. This never really showed any benefit, and in some cases, seemed to be detrimental. Our theory was that there is a pressure buildup at the main before the oil hole to the rod journal passes over it causing a kind of pulse effect. When the main journal is grooved this is done away with and constant flow is maintained but there doesn't seem to be enough pressure to assure a good constant flow. The best scenario would be if the oil holes in the journals which must feed two rod journals ( #2 and #3 on an old inline ) were 180 degrees apart, but unfortunately, they aren't. I actually heard one guy saying the oil holes were strategically placed for optimum benefit. In reality they are in the only place they can be ( there's only so much space to drill a hole from the main journal through the counterweight to the rod journal ). Grooving the rod journals does nothing to aid oiling the bearing. If anything, it reduces the bearing contact area.
Compression and breathing are at direct odds in a flathead. The transfer slot ( the area between the valves and cylinder ) is the main problem. In the old days it was common practice to mill the head a considerable amount to gain compression. This reduces the height of the transfer slot, hindering the engines ability to breathe. So with a stock head, raising the compression is a double edged sword. It all boils down to volumetric efficiency. I would roughly guess that a typical flathead is somewhere in the 60% range, since most mild ohv motors are in the 75%-80% range. At least one of the old builders of flathead Ford v-8's is thinking a little different now. They have raised the roof of the chamber above and behind the intake valve and blended the raised portion of the roof out into the cylinder ( kind of like a relieving the block, but in reverse, and only concerning the intake ). It also has a higher roof in the area over the cylinder and requires a piston with a taller dome. They claim a 30% increase in flow. It was thought for a long time that the area behind the intake valve was a dead area, but now, with flow benches more common, they are finding out different. ( more later )
Regards,
Del
[This message has been edited by DEL (edited 11-30-2001).]
[This message has been edited by DEL (edited 12-04-2001).]
[This message has been edited by DEL (edited 12-13-2001).]
[This message has been edited by DEL (edited 04-09-2002).]
[This message has been edited by DEL (edited 04-10-2002).]
[This message has been edited by DEL (edited 04-12-2002).]
|
|
|
|
|
Joined: Oct 2001
Posts: 90
Active BB Member
|
|
Active BB Member
Joined: Oct 2001
Posts: 90 |
Just thought this deserved to be pulled back to the top for the benefit of charlie, who was looking for articles.
Where is Hudson anyway?
I just acquired a pickup load of old engines and transmissions, most apparently late 30's stuff. I wanted a core motor to build up using some of the mods listed above. I think there's a useable 230 crank, and a good 1938 block. I'll probably need to find some pistons and rods. Since my Coupe is doing fine with what's in it now, I can take my time and do this right.
|
|
|
|
|
Joined: Apr 2004
Posts: 12
Active BB Member
|
|
Active BB Member
Joined: Apr 2004
Posts: 12 |
ive got the 251 6 in my 47 fargo 1/2 ton, and have modified the motor using the complete electronic ignition and fuel injection from a 92 chevy 4.3 liter v6. machine the chevy distributor to fit the chrysler 6 and made new intake and exhaust manifolds. it runs awesome and will post pics if any one is interested
but i need a little help here, does any one know the napa part number for a new water pump for this flathead?
Thanks
John
|
|
|
|
|
Joined: Oct 2003
Posts: 98
Active BB Member
|
|
Active BB Member
Joined: Oct 2003
Posts: 98 |
John; I would like to see pictures of your modified engine. Sounds like you have done some interesting things to it. Your ignition system sounds intriguing. I have converted my 251CI Desoto engine to dual points. And I just got an electronic controller that will still use the points as a trigger but I have not yet installed it. I also have a new high output coil that I will install at the same time. I do not have a NAPA number for a new water pump but I do have a Car Quest number (NWP-713). Hope this helps. I have several pictures of my car at the following link. http://photobucket.com/albums/v65/DonCoatney/ Don Coatney 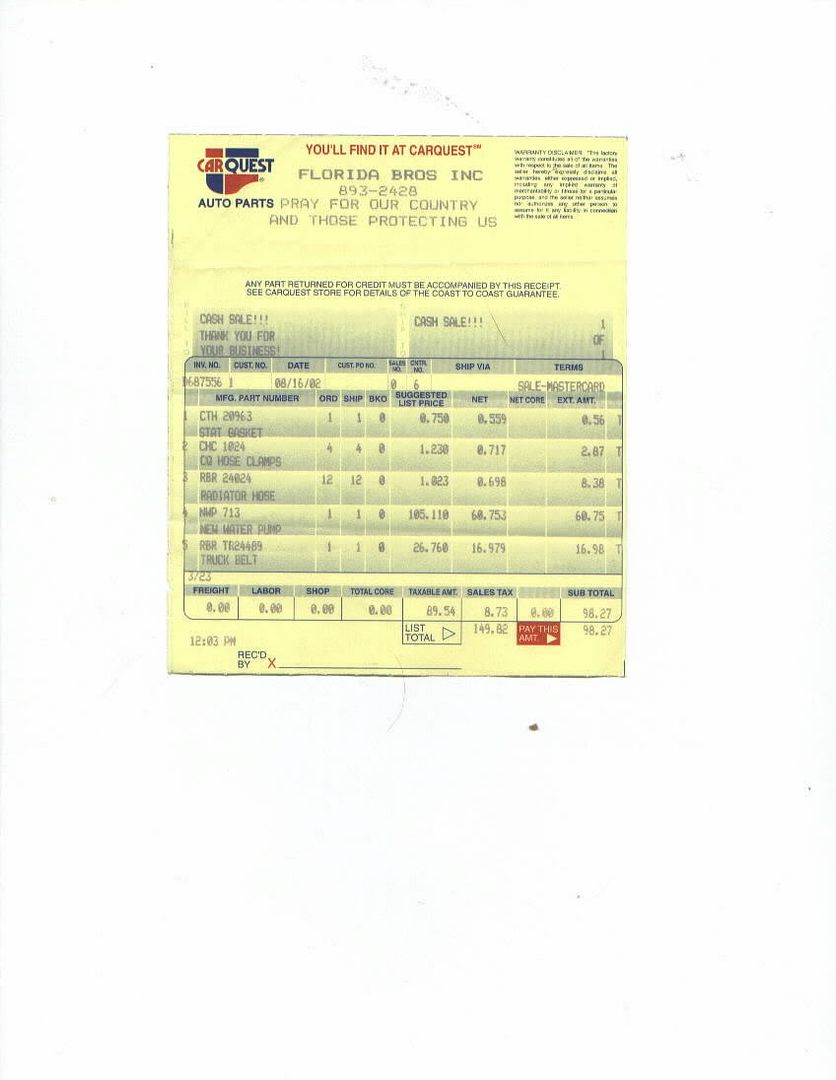
Don Coatney
|
|
|
|
|
Joined: Aug 2001
Posts: 71
Active BB Member
|
|
OP
Active BB Member
Joined: Aug 2001
Posts: 71 |
I did just kinda "disappear" huh? The tractor in question is still running trouble free, albeit not in the particular spotlight it was in 2001. It doesn't hit 6000 anymore, the valve springs got weak and limits it to 5500. The good news is, since I've been absent from Mopar flatties - I've been putting some of the breathing theory discussed in this thread into practice with Harley Davidson 45" Flatties. A friend of mine even got the results of all the flatty mad science in November's "Iron Works" magazine, and he mentioned me in the article (now that's a real buddy!). Ok, so shoot me - its a "v" I learned alot about the topside of the flathead apparatus that you won't read in the 'Old Skool' books. What I developed worked beyond my expectation and I'm looking forward to adapting it to our beloved inline flatties. This past August I got the chance to fulfill the first phase of a lifelong dream.  A '53 Hudson Super Wasp Coupe And you know it - a fat 308 flatty inline under the hood. I'm like blueskies was in 2001, having way too much fun driving it around to start working on it. But I'm collecting parts and laying down strategy. My Dad (HudI) is a member of this board and has kept me abreast of what has gone on during my sabbatical - I really loved watching blueskies' car coming along. Very Cool. Hudson
|
|
|
|
|
Joined: Aug 2001
Posts: 71
Active BB Member
|
|
OP
Active BB Member
Joined: Aug 2001
Posts: 71 |
alot of water has passed under the bridge since 2001, but the tractor that started this thread hasn't changed one bit (with the possible exception of wheels). The rules changed in the class this tractor competed in, which meant making some modifications to the frame etc that just wasn't a good idea on such a rare tractor. It was eclipsed in 2003 by better technology, but still draws the lion's share of admirer's when it gets to make an outing - especially if folks get to hear it hit the high notes. I never was able to post pictures of it until now, so here she is. The Custom Model "B", a real production tractor minus the twin B&B's and offy manifold.   Hudson
|
|
|
|
|
Joined: Oct 2003
Posts: 98
Active BB Member
|
|
Active BB Member
Joined: Oct 2003
Posts: 98 |
Hudson;
I was not able to view the pictures you posted. Got the red X. Any way you could e mail them to me? Also I notice you are not too far from me as I am in Murfreesboro just south of Nashville. I would like to drive up and see your tractor and Hudson some day.
Don Coatney
Don Coatney
|
|
|
|
|
Joined: Aug 2001
Posts: 71
Active BB Member
|
|
OP
Active BB Member
Joined: Aug 2001
Posts: 71 |
Don, try right clicking the red x and in the box that pops open - left click the option "show picture"
Dangit, I thought I knew how to post pictures huh?
A big wave south to the 'Boro, we'd be happy to meet up with a fellow inliner and flathead enthusiast. The tractor belongs to my Dad - but the Wasp is my baby!
I'll e-mail you some pictures on the promise I get some of your rides/rods/projects.
Hudson
|
|
|
|
|
Joined: Oct 2003
Posts: 98
Active BB Member
|
|
Active BB Member
Joined: Oct 2003
Posts: 98 |
Hudson; I tried right clicking your pictures but it was a no go. I also tried capturing the properties and opening the pictures in a new window to no avail. I have over a thousand pictures posted at the following URL. http://img.photobucket.com/albums/v65/DonCoatney/bnch3.jpg Pictured is my Desoto big block 251 engine I have installed in my 1948 Plymouth. This is the engine that will flat out beat my Arch Race Rival Pete blueskies Anderson in the big race if he ever gets his jalopy on the road. I had to call Pete the first day I started my engine so he could hear it on the phone. I have always has a soft spot for the Hudsons. I look forward to seeing your pictures. Don Coatney 
Don Coatney
|
|
|
|
|
Joined: Aug 2001
Posts: 71
Active BB Member
|
|
OP
Active BB Member
Joined: Aug 2001
Posts: 71 |
Very NICE!
Well, I'm disappointed in the pic posting. Sure thought I had that whipped. I can see them, but then the file storage I used is passworded to this computer.
I need to check out your file storing site.
e-mail on the way
Hud
|
|
|
|
|
Joined: Oct 2003
Posts: 98
Active BB Member
|
|
Active BB Member
Joined: Oct 2003
Posts: 98 |
Mark; This tractor sure looks good. Last summer I went to the antique tractor show and pull in Chapel Hill, Tennessee. I have posted several pictures taken at this show at the following URL. http://photobucket.com/albums/v65/DonCoatney/Fun%20Stuff/Tractor%20show/ I use Photobucket as a host for my pictures. They offer a free version but the bandwidth is limited. For twenty bucks annually I have the premium account with unlimited bandwidth. I have over 1000 pictures posted there. I also posted your pictures on the P-15, D-24 forum at the following URL. http://merc583.addr.com/cgi-bin/webbbs/webbbs_config.pl?read=74875 Here are the pictures you sent. Don Coatney 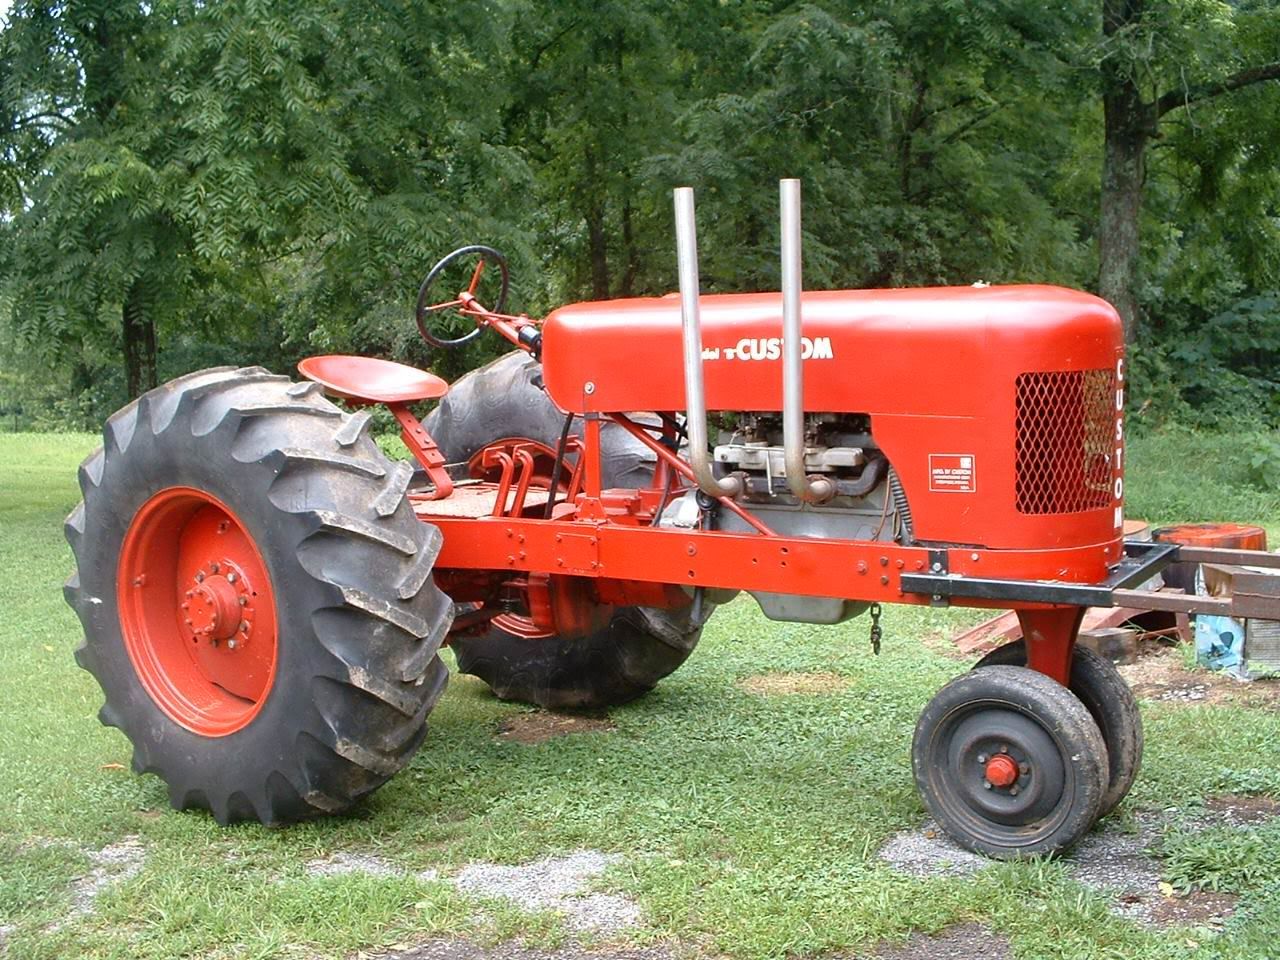 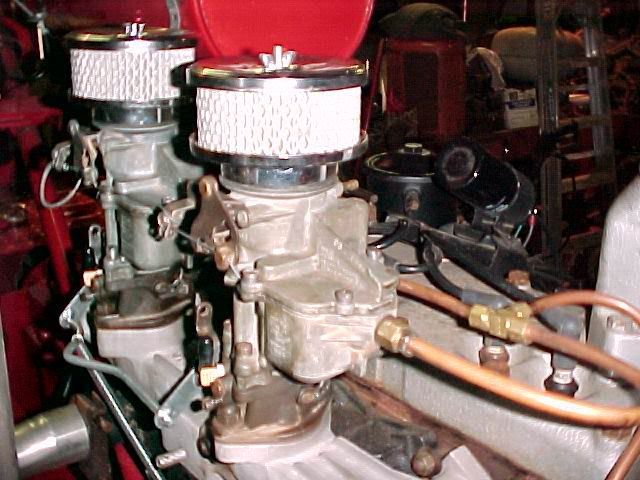 
Don Coatney
|
|
|
|
|
Joined: Feb 2001
Posts: 144
Contributor
|
|
Contributor
Joined: Feb 2001
Posts: 144 |
Hudson- Glad to see this thread re-surface! This thread is where it all started for me, right after seeing a pic of Jim R's fladhead in the rides section. Jim's engine was the only one I found on the net at the time that was not stock, and had a bit of the "look" that I wanted for mine. Here's Jim's engine: 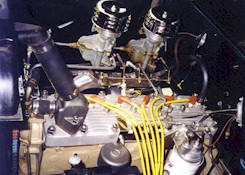 When I bought my '50 plymouth, I had never seen a flathead six before, and mine looked more like an abandoned rusty old furnace that and engine.  The little pic of Jim's engine got me to searching the net for keywords like "Edmunds", etc. I started finding bits of info here and there, and then found this thread, which really got me consumed with flatheads. It's been a long road for my project due to lack of time, but it's just about ready for the BIG RACE. I hope to have the car on the road, er track, by June of '05. Of course, I've been saying that for four years now...LOL  Glad to see the pics of your race tractor, looks great. I'd love to hear a sound clip, I'm too far away for a visit... Pete
|
|
|
|
|
Joined: Aug 2001
Posts: 71
Active BB Member
|
|
OP
Active BB Member
Joined: Aug 2001
Posts: 71 |
That is one gorgeous flathead, blueskies!
I think you did real well getting the tube type headers over the new cast ones. Really nice pieces of work, the ones you have on your flatty.
I like the Motorcraft/Holley/Weber carbs as well, bought some for fitting to the Super Wasp myself.
I would like to get your recipe on what you finally used inside your engine. I really like the intake setup and the Edgy head. I had the chance to talk to Edgerton about the time this thread originally ended and was excited by some of the additional metal casted into and around the chamber profile.
I hope Don isn't counting on those extra 21 cubic inches to sway the track-meeting. The short mopars are capable of some "shock and awe".
Hudson
|
|
|
|
|
Joined: Feb 2001
Posts: 144
Contributor
|
|
Contributor
Joined: Feb 2001
Posts: 144 |
Hudson- The tube headers came from Tom Langdon, and were apparently made from Vette headers. I had them coated with HPC ceramic stuff for longevity. I'm flattered by your interest in my engine, after trying to pick up as much info as possible from your well informed posts to this forum. This 230 is my first engine build, sort of engine 101 if you will. If I were to do it again, I would have gone further in the lower end with oiling mods, etc. I didn't know at the time what to do, or how to do it. At the time I decided to leave well enough alone and go for the mods that were easy bolt-on bits to get as much out of the little engine that I could. I wanted the engine to have a "look", and knew that it wouldn't ever be pushed very hard. All that I did with the guts were to have the cam ground, and bored the block .030" over. Otherwise, it is stock aside from converting it from the 218 stroke to the 230 with NOS crank and rods. If I had had more time and $$, it would have been fun to explore the outer limits of the engine's capability, or experiment with a blower, etc. Maybe on the next car... My main goal with this engine was dependability for a daily driver, and a bit of "show stopper" appeal in something you hardly ever see at a car show. That, and winning the BIG RACE, of course.  I'd be happy to answer any specific questions if you have any... Looking forward to pics of the Super Wasp, get that pic posting thing figured out! Pete
|
|
|
|
0 members (),
132
guests, and
57
robots. |
|
Key:
Admin,
Global Mod,
Mod
|
|
|
|