|
|
Joined: Mar 2010
Posts: 623
Major Contributor
|
OP

Major Contributor
Joined: Mar 2010
Posts: 623 |
Hey guys. I took off my manifolds to clean and replace gaskets because I had an exhaust leak and I wanted to fix the choke and rebuild the carb. Now here's my problem... I had to cut two things to get the manifolds off because I stripped the heads of the bolts. First, I had to cut one of the clamps that hold the manifolds on so I need to know where to get another one of those. Second and more importantly, I had to cut off the studs that the exhaust pipe collar bolts to because they wouldn't twist out of the manifold and I couldn't get the nut off because it got stripped. Now I'm kind of lost as to what to do now because my plan all along was to clean the surface and MIG weld a bolt that was the same size and length as the stud but the weld never sticks to the cast iron even after its freshly grinded. What should I do because I can't just run open headers. My last thought is to drill it out and tap it but that would be painfully annoying. Thanks for your help.
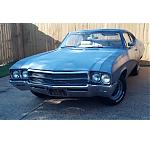
69 Buick Special Deluxe. Intercooled Turbo Chevy 250 @ 15psi on a stock long block. It's kinda fast.
|
|
|
|
|
Joined: Jan 2010
Posts: 137
Contributor
|
|
Contributor
Joined: Jan 2010
Posts: 137 |
You'll need to cut the broken stud off flush with the manifold and then drill it out and retap the threads in the manifold. The bolt size is 5/16 coarse thread I'm pretty sure.
The mounting clamps are easy to find at a junk yard. But if you can't seem to locate one, then let me know and I'll send you one.
If at first you don't succeed,
then read the directions and try again.
|
|
|
|
|
Joined: Oct 2000
Posts: 368
Contributor
|
|
Contributor
Joined: Oct 2000
Posts: 368 |
What has worked for me on removing broken studs on the exhaust manifold..... First find a nut that will fit over the broken stud, cut the broken stud so it is even or slightly recessed in the nut, then wire weld the two together. Heat the manifold casting (at the stud) to dull red with a torch and carefully turn the stud out with a wrench.
Tim Tenold
I.I.#498
|
|
|
|
|
Joined: May 2009
Posts: 493
Contributor
|
|
Contributor
Joined: May 2009
Posts: 493 |
snowman, I smiled with memory of my grandfather when reading your question. He helped me with my first car, a '70 Nova when I was 16. Exact same problem. I drilled out the broken stud while the manifolds were still on the engine and I was lying on my back under the car.
If the above methods don't work you are going to have to drill it out. If you drill right in the middle of the stud then you can peel the stud remnants out of the manifold and save the original threads. If you miss and damage the manifold then a helical thread repair insert will fix it.
Grind it off flush, center punch, drill it out. Start with a small bit, then step up to 5/16, which is the tap drill size for 3/8-16. Your studs are probably 3/8-16. You must drill it right through the center to save the original manifold threads. If you have an easy-out, you can try it when the drilled hole is about 1/4 but I haven't had much luck with easy-outs.
|
|
|
|
|
Joined: Mar 2010
Posts: 623
Major Contributor
|
|
OP
Major Contributor
Joined: Mar 2010
Posts: 623 |
Thanks guys, I just ended up starting to drill it through. The size between two of my bits is two big so I can't drill it out. I'm going to Home Depot or something to get the bit tomorrow I hope so that I can finish drilling it out. I just hope that tapping a cast iron hole won't be too hard.
69 Buick Special Deluxe. Intercooled Turbo Chevy 250 @ 15psi on a stock long block. It's kinda fast.
|
|
|
|
|
Joined: May 2009
Posts: 493
Contributor
|
|
Contributor
Joined: May 2009
Posts: 493 |
If you drill it exactly through the center at 5/16 or 19/64 plus a little bit of luck you will be able to pick out the stud remnants with a center punch, needle nose pliers, etc. Then all you have to do is run a tap in to clean up the original threads and you are good to go.
The closer to center you drill the better your odds of saving the original threads.
The problem is if you drill off center now you have a hole that is partially cast iron manifold and partially steel stud. You cannot tap threads into such a hole without breaking something. In fact, you will probably have trouble even drilling it because the iron is softer and the drill will go off center and jam. At this point you will need to pick out the steel remnants, then drill and tap for a helical thread insert.
If you really screw it up then it is possible to weld up the hole with nickle rod. But before you do that you are probably better off finding another manifold, even one with broken studs so you can practice drilling on center!
Good luck!
|
|
|
|
|
Joined: Mar 2010
Posts: 623
Major Contributor
|
|
OP
Major Contributor
Joined: Mar 2010
Posts: 623 |
haha alright thanks stroker. I did a pretty good job drilling straight though on the first one. It's only slightly off-center on the exit hole but the problem is that on the other bolt, it just goes into the manifold so I can't check the exit hole unless I drill through the bolt and then on through the cast iron but I don't have any bits that long and that'd just be pointless. I need to find a way to get it perfectly perpendicular but I guess I'll just have to do my best eyeballing it.
69 Buick Special Deluxe. Intercooled Turbo Chevy 250 @ 15psi on a stock long block. It's kinda fast.
|
|
|
|
|
Joined: Mar 2010
Posts: 623
Major Contributor
|
|
OP
Major Contributor
Joined: Mar 2010
Posts: 623 |
Alright Guys, finally got it all done. I know this doesn't really seem that important to you guys but it's a major victory for me. Here's some pics and I posted on my restore vlog of my and my dad's cars http://www.youtube.com/watch?v=VIW9r3JDuK4. Put together 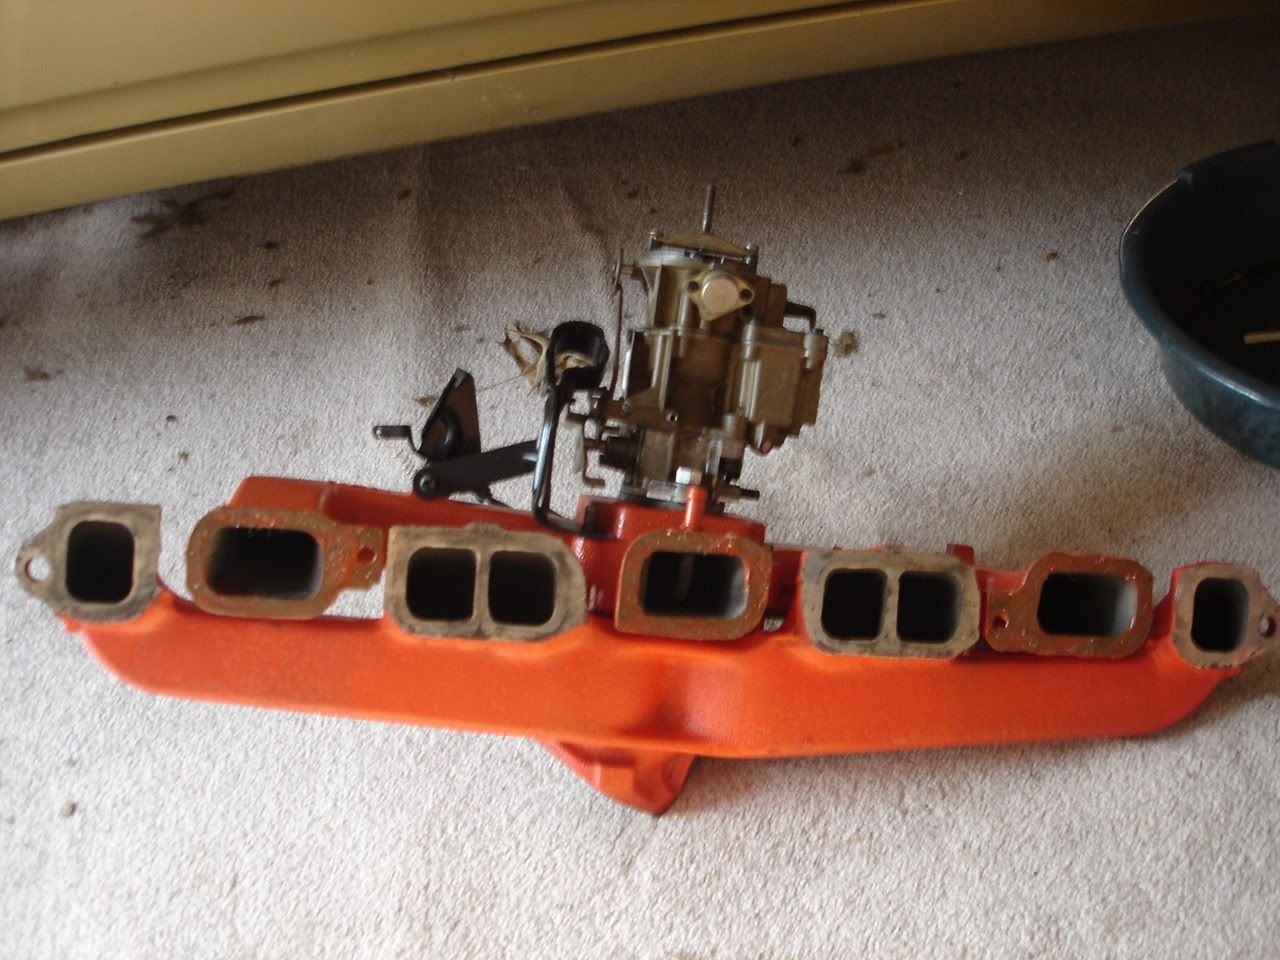 Two Clean Drilled and Tapped Holes 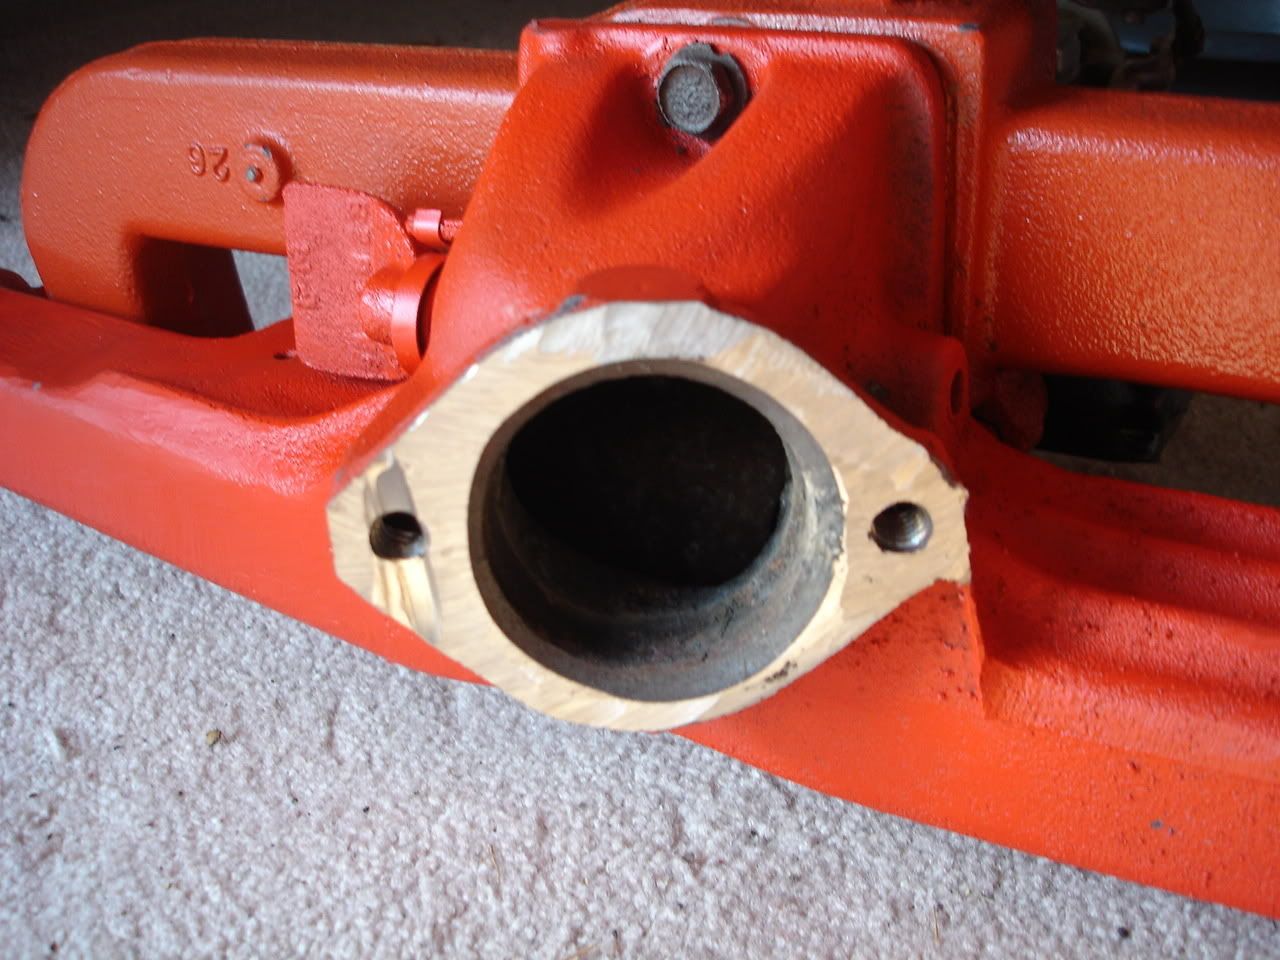 Slight color difference because they didn't have 2000+ degree Chevy Orange paint 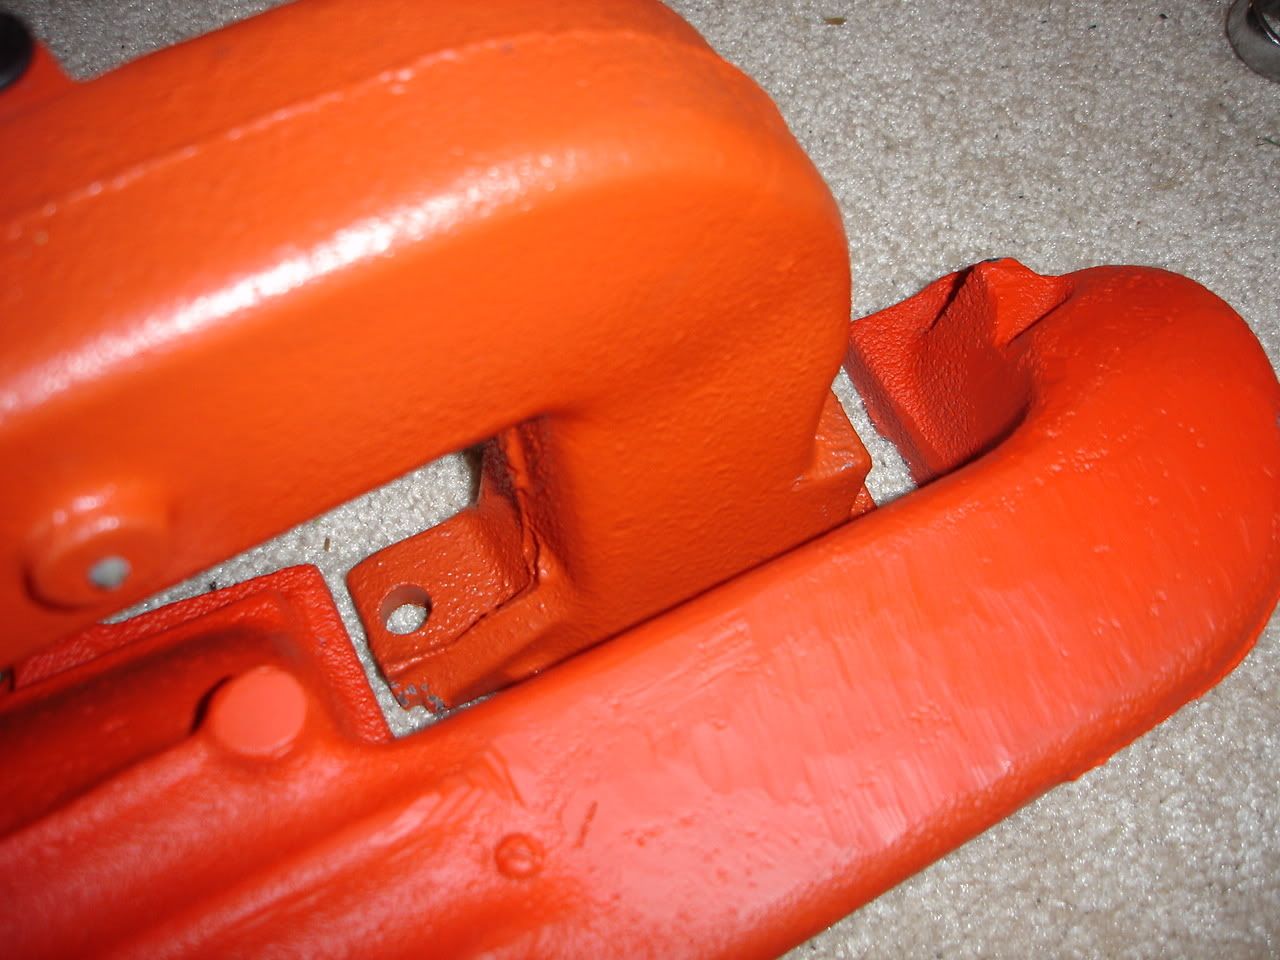 The right one is slightly crooked but no big deal. First time tapping and drilling for something like this so not bad. 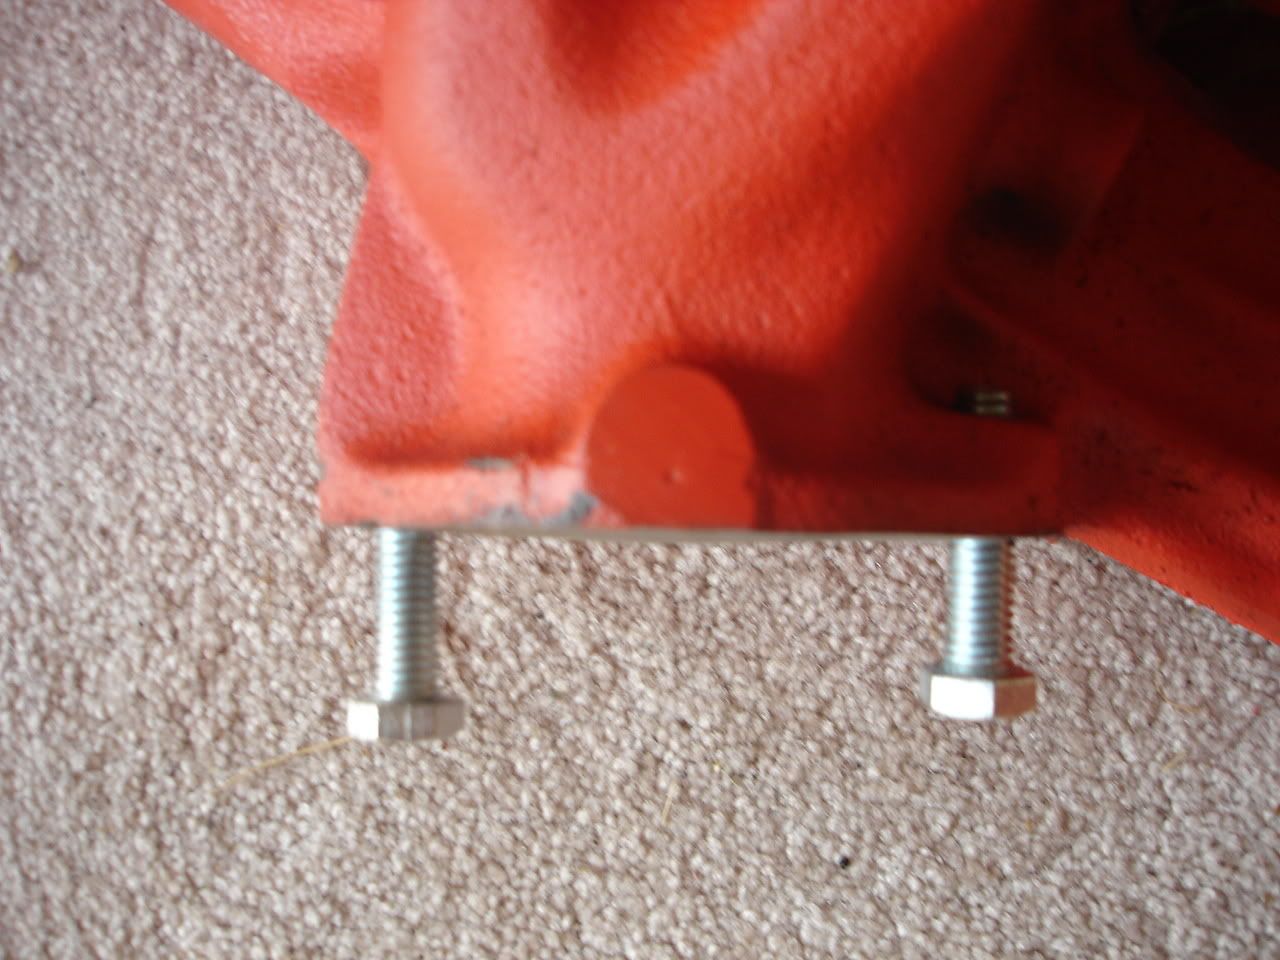 Just another angle I had to grind down to get the broken easy-out head out because it prevented me from center-punching and drilling it out since it was harder metal. 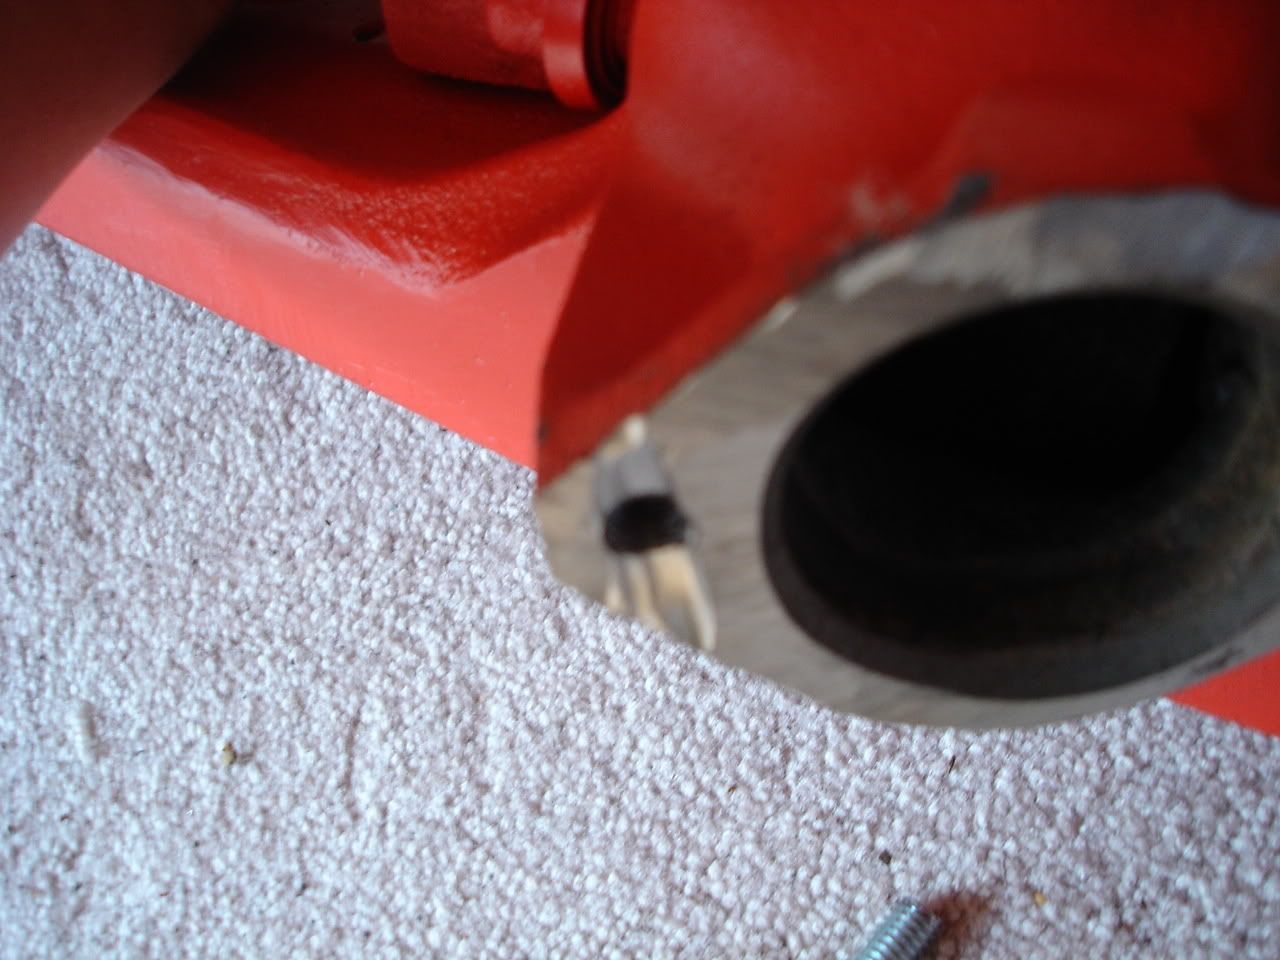
69 Buick Special Deluxe. Intercooled Turbo Chevy 250 @ 15psi on a stock long block. It's kinda fast.
|
|
|
|
|
Joined: May 2009
Posts: 493
Contributor
|
|
Contributor
Joined: May 2009
Posts: 493 |
Good job!
This type of repair is required skill for working on old cars.
|
|
|
|
|
Joined: Sep 2004
Posts: 5,839 Likes: 1
1000 Post Club
|
|
1000 Post Club
Joined: Sep 2004
Posts: 5,839 Likes: 1 |
Nice,
Personally I would use studs again,not bolts.
Also use copper antisieze compound on the threads.
Also,if you see the exit hole is less than 2",now would be a good time to port/open it up a bit.
MBHD
12 port SDS EFI 
|
|
|
|
|
Joined: Mar 2010
Posts: 623
Major Contributor
|
|
OP
Major Contributor
Joined: Mar 2010
Posts: 623 |
Thanks stroker!
And Hank, I'm using bolts instead because if it become stuck again, I won't have to go through the god d**n process again because this was not fun at all and if I can save myself the hassle of even POSSIBLY doing this again then I'll do it. Besides they'll serve the same purpose then so why not? Plus the "studs" we're screwed in I think they were actually just super-seized bolts without heads.
I actually decided to put a coat of the 500 degree paint that actually matches the intake over the 2000 degree so I hope it won't burn off but even if it does, it'll just leave a slightly mismatched. I'll try to post more pictures and a video on my restore vlog.
69 Buick Special Deluxe. Intercooled Turbo Chevy 250 @ 15psi on a stock long block. It's kinda fast.
|
|
|
|
|
Joined: May 2009
Posts: 493
Contributor
|
|
Contributor
Joined: May 2009
Posts: 493 |
You can use bolts if you want, won't hurt anything.
I offer three points in favor of studs:
The studs should have a short threaded end and a long threaded end with an unthreaded spot between. The short threaded end goes in the manifold and either bottoms out in the blind hole or goes into the thru hole until the unthreaded part stops it. This locks the studs in place with maximum thread engagement in the manifold. Still a good idea to use some anti-sieze in case you do want to remove them in the future.
Use double nuts on the studs, again with anti-seize. I've found double nuts jammed together to be the most robust way to connect exhaust components while still being removable.
Bolts will have less thread engagement in the manifold and can't use double nuts.
Use studs intended for exhaust manifolds from the auto parts store. Should be better material and have the unthreaded portion described above. Hardware store all-thread is typically poor material. Sometimes the studs come with long brass nuts. These seem to work OK but I prefer the double nut method.
|
|
|
|
|
Joined: May 2009
Posts: 493
Contributor
|
|
Contributor
Joined: May 2009
Posts: 493 |
It is possible to break the manifold if you crank down hard installing the studs. The unthreaded portion can split the manifold boss. I've not had this happen to me but I've seen it on other applications, specifically threaded rocker studs. In that case, the threaded hole in the head needs to be counterbored to clear the last incomplete thread or a hardened washer needs to be used to accomplish the same thing.
I would torque the studs to 20 lb-ft or so. No need for torque wrench just tight but don't crank down hard.
Last edited by strokersix; 05/31/10 08:57 AM.
|
|
|
|
|
Joined: Jan 2010
Posts: 137
Contributor
|
|
Contributor
Joined: Jan 2010
Posts: 137 |
X2 on the studs.
You can torque the stud into the manifold tighter than the nut on the stud with no issue.
If you want some very strong studs that you can get locally, then find most any truck dealership, i.e. Mack, Kenworth, etc., and ask for some turbo mount studs and nuts for a mid '90's or older. The older stuff on the Macks and Caterpillars weren't metric. The studs will be course into the manifold and fine thread for the nuts which equates into better clamping value at lower torque value and also will come apart easier in the future.
Lastly,
Never seize is your friend. Don't forget to use it!
If at first you don't succeed,
then read the directions and try again.
|
|
|
|
|
Joined: Mar 2010
Posts: 623
Major Contributor
|
|
OP
Major Contributor
Joined: Mar 2010
Posts: 623 |
Alright guys, I'm still going to use screws into the exhaust manifold but now I have a few questions. I put the idle solenoid mount back on and now it hits the throttle linkages. Would a REALLY thick gasket have anything to do with it? Because the ones autozone gave me were very thick. (pics below) Second, I have a linkage that was the ONLY piece leftover from my rebuilding the carb. I think I know where it goes but it won't stay in. I thought it connects to the throttle plate and then to a hook but I KNOW for a fact that the hook doesn't directly connect to the plate. (pics below) The mount 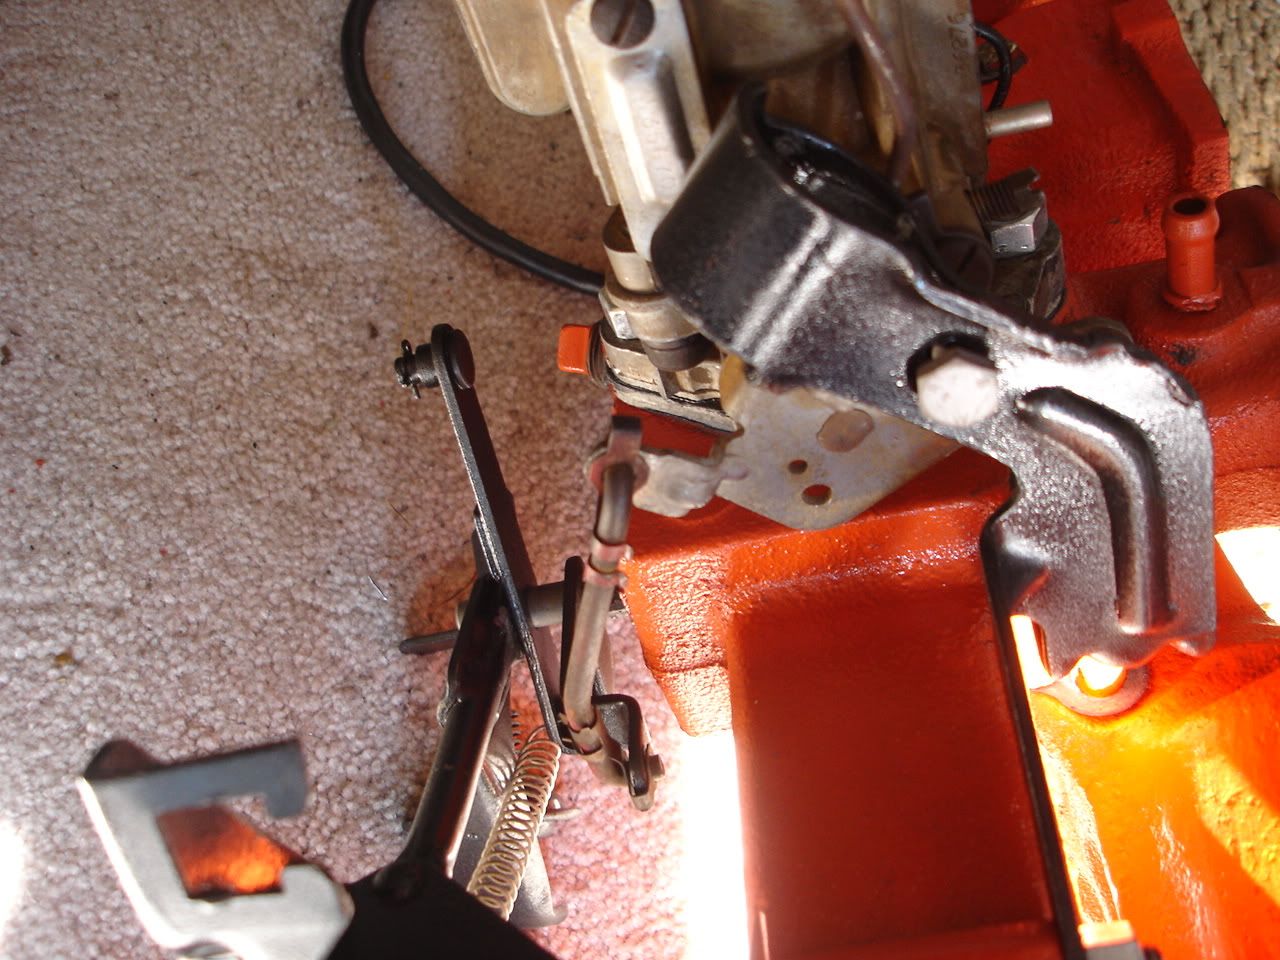 It hits the throttle 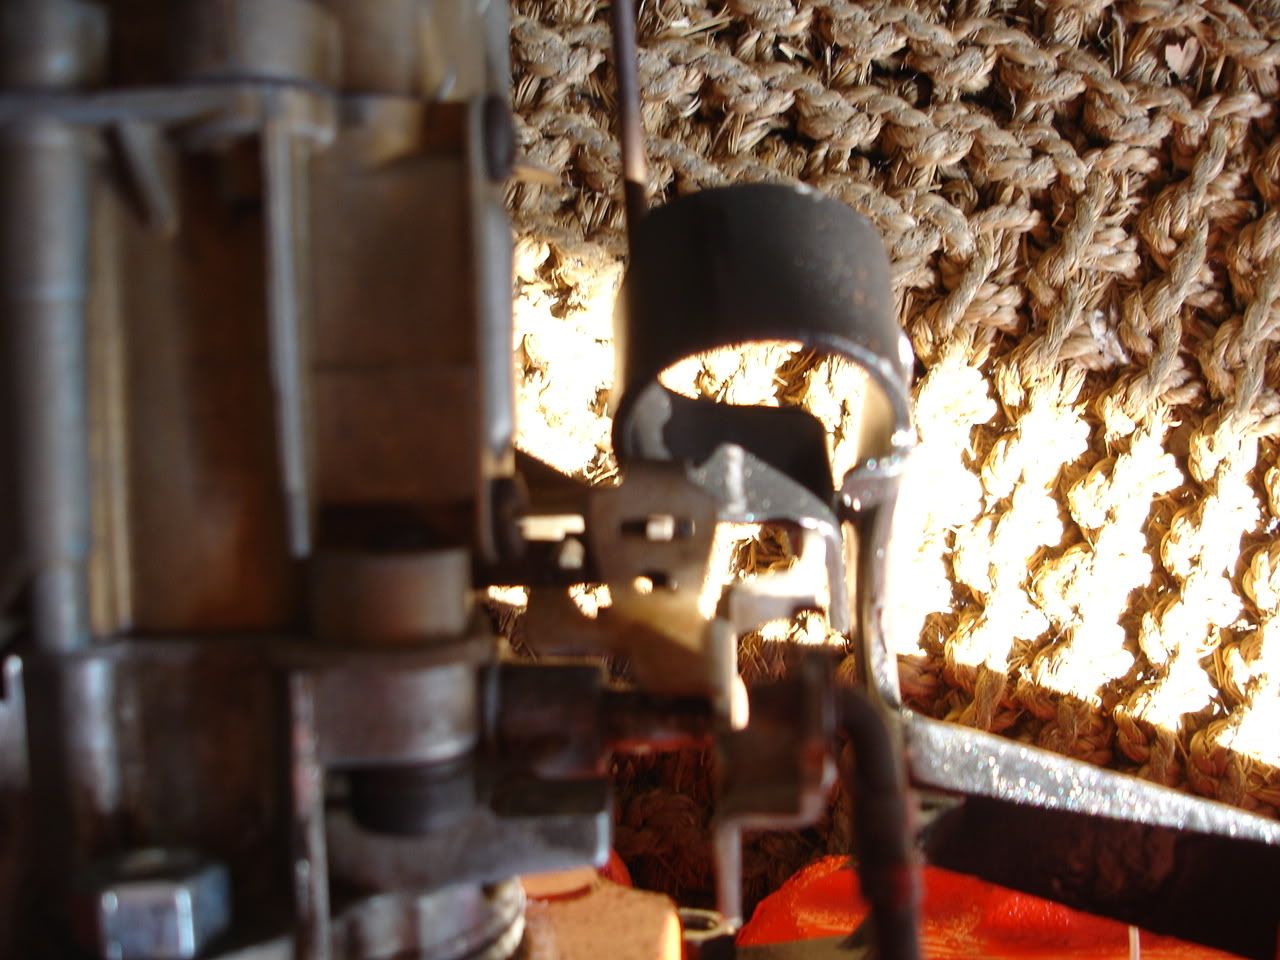 Just showing you what part actually moves to hit it 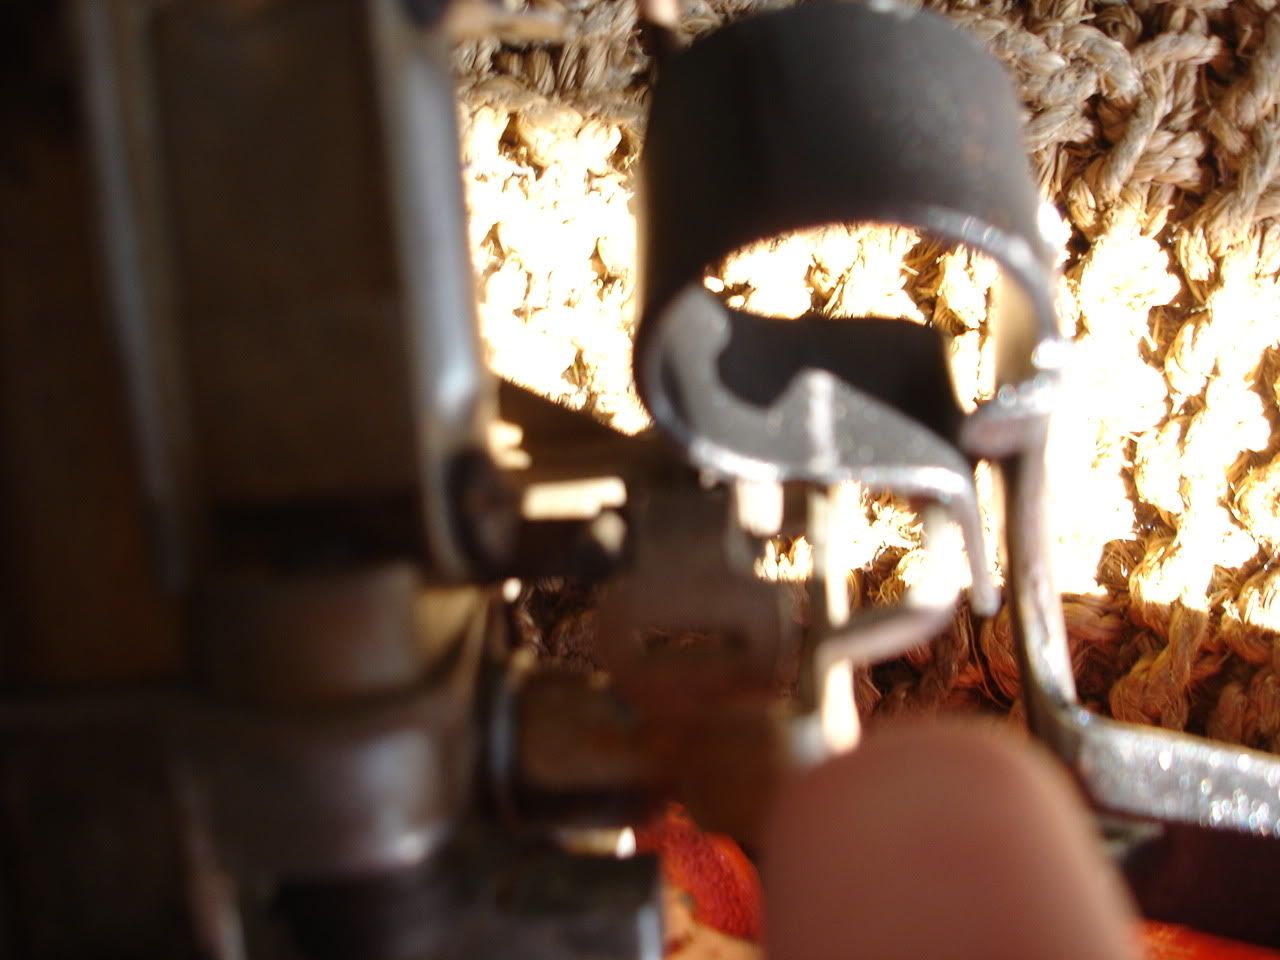 It's a little worse when I put the actual solenoid in there 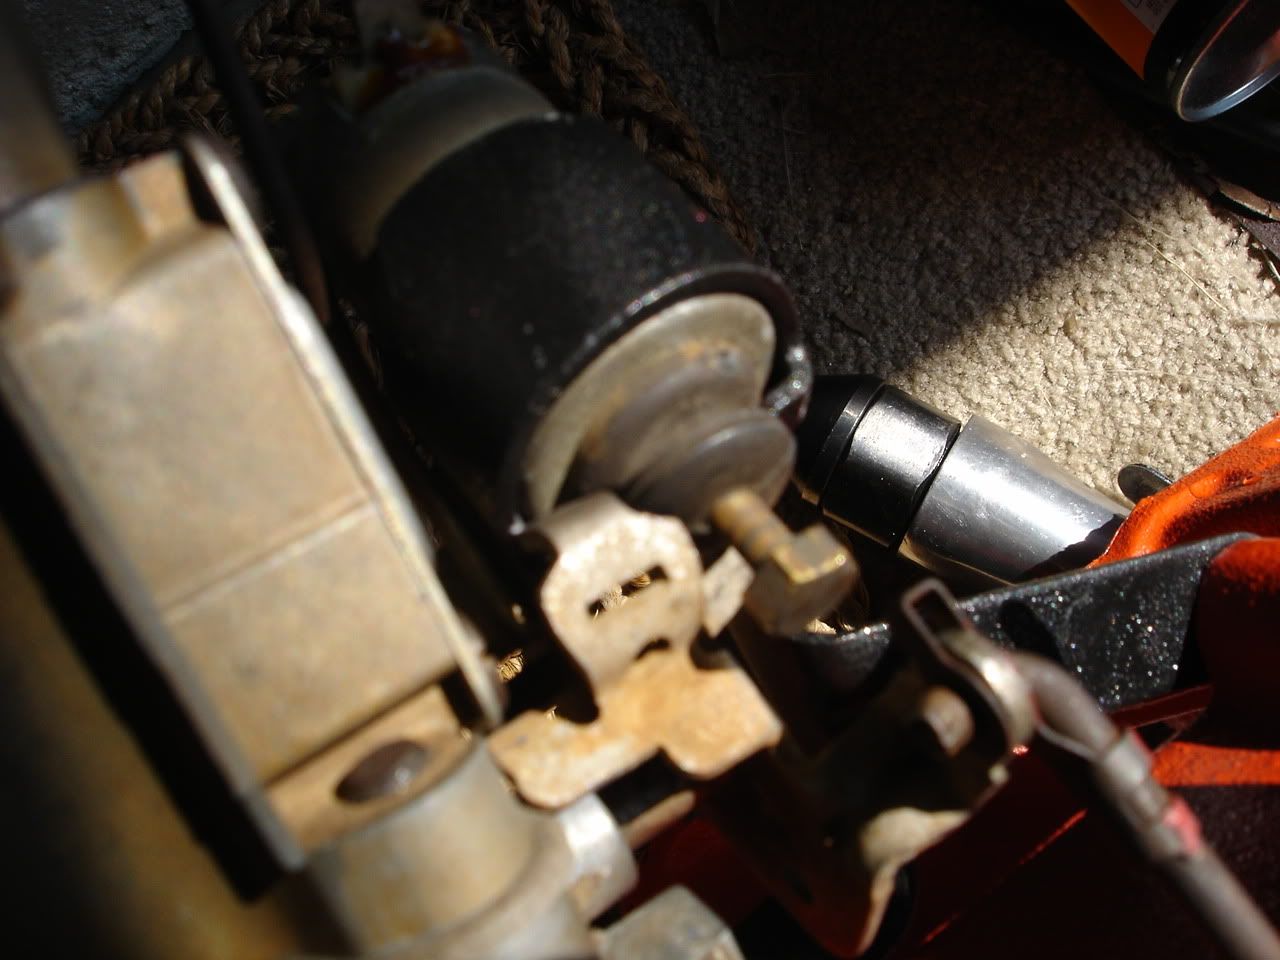 Here's that linkage 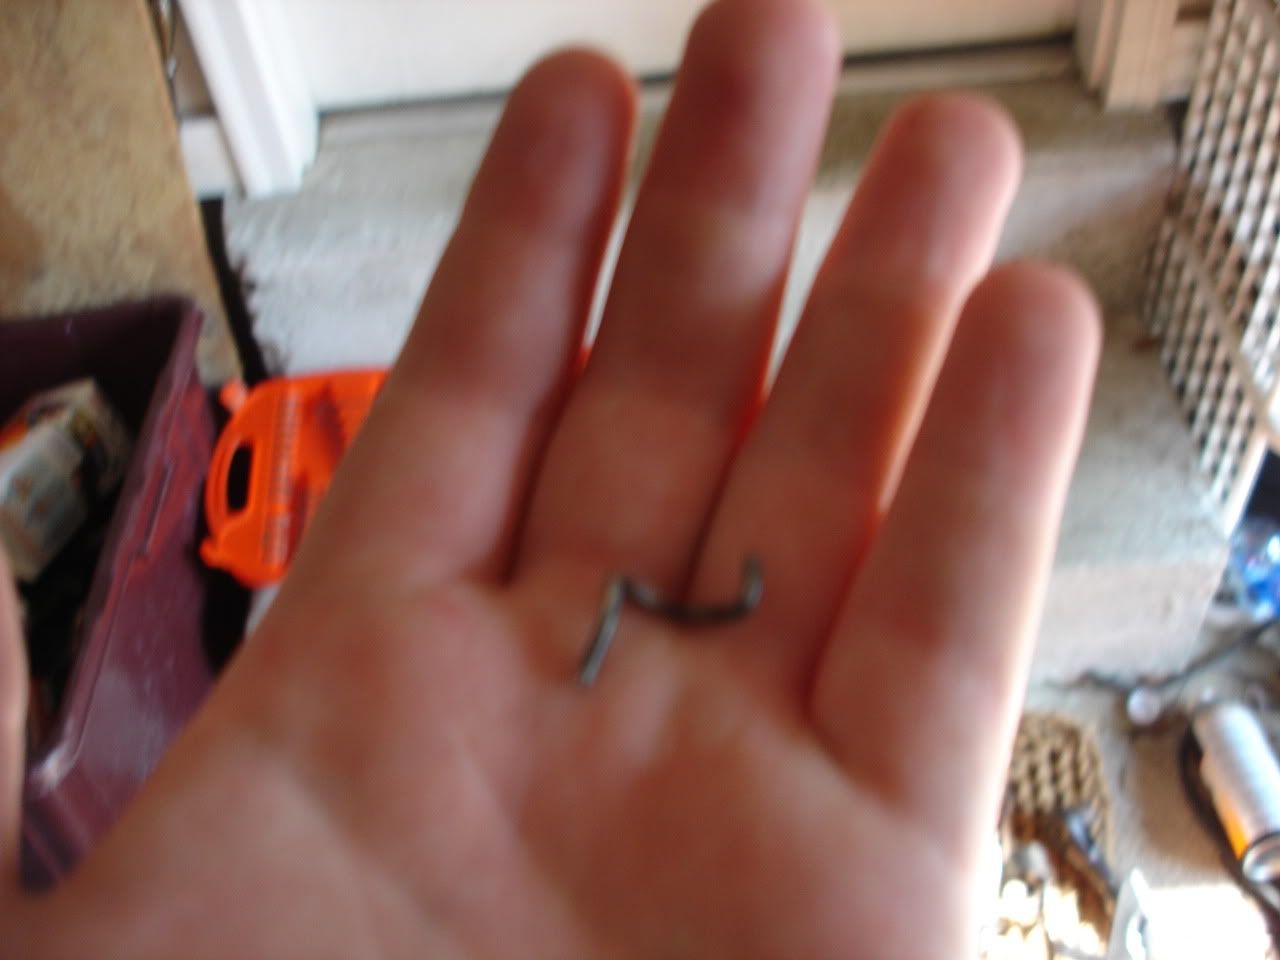 I think it attaches to that throttle plate and is pulled by that hook 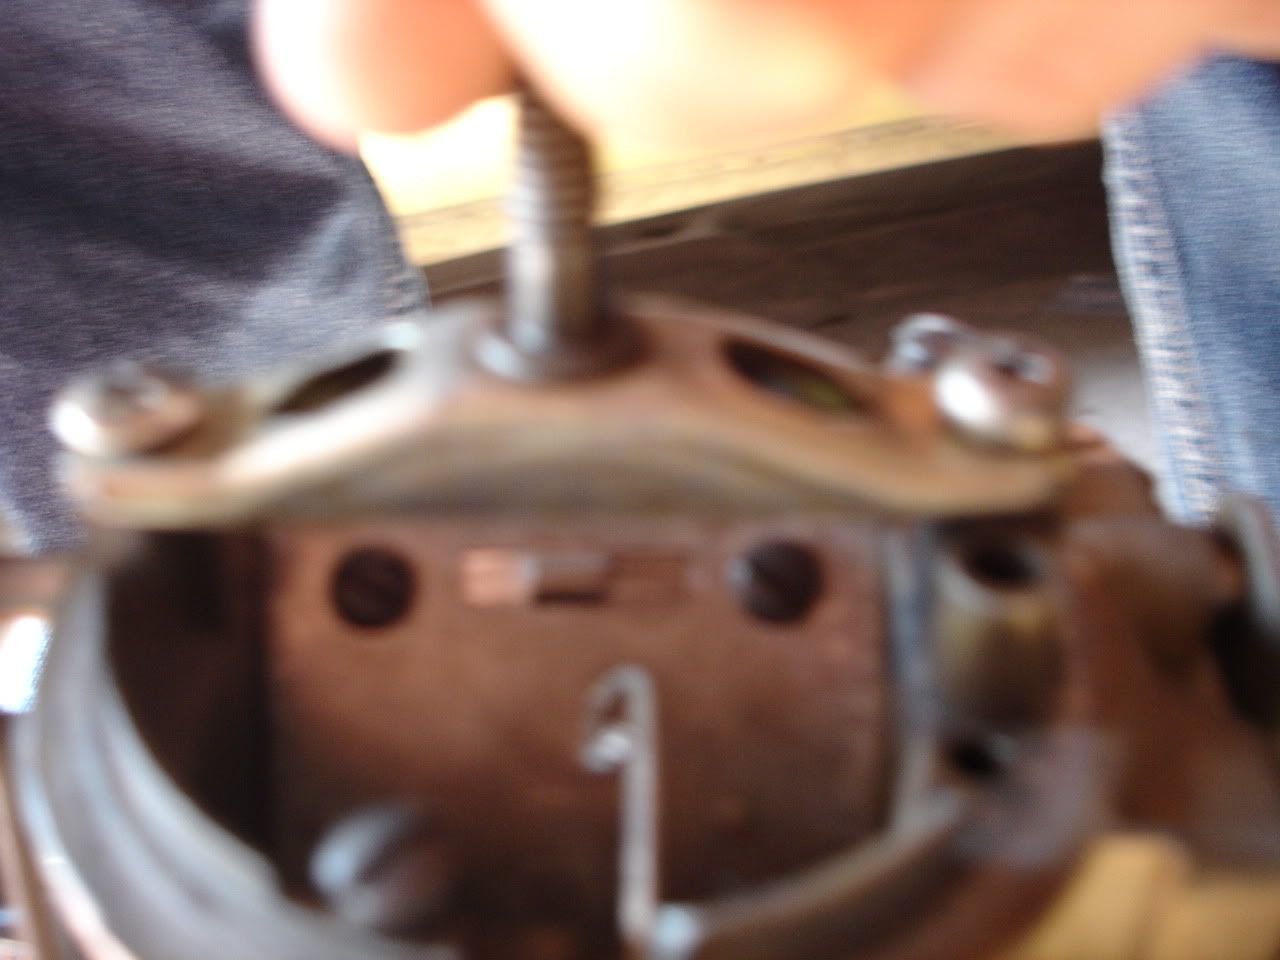 I repainted it to match with 500 Degree paint so lets just hope it slightly mixed with the 2000 degree paint or something and that it doesn't burn off. 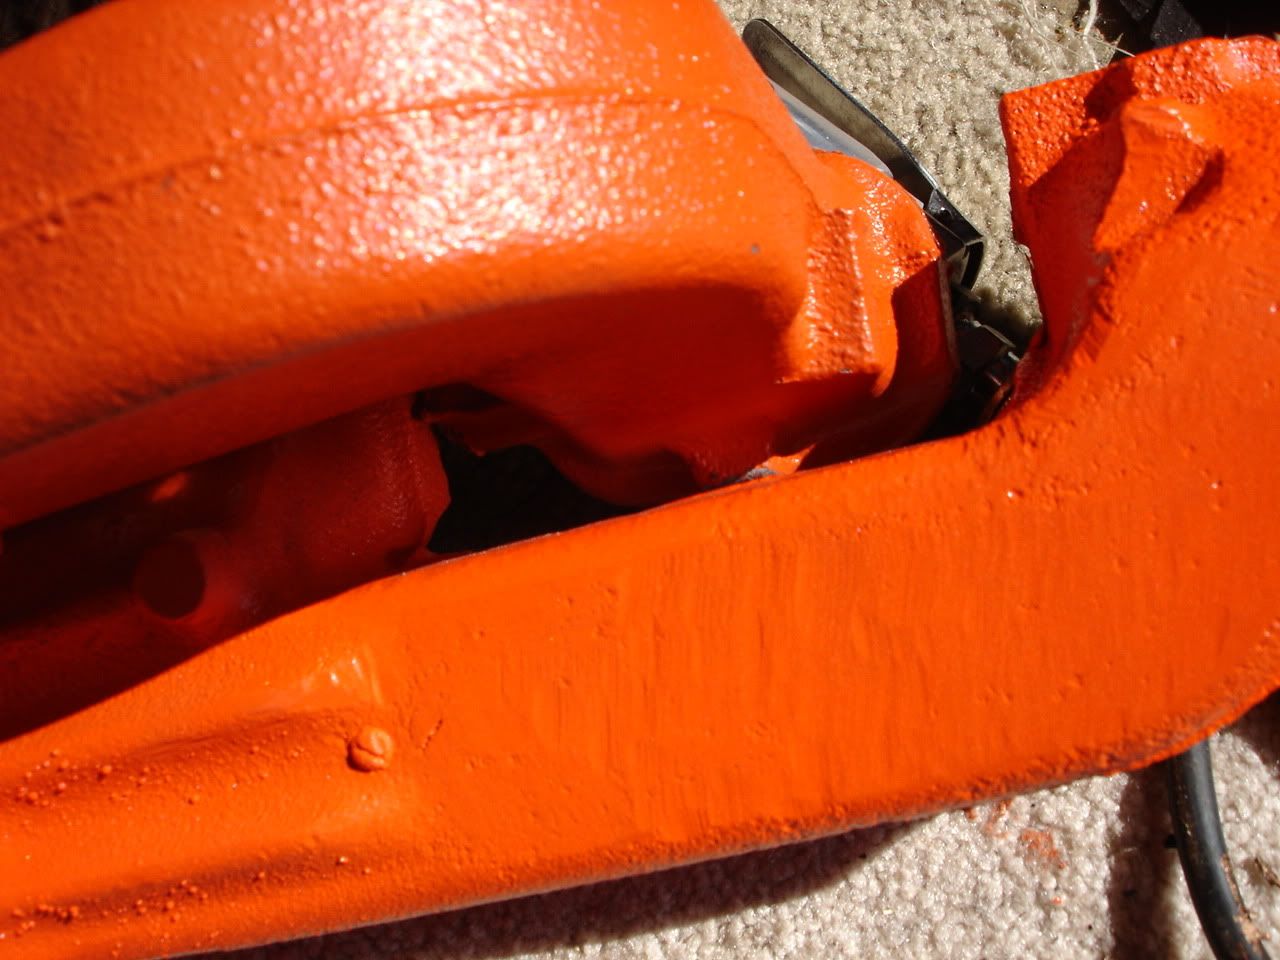
69 Buick Special Deluxe. Intercooled Turbo Chevy 250 @ 15psi on a stock long block. It's kinda fast.
|
|
|
|
|
Joined: Mar 2010
Posts: 623
Major Contributor
|
|
OP
Major Contributor
Joined: Mar 2010
Posts: 623 |
I just ended up bending the mount out of the way but I have some crappy news that I'm too tired to say all out right now so I'll make a video or post pics or something later.
69 Buick Special Deluxe. Intercooled Turbo Chevy 250 @ 15psi on a stock long block. It's kinda fast.
|
|
|
|
|
Joined: Mar 2010
Posts: 623
Major Contributor
|
|
OP
Major Contributor
Joined: Mar 2010
Posts: 623 |
Yay! Alright guys. Got it mostly back together but it's running!. The thing that I was too frustrated to type last night was that my paint hadn't cured yet and I didn't put in my float in correctly so it overflowed and ruined a good bit of the paint. I made a video for anyone who wants to see. http://www.youtube.com/watch?v=jfuUUpXLAQU
69 Buick Special Deluxe. Intercooled Turbo Chevy 250 @ 15psi on a stock long block. It's kinda fast.
|
|
|
|
|
Joined: Sep 2004
Posts: 5,839 Likes: 1
1000 Post Club
|
|
1000 Post Club
Joined: Sep 2004
Posts: 5,839 Likes: 1 |
Need to run a custom turbo set-up like this using your stock exhaust manifold. http://www.youtube.com/watch?v=xSB2uvlOOtQPrices; $60 in the turbo, $30 in pipe, $100 in the intake and $75 in the carb. Maybe another $50 in misc pieces. $100 in the exhaust." Thats a total of $415.00 That is not too much for the power increase as compared to a normally aspirated engine. Or a turbo set-up like this,which BTW ,will be the simplest set-up & should cost less for the complete used set-up,then have a downpipe made. Still useing your stock exhaust manifold to hook up to the turbine housing of the turbo. Can also use stock/modded intake manifold,to accept the 3 bolt flange from the compressor housing,instead of the two bolt stock carb studs post #4 http://www.turbobuick.com/forums/before-black-non-sfi-tech/312778-301-turbo-stuff-sale.htmlI have said it before & i'll say it again,If I would have turbo or supercharged my L 6 first time around of performance mods,,, I would have never wanted to try anything normally aspirated . The Pontiac 301 V-8 turbo set-up or Buick Regal V-6 set-up w/quadrajet carb,will be the best/easyiest thing to due for your L6. It will far out torque & out perform any simple 4bbl carb,headers,camshaft install you are thinking to install,period. Just need to save up a few dollars & take that minimal plunge to get into the boosted world. MBHD
12 port SDS EFI
|
|
|
|
|
Joined: Mar 2010
Posts: 623
Major Contributor
|
|
OP
Major Contributor
Joined: Mar 2010
Posts: 623 |
Now I have a new problem. The fast idle cam hits my throttle linkage before the actual idle screw so when its cold, it idles at 1800rpm and then as it gets warmer, it idles at 1500rpm. That's wayyy to fast for idle. What is going on??
69 Buick Special Deluxe. Intercooled Turbo Chevy 250 @ 15psi on a stock long block. It's kinda fast.
|
|
|
|
0 members (),
322
guests, and
33
robots. |
|
Key:
Admin,
Global Mod,
Mod
|
|
|
|