|
|
Joined: Jun 2005
Posts: 590
Major Contributor
|
OP

Major Contributor
Joined: Jun 2005
Posts: 590 |
I can tell you that when you think you have enough clearance, you don't, and when you hit the brakes hard the engine shifts forward quite a bit.
Add extra room, or you'll have to do it again. Thanks for the tip! I pulled the engine out Sunday afternoon. I had a hard time getting in there with the chisel, although it was a great idea. I notched that pan 1/2" less than what the moroso site called for b/c I was afraid of the notch interfering with the pickup. I formed and tacked a piece of 16 gauge sheet metal in there and put the engine back in the car. It is really close to clearing everything now. It seems that the only thing that is hitting is the castle nut on the tie rod end on the passenger side. I think I'll notch is as much as I can without it hitting the pickup. This will have to wait until after May 8th, as the inlaws are arriving from NH on Wednesday. I'll be on the road May 4 - May 8. Hopefully I'll be motivated and excited about working on this when I get back.
|
|
|
|
|
Joined: Apr 2004
Posts: 3,556 Likes: 35
1000 Post Club
|
|
1000 Post Club
Joined: Apr 2004
Posts: 3,556 Likes: 35 |
Inliner Member 1716 65 Chevelle Wagon and 41 Hudson Pickup Information and parts www.12bolt.com
|
|
|
|
|
Joined: Jun 2005
Posts: 590
Major Contributor
|
|
OP
Major Contributor
Joined: Jun 2005
Posts: 590 |
just got back from vacation. I've spent some time though practicing welding on sheet metal with the flux core welder I have.
I'm planning pulling the engine tonight and working on the oil pan over the next couple of days. Two of the biggest events of the year for my 'car club' are on the 22nd and 29th of this month. I'm going to be disappointed if I miss both of them.
Last edited by 63ChevyII; 05/11/10 03:04 PM.
|
|
|
|
|
Joined: Sep 2008
Posts: 3,669 Likes: 42
1000 Post Club
|
|
1000 Post Club
Joined: Sep 2008
Posts: 3,669 Likes: 42 |
Keep us posted on your progress.
Class III CNC Machinist/Programmer
|
|
|
|
|
Joined: Jun 2005
Posts: 590
Major Contributor
|
|
OP
Major Contributor
Joined: Jun 2005
Posts: 590 |
got home at 5pm last night from work. Worked on car from 5:30 to 12:30am, when I ran out of welder wire. I got the engine out and spent lots of time working of the oil pan. I have a couple of leaks to plug and have to move the drain plug to the back of the oil pan.
With a little luck, I'll finish up the welding on the oil pan put a thin coat of jb weld over the seams tonight, then sand and paint the pan tomorrow.
Tomorrow, I also hope to install the new fuel lines, work on the radiator mounts.
Fri plans - put oil pan & flexplate on and install engine, hopefully for the last time.
Last edited by 63ChevyII; 05/12/10 03:12 PM.
|
|
|
|
|
Joined: Apr 2004
Posts: 255
Contributor
|
|
Contributor
Joined: Apr 2004
Posts: 255 |
Best of luck man, I'm really excited to see your car with a 292 in it. Fluxcore can be a pain, but it sure gets the job done.
Anything else you have to do to finsih the install, besides the oil pan and install the engine?
Hope to see pics and vids!
-Sam.
1967 Chevy II, 2-door post.
250, 3-OTT.
1969 GMC 1/2-ton.
307, 3-OTT.
DD.
|
|
|
|
|
Joined: Jun 2005
Posts: 590
Major Contributor
|
|
OP
Major Contributor
Joined: Jun 2005
Posts: 590 |
ton more actually. Even with as hard as I'm working now, I'll be lucky to finish by June 1st.
|
|
|
|
|
Joined: Jun 2007
Posts: 66
Active BB Member
|
|
Active BB Member
Joined: Jun 2007
Posts: 66 |
hey 63chevyII have u 2 tried use exhaust pipe 4 the center link clearance issue? when i put a v8 in my 67 i looked at the moroso
pans 4 the novas using there mesurements, i used 3" pipe then put in vice and squeezed down 2 2.5" so it was now oval shaped, cut of what i did not need, added a s10 4.3 4x4 bottom 1/2 of pan 2 create a deep sump with the pump pick up 2 the stock pump.
lasted 4 yrs with no problems. made 2 others also. now i 2 am doing the same thing 2 my 67 using a 66 shell 2 do my mock up in
as i have a 3 sheeve balancer. i have modified the r. side mount so when i put it in this weekend, i want 2 c what i can do 2 make it look factory. pics will follow poss by mon. i have a pic on old pc at home where i saw one on ebay where a 63 had a 292 with somewhat decent pic of the right mount. the rad so is the other issue as i mite cut some core support and move rad outward some (not doing the elec fan thing) it's a race car. functionality be for bling. no hood latch as i use hood pins.
|
|
|
|
|
Joined: Apr 2004
Posts: 255
Contributor
|
|
Contributor
Joined: Apr 2004
Posts: 255 |
Thats what I meant - glad I'm not alone with using a piece of pipe to section into the pan.
Can't wait to see both of your guys' pics. My install will rest alot on the success of 63chevyII's install, and how he likes the big six in his car.
Keep at 'er1
-Sam.
1967 Chevy II, 2-door post.
250, 3-OTT.
1969 GMC 1/2-ton.
307, 3-OTT.
DD.
|
|
|
|
|
Joined: Jun 2005
Posts: 590
Major Contributor
|
|
OP
Major Contributor
Joined: Jun 2005
Posts: 590 |
I ending up wrapping a piece of 16 gauge steel around a 2.5 inch pipe.
|
|
|
|
|
Joined: Jul 2003
Posts: 230
Contributor
|
|
Contributor
Joined: Jul 2003
Posts: 230 |
Hey guys,,I've been looking to do this with a 65,,,can I go back to the beginning for a couple questions,, I know the passenger side mount has to change, but I thought the driver standard inline mount matched the 292,,?? did I see on here a mount that mounted to the block then had an arm that reached forward to the inline 6 perch/nub,,instead of the full v-8 change,,?
The oil pan,,, can I not use the standard chevy11 pan I have now,,, my engine right now is a 1974,, my machine shop made a jig to drill a dipstick hole into the pad on the earlier block, worked great, then I epoxied the rear original hole,,I figured I would do the same to the 292,, or is that pad not there,,,I haven't even been able to find a big six in my area to look at,,,
|
|
|
|
|
Joined: Jun 2007
Posts: 66
Active BB Member
|
|
Active BB Member
Joined: Jun 2007
Posts: 66 |
the left side mount's will still stay the same, the right side is what comes into question as most use the fab style (help me here 63chevyII & others) on the right side that relocates the mount back to the original location but u sacrafice the mech fuel pump, so then a elec pump comes in 2 play. as far as the use of the original pan yes! u can use it but where 2 put the dipstick (ha ha no pun inteaded) is up 2 the user. in the past on later blocks i have put them in the pan using the big block piece from the pan weld or braze in and also have done the drill bit style in the original location. now as for my style of right side mount, i had an old rusted frame that i cut the frame piece off of, the block mount was opened up so that it would clear the block and mount flush and in my pics as i laid the eng/trans combo in the holes all lined up just need now to pull it all out and put in race car weld up fame part then just somewhat down hill from there. also pay close attion 2 the balancer clearance issue between rad/pump pully/fan and such. i have at least 1/2- 3/4 space in all places. questions? keep asking i'm sure other's will answer also.
|
|
|
|
|
Joined: Jun 2007
Posts: 66
Active BB Member
|
|
Active BB Member
Joined: Jun 2007
Posts: 66 |
well i have the engine at work 2 day and will b changing the pan and p/up and some of the gaskets and paint it. would like 2 put in the race car this weekend but will c.
|
|
|
|
|
Joined: Jun 2005
Posts: 590
Major Contributor
|
|
OP
Major Contributor
Joined: Jun 2005
Posts: 590 |
progress is really slow, but I am getting a few things done. I am at the point were I pretty much have questions on everything I do. Vince has been a huge help and when he's not racing his fuel altered or working, he's out here helping me. Progress - pics may -june
Last edited by 63ChevyII; 06/08/10 03:34 PM.
|
|
|
|
|
Joined: Jun 2007
Posts: 66
Active BB Member
|
|
Active BB Member
Joined: Jun 2007
Posts: 66 |
hey 63, i'm with ya on the slo thing. put it in last week friday and took home on sat. now just get it 2 my buddies house 2 weld.
1 set back was a locked up left caliper
|
|
|
|
|
Joined: Jun 2007
Posts: 66
Active BB Member
|
|
Active BB Member
Joined: Jun 2007
Posts: 66 |
hey 63 did u use a 230/250 type damper cause i'm still gona use the 292 3 sheeve type. also another problem is the stock 292 alt bracket. i have only 1 and it's 1/4 shorter then the small block 6's. as i have mounted the small 6 alt bracket and the pulleys no line up unless i use a double pulley. the the end damper sheeve lines up with the outter sheeve alt pulley, so i will use the stock small 6 bracket 2 use only a single pulley
|
|
|
|
|
Joined: Jun 2005
Posts: 590
Major Contributor
|
|
OP
Major Contributor
Joined: Jun 2005
Posts: 590 |
hey 63 did u use a 230/250 type damper I believe you're not supposed to use a STD-LD damper on a 292. I am using a 2 groove 292 pulley. It's the one where the pulleys are close to the outer edges and there's a half inch between the pulleys. I just sent it back yesterday to have them move it out 1/8" on the hub so that everything lines up. I am using a BBC pulley on the waterpump and the alternator brackets from STD-LD (the 194 that was in there previously).
|
|
|
|
|
Joined: Jun 2007
Posts: 66
Active BB Member
|
|
Active BB Member
Joined: Jun 2007
Posts: 66 |
ok on the pulley (yours) its just i'm was going by what they said about smoothness (vibe) by using the bigger damper along with the bigger flexplate.
|
|
|
|
|
Joined: Jun 2005
Posts: 590
Major Contributor
|
|
OP
Major Contributor
Joined: Jun 2005
Posts: 590 |
when I get the damper back, will take some pics of the alignment with the BBC waterpump pulley and alternator (which I had converted to a 100 amp, 1 Wire).
|
|
|
|
|
Joined: Jun 2007
Posts: 66
Active BB Member
|
|
Active BB Member
Joined: Jun 2007
Posts: 66 |
hey 63 how's the rad situation going? i've got mine all welded up (frame mount), water pump b here tomorrow. have old on now for mock up. I'm tring not 2 modify the core support for rad because i do not won't 2 go the elec fan route
|
|
|
|
|
Joined: Jun 2005
Posts: 590
Major Contributor
|
|
OP
Major Contributor
Joined: Jun 2005
Posts: 590 |
ordering two 8" electric fans today probably. Plan to start fabricating a shroud this weekend.
|
|
|
|
|
Joined: Jun 2007
Posts: 66
Active BB Member
|
|
Active BB Member
Joined: Jun 2007
Posts: 66 |
|
|
|
|
|
Joined: Jun 2007
Posts: 66
Active BB Member
|
|
Active BB Member
Joined: Jun 2007
Posts: 66 |
well i worked on a core support 4 the 3core rad w/a 6 blade
custom fan (thin blade) w/plenty room at rad/fan/bottom pulley
made some support brackets 2day have 2 wait till i get them welded in and some final tweeking
|
|
|
|
|
Joined: Jun 2005
Posts: 590
Major Contributor
|
|
OP
Major Contributor
Joined: Jun 2005
Posts: 590 |
Progress has been slow... I have a 2 core crosswflow aluminum universal rad from summit. I also bought some nice brackets for mounting (http://home.earthlink.net/~2drcdan/id1.html). Another guy with an L6 has used this radiator and mounts with a mechanical fan with no problems. Problem is, he was using a 250 and from what I can tell, the waterpump snout on my 292 sticks out further. I'm guessing it sticks out further so the the fan can clear the larger harmonic balancer. There is no way I can use a mechanical fan with this radiator. There isn't even enough room in there for two 10" electrical fans, so I bought two 8" fans (rated at 2200cfm each, IIRC). I was planning on making a shroud for the fans and upon further inspection, it looks as though I will need to bolt everything up to the core support (rad, shroud, fans), then put the core support in the car. Which means, if the radiator or fans need to come out in the future, I'll need to pull the grill and everything else out. I'd like to avoid this if possible. If possible, I'd like to buy a HD L6 Nova radiator and use a mechanical fan. I know the HD L6 Rad will give me more clearance, but not sure if it will be enough for a mechanical fan. I'm a little upset since I already bought the aluminum radiator and can't return it. This is the HD radiator:  my original is like this one (notice the wide brackets):  Vince Vince convinced me that I should just install the 700R4 while we have everything apart. This of course means spending more money and more time off the road for the Nova. I better just do it now though, b/c with the hassle the 292 install has been, I may never want to take it off the road again  I pulled the powerglide out and got the 700R4 bolted up to the 292 in about 45 mins. Then I spent an hour trying to get the crossmember bolted up to the car. Since the 700R4 is larger, I think it may be hitting somewhere in the trans tunnel. The transmission mount that I bought is supposed to be 62-67 nova specific and drop the transmission down so that it doesn't hit the tunnel. I will give it another try tonight. 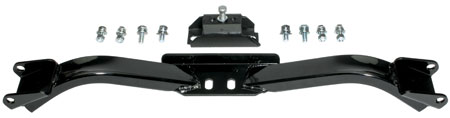
Last edited by 63ChevyII; 06/30/10 02:30 PM.
|
|
|
|
|
Joined: Jun 2005
Posts: 590
Major Contributor
|
|
OP
Major Contributor
Joined: Jun 2005
Posts: 590 |
so tonight I bolted the engine hoist up to the engine to pull the engine and tranny forward to try to figure out my crossmember problem.
Turns out the crossmember hits the floor before it is high enough to bolt to the car. CPP has a 30 day return policy. I've had the crossmember since March. I'm hoping they'll let me return or exchange it.
|
|
|
|
|
Joined: Jul 2003
Posts: 230
Contributor
|
|
Contributor
Joined: Jul 2003
Posts: 230 |
I had same rad/fan problems on my 65 chevy2,,,my rad looked like the original type,,, got it from us radiator,,it was a super cool 3 core,,,what I found with 250 water pump and a 1/4" alum spacer(the savior) from march pulleys,,(it wasn't cheap,,,)put the spacer about 1" away from the core,then the fan and bolts,,anything less the blades smacked the damper,,2 grooves,,the original 1 groove cleared, the fan was another concern, I got a nylon flex to fit but the big one hit the tranny fittings and the small one too small,no flex fan fit all the arcs on the blades hit the damper, and steel ones with no flex didn't work either the front tips of the blades are out farther than the center hub,,it was way to close to the tanks for comfort,I found a universal steel at autozone that was flat across the face and fit,, I picked the larger to get side to side on the rad, but it did not allow use of the tranny fitting,, even with the tightest 90 I could find,,,
|
|
|
|
|
Joined: Jun 2005
Posts: 590
Major Contributor
|
|
OP
Major Contributor
Joined: Jun 2005
Posts: 590 |
I think I will be able to use a mechanical fan with the HD L6 radiator and the 2 groove balancer I have. It is going to be close, but I won't know for sure until I test fit everything. After poking around on a few websites, I figured out that the tranny crossmember is actually made by Bowtie Overdrives. Here is an email I got from them: WE MANUFACTURE IT .. YOU CAN SEND IT TO US SO WE CAN CHECK IT OUT ON THE JIG OR SEND IT BACK TO CPP AND GET ANOTHER ONE .. POSSIBLE IT MOVED DURING WELD PROCESS.. NON OF THE X MEMBERS WE SELL EXCLUDE ANY EXHUAST MODS IF YOU HAD PRE EXISTING EXHAUST.. Hopefully CPP will take it back, if not though, it looks like BTO will.
Last edited by 63ChevyII; 07/01/10 05:16 PM.
|
|
|
|
|
Joined: Apr 2004
Posts: 3,556 Likes: 35
1000 Post Club
|
|
1000 Post Club
Joined: Apr 2004
Posts: 3,556 Likes: 35 |
We, put a 700 R4 in my Bro's 67 ChevyII and I made the rear xmember. Used 1.5 x 3" tubing. Bent a wire to fit from side to side and then cut/ welded the tubing as needed. Took 2 hrs.
On my car (65 Elcamino) , There was not room for mech fan, used 3 fans positioned around the nose of WP. They have had no problem keeping up. My bro also uses 1 large elec fan on his II. works great.
Inliner Member 1716 65 Chevelle Wagon and 41 Hudson Pickup Information and parts www.12bolt.com
|
|
|
|
|
Joined: Jun 2005
Posts: 590
Major Contributor
|
|
OP
Major Contributor
Joined: Jun 2005
Posts: 590 |
It's been a frustrating few days. I traded in the tubular style crossmember for a sheet metal style one.  The crossmember bolted up fine, but when I add the tranny mount, the transmission hits the tranny tunnel in three places.  The direct fit/replacement radiator I got doesn't actually just bolt in. I will have to drill some holes in the core support to mount it. Not that big of a deal, but a little frustrating when you pay extra for the 'direct fit' aspect.  To top it off, I got asked if my car could be used in an HP commercial that is probably being filmed as I type this. These jobs usually pay pretty well from what I hear...  oh well, vent over 
|
|
|
|
|
Joined: Jul 2003
Posts: 230
Contributor
|
|
Contributor
Joined: Jul 2003
Posts: 230 |
mmmmmm, that's the same flat style member I used in my 65,,,no problems at all,,where is it hitting,,I'll look at mine when I get home and check back,,
|
|
|
|
|
Joined: Jun 2007
Posts: 66
Active BB Member
|
|
Active BB Member
Joined: Jun 2007
Posts: 66 |
|
|
|
|
|
Joined: Jun 2007
Posts: 66
Active BB Member
|
|
Active BB Member
Joined: Jun 2007
Posts: 66 |
ya the fan brackets i was using broke 2yrs ago w/the old 6
mite know it was friday the 13th! but its fixed a still holds water and temp 165-180 w/a 160 stat
|
|
|
|
|
Joined: Jun 2005
Posts: 590
Major Contributor
|
|
OP
Major Contributor
Joined: Jun 2005
Posts: 590 |
Last edited by 63ChevyII; 07/26/10 06:09 PM.
|
|
|
|
|
Joined: Apr 2004
Posts: 3,556 Likes: 35
1000 Post Club
|
|
1000 Post Club
Joined: Apr 2004
Posts: 3,556 Likes: 35 |
Atleast you have a schedule! Keep up the good work. Maybe you will get to drive it before the snow fly's. Oh wait, you probably don't get snow.
Looking at your site ( very nice), do not see any write up details on the 292. Carb, cam, exh , intake ect. Just more fun reading. Tom
Inliner Member 1716 65 Chevelle Wagon and 41 Hudson Pickup Information and parts www.12bolt.com
|
|
|
|
|
Joined: Jun 2005
Posts: 590
Major Contributor
|
|
OP
Major Contributor
Joined: Jun 2005
Posts: 590 |
Atleast you have a schedule! Keep up the good work. Maybe you will get to drive it before the snow fly's. Oh wait, you probably don't get snow.
Looking at your site ( very nice), do not see any write up details on the 292. Carb, cam, exh , intake ect. Just more fun reading. Tom Thanks Tom. I do some freelance web design when I have the time or need the $ for my car. I plan on doing more detailed writeups on the car once I get it up and running. I'm taking lots of pictures along the way, so I'll have plenty of material to work with when the time comes.
|
|
|
|
|
Joined: Jun 2005
Posts: 590
Major Contributor
|
|
OP
Major Contributor
Joined: Jun 2005
Posts: 590 |
Made some progress on the nova over the last couple of weeks, mostly related to heater box, trunk, and fan cleanup and refinishing. pics here: 63ChevyII.com Pics, 07.25.10 - 08.14.10 I was hoping to get the flexplate and torque converter installed today, but hit a bit of a snag. The 292 flexplate I bought a few months ago and 700R4 torque converter patterns don't match up. Looks like I will be drilling the old 194 flexplate for the alignent dowels, unless I can figure something else out.
|
|
|
|
|
Joined: Sep 2004
Posts: 5,839 Likes: 1
1000 Post Club
|
|
1000 Post Club
Joined: Sep 2004
Posts: 5,839 Likes: 1 |
Nice work!
Those fixed 4 bladed fans suck/push a lot of air!
MBHD
12 port SDS EFI 
|
|
|
|
|
Joined: Jun 2005
Posts: 590
Major Contributor
|
|
OP
Major Contributor
Joined: Jun 2005
Posts: 590 |
Nice work!
Those fixed 4 bladed fans suck/push a lot of air!
MBHD Thanks - next time I think I'll take the heater to the sandblaster/power coating shop... that was a ton of work.
|
|
|
|
0 members (),
325
guests, and
48
robots. |
|
Key:
Admin,
Global Mod,
Mod
|
|
|
|


