|
|
Joined: Jan 2013
Posts: 133
Contributor
|
OP

Contributor
Joined: Jan 2013
Posts: 133 |
Thank you! I hope my Saginaw holds together... I'm not looking forward to cutting up the frame for a T-5. I may also look into a Muncie M21 if things go South. It should be able to take the stress.
I'll look into the Mustang front end. I like the idea.
The exhaust idea makes sense. I may take a trip to Pick-n-Pull one of these days to look for the XJ6. Definitely the cheapest option. What headers are you running on your 302? I'll most likely have to build a set of steel tube headers for mine. Also, what are your recommendations for mufflers- if any.
Thanks so much guys!
Pete
--Peter Gray: #6073--
"If at first you don't succeed,
Try, try again."
-William Edward Hickson
|
|
|
|
|
Joined: Nov 2012
Posts: 551
Major Contributor
|
|
Major Contributor
Joined: Nov 2012
Posts: 551 |
i was fortunate to find a tremec 5 speed cheap maybe lookinto one of those if you feel like saving your pennies 
Josh
72 gmc lwb air ride 5 speed (soon) turbo 292 II# 6102
|
|
|
|
|
Joined: May 2003
Posts: 218
Contributor
|
|
Contributor
Joined: May 2003
Posts: 218 |
My suggestion about using an old Jag XJ6 exhaust system includes using all the pipes and mufflers. There are two mufflers on each side. Everything is made of stainless steel. There is no rust or deteriation on these parts. The pipes are 1.75 OD and they work better than anything I have tried so far. They sound is fairly quiet yet you can hear them.
As for headers, I make my own. The dual headers I now use are made from 1.5 OD tubing on the single port and 1.626 tubing on the siamese port. They are 17.5 inches long and merge into a 1.75 OD collector with a Flange at the end. The exhaust pipes are 1.75 as well. When I drag race the car I disconnect the system at the mufflers. It sounds like a B-29 going down the track. My best 1/4 mile is 15.9 sec. and 89 mph. I do the 1/8 mile in 10 sec. and 70 mph.
Good luck with your car. Frank
FranK Hainey
|
|
|
|
|
Joined: Oct 2007
Posts: 5,015 Likes: 47
1000 Post Club
|
|
1000 Post Club
Joined: Oct 2007
Posts: 5,015 Likes: 47 |
What years XJ6 would we look for?
"I wonder if God created man because he was disappointed in the monkey?" Mark Twain
|
|
|
|
|
Joined: Jan 2013
Posts: 133
Contributor
|
|
OP
Contributor
Joined: Jan 2013
Posts: 133 |
What he said. ^^ Haha, Beater beat me to it.
Thanks Frank! I'll definitely look into the XJ6 exhaust. Cheap, easy, bolt in. I like it.
Thanks Josh! I've seen the Tremecs around, never knew they would fit. My hopes are high with the Saginaw though. I'd hate to nestle it in there and have it blow up. Fingers crossed!
Thank you!
Pete
Last edited by BlackJackPG; 04/17/13 12:28 AM.
--Peter Gray: #6073--
"If at first you don't succeed,
Try, try again."
-William Edward Hickson
|
|
|
|
|
Joined: May 2003
Posts: 218
Contributor
|
|
Contributor
Joined: May 2003
Posts: 218 |
The XJ6 exhaust system I used was out of an early version because it did not have a catalitic converter. There are 3 series : S1 68-73, S2 73-79 and S3 79-87.
It is not a bolt in type job. You will have to custom hand fit the pipes and mufflers into your car. But, you will have to do this anyway with plane old steel pipe and mufflers. It is cheep and made of high quality stainless steel - but not easy or bolt in.
FranK Hainey
|
|
|
|
|
Joined: Jan 2013
Posts: 133
Contributor
|
|
OP
Contributor
Joined: Jan 2013
Posts: 133 |
Okay, well things are rarely that way. I still like it.
Thanks for the help!
Pete
--Peter Gray: #6073--
"If at first you don't succeed,
Try, try again."
-William Edward Hickson
|
|
|
|
|
Joined: May 2000
Posts: 1,464
1000 Post Club
|
|
1000 Post Club
Joined: May 2000
Posts: 1,464 |
A fellow at a swap meet was selling a pile of stainless steel exhaust pipes - actually the stingers from the rear of Mustang GTs, take offs. I bought the whole pile, cut and fit them into a system for my '46 truck, welded the entire system up solid with Flowmaster series 50 stainless mufflers and now have a lifetime exhaust system for not a lot of money. Check with your local muffler shop. Sometimes they have a barrel of scrap cut-offs thay will sell cheap. 
Last edited by THE FRENCHTOWN FLYER; 04/18/13 05:58 PM.
FORD 300 inline six - THE BEST KEPT SECRET IN DRAG RACING!
|
|
|
|
|
Joined: Oct 2007
Posts: 5,015 Likes: 47
1000 Post Club
|
|
1000 Post Club
Joined: Oct 2007
Posts: 5,015 Likes: 47 |
Those look nice! Good tip.
"I wonder if God created man because he was disappointed in the monkey?" Mark Twain
|
|
|
|
|
Joined: Jan 2013
Posts: 133
Contributor
|
|
OP
Contributor
Joined: Jan 2013
Posts: 133 |
Wow! Those are beautiful! Another good idea! Let the engine rebuild begin! 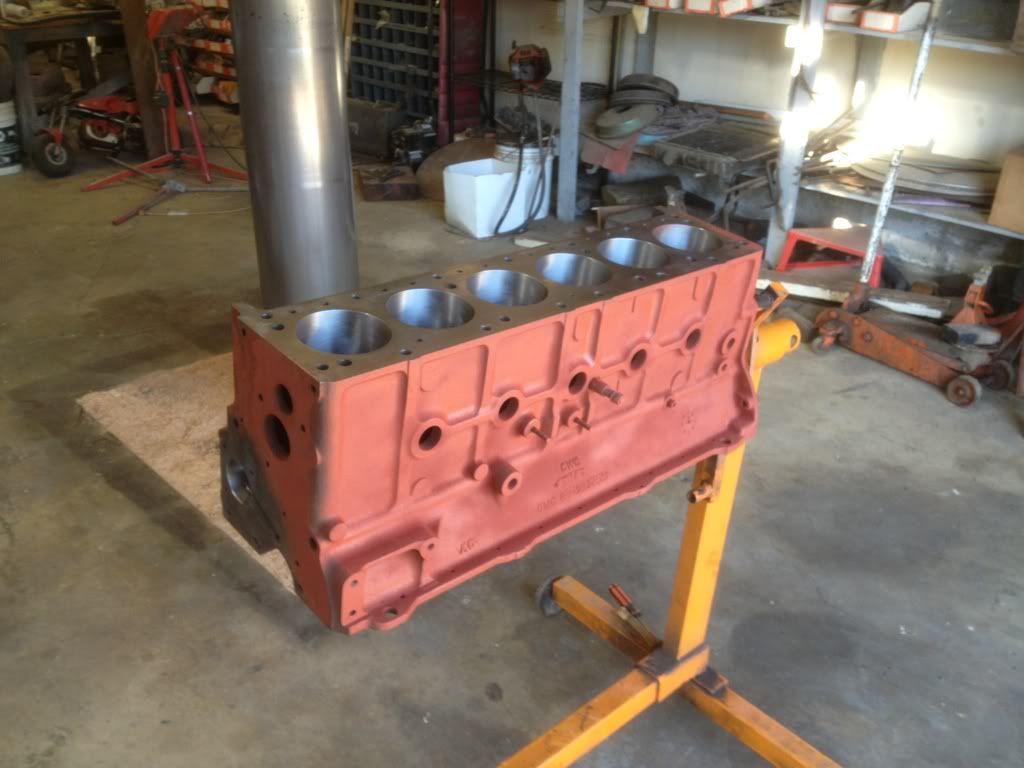 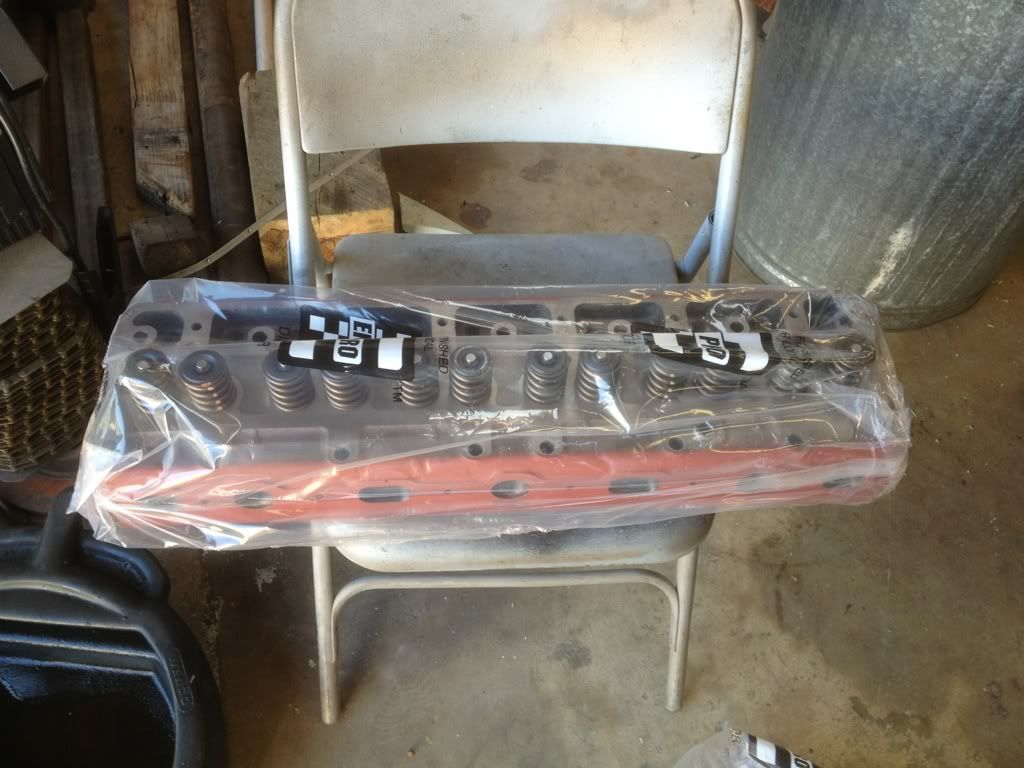 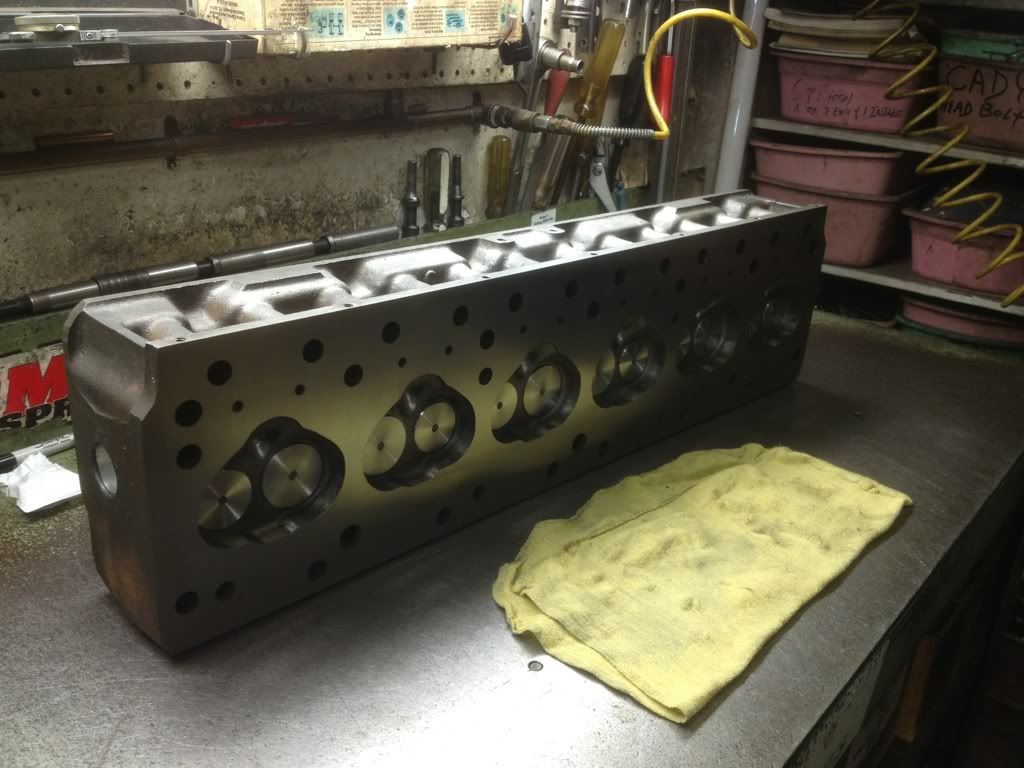 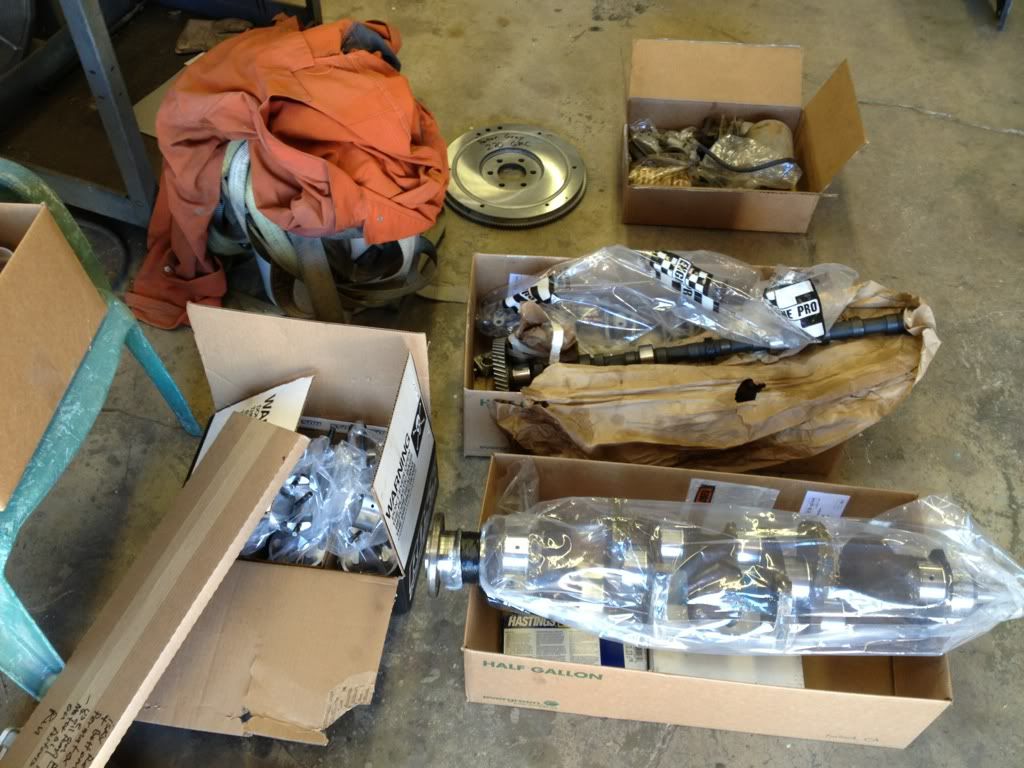 Woohoo! Pete
--Peter Gray: #6073--
"If at first you don't succeed,
Try, try again."
-William Edward Hickson
|
|
|
|
|
Joined: Oct 2007
Posts: 5,015 Likes: 47
1000 Post Club
|
|
1000 Post Club
Joined: Oct 2007
Posts: 5,015 Likes: 47 |
There is something really exciting about clean fresh engine parts begging to be assembled. I can almost smell them from here! 
"I wonder if God created man because he was disappointed in the monkey?" Mark Twain
|
|
|
|
|
Joined: Jan 2013
Posts: 133
Contributor
|
|
OP
Contributor
Joined: Jan 2013
Posts: 133 |
Haha, it's like Christmas! Even for a 79 year old! Yesterday was kind of traumatic. We went to put in the crankshaft and realized that we did not have the main bearing caps. Then we tried to do the next best thing and put the cam shaft in. We then realized that the camshaft was too far in. After a few hours of cussing and a trip to Rocket Motors to see Rockey Marino (I think he's on this site) we realized that we didn't have the backing plate underneath, so we put that it lined right up. Then after a trip to the engine builder (Thanks John for coming down after hours!) to get the main caps. Everything flew together in a matter of hours. We're still mising two of the rod bearings, so that's why the picture shows 4 pistons all the way up at once, but I'm sure those will turn up eventually. They're probably up at the engine builder aswell. They're not that crucial now. We can go ahead and put the head, rocker arms, tappats etc. in and bolt up the last two rods on monday. Anyhow, that's where we're at, more to come today! 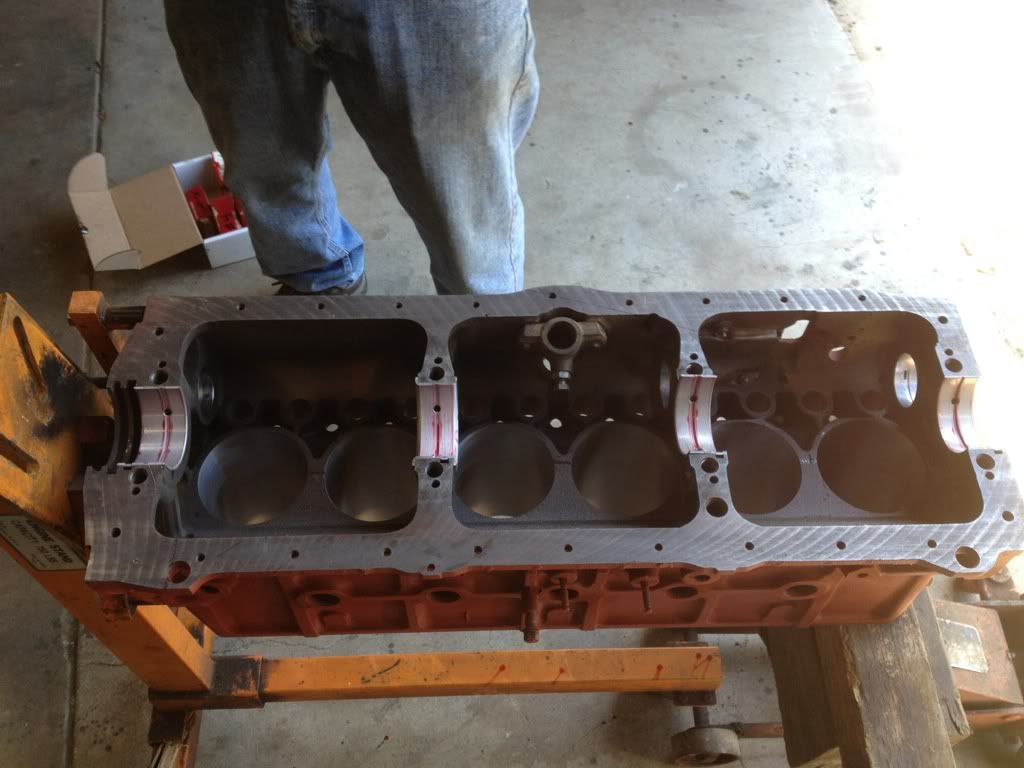 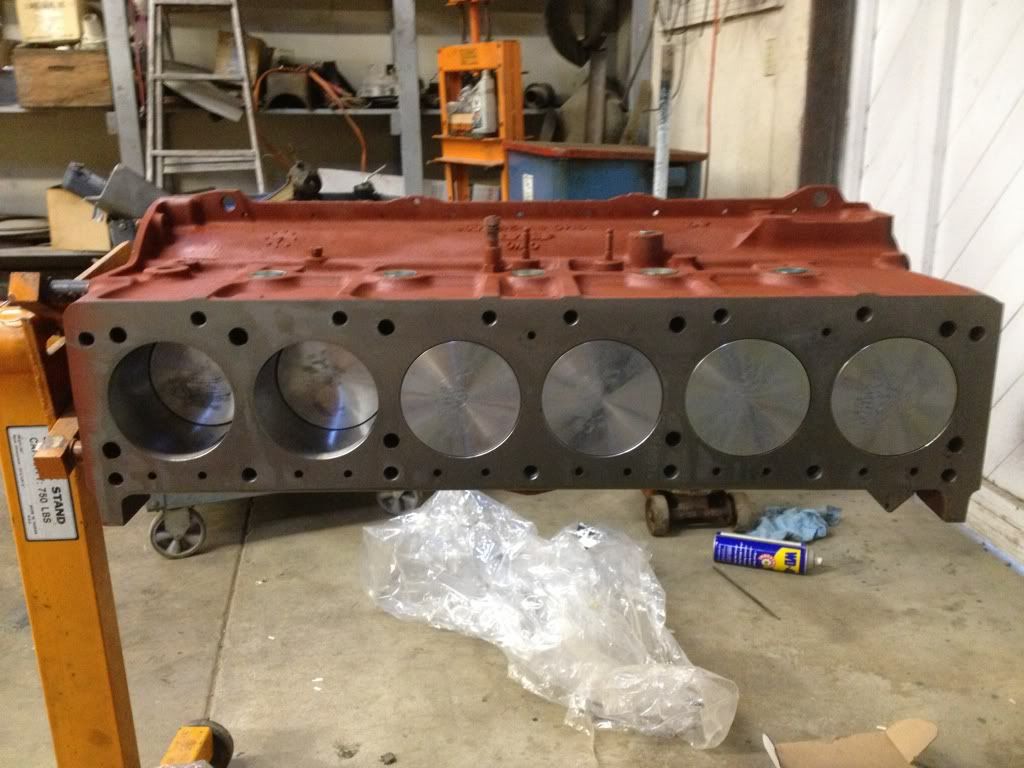 Thanks! Pete
--Peter Gray: #6073--
"If at first you don't succeed,
Try, try again."
-William Edward Hickson
|
|
|
|
|
Joined: Jan 2013
Posts: 133
Contributor
|
|
OP
Contributor
Joined: Jan 2013
Posts: 133 |
Today was interesting. We dinged around with the Cam Shaft even more, realizing that there was a little oil dripper above the timing gears. After looking at and reading a few manuals, we realized that ours was different than the one in the manual. Our manual shows that the one end above the timing gear is crimped down to increase pressure. Ours is wide open. What do you guys think? Did what I just say make any sense at all? About noon, we got a call from a good friend of ours. He was down at a swap meet in Sacramento, Ca and saw a Nicson 2X1 intake w/ heat for a 270 GMC. He wanted to know if he should buy it. I almost dropped the phone. The guy wanted $375. After some haggeling, we could only get him down to $350. Pretty expensive, but the way I see it, it has two Rochester single barrels on it- throttle linkage and everything. $25 buck a piece for rebuild kits and I see them rebuilt going for $250 bucks on ebay. I think rebuilt with linkage, I'd put them up for $350 and see if I get any bites. That should re-coupe some of the money... I then tore apart our two Zenith Carburetors and stuck them in an over-night bucket of Carburetor Cleaner while my grandpa took apart and cleaned up the distributor. Oh yeah, and we put on the head. We're still waiting on the last two sets of rod bearings (will pick those up tomorrow most likely.) Then we can put everything else on.   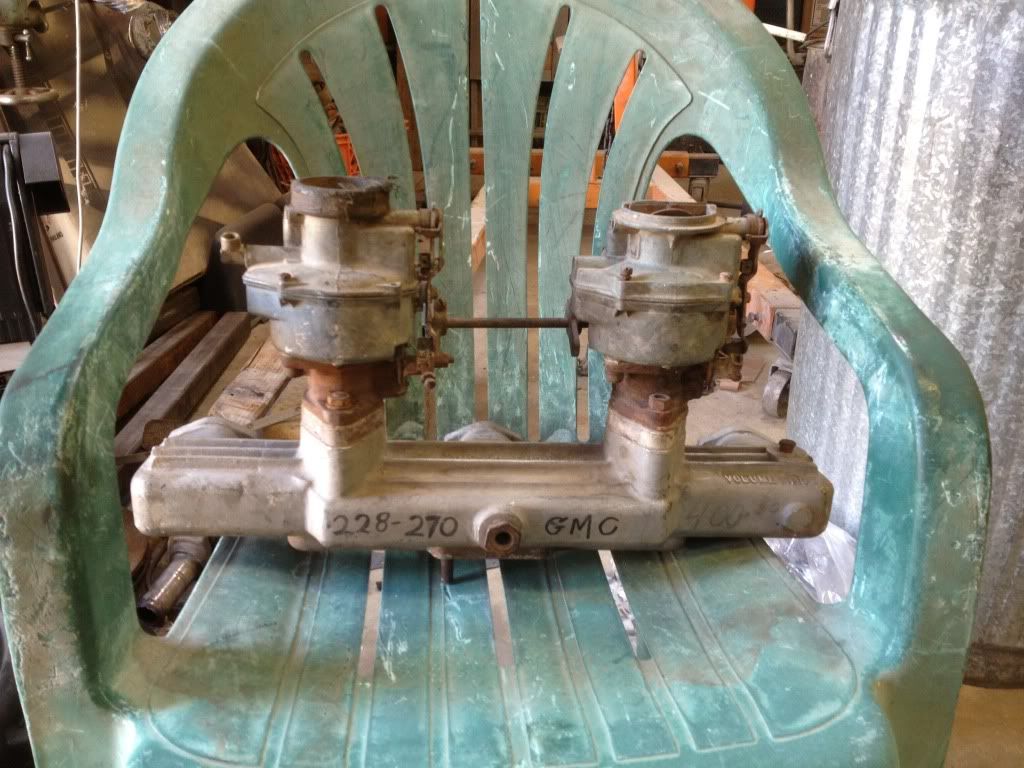 Man, I'm excited about that intake! I've been looking for one of those for almost a year now! Good timing too! Thanks! Pete
Last edited by BlackJackPG; 04/22/13 01:30 AM.
--Peter Gray: #6073--
"If at first you don't succeed,
Try, try again."
-William Edward Hickson
|
|
|
|
|
Joined: Aug 2003
Posts: 1,905
1000 Post Club
|
|
1000 Post Club
Joined: Aug 2003
Posts: 1,905 |
The Oil Feed Tube on the front engine plate should be crimped to a 1/32 to 1/16 opening. You can just eye ball it if you want. It is not a high pressure feed.
Drew
Mid-Atlantic Chapter
|
|
|
|
|
Joined: Jan 2013
Posts: 133
Contributor
|
|
OP
Contributor
Joined: Jan 2013
Posts: 133 |
Great, will do! Thanks Drew!
Pete
Last edited by BlackJackPG; 04/22/13 10:39 AM.
--Peter Gray: #6073--
"If at first you don't succeed,
Try, try again."
-William Edward Hickson
|
|
|
|
|
Joined: Oct 2007
Posts: 5,015 Likes: 47
1000 Post Club
|
|
1000 Post Club
Joined: Oct 2007
Posts: 5,015 Likes: 47 |
That is a good deal for the Nicson intake. I'v never had a Nicson for a GMC. Like Drew said on the oil tube. It doesnt take a lot of oil to lube the gears and you don't want all of your oil to go there. I'm getting ready to rebuild a pair of Zeniths for my 4 cylinder.
"I wonder if God created man because he was disappointed in the monkey?" Mark Twain
|
|
|
|
|
Joined: Jan 2013
Posts: 133
Contributor
|
|
OP
Contributor
Joined: Jan 2013
Posts: 133 |
Thanks guys! According to my books and a few friends, those Zeniths have the best flow. (Strombers BXOV-2's are a close second.) Good carburetors. I was able to pop on down to the shop for about an hour today, so grandpa and I put the cam shaft in after crimping the oil feed (thanks Drew & Beater!) Also put the tappets, push rods and rocker arms in. The rocker arm mounts were not in the right spots (because a few of them were cracked and replaced), so we took it apart, drilled a couple holes for oil to squirt and put them back together. (pictures w/ rocker arms to come.) Also, Zenith Carburetor rebuild kits to come tomorrow morning, as well as our new rod bearings (had to order new ones) and at long last our front shock absorbers! The last piece to get a rolling frame. Anyhow, movin' along!  One more thing, anyone have some wisdom on how to go about refurbishing one of these aluminum intakes? How to safely strip the paint off, possibly polish it up nice and shiny? Thanks! Pete
Last edited by BlackJackPG; 04/22/13 10:29 PM.
--Peter Gray: #6073--
"If at first you don't succeed,
Try, try again."
-William Edward Hickson
|
|
|
|
|
Joined: Nov 2012
Posts: 551
Major Contributor
|
|
Major Contributor
Joined: Nov 2012
Posts: 551 |
thats awesome man you guys are catvhing my very q2uickly and i am jealous 
Josh
72 gmc lwb air ride 5 speed (soon) turbo 292 II# 6102
|
|
|
|
|
Joined: Jan 2013
Posts: 133
Contributor
|
|
OP
Contributor
Joined: Jan 2013
Posts: 133 |
Thanks Josh! Haha, things tend to go pretty quick if your high school graduation is on the line.  Last two sets of rod bearings are in. Oil pump is in too. (That's it for the internals!) Covers are on, distributor is in, water pump is on and carburetors are coming together. Also, a set of Clifford's steel tube headers are on the way. Getting close! 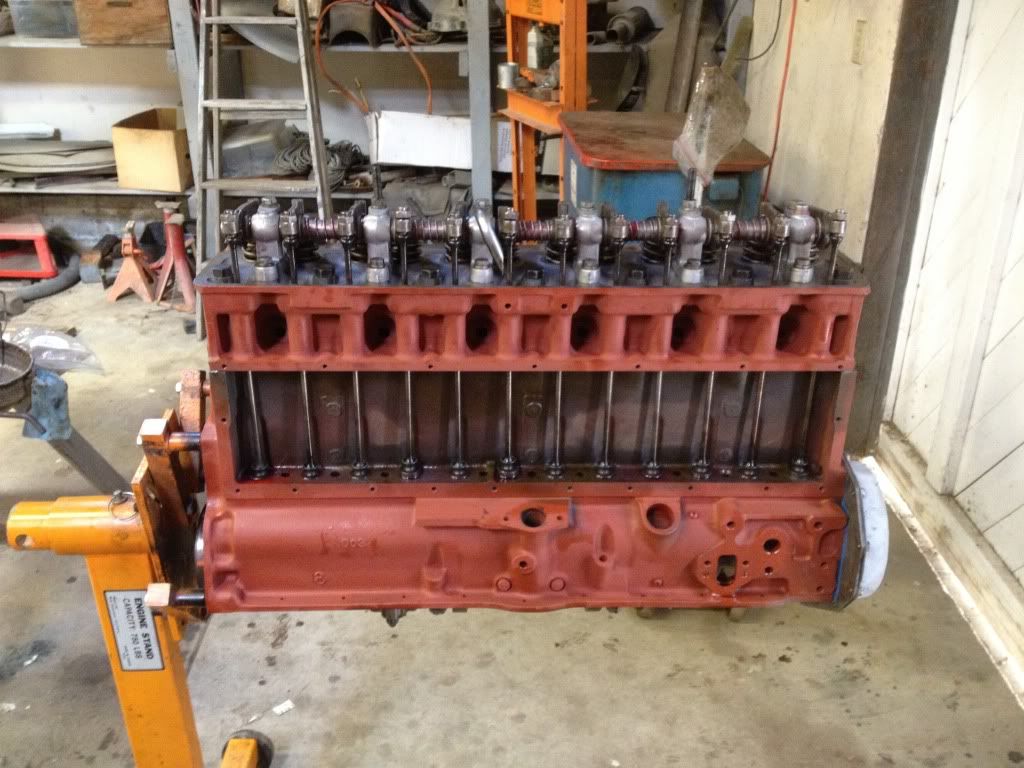 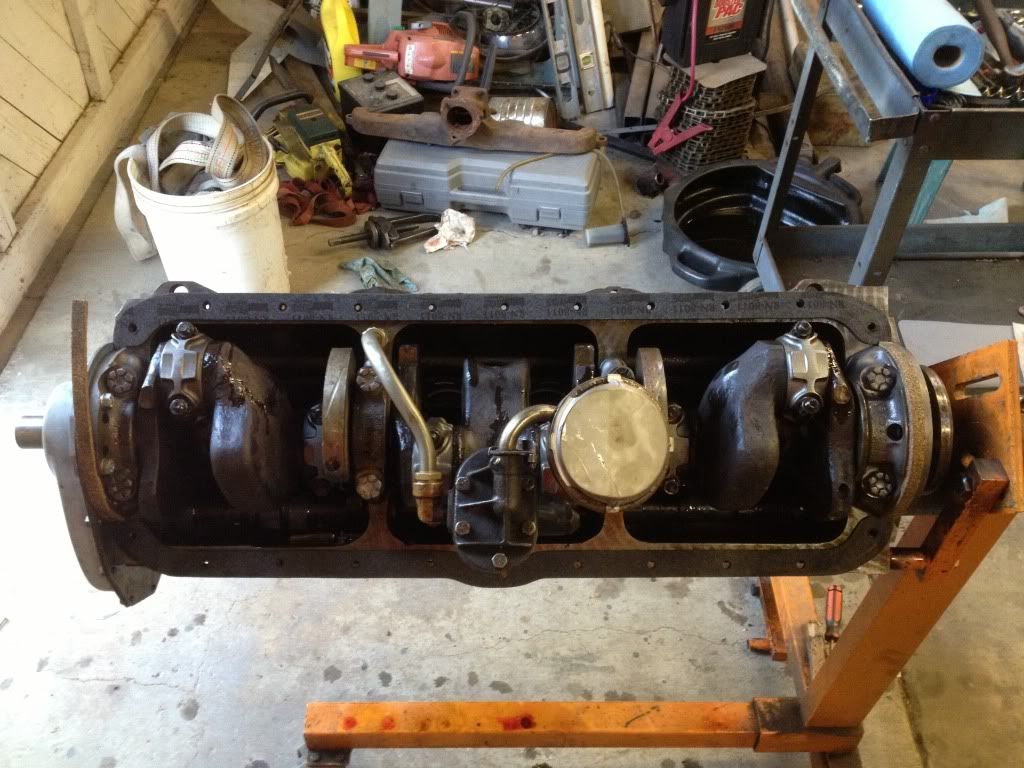 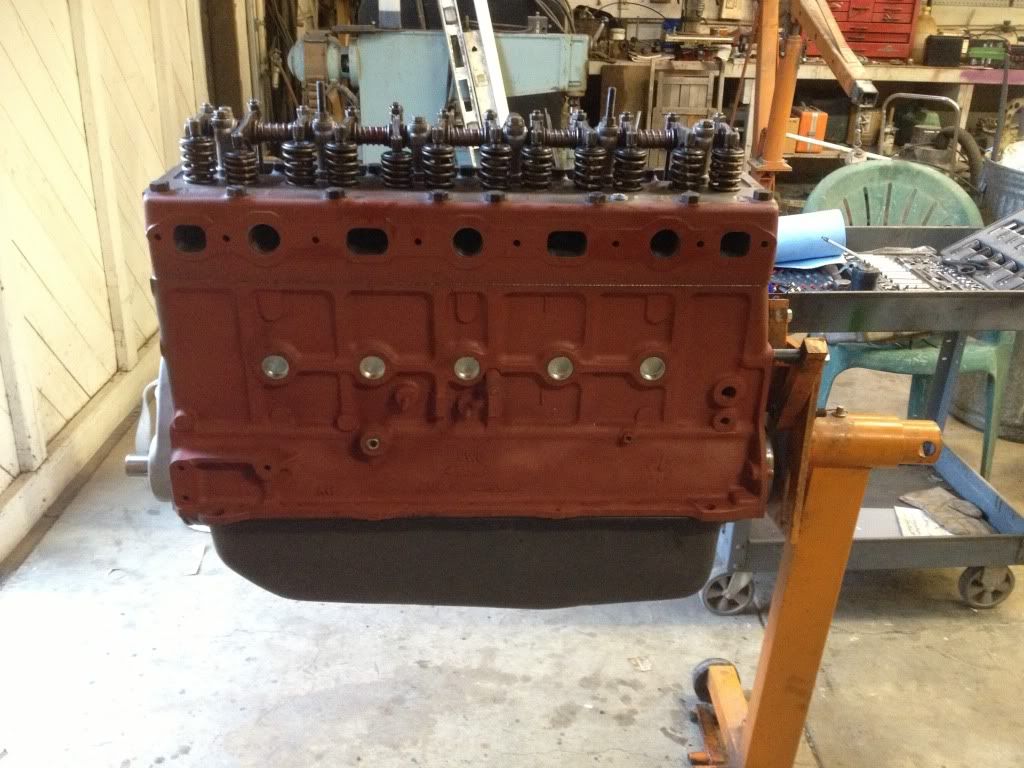 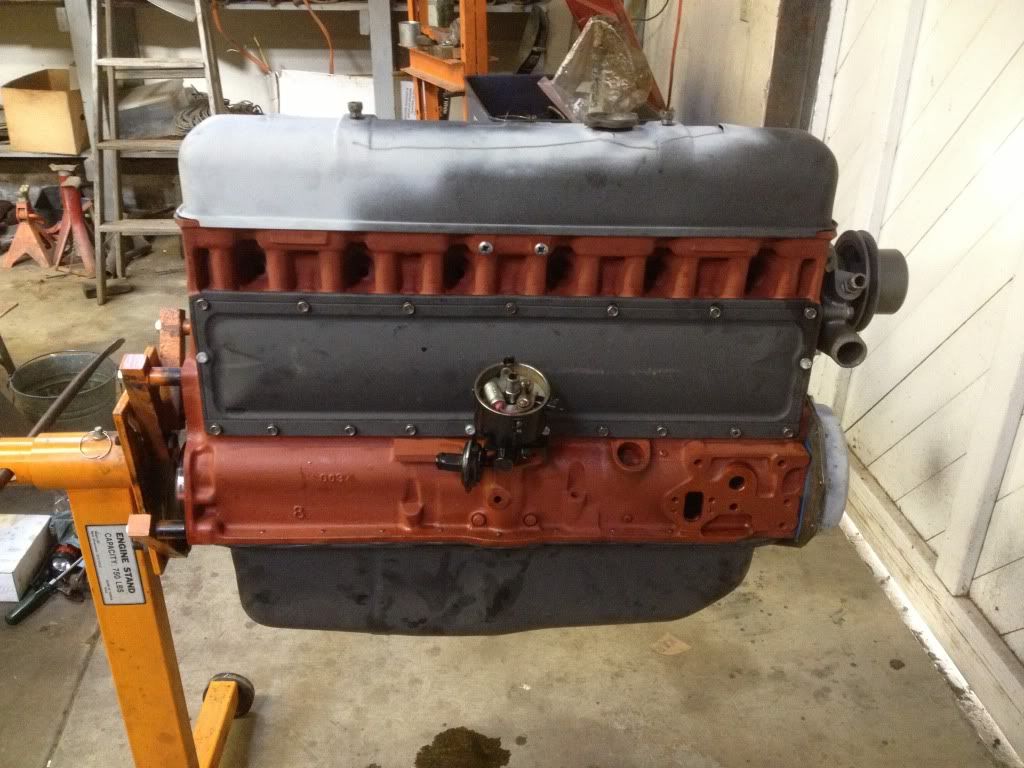 Pete
--Peter Gray: #6073--
"If at first you don't succeed,
Try, try again."
-William Edward Hickson
|
|
|
|
|
Joined: Jan 2013
Posts: 133
Contributor
|
|
OP
Contributor
Joined: Jan 2013
Posts: 133 |
Weekend Update: Carburetors are rebuilt! Word from the recently wise--do not try to rebuild two matching Zenith Carubretors! Every single cover, jet, screw, filter, butterfly, pump has a serial number on it! If the set doesn't match, you risk it not running properly. We got it sorted out thanks to a friend of mine who has shelves of Zeniths (thanks for letting me tear apart most of your carburetors!) but boy that took alot of work! While I was rolling around on the floor histerically trying to sort out the carburetors, my grandpa was working on the engine. He got the flywheel, bell housing and fuel pump on as well as the generator, oil filter, manifolds ready to put on once we get the motor mounts built and attached to the frame. Oh yeah, and he also adjusted the valve clearances. 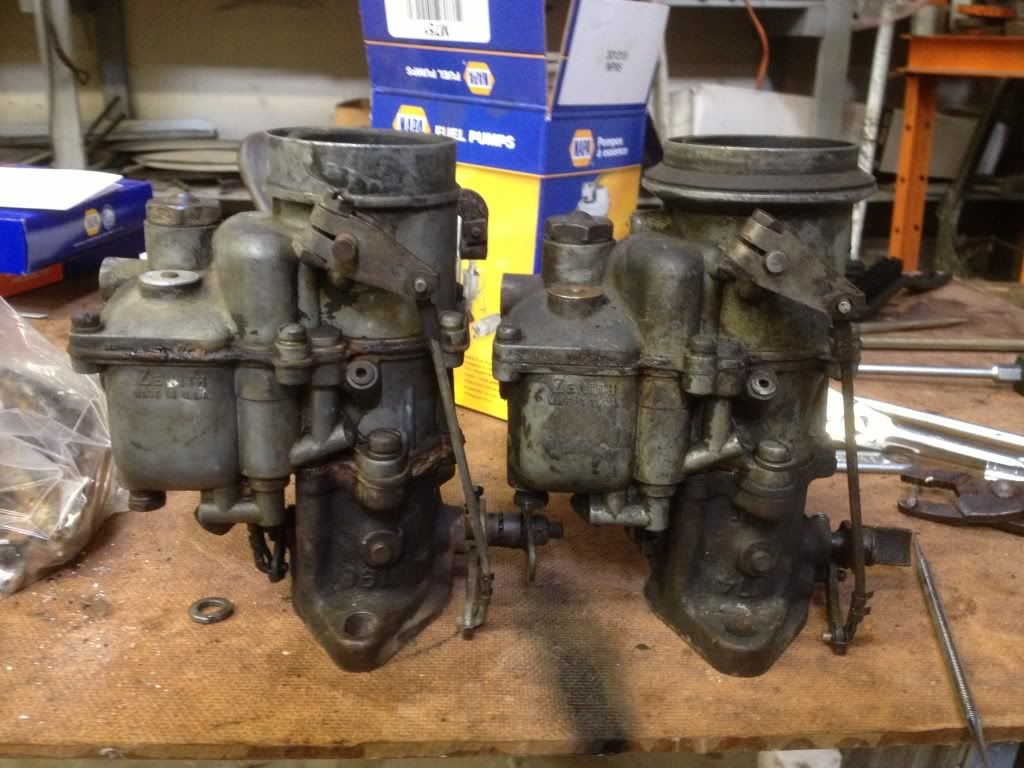 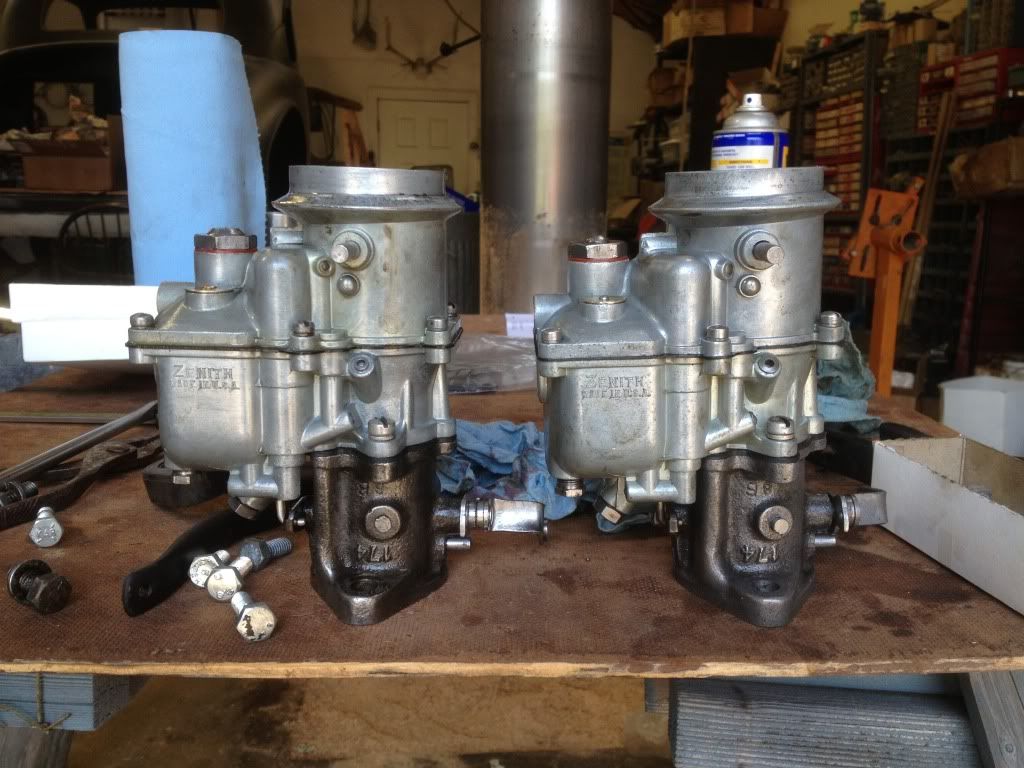 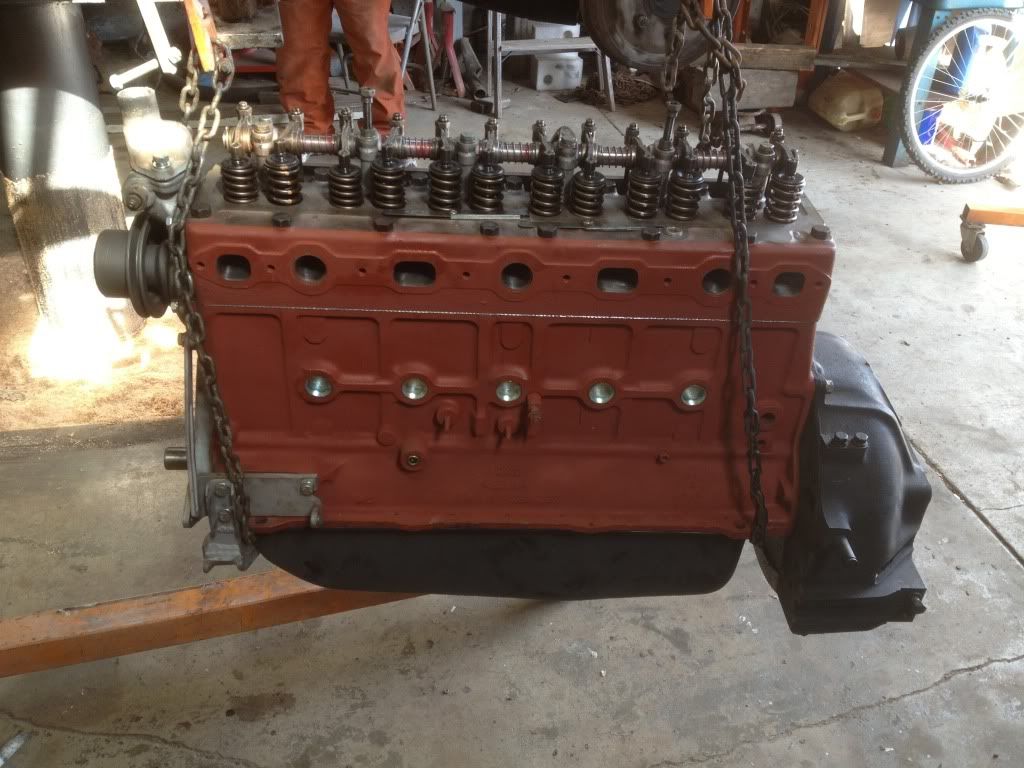 Thanks! Pete
Last edited by BlackJackPG; 04/28/13 09:16 PM.
--Peter Gray: #6073--
"If at first you don't succeed,
Try, try again."
-William Edward Hickson
|
|
|
|
|
Joined: Oct 2007
Posts: 5,015 Likes: 47
1000 Post Club
|
|
1000 Post Club
Joined: Oct 2007
Posts: 5,015 Likes: 47 |
Don't scare me about Zeniths I still have to do mine. Good progress, keep it going.
"I wonder if God created man because he was disappointed in the monkey?" Mark Twain
|
|
|
|
|
Joined: Jan 2013
Posts: 133
Contributor
|
|
OP
Contributor
Joined: Jan 2013
Posts: 133 |
Haha, my bad! Just a heads up! Get a magnifying glass and read the numbers stamped in each piece. Worst comes to worst and you can re-dril the jets you've got. It voids the number stamped on it (which tells size) but ya gotta do what ya gotta do.
You can get rebuild kits from NAPA auto parts--gaskets, accelerator pump and idle jet-- for $25/ea. I would reccomend it not only for the new gaskets, but because it has a blow-up diagram of where everything goes. It was a huge help for me at least, who's never done this before.
Any questions, post them up! I think I've got these pretty well figured out. It'll give me a chance to start repaying you for all the advice you've given me!
Thanks!
Pete
--Peter Gray: #6073--
"If at first you don't succeed,
Try, try again."
-William Edward Hickson
|
|
|
|
|
Joined: Oct 2007
Posts: 5,015 Likes: 47
1000 Post Club
|
|
1000 Post Club
Joined: Oct 2007
Posts: 5,015 Likes: 47 |
Thanks for the offer I may need some help. It's been a while. My advice is free because that's all it's worth. I'm glad you used the Zeniths they add even more tradition to your build. You and your Granddad are doing a great job. You'll remember this your whole life. Too late for you but here's a LINK to the first of a series of videos on Zenith 28 rebuilding. The others come up to the right of it. He makes me feel pretty light handed. There isn't a lot of the info needed to build a set for a multiple carb set up or any mention of the great tenability of these carbs.
"I wonder if God created man because he was disappointed in the monkey?" Mark Twain
|
|
|
|
|
Joined: Jan 2013
Posts: 133
Contributor
|
|
OP
Contributor
Joined: Jan 2013
Posts: 133 |
My advice is free because that's all it's worth. Haha, very funny... Yeah, the Zenith's should draw some attention. We're happy, it just took a little work. You and your Granddad are doing a great job. You'll remember this your whole life. That's why we're doing it! Both of us are having a really good time too. Grandpops is starting to have a little buyers remorse as the bills have been stacking up, but it's going to be a really nice car that (hopefully) will stay in the family for generations to come. Once I get him behind the wheel and he can peel all the rubber off the rear tires, I'm sure he'll perk up a little. Yesterday's update: Front coil springs and shocks are in, and nobody is missing any fingers so that's good! Then we did another engine-frame mock up and built the rear motor mount for the transmission. Also, we found a chromer who hasn't been crushed by the EPA (yet), so we should drop all the trim, bumpers etc. off here in the next few days. 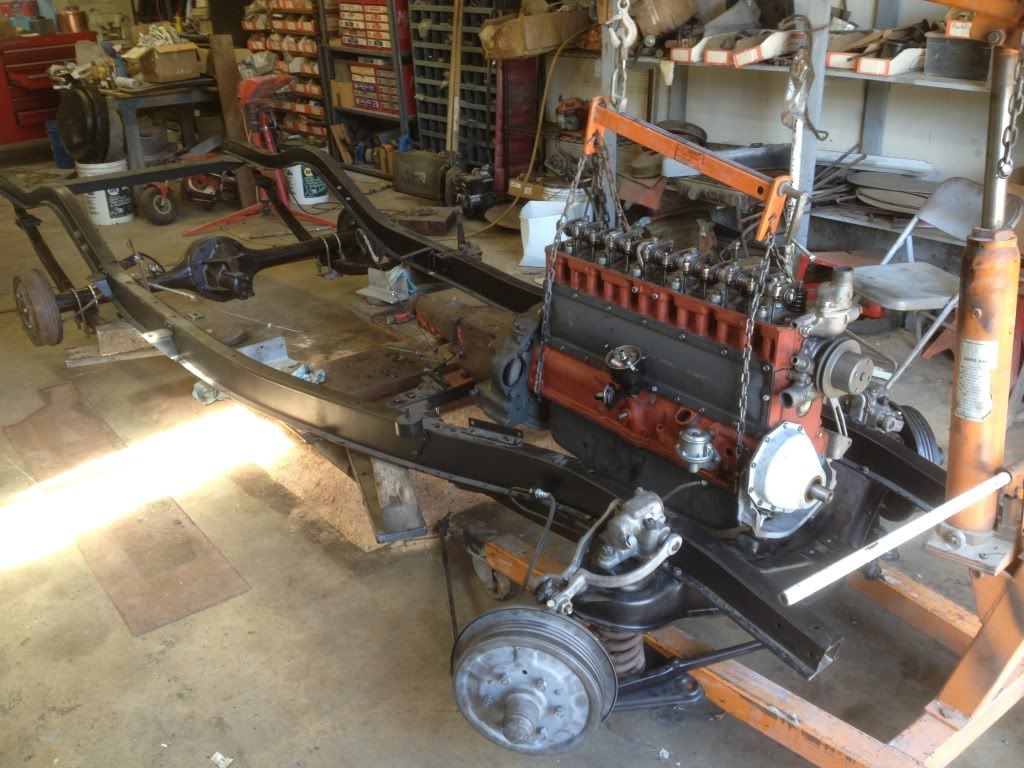 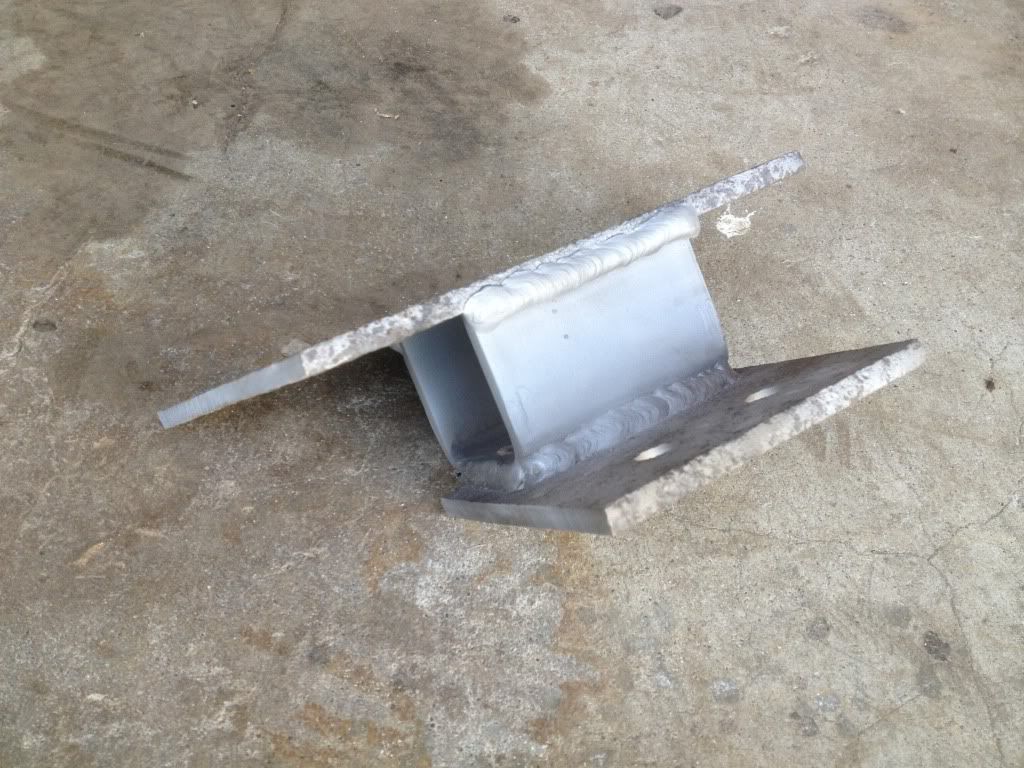 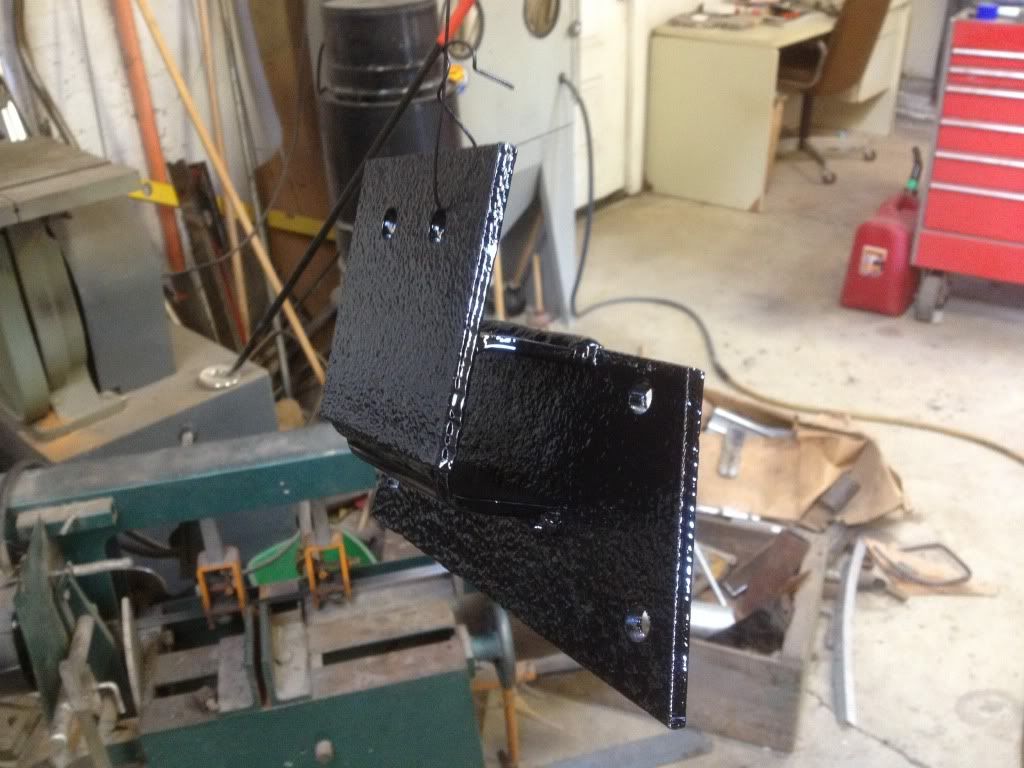 Thanks! Pete
Last edited by BlackJackPG; 05/01/13 01:06 AM.
--Peter Gray: #6073--
"If at first you don't succeed,
Try, try again."
-William Edward Hickson
|
|
|
|
|
Joined: Apr 2012
Posts: 24
Active BB Member
|
|
Active BB Member
Joined: Apr 2012
Posts: 24 |
I'm digging this rebuild. Keep up the momentum!
Joey #6098 - Bay Area Chapter
1964 Chevelle - 4 Door - I6 230 - Weber 32/36 & Cast Iron Header
|
|
|
|
|
Joined: Oct 2007
Posts: 5,015 Likes: 47
1000 Post Club
|
|
1000 Post Club
Joined: Oct 2007
Posts: 5,015 Likes: 47 |
You and your Granddad are doing a great job. You'll remember this your whole life. That's why we're doing it! Both of us are having a really good time too. Grandpops is starting to have a little buyers remorse as the bills have been stacking up, but it's going to be a really nice car that (hopefully) will stay in the family for generations to come. Once I get him behind the wheel and he can peel all the rubber off the rear tires, I'm sure he'll perk up a little. Pete [/quote] My wife still thinks we only $10,000 on our son's Studebaker, and that was in the last century.
"I wonder if God created man because he was disappointed in the monkey?" Mark Twain
|
|
|
|
|
Joined: Jan 2013
Posts: 133
Contributor
|
|
OP
Contributor
Joined: Jan 2013
Posts: 133 |
Haha, that's the only way to get these things done! My lips are sealed.
Joey: Thanks! Will do!
Pete
--Peter Gray: #6073--
"If at first you don't succeed,
Try, try again."
-William Edward Hickson
|
|
|
|
|
Joined: Jan 2013
Posts: 133
Contributor
|
|
OP
Contributor
Joined: Jan 2013
Posts: 133 |
Weekend Update: The day before yesterday we drove up to Sacramento to drop off all of our chrome. Sherms Custom Chroming is the place and they are some of the nicest people you'll ever meet. Our origional plan was to go to a place to Lodi, but just by the way they talked to us and were taking the afternoon off, we knew they didn't deserve our business anyway. So we called up Sherms, and the guy who answered the phone was plain nice, cracking jokes and having a good time. We told him that we were coming and should be there about 20 minutes before closing time, but traffic could be pretty bad. They said it was no problem. They would keep a guy to wait for us. If the traffic was super bad to the point that we would be hours late, than let them know and they could leave a place for us to drop the stuff and come put it inside over the weekend. That's the way to do buisness. Anyhow, rant over. Oh yeah, and we picked up our driveline from the driveline shop. Yesterday, we pulled the engine back off the frame. Put the clutch and pressure plate in then re-attached the transmission. Getting the transmission in took most of the day because getting and keeping everything in alignment while the transmission slid in took some effort. We then spent the rest of the day fixing and adjusting our shift linkage. The guy who we bought it from had lengthened it out to get the shifter was further back, so we cut it all to bits and welded it back up so it was back to the origional position. We may end up shortening it after putting it in the frame and doing some measurements because it still may end up under the seat. Quick tutorial on how to adjust the shift linkage on a Saginaw 4 speed. (because this took us half the day to figure out) There is a pin hole to line up all neutral on all the horizontal planes (see picture) then just adjust all the rest of the rods untill they go into their places. It's really simple, but impossible to do without putting a pin through.  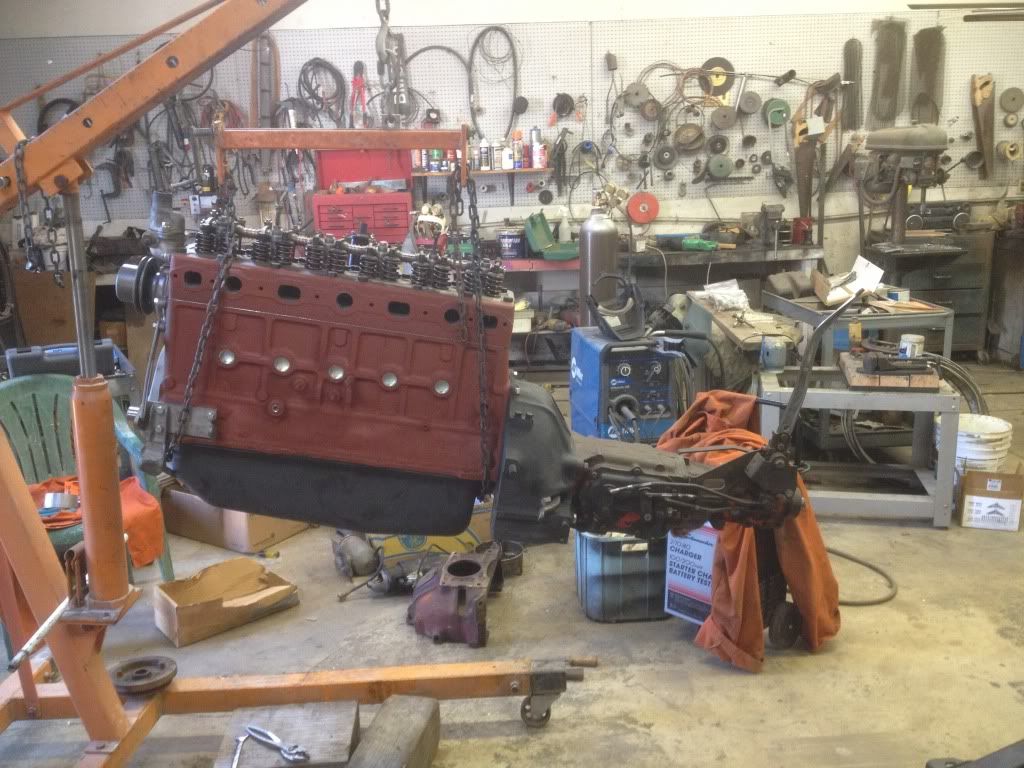 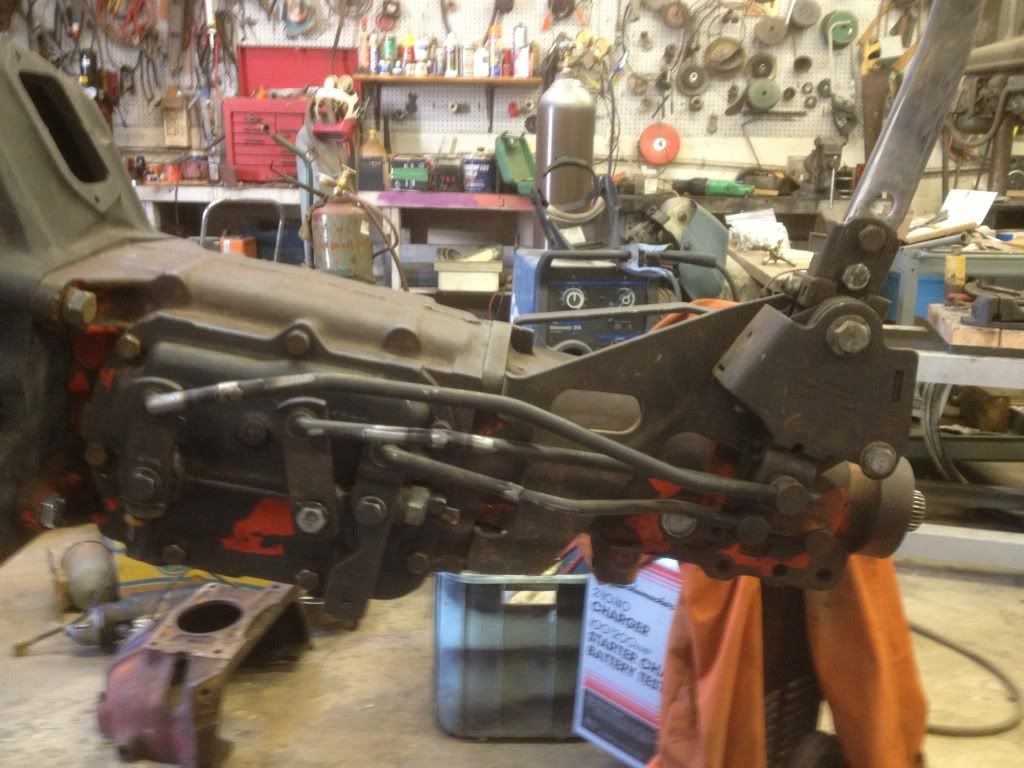 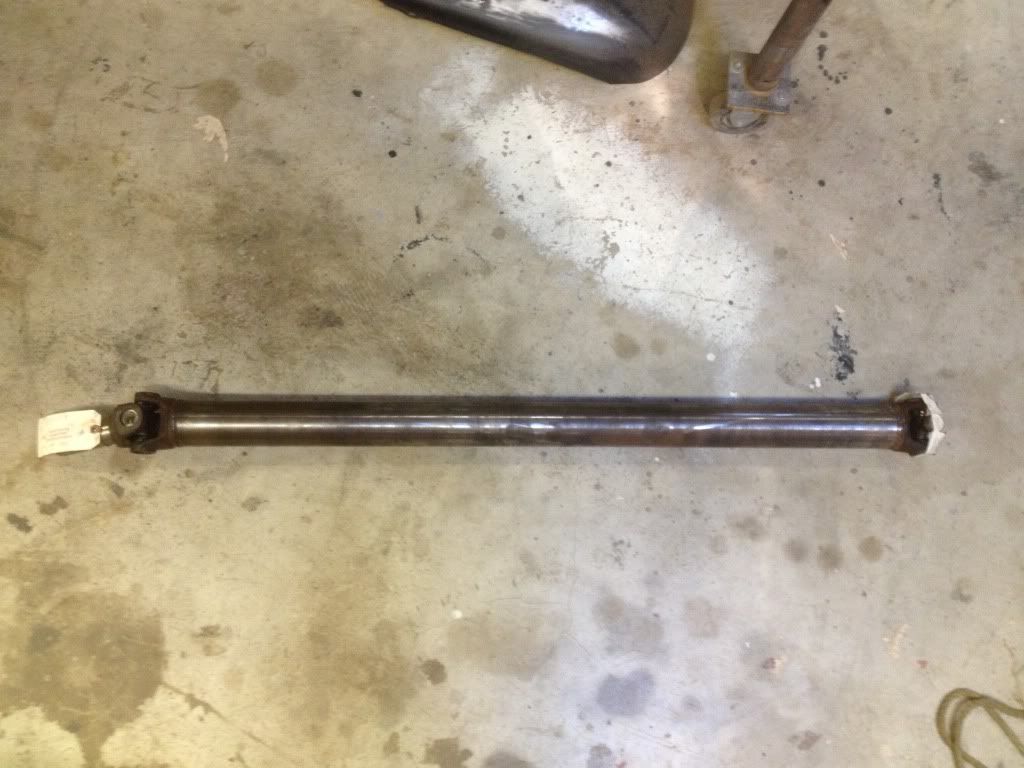 Thanks! Pete
--Peter Gray: #6073--
"If at first you don't succeed,
Try, try again."
-William Edward Hickson
|
|
|
|
|
Joined: Oct 2007
Posts: 5,015 Likes: 47
1000 Post Club
|
|
1000 Post Club
Joined: Oct 2007
Posts: 5,015 Likes: 47 |
Good progress. I think Patrick's still sell a modified Hurst linkage for the Saginaw. It moves the shifter well in front of the seat in a pickup. I'm sure it would work in your '40. It won't work if you decide to put and OD on it. The solenoid is in the way.
"I wonder if God created man because he was disappointed in the monkey?" Mark Twain
|
|
|
|
|
Joined: Jan 2013
Posts: 133
Contributor
|
|
OP
Contributor
Joined: Jan 2013
Posts: 133 |
Good idea! I'll check it out. I hope mine fits. I've been loking at it and I think I can shorten it by a few inches if need be. Fingers crossed. Painted the motor. Sure is bright! 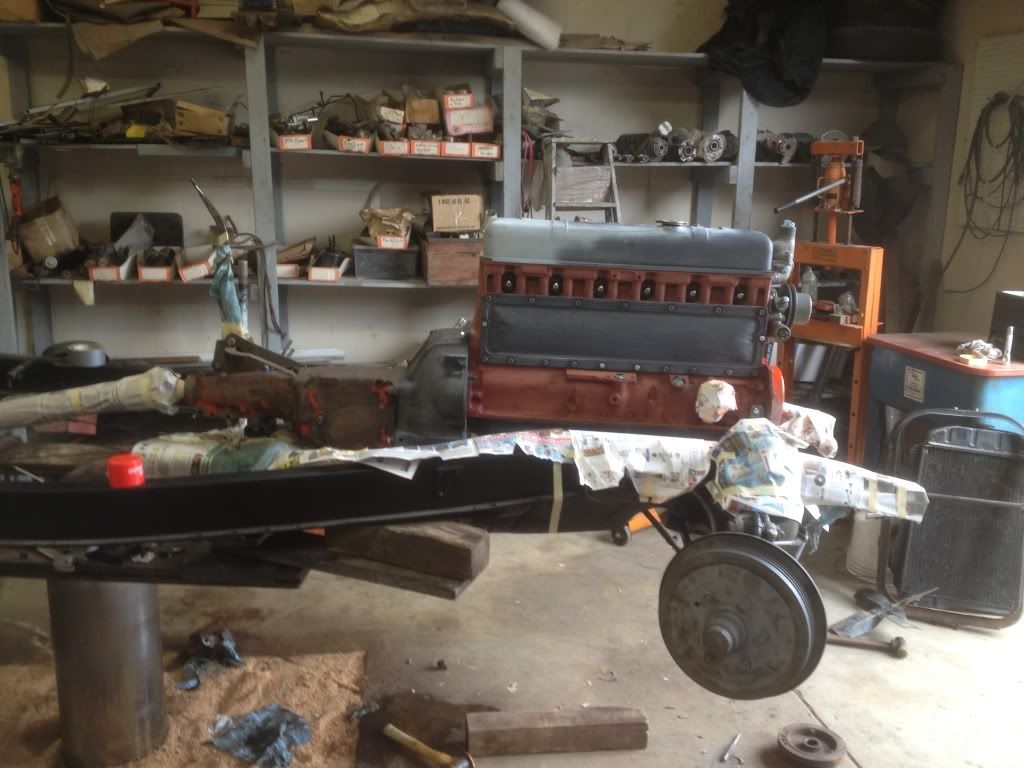 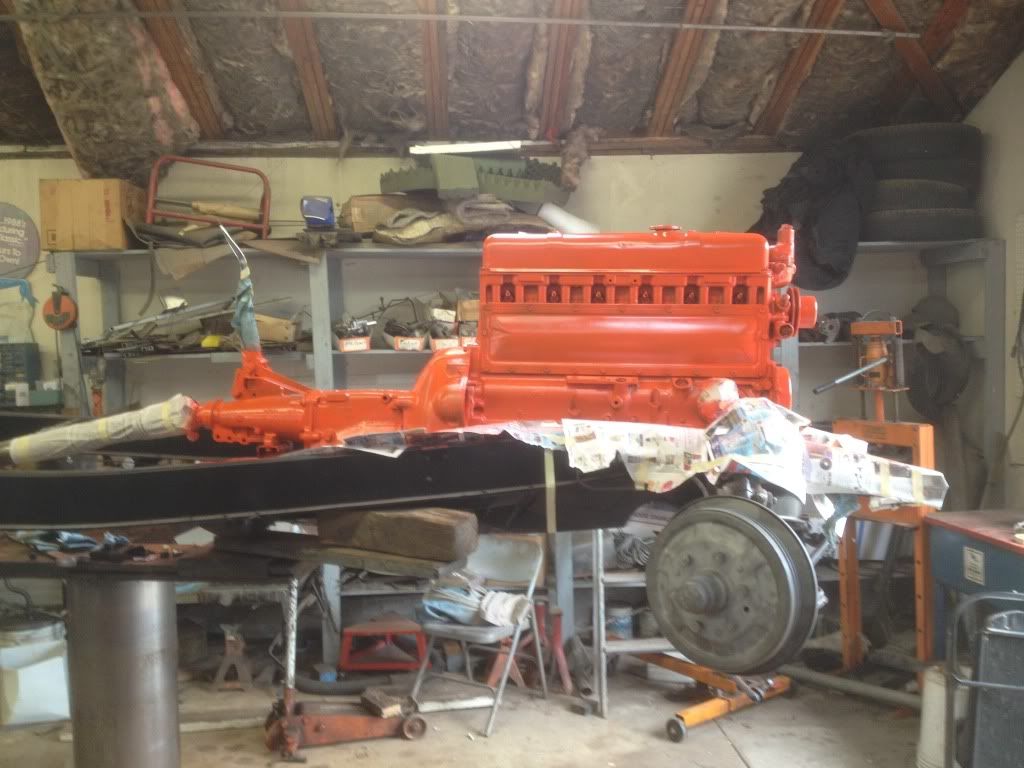 Thanks! Pete
--Peter Gray: #6073--
"If at first you don't succeed,
Try, try again."
-William Edward Hickson
|
|
|
|
|
Joined: Sep 2000
Posts: 588
Major Contributor
|
|
Major Contributor
Joined: Sep 2000
Posts: 588 |
I could be mistaken but doesn't the lever for reverse go down and the other 2 stay up the way you have them? Or will that just move the position of reverse on the shifter handle?
Ontario Inliners
1965 Chevelle
1940 Chev
1965 Chev Pick-up
1970 MGB Roadster
|
|
|
|
|
Joined: Jan 2013
Posts: 133
Contributor
|
|
OP
Contributor
Joined: Jan 2013
Posts: 133 |
Ya know, I'm not sure. The reason I put it that way is because the little cut out on the lever allows it to not hit the 3rd & 4th lever. It seems like a good fit. I'll flip it round next time I'm over there and see what's what. Quick question: Where the heck is the speedo outlet on this transmission? I can't find it! I have a stinking suspicion its behind this freeze plug (see attached), but I don't know. Any advice? 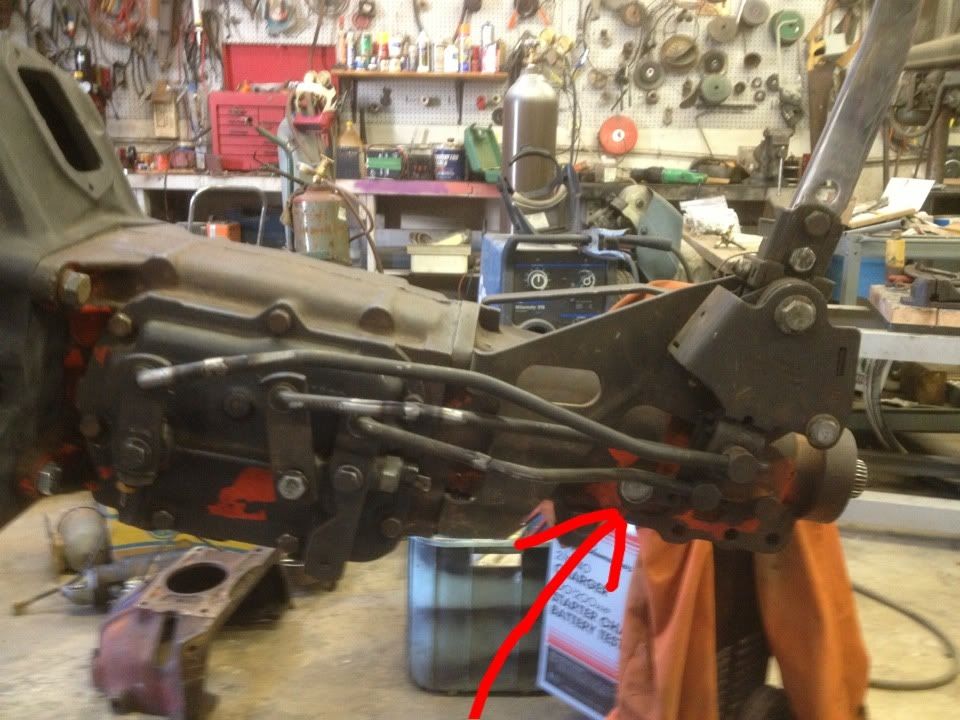 Thanks! Pete
Last edited by BlackJackPG; 05/06/13 11:07 PM.
--Peter Gray: #6073--
"If at first you don't succeed,
Try, try again."
-William Edward Hickson
|
|
|
|
|
Joined: Sep 2000
Posts: 588
Major Contributor
|
|
Major Contributor
Joined: Sep 2000
Posts: 588 |
You are correct. Have to take the freeze plug out and put a fitting in there. The fitting has an internal and external o-ring on it and there is a small rectangular plate with one corner cut off it that slides into a groove on the fitting to hold it in along with a short 1/4" bolt. This fitting was very common on G.M. trans for many years. The powerglide, TH350, 3 spd and 4 speed, both Muncie and Saginaw used the same fitting and gear. The TH400 and M21 Muncie used a much larger fitting. Just try it with any gear that you have and you can fine tune it later. A good rule of thumb for these gears is that every tooth, more or less on the gear will make about 5 MPH difference on your speedo. Hope this helps.
And by the way, excellent job on the Coupe. I did the same to my 1940 Chev 2 door (that I still own) back in the early 80's but took me 5 years to do what you have done in 5 weeks. Boy does that ever make me feel older and slower...lol
Ontario Inliners
1965 Chevelle
1940 Chev
1965 Chev Pick-up
1970 MGB Roadster
|
|
|
|
|
Joined: Jan 2013
Posts: 133
Contributor
|
|
OP
Contributor
Joined: Jan 2013
Posts: 133 |
Thanks GMDad! That helps alot! Great info! Yeah, I've been scratching my head at that transmission for the past few months trying to figure out where the speedo goes. Problem solved! I'll get the parts rolling in. Thank You! A little more progress... Clifford headers are in - 3 days early too! They're really nice, fit perfectly. Thanks Clifford! The intake manifold cleaned up nicely in the sand blaster, and the carbs bolted right up. Only a matter of hours 'till this thing will be running! 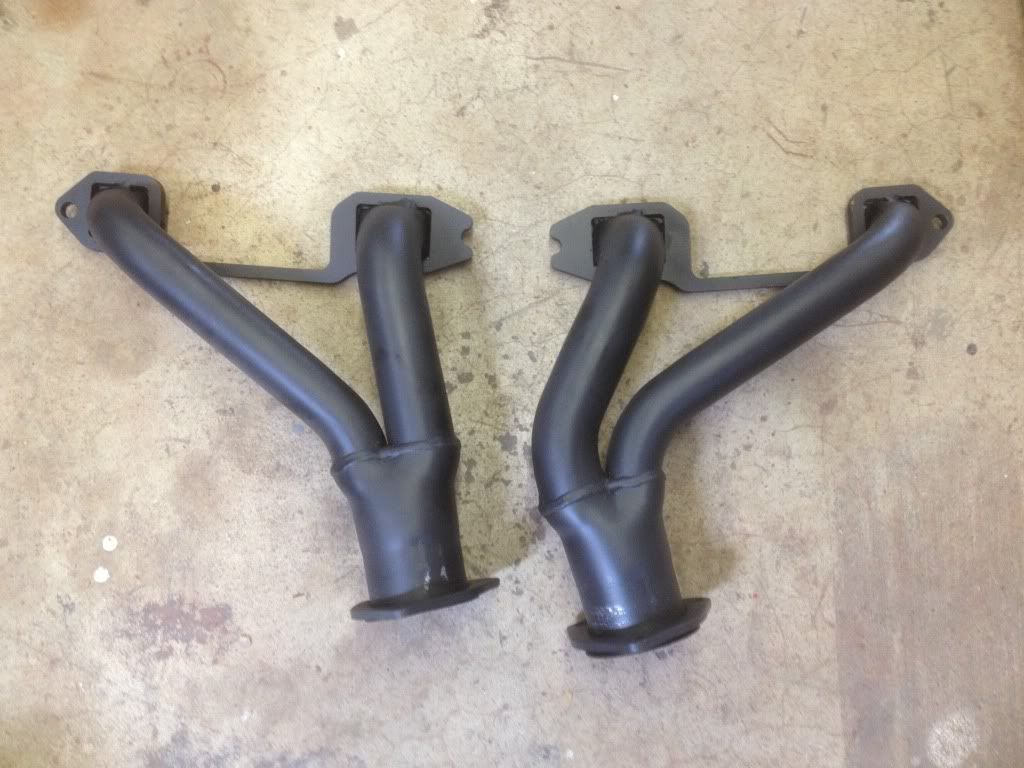 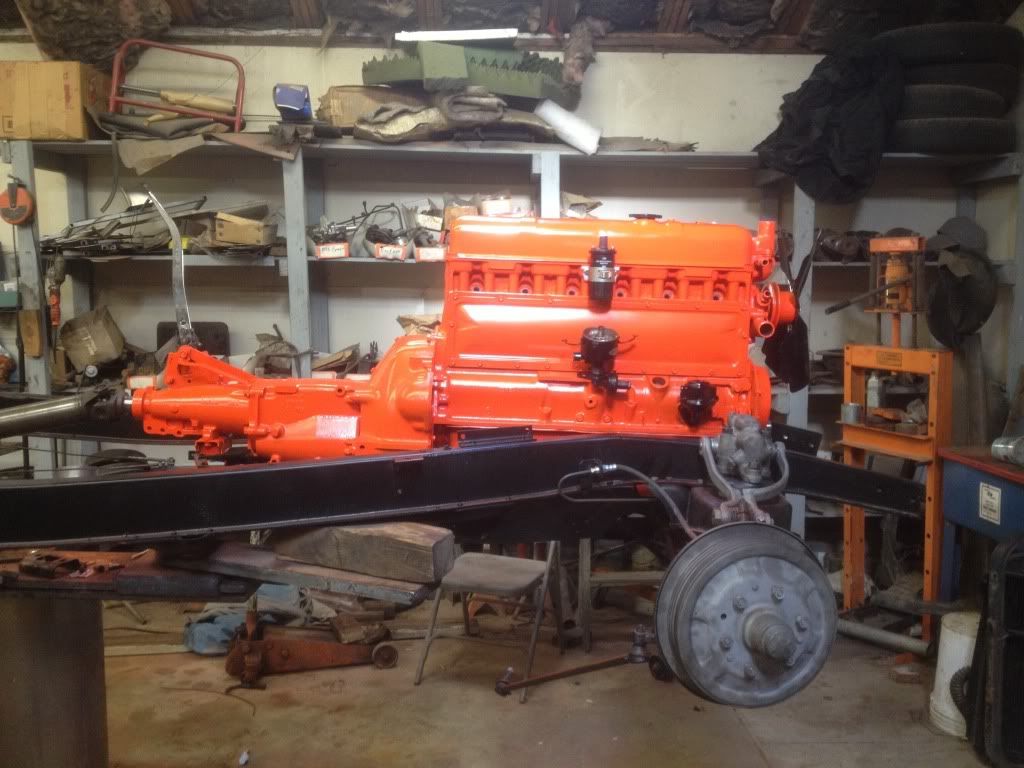 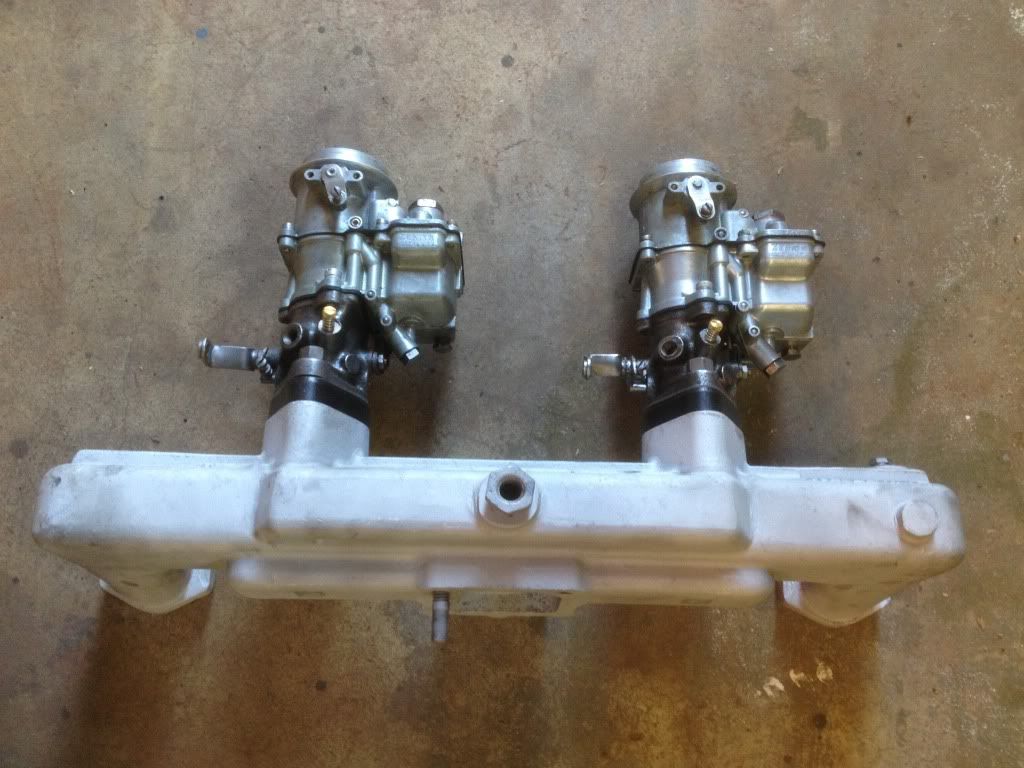 Thanks! Pete
--Peter Gray: #6073--
"If at first you don't succeed,
Try, try again."
-William Edward Hickson
|
|
|
|
|
Joined: Jan 2013
Posts: 133
Contributor
|
|
OP
Contributor
Joined: Jan 2013
Posts: 133 |
Manifolds are on. Throttle linkage is cleaned, painted and drying. Just more odds and ends really. Still waiting on the 235 harmonic balancer and starter motor which should be here tomorrow or Saturday. It's getting real close. 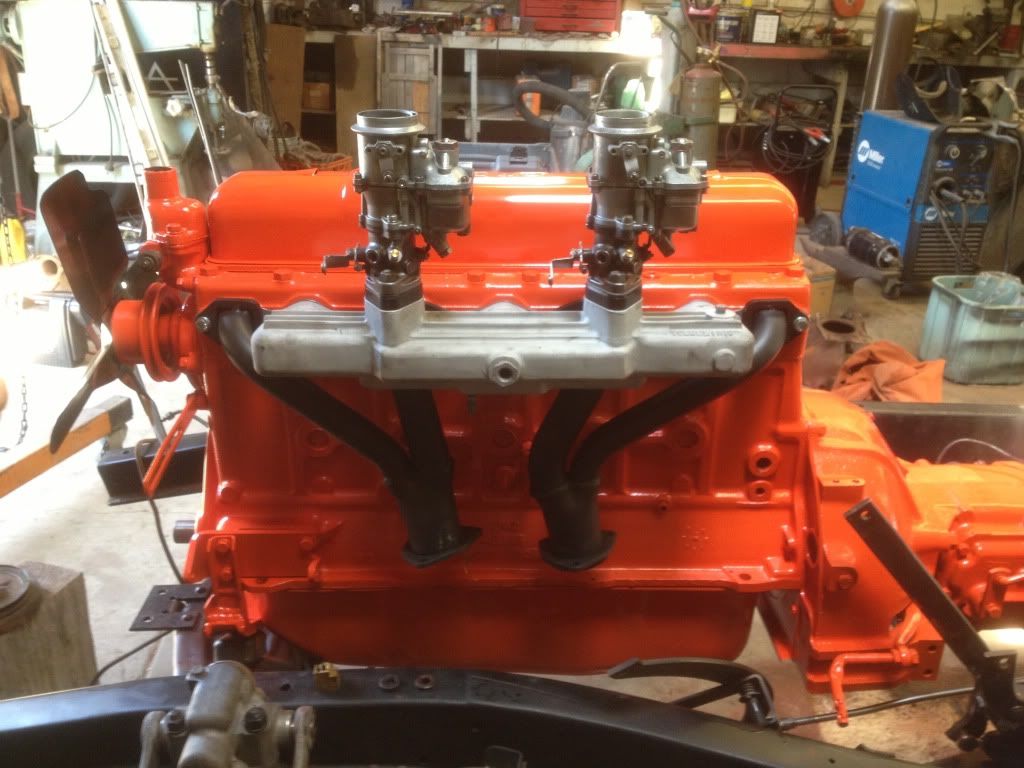 Thanks! Pete
--Peter Gray: #6073--
"If at first you don't succeed,
Try, try again."
-William Edward Hickson
|
|
|
|
|
Joined: Nov 2012
Posts: 551
Major Contributor
|
|
Major Contributor
Joined: Nov 2012
Posts: 551 |
engine looks prime sitting in there!
Josh
72 gmc lwb air ride 5 speed (soon) turbo 292 II# 6102
|
|
|
|
|
Joined: Jan 2013
Posts: 133
Contributor
|
|
OP
Contributor
Joined: Jan 2013
Posts: 133 |
Thanks Josh! Can't wait to hear that 292 of yours crank up! Progress from today was minimal. I just went and picked up our 235 harmonic balancer, blasted and painted it. Also picked up our new starter which engages, but won't turn the motor over because everything is too stiff right now. Grandpa Jim also built the rear tube shock mounts, I welded them, blasted and painted them. Again, just odds and ends until this thing is roaring! This should be the lucky weekend for lift off! 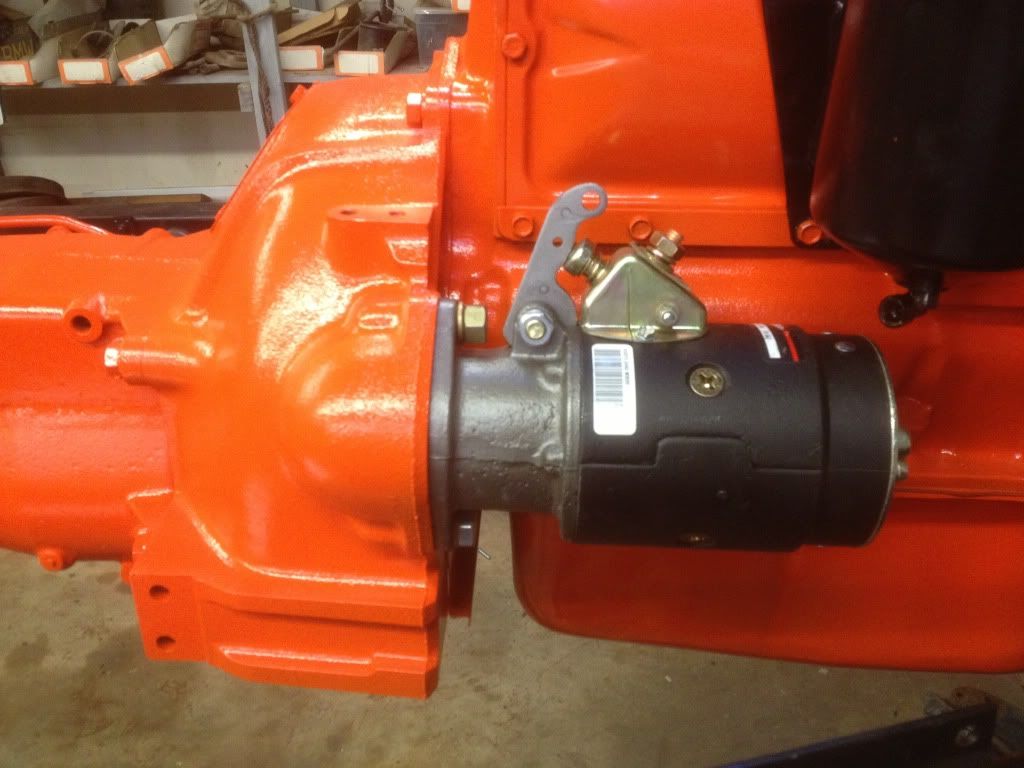 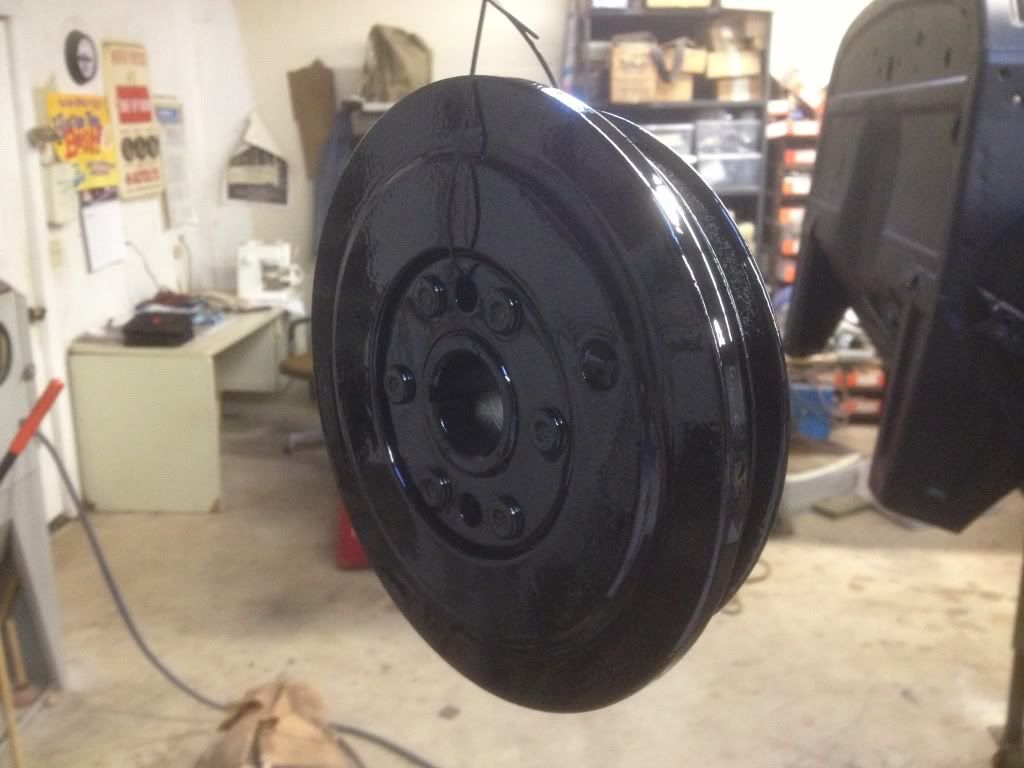 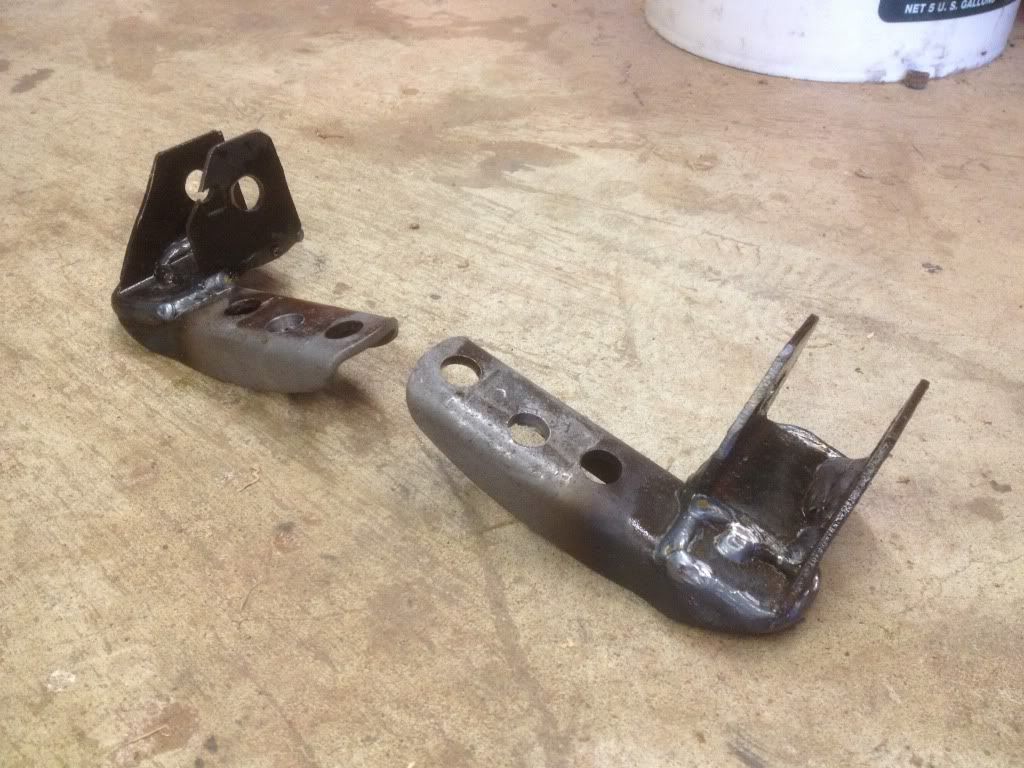 Thanks! Pete
--Peter Gray: #6073--
"If at first you don't succeed,
Try, try again."
-William Edward Hickson
|
|
|
|
|
Joined: Jan 2013
Posts: 133
Contributor
|
|
OP
Contributor
Joined: Jan 2013
Posts: 133 |
Today was tough. Spent most of the morning looking for the bolt that holds the Harmonic Balancer on with no avail. I drove over to NAPA. They dug around for about half an hour and came up with one! Drove back to the shop and figured out it didnt fit. It was pretty strange. It measured out correctly - 5/8 18, but for some reason would start cutting the threads off the bolt after about 4 turns. Drove back over to NAPA. We determined it was a production error with threads that were slightly off (something like 18.3 threads/inch) They dug around for me some more and came up with a dye, but no bolt. Drove around to all the rest of the autoparts/ hardware stores nearby and came up empty. Went back to the shop, dug around some more and came up with a long 5/8 bolt. Cut the coarse threads off the end, went back to NAPA bought the dye they had dug up and cut new threads on the bolt. Great! Went to put the harmonic balancer on, banged on it for a while, but it went on about half way, then just stopped. Destroyed a set of pullers trying to get it back off. Drove to NAPA-closed. Drove to O'Reily and bought a set of fine-thread pullers. Back to the shop. Pulled the harmonic balancer off. Figured out there was a little lip inside the harmonic balancer which let it go on to a certain point then stop. It must have been for alignment of the fan belt or something on the 235. Cut off lip on the lathe. Still doesn't fit. Repeat. Pound back on and put bolt in. Roll around on the floor laughing. It's 10:00 pm. The only picture from today: 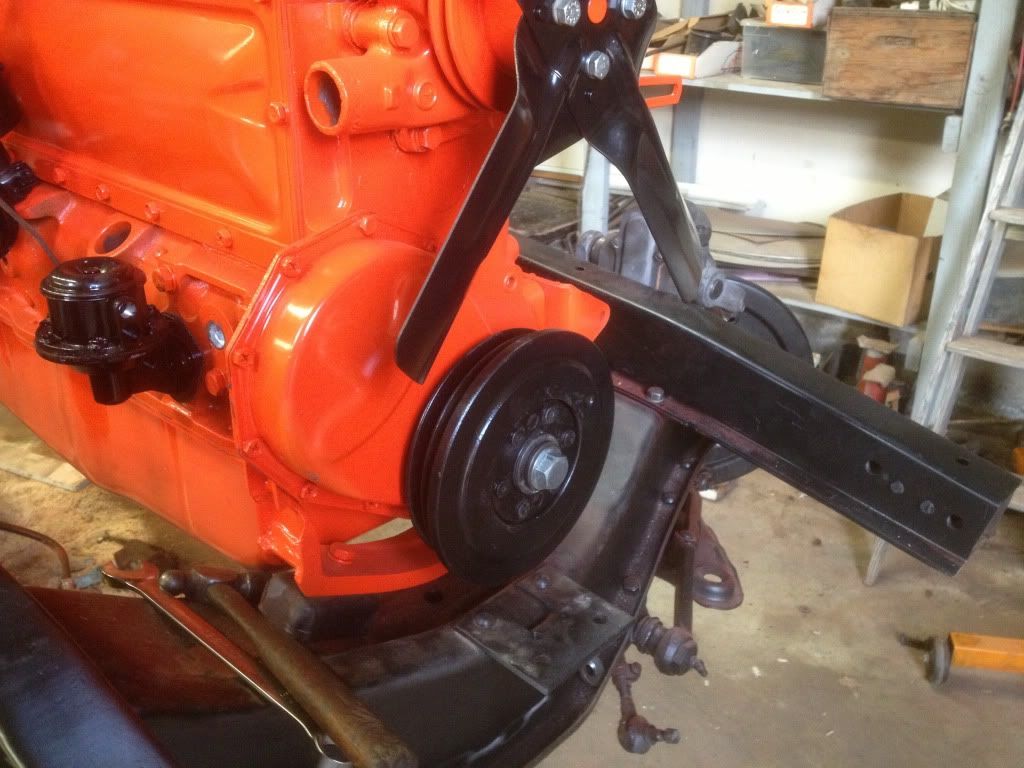 Goodnight! Pete P.S. Does anyone know what these three holes lead to (see attached)? I can't seem to figure it out. Thanks! 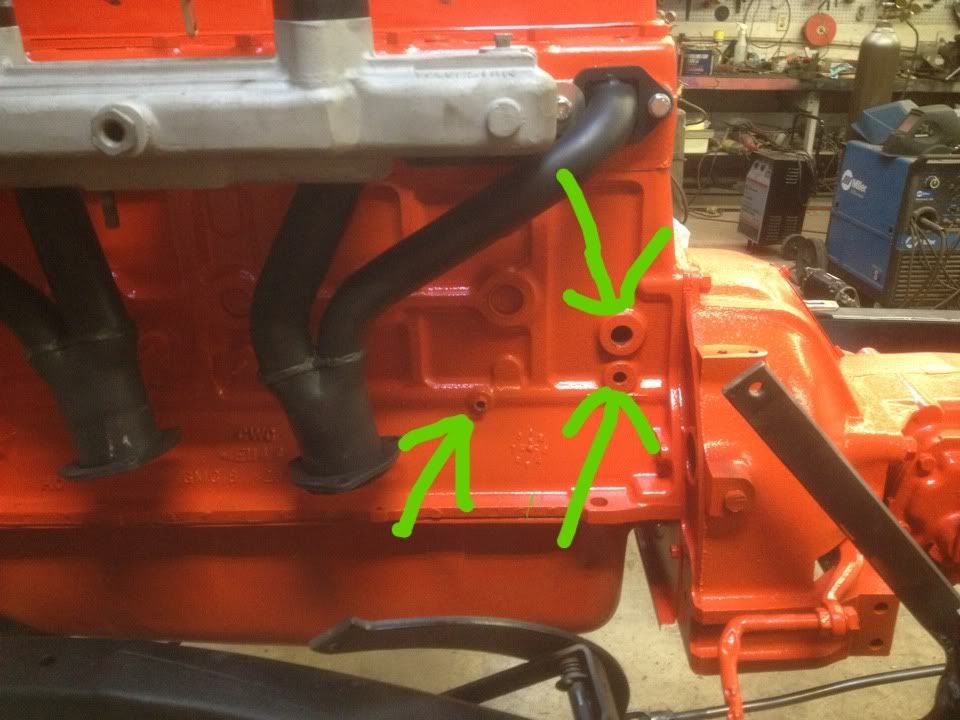
--Peter Gray: #6073--
"If at first you don't succeed,
Try, try again."
-William Edward Hickson
|
|
|
|
|
Joined: Oct 2007
Posts: 5,015 Likes: 47
1000 Post Club
|
|
1000 Post Club
Joined: Oct 2007
Posts: 5,015 Likes: 47 |
First the holes: The lowest and most forward hole is for the stock oil pressure gauge connection. The small one in the rear is for the coolant drain cock. The other one on my engines has a pipe plug in it. If that one is in a water jacket you could return the water from your intake heat to it. I think you could put a T in the heater hose from the water pump and run it to the manifold and then from the manifold to either of the rear holes. make sure the big one is water.
Be careful about banging on the crank snout. Dampeners should be pressed on and off when possible. You can damage the thrust bearing on the main bearing, the one that limits crank end play. Check the end play to make sure you are still OK. I've never ruined one but it can be done.
"I wonder if God created man because he was disappointed in the monkey?" Mark Twain
|
|
|
|
|
Joined: Jan 2013
Posts: 133
Contributor
|
|
OP
Contributor
Joined: Jan 2013
Posts: 133 |
Thanks! I poked around on the internet this morning, found some pictures of a finished engine came up with exactally what you have. Glad I did it right. Good idea with the water return for the intake! That's probably what I'll do! Jeez. I really hope I didnt do too much damage. That worries me. Progress from today: Oil, Vaccum and Fuel lines are bent and in. Still waiting on a couple fittings, but that's just a matter of getting them and tightening them down. Rear Shock mounts are made and bolted in. Breather tube is sandblasted and painted.  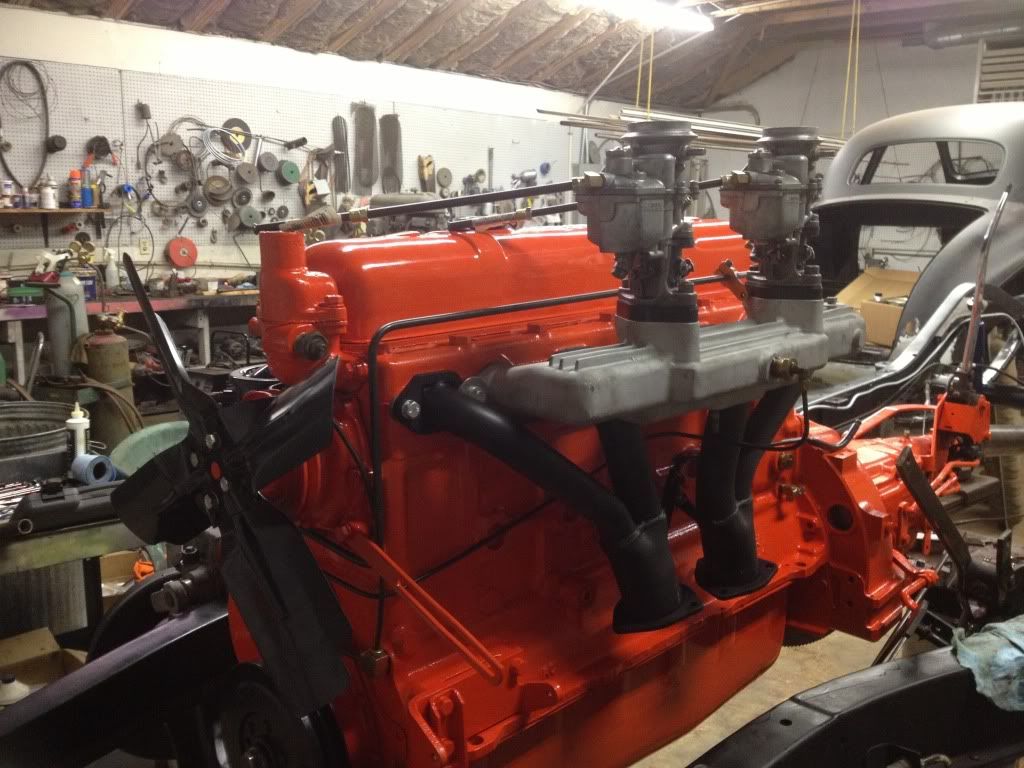  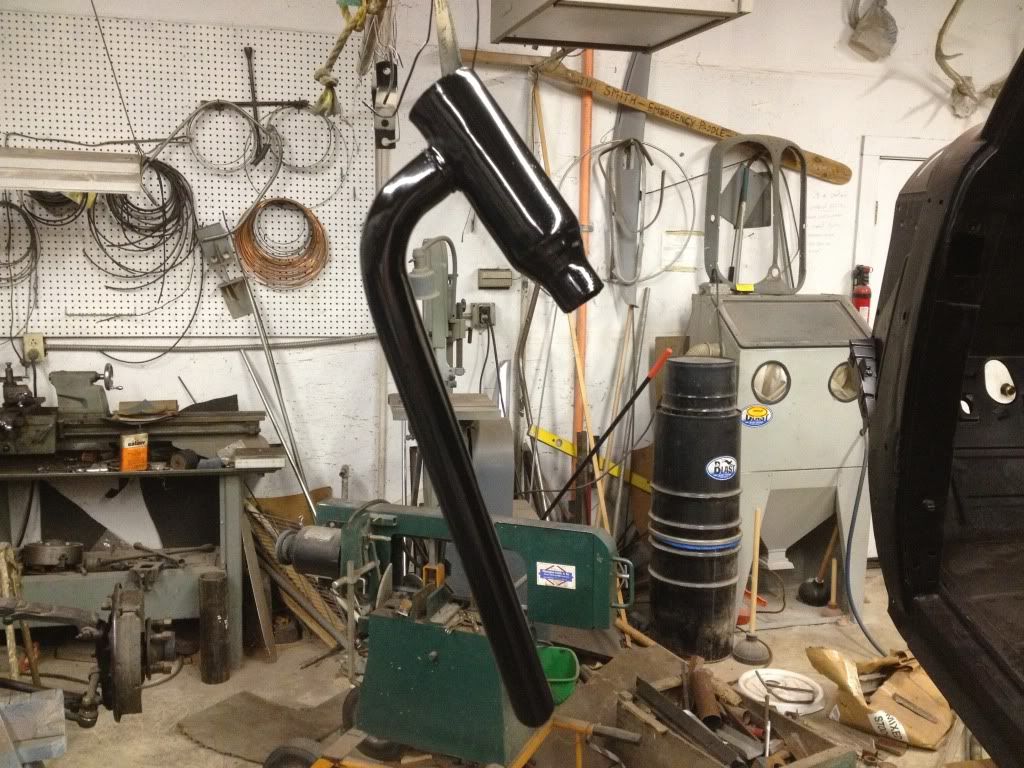 Thanks! Pete
--Peter Gray: #6073--
"If at first you don't succeed,
Try, try again."
-William Edward Hickson
|
|
|
|
0 members (),
300
guests, and
38
robots. |
|
Key:
Admin,
Global Mod,
Mod
|
|
|
|