|
|
Joined: Feb 2009
Posts: 70
Active BB Member
|
OP

Active BB Member
Joined: Feb 2009
Posts: 70 |
The other parts are sitting in my ebay watched list, lol. I need to save up a few bucks before I buy them. Otherwise, all that's holding me back is money and cold weather.
On a side note, how do I remove the Oil PSI sensor from the side of the block?
Alex
|
|
|
|
|
Joined: Nov 2012
Posts: 551
Major Contributor
|
|
Major Contributor
Joined: Nov 2012
Posts: 551 |
Dang that money thing! About as vexatiousas a v8;)
Josh
72 gmc lwb air ride 5 speed (soon) turbo 292 II# 6102
|
|
|
|
|
Joined: Sep 2004
Posts: 5,839 Likes: 1
1000 Post Club
|
|
1000 Post Club
Joined: Sep 2004
Posts: 5,839 Likes: 1 |
12 port SDS EFI 
|
|
|
|
|
Joined: Nov 2012
Posts: 551
Major Contributor
|
|
Major Contributor
Joined: Nov 2012
Posts: 551 |
It was supposed to read about as vexatious as, not vexatiousas
Josh
72 gmc lwb air ride 5 speed (soon) turbo 292 II# 6102
|
|
|
|
|
Joined: Sep 2004
Posts: 5,839 Likes: 1
1000 Post Club
|
|
1000 Post Club
Joined: Sep 2004
Posts: 5,839 Likes: 1 |
12 port SDS EFI
|
|
|
|
|
Joined: Nov 2012
Posts: 551
Major Contributor
|
|
Major Contributor
Joined: Nov 2012
Posts: 551 |
I'll teach you english and you teach me turbos deal? 
Josh
72 gmc lwb air ride 5 speed (soon) turbo 292 II# 6102
|
|
|
|
|
Joined: Feb 2009
Posts: 70
Active BB Member
|
|
OP
Active BB Member
Joined: Feb 2009
Posts: 70 |
How does one remove the oil psi sensor from the side of the block?
Alex
|
|
|
|
|
Joined: Apr 2004
Posts: 3,556 Likes: 35
1000 Post Club
|
|
1000 Post Club
Joined: Apr 2004
Posts: 3,556 Likes: 35 |
It should only be threaded into the block. Simply unscrew it.
Inliner Member 1716 65 Chevelle Wagon and 41 Hudson Pickup Information and parts www.12bolt.com
|
|
|
|
|
Joined: Nov 2012
Posts: 551
Major Contributor
|
|
Major Contributor
Joined: Nov 2012
Posts: 551 |
tom got my parts today haven't opened every thing but its all here safe! thanks so much
Josh
72 gmc lwb air ride 5 speed (soon) turbo 292 II# 6102
|
|
|
|
|
Joined: Nov 2012
Posts: 551
Major Contributor
|
|
Major Contributor
Joined: Nov 2012
Posts: 551 |
Josh
72 gmc lwb air ride 5 speed (soon) turbo 292 II# 6102
|
|
|
|
|
Joined: Feb 2009
Posts: 70
Active BB Member
|
|
OP
Active BB Member
Joined: Feb 2009
Posts: 70 |
HEY! Today was a good day indeed. Got the exhaust manifold back from my guy. He did a great job opening up the outlet to 2.5" so that should help with flow. Plus, he's cheap. He only charged me $25 for what seemed to be a tedious job. Being used to aluminum he wasn't expecting how much longer it would take. LOL.
Purchased my oil feed/return materials. Got it as a kit from eBay for less than $65 and it includes all materials I'll need. I plan on running a T fitting so I can include a gauge in the oil feed to keep that monitored.
Also ordered a 65k HEI from eBay.
Found a Sun Pro Boost gauge on eBay for a decent price. Still watching the UEGO to see if it goes cheaper soon.
Lastly, the preturbo piping is on it's way. 2.5" 180* with a 2 bolt flange and gasket from mandrel-bends.com. Total price was less than $50 shipped. Not too bad, IMO. I'm really nervous how my preturbo is goin to fit. My upper control arm is gonna be a pain in the ass. It's going to be a tight fit.
Also looking at converting to an electric fan setup and replacing the radiator with an aluminum one. Electric pullers are pretty inexpensive on ebay, and a particular 3 row aluminum radiator is fairly inexpensive as well. Since I'll be making a bit more unhood head, I'm thinking it'd be a good idea.
Alex
|
|
|
|
|
Joined: Feb 2009
Posts: 70
Active BB Member
|
|
OP
Active BB Member
Joined: Feb 2009
Posts: 70 |
Alex
|
|
|
|
|
Joined: Nov 2012
Posts: 551
Major Contributor
|
|
Major Contributor
Joined: Nov 2012
Posts: 551 |
Thats great alot of progress! I have that same hat good quality was thinking about maybe anodizing it but i don't know yet
Josh
72 gmc lwb air ride 5 speed (soon) turbo 292 II# 6102
|
|
|
|
|
Joined: Feb 2009
Posts: 70
Active BB Member
|
|
OP
Active BB Member
Joined: Feb 2009
Posts: 70 |
Today was another good day. Things are coming along. Got another 8" of snow on Sunday so that kind of put a crimp in my mood. Spring was almost here! Anyway, got a lot of stuff over the past week (see last post). The HEI is a monster of a part. Surprised at it's size! Replacing that was a little more difficult than I expected. I need to replace the ignition wire (wasn't expecting that) per instructions. For those who dont know, their is a resistance wire from the firewall to the stock coil. Without removing that wire, the car wont run right at idle (warm). So I still need to replace that wire, otherwise the HEI is installed and set as best as I can set it while the car still isn't in running form. 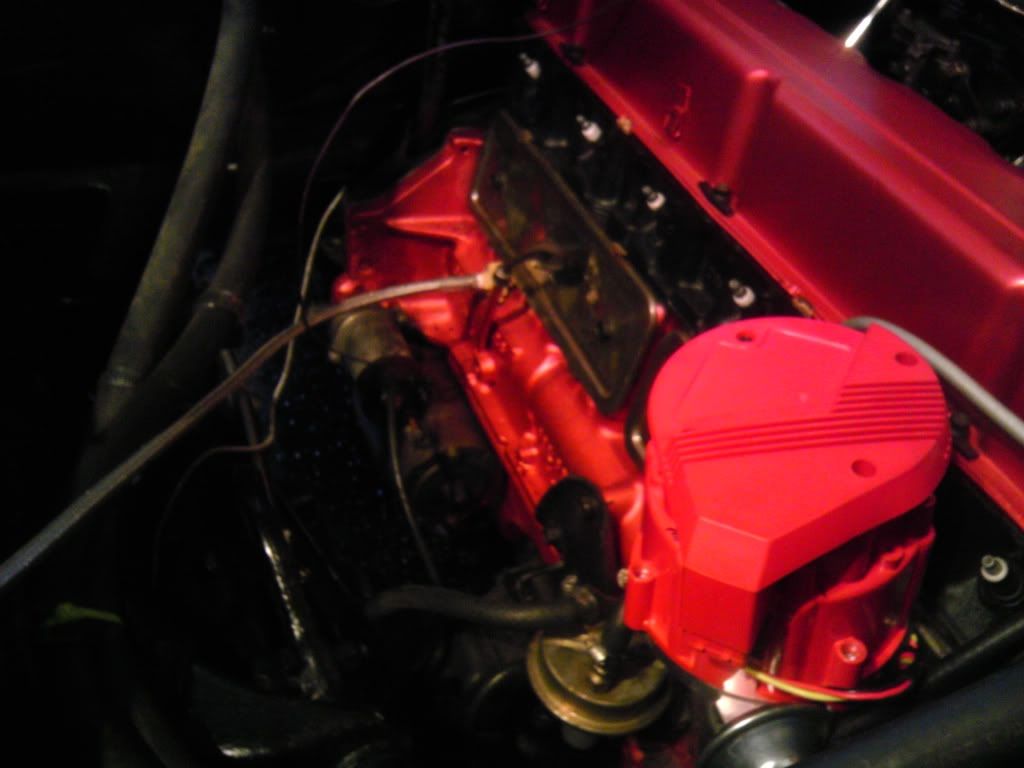 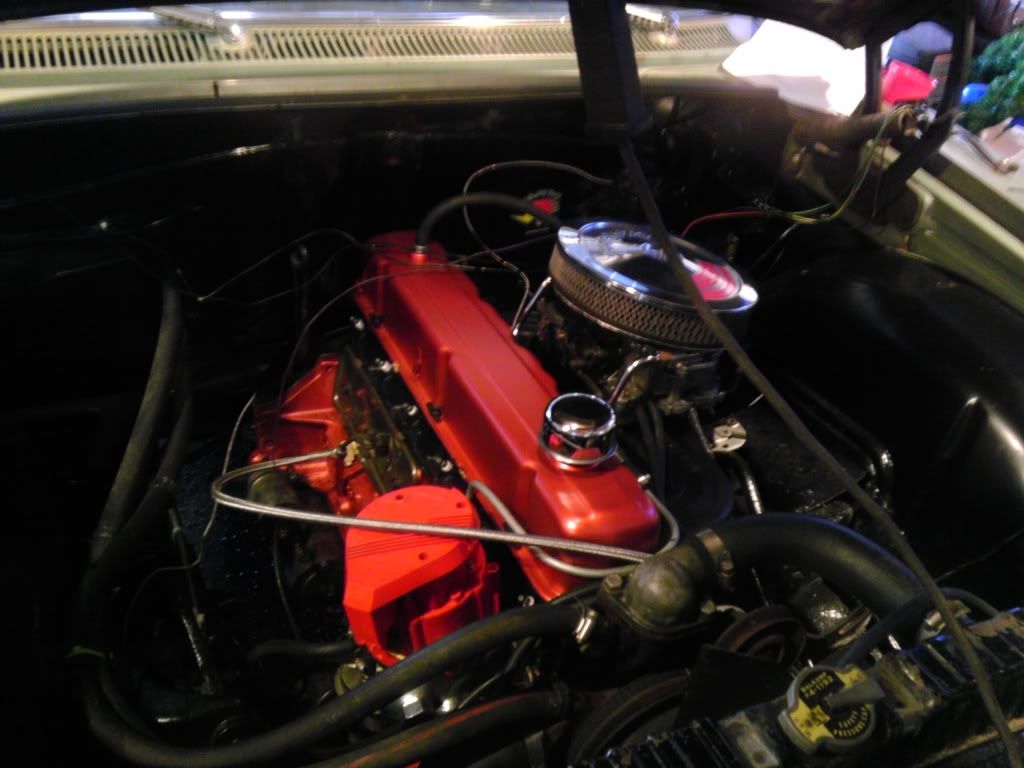 Also got the oil feed system established. What does everyone use for sealing the thread on the fittings? I've never done this before, so I just used plumbers tape on the threads. If I'm wrong, someone please correct me? Also got a closer look at my pre-turbo piping. It's going to be VERY tough to get the pipe right. To be honest, it's the thing that scares me the most about this whole project. The Upper control arm is scary close to the exhaust outlet. I'm very impressed with the quality of the pipe though. It's 16ga mild steel from mandrel-bends.com It was only 13.50 for the 180* bend and they shipped it 2 day. No complaints their. 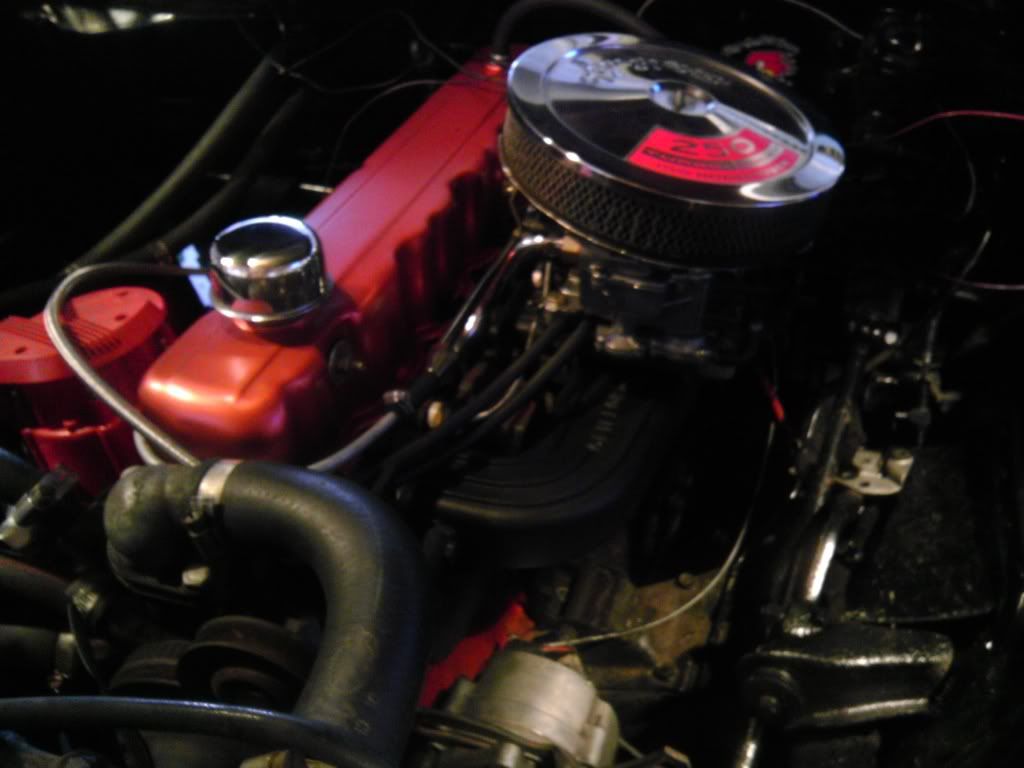 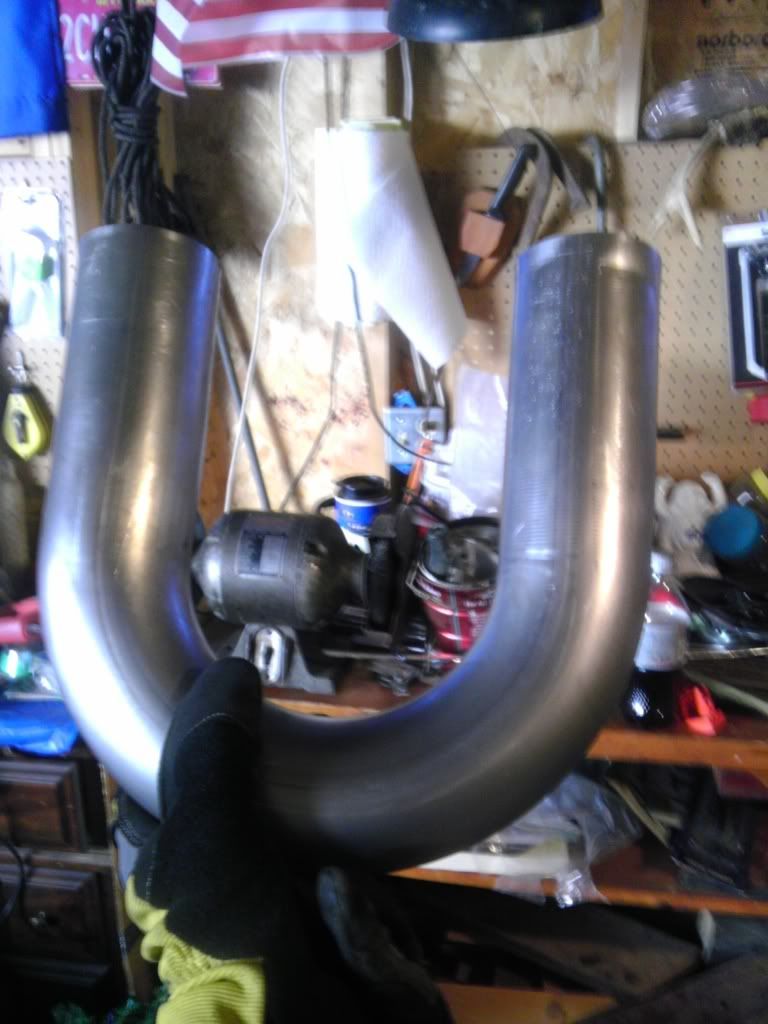 Here are my Boost and Water Temp gauge. The Temp gauge is electrical since I plan on swapping over to a pull electric fan. Also should note I got a great deal on a Wideband from a Honda forum for $120 shipped. Only used for 5,000 miles and comes with everything a new setup would have. I should have that next week sometime. 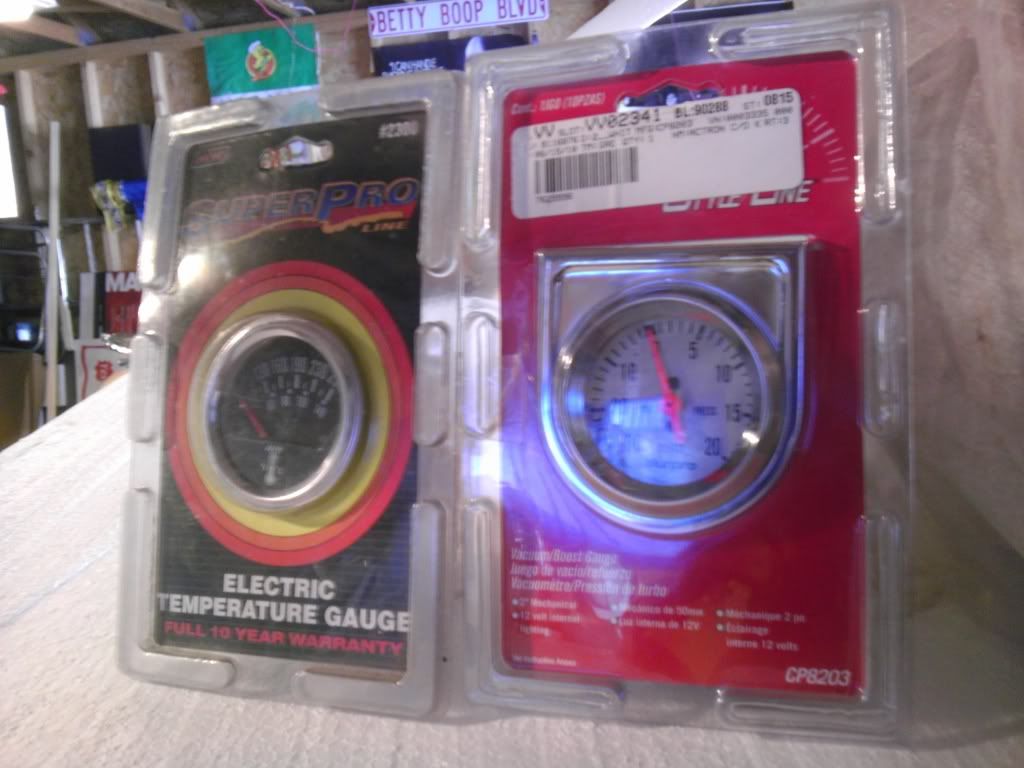 I'm on spring break from classes starting next week. I plan on getting the pre-turbo mocked up and installed. Does anyone have any ideas for sealing up the gap between intake and exhaust manifold? I have the Clifford so it doesn't use the heat riser. I've managed to grind the exhaust mani down so I can mount the exh/int mani's on the head, but there is still a little gap between the two. Should I get a gasket and hope it seats? Or hope I can find a welder to braze the gap shut? I need some ideas. There is definitely enough room for a leak.
Last edited by 64fourdoor; 03/06/13 11:32 PM.
Alex
|
|
|
|
|
Joined: Nov 2012
Posts: 551
Major Contributor
|
|
Major Contributor
Joined: Nov 2012
Posts: 551 |
I believe it was scott who said not to usetephlon tape don't want anyof that to get into the turbo may e a liquid tephlon on the threads sweet pics she is really comming along
Josh
72 gmc lwb air ride 5 speed (soon) turbo 292 II# 6102
|
|
|
|
|
Joined: Feb 2009
Posts: 70
Active BB Member
|
|
OP
Active BB Member
Joined: Feb 2009
Posts: 70 |
Last edited by 64fourdoor; 03/14/13 12:06 AM.
Alex
|
|
|
|
|
Joined: Nov 2012
Posts: 551
Major Contributor
|
|
Major Contributor
Joined: Nov 2012
Posts: 551 |
Seen duct tape fix a lot of thig but never a turbo "&" pipe  just messing man can't wait to see that welded up ad that engine have a nice color of paint on it! Keep it up stay inline!
Josh
72 gmc lwb air ride 5 speed (soon) turbo 292 II# 6102
|
|
|
|
|
Joined: Feb 2009
Posts: 70
Active BB Member
|
|
OP
Active BB Member
Joined: Feb 2009
Posts: 70 |
Got the up pipe mostly welded together. Still need to finish it up and clean up the piece of sheetmetal I used up top. But I wasn't able to finish before calling it a day, so I attached the turbo to get some pics taken for inspiration to get back. Note: It's not level because the up-pipe isn't bolted all the way to the exhaust manifold.    I still need to do some grinding, then wrap it in heat wrap before it's done. Do you guys recommend painting it with anything? I don't want the welds to rust under the heat wrap. It was my first time welding since replacing the floorboards in my old 64 Nova when I was 16. It was tough mostly because I was using 3 different types of metal, 16 gauge mild, 16 gauge stainless, and 16 gauge mild that was from my old Eclipse Exhaust. It was tough not burning the weld through beyond repair. Other than that, it's all really starting to come together.
Last edited by 64fourdoor; 03/26/13 09:48 AM.
Alex
|
|
|
|
|
Joined: Sep 2004
Posts: 5,839 Likes: 1
1000 Post Club
|
|
1000 Post Club
Joined: Sep 2004
Posts: 5,839 Likes: 1 |
Looking good.
Be sure you do not have any loose or ready to come loose welds, or pieces of metal,, those will be injested by the turbine wheel & will damage it.
Heat wrap will speed up the process of rusting out your up-pipe & the welds if they are not a high grade of stainless. Stainless 409 grade rust' 304,316 etc are better grades.321 being the best,,, but is very pricey.
I would paint it w/a high temp black spray paint. I use it on my Syclone turbos & it works fine.
MBHD
12 port SDS EFI
|
|
|
|
|
Joined: Sep 2004
Posts: 5,839 Likes: 1
1000 Post Club
|
|
1000 Post Club
Joined: Sep 2004
Posts: 5,839 Likes: 1 |
HEY!.
.
Also looking at converting to an electric fan setup and replacing the radiator with an aluminum one. Electric pullers are pretty inexpensive on ebay, and a particular 3 row aluminum radiator is fairly inexpensive as well. Since I'll be making a bit more unhood head, I'm thinking it'd be a good idea. I never had much luck when going to an electric fan/s (I never had the correct combo) Do your research & get the correct combo of a radiator & fans, those cheap ebay fans most likely will not work too well. Electric fans pull a lot of amperage & if you do not have a good enough alternator, most likely the alternator will go pretty quickly. You simply do not add fans w/out a shroud, otherwise the only area doing the cooling is where the fan is located, hope that makes sense. Just a thought,,, I would go w/a larger mechanical fan w/a clutch, less problems, they work great & get a clutch w/an external thermal spring on the outside of the clutch, those are the better heavy duty type. Cost more but are more efficient. Example: http://www.bing.com/images/search?q=pics...selectedIndex=9MBHD
12 port SDS EFI
|
|
|
|
|
Joined: Sep 2004
Posts: 5,839 Likes: 1
1000 Post Club
|
|
1000 Post Club
Joined: Sep 2004
Posts: 5,839 Likes: 1 |
Forgot to ask, are you going to use a intercooler?
They are inexpensive on Ebay along w/a piping kit.
There are really cheap quality pipes & clamps so do some research or post it here, a kit or intercooler you are thinking of purchasing. We can help you out.
MBHD
12 port SDS EFI
|
|
|
|
|
Joined: Feb 2009
Posts: 70
Active BB Member
|
|
OP
Active BB Member
Joined: Feb 2009
Posts: 70 |
Not this summer. Goal is to get it running at no more than 6psi. With that said, as often as I drive the thing I don't anticipate the urge to go higher. Got my return feed drilled in the pan. It's a 7/8" hole. I used one of those Irwin Unibit hole saw's to cut it. Worked amazing. I'm never wasting money on carbide hole sale bit's again.    Cleaned the hole with brake cleaner and a wire brush attachment for a drill. Sealed with O-Rings on each side of the pan, with gasket maker (400* proof). Should seal up nicely. Also redid the oil feed lines with the same gasket sealer to remove the risk of the teflon coming loose and entering the oil.
Alex
|
|
|
|
|
Joined: Nov 2012
Posts: 551
Major Contributor
|
|
Major Contributor
Joined: Nov 2012
Posts: 551 |
Hey alex just want to say i love your build always following it!
As for the tephlone i know you redis it but what i use is kimblemidwest liquid tephlon is is good to 500 degrees doesn't tear or rip and defffinatly doesn't clog use it all the time on our big diesels maybe spread it around to all the great inliners out there:)
Stay in line.
Keep up the good work!
Josh
72 gmc lwb air ride 5 speed (soon) turbo 292 II# 6102
|
|
|
|
|
Joined: Feb 2009
Posts: 70
Active BB Member
|
|
OP
Active BB Member
Joined: Feb 2009
Posts: 70 |
Why do oil pans have to be some goddamn difficult!!
Today didn't go quiet as planned. Took nearly 3 hours to pull the stock pan, only to take another hour before I unsucessfully got the modified pan in. It wouldnt move into place. I have no idea why. Anyone have ideas as to why a 230 pan wouldn't fit a 250 pan? Otherwise, I'm stumped. I'll modify the 250 pan tomorrow and give it another shot.
In the mean time, I'll wait for my gash across my hand to heal up. Damn oil pump.
Alex
|
|
|
|
|
Joined: Apr 2004
Posts: 3,556 Likes: 35
1000 Post Club
|
|
1000 Post Club
Joined: Apr 2004
Posts: 3,556 Likes: 35 |
Inliner Member 1716 65 Chevelle Wagon and 41 Hudson Pickup Information and parts www.12bolt.com
|
|
|
|
|
Joined: Feb 2009
Posts: 70
Active BB Member
|
|
OP
Active BB Member
Joined: Feb 2009
Posts: 70 |
Sadly, I do not.
The only noticeable difference I saw was in regards to the front of the pan. The 250 had no holes for bolts, whereas the 230 had them. The gasket I had for it was for the 250 (no holes) so I just went with it. Laying on my back under the car trying to wiggle it in the same way the 250 pan came out, and it wouldn't budge. Even by completely remove the oil pump sending unit, there wasn't enough room. I couldn't see where it was binding, got frustrated, and quit for the day.
The only thing I can imaging is the layout of the pan is moderately different. Although, being that the 230 pan was what came in the car stock, I can't image why it wouldn't bolt onto the 250 block, being they are the same casting.
I don't know. Going at again Wednesday to see if I can't get it situated.
I'll be in touch.
Alex
|
|
|
|
|
Joined: Feb 2013
Posts: 6
Active BB Member
|
|
Active BB Member
Joined: Feb 2013
Posts: 6 |
Here's a thought for you...you said something about keeping your welds from rusting. I'm working on some headers for my 250 and I plan to coat the welds with 3M weld through primer. It should stand the heat. I've never done it before, but seemed logical that it would work and it's silver colored.
curious old man
|
|
|
|
|
Joined: Feb 2009
Posts: 70
Active BB Member
|
|
OP
Active BB Member
Joined: Feb 2009
Posts: 70 |
Thanks for the idea. I went with Grill paint. It's got a 1200* threshhold and is cheaper than header paint. Also says it's withstands scratches and nicks. I'll let you know how that goes for me.
Alex
|
|
|
|
|
Joined: Feb 2009
Posts: 70
Active BB Member
|
|
OP
Active BB Member
Joined: Feb 2009
Posts: 70 |
Took some pictures of the oil pans today. I'll post them later.
For the record, the 230 and 250 pans are considerably different. The sump for the 230 is shorter in the back, and the drain plug is in a different location on the pan as well (front vs rear). This is most likely the reason it didn't fit the other day when I tried installing it.
I drilled a hole in the 250 pan, applied the gasket and some adhesive, then attempted to install the modified 250 pan. I couldn't get it mated without the gasket falling out of place. My only choice now is to pull the motor.
It shouldn't be much of a chore considering I already have 2/3 of the components removed or unhooked. All that's left is the trans and she's coming out with the motor. I need to barrow my friends lift, and that will have to wait until next week.
Alex
|
|
|
|
|
Joined: Nov 2012
Posts: 551
Major Contributor
|
|
Major Contributor
Joined: Nov 2012
Posts: 551 |
did you try sticking it to the block first?
i know my gasket is like 4 pieces
Josh
72 gmc lwb air ride 5 speed (soon) turbo 292 II# 6102
|
|
|
|
|
Joined: Apr 2004
Posts: 3,556 Likes: 35
1000 Post Club
|
|
1000 Post Club
Joined: Apr 2004
Posts: 3,556 Likes: 35 |
Isn't that original pan dented in the rear to clear your steering?
Inliner Member 1716 65 Chevelle Wagon and 41 Hudson Pickup Information and parts www.12bolt.com
|
|
|
|
|
Joined: Feb 2009
Posts: 70
Active BB Member
|
|
OP
Active BB Member
Joined: Feb 2009
Posts: 70 |
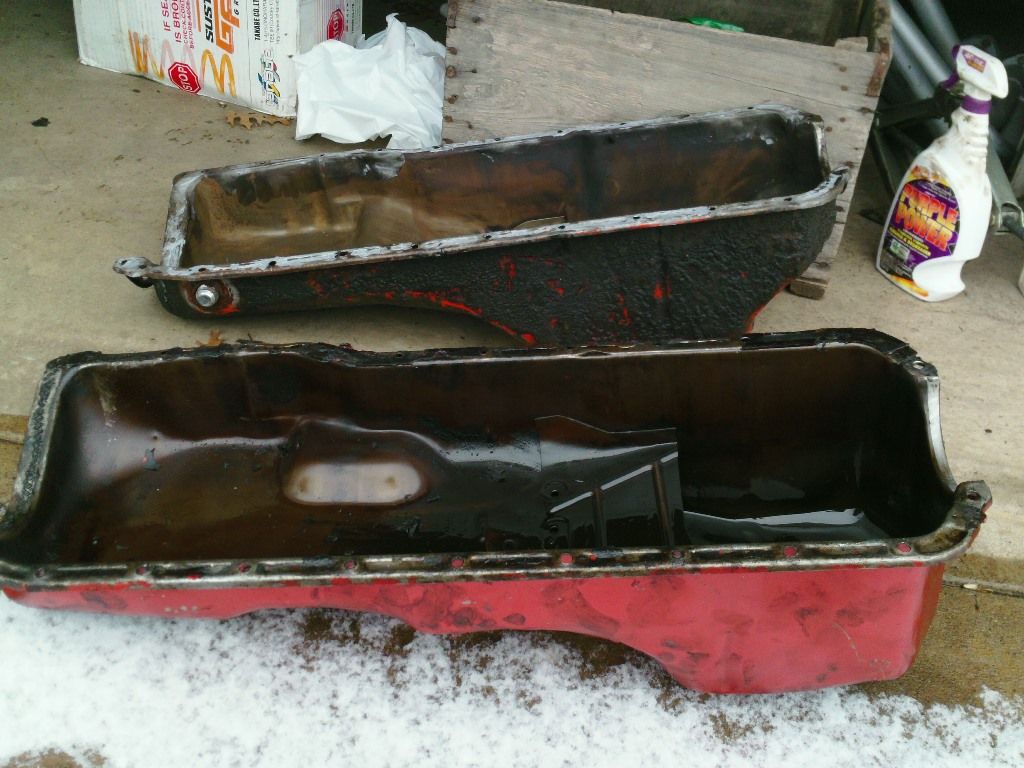 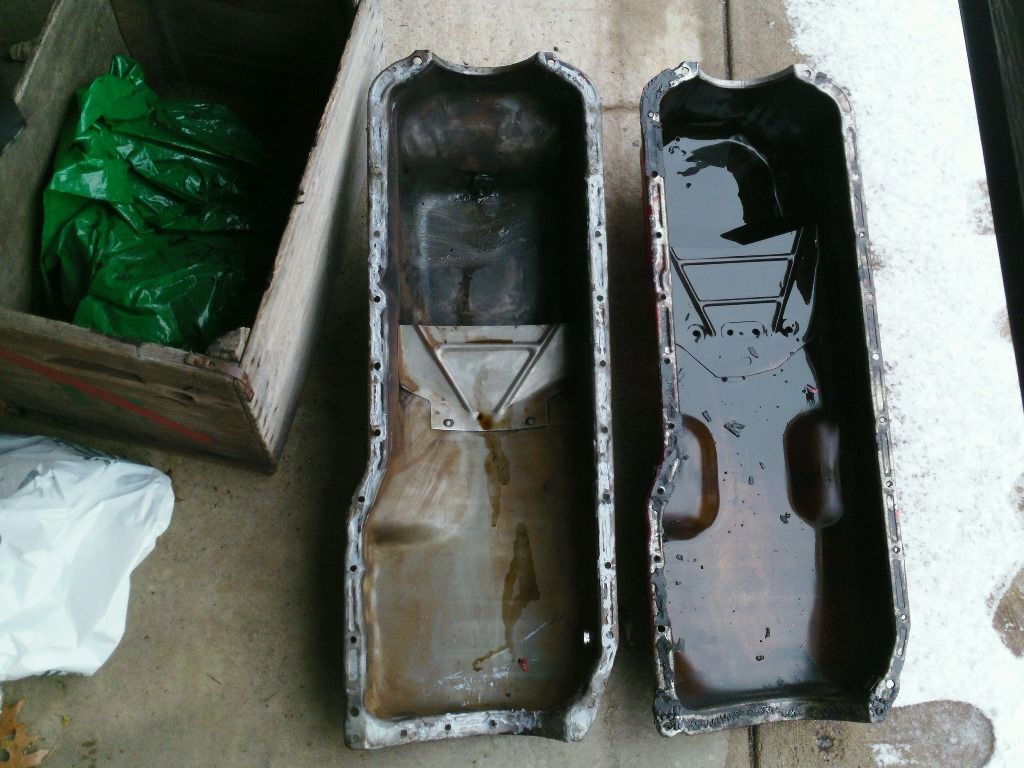 Here are side by side comparisons. The 230 pan being the dirtier of the two, with the 250 pan being the painted one.
Alex
|
|
|
|
|
Joined: Jan 2012
Posts: 65
Active BB Member
|
|
Active BB Member
Joined: Jan 2012
Posts: 65 |
64fourdoor/Alex,
keep the faith man.
I'm finally getting back on track and looking at your build up has seriously helped get me re-motivated.
Thanks,
Stu
|
|
|
|
|
Joined: Nov 2012
Posts: 551
Major Contributor
|
|
Major Contributor
Joined: Nov 2012
Posts: 551 |
Josh
72 gmc lwb air ride 5 speed (soon) turbo 292 II# 6102
|
|
|
|
|
Joined: Feb 2009
Posts: 70
Active BB Member
|
|
OP
Active BB Member
Joined: Feb 2009
Posts: 70 |
Ran outta money!
Hoping to get back to the shop this weekend to tinker. Everything is sitting next to the car on a shelf awaiting install. I'll update when I get to the next step
Thanks guys.
Alex
|
|
|
|
|
Joined: Feb 2009
Posts: 70
Active BB Member
|
|
OP
Active BB Member
Joined: Feb 2009
Posts: 70 |
Well, this summer will start off NA.
I ran into some problems, and long story short my DD needed a new motor. Stupid interference engines! Timing belt snapped prematurely, resulting in bent valves in 2/6 cylinders.
So the Chevy has been on the backburner. All the money I had saved for coldside and downpiping has been expunged. I was planning on 3" piping all the way back to the rear axle before splitting to dual 2.5" Smitty Glasspacks.
Luckily, I purchased those long-tubes back in December. So they are going on with the Clifford intake and the 4bbl. The HEI is staying in too. I'm also planning on using the turbo-hat and fabricating a CAI with it. The motor is gonna be rappin' here by mid-week!
Alex
|
|
|
|
|
Joined: Feb 2009
Posts: 70
Active BB Member
|
|
OP
Active BB Member
Joined: Feb 2009
Posts: 70 |
okay, I lied. Car will be turbo'd, god-damnit! The headers didn't fit. Devastated and planning on returning it to stock, I test fit everything for the turbo again. After that, I noticed a good chunk of exhaust from my old car just sitting there, collecting dust. 2.5" pipe with a 90* mandrel bend and a 3" resonator. Feeling motivated, I cut it in pieces and began test fitting the downpipe and mocking everything up, and by golly it's going to work!  It's perfect. Clears the throttle bracket by 2" and only comes close to the intake manifold's rear runner. I'll fabricate a shield for between the downpipe and intake so it wont affect intake temps too much. Also ordered 3 45* couplers. I'll be using steel tubing between the couplers, with lips spot welded to prevent slippage. Debating on adding a pipe for the BOV. o2 bung is on the way. Progress pic before I leave. I have a 90* fitting for the oil feed, so the visible crimp there will be null. You can see the route of the charge piping. Choke horn has been milled off so it wont interfere with airflow. 
Alex
|
|
|
|
|
Joined: Nov 2012
Posts: 551
Major Contributor
|
|
Major Contributor
Joined: Nov 2012
Posts: 551 |
Josh
72 gmc lwb air ride 5 speed (soon) turbo 292 II# 6102
|
|
|
|
|
Joined: Feb 2009
Posts: 70
Active BB Member
|
|
OP
Active BB Member
Joined: Feb 2009
Posts: 70 |
Last edited by 64fourdoor; 06/18/13 01:13 AM.
Alex
|
|
|
|
|
Joined: Feb 2010
Posts: 136
Contributor
|
|
Contributor
Joined: Feb 2010
Posts: 136 |
Damn that's awesome, Made my morning!
What carb hat is that?
|
|
|
|
0 members (),
450
guests, and
46
robots. |
|
Key:
Admin,
Global Mod,
Mod
|
|
|
|


