OP

Active BB Member
Joined: Dec 2001
Posts: 48 |
EUREKA! Today, after six months and five engine breakdowns, we have finally sealed the rear main! I am going to copy my post on the oldGMCtrucks.com boards to make it a little easier for me, so realize that references to others are members of the oldGMC boards where we have a close circle of buddies. ---------------------------------------------
Nothing is as easy as it looks!
As many of you know, the Huckster/302 project has been plagued all summer with a pesky rear main leak. We've had the engine apart FIVE times (counting today) in an attempt to seal up this leak. We've used every seal known to man including NOS asbestos rope seal; all without success until today.
I emailed Best Gaskets, and got a nice response from the owner who asked that I call to discuss the problem. I decided it would be best to have Mike Aldrich talk to Best Gaskets instead of me since Mike was familiar with the problem in more engines than mine, and, he knows what he's doing and I don't!
After a few calls back and forth, Best sent along some different gasket material to try. We did that a couple months ago and unfortunately the leak continued unabated. Back to the drawing board.
Mike has had a running dialog with Best since mid summer and a few weeks ago they sent some new gasket material, and, a few other secret tricks which I am unable to reveal at this time.
What I can tell you is that the new gasket material has, for the first time, totally sealed up the back end of my 302! Yippee!!!!
Bill is like some contender in the Iron Chef, only he's the Iron Mechanic! Fast, efficient, and very knowledgeable, watching Bill attack a job is like watching a lion bring down a gazelle. He knows exactly what he's doing all the way. Couple him up with 40 years of experince in building engines in MikeA, and you have the ultimate dream team.
I had done most of the hard work when they got started: I had removed the oil plug and drained the crankcase. So they only had a little disassembly to do.
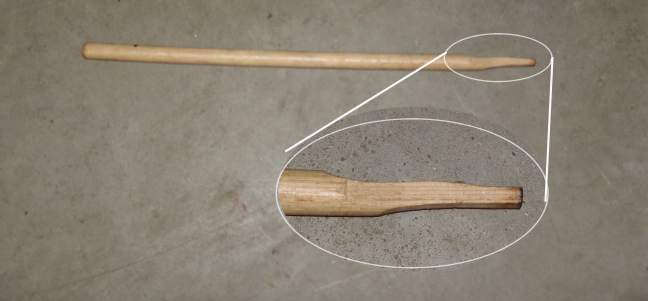
First, with the rear main cap removed, Mike asked me to make a push stick for him to coax the NOS asbestos rope seal that was in there out. I tried cutting down a toothbrush handle, but it broke and as I was headed back into my basement woodshop to find something else, I passed my son's drumset and saw 100 or so busted drumsticks in pile. EUREKA! I took a drum stick to my band saw and carved down to match the rear main seal pocket size:
Now armed with the pusher and MikeA's rope seal remover tool, a corkscrew, he successfully attacked and removed the original NOS rope seal.
That was the easy part.
We thought we'd try to "sneak" the top half of this newer, thicker, denser, teflon/graphite rope seal up and over the main by fashioning a slip knot on a strong piece of nylon but after a great number of tries and loosening up ALL of the main caps, we could still not get it in. Getting the larger replacement seal in place on the top proved to be a much more difficult task. We tried a number of different approaches to feed it in, up, and over the crank but all just resulted in total frustration.
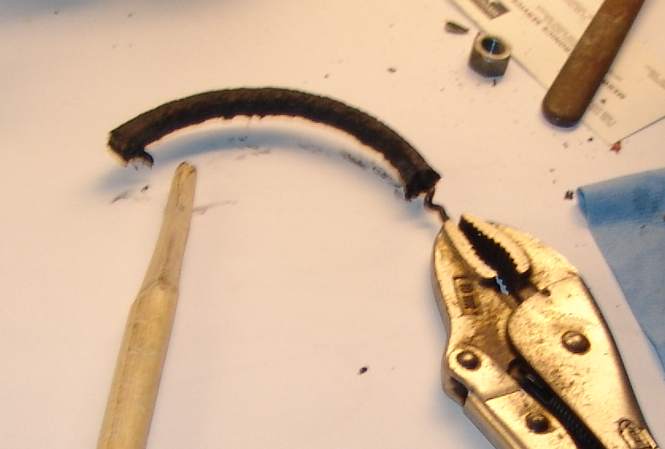
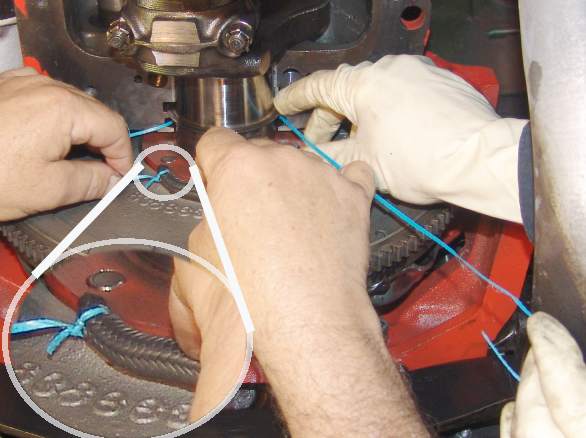
In the end, we pulled the driveshaft and tranny and then with all four main caps loosened a bit, the crank fell down a little and allowed us to finally feed the new seal in, up and over. The photo below shows the first (failed) attempt using a thick piece of plastic strapping. We ended up using double dental floss which was just strong enough to lasso the end of the seal, and while Bill's gloved hand tugged on the line, MikeA fed it carefully to the slot with a small flat screwdriver while I turned the the engine over from the top by the fan belt/fan blade. This was absolutely a three man operation. NOT EASY!
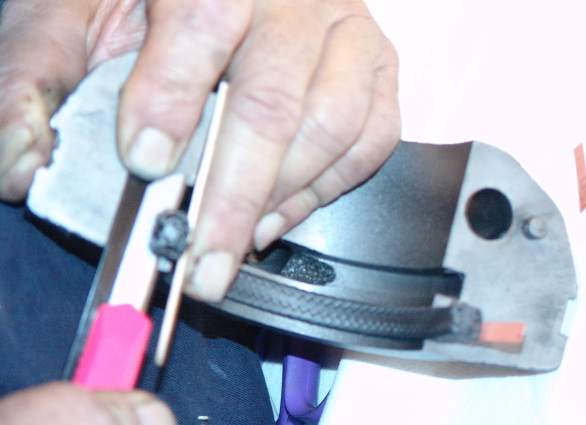
With the top seal now in place, MikeA & Bill spent a long time trying to carefully trim the ends of the rope to get it just right. Using the drumstick/pusher, they kept mashing the proud ends of the seal into the pocket alternating on each side and with it now mashed in there as much as possible, they tightened up the bearing caps and Mike trimmed it up to his satisfaction. Now the focus shifted to the lower seal half in the bearing cap.
Mike used the tools that come with the BEST kit which include a small shim spacer that leaves "just the right amount" of seal showing AFTER he used his original GM rope seal tools to set the seal in the pocket and get it compressed and mashed in place with the drumstick and round GM seal tool which duplicates the radius and diameter of the crankshaft surface that the seal will ride on.
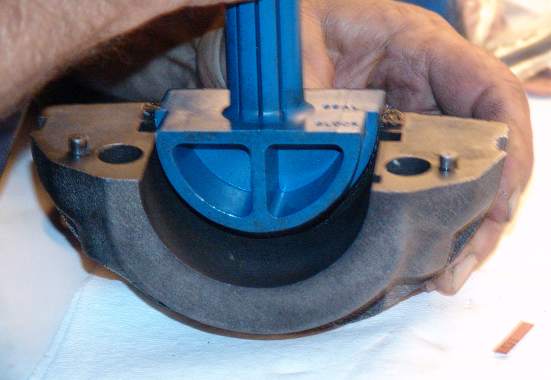
The cap is now ready to be installed:

Mike was careful to put just enough BlackRTV Gasket seal on the bearing surface and seal ends to give a little sealing of any irregularities, but not so much as to squirt out all over the place in end up in my oil system. He installed, then removed the cap to inspect both surfaces carefully before installing it a final time and torquing down the bearing caps to the specified 95 ft/lbs.
Reassembly went quickly, but that is ONLY because of Bill's speed and experience. I'm telling you, watching Bill on a job is like watching one of these iron chef competitions! One hour flat and the meal is done!
I will spare you the details of the reassembly, and the embarressment of Bill's discovery that I was just a tad low on tranny oil (1+ quart) but suffice it to say it went well for me watching the masters in action.
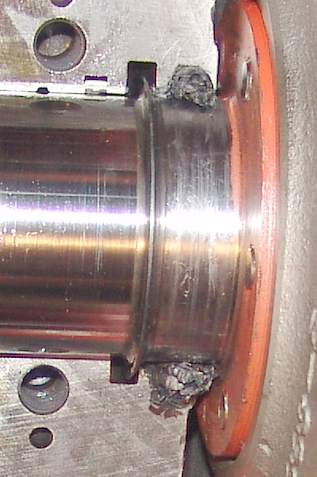
The proof as they say, is in the pudding. After a half hour HIGH SPEED flogging, I returned and parked in the driveway. Normally at this time, in all of the previous four attempts, a large oil spot appeared nearly immediately.
After 1 hour of sitting, it looked like this under the truck:
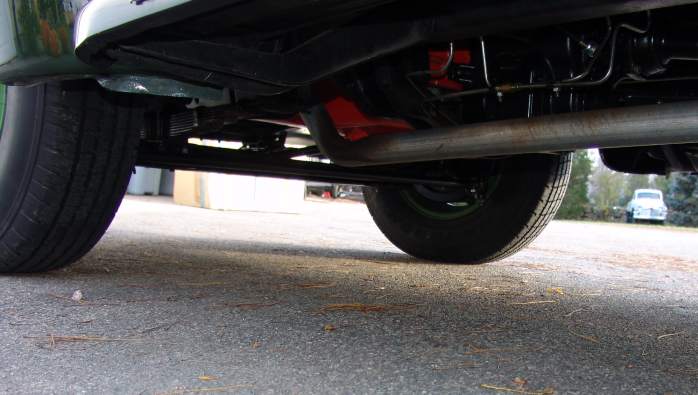
FINALLY! We have met the enemy, and after four months, five seals, and much blood and crankcase oil, WE HAVE WON!
-----------------------------------------------
Rob English
II Member #2141
|