Greetings . . .
Been busy in the garage since the weather broke. First order of business was to get a permanent finish on the block.
The base coat is Glyptal Red 1201 which is suitable for use on inside engine surfaces to promote clean oil draining back into the pan.
With the push-rod bay covered with two coats of Glyptal I masked it off and began work on the lower half of the block.
One coat of Glyptal Red worked into the surface with a semi stiff brush - acts as a primer - followed by two light coats of Bertolucci blue-gray
from the Filling Station. I let the light 'dusting' coats bond with the Glyptal for a few mins and then apply two heavier coats just on the edge of looking 'wet'.
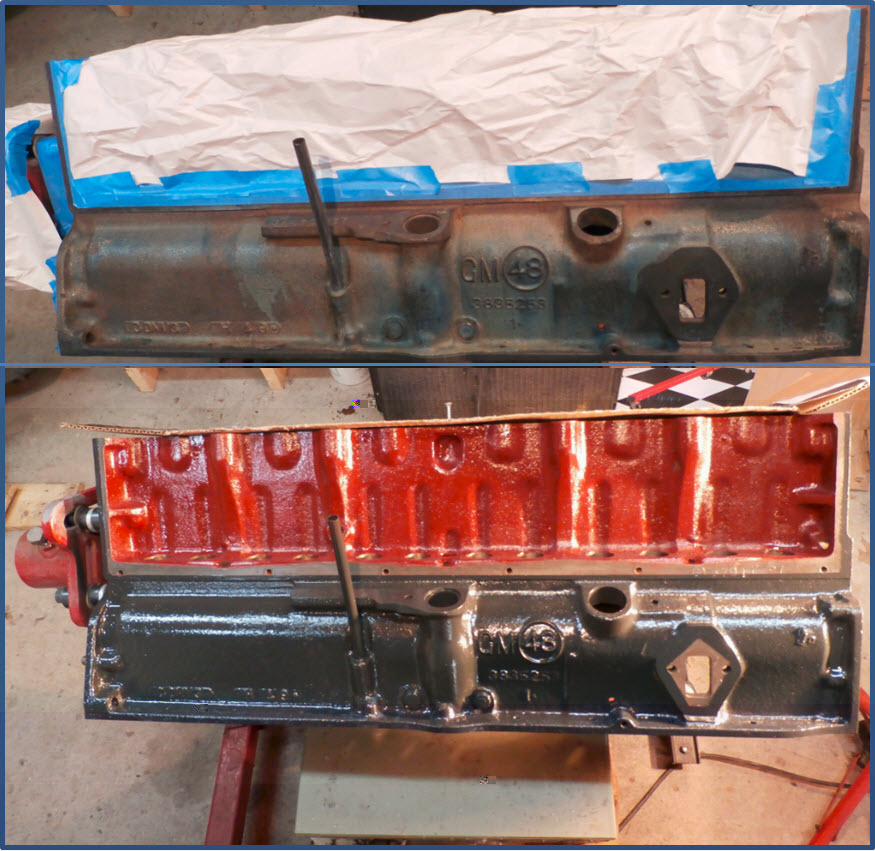
What is most curious about these enamels is that they show brush marks (in the top coats) from the Glyptal application - that is until heat is applied.
My space heater setup underneath the block raises the temperature of the entire block to the point that it is hot to the touch.
The enamels slowly spread out and gloss flows to the surface. I leave the heat on for about two hours. The smell of the enamel baking is distinctly different from paint fumes.
The same treatment was given to the opposite side of the block:
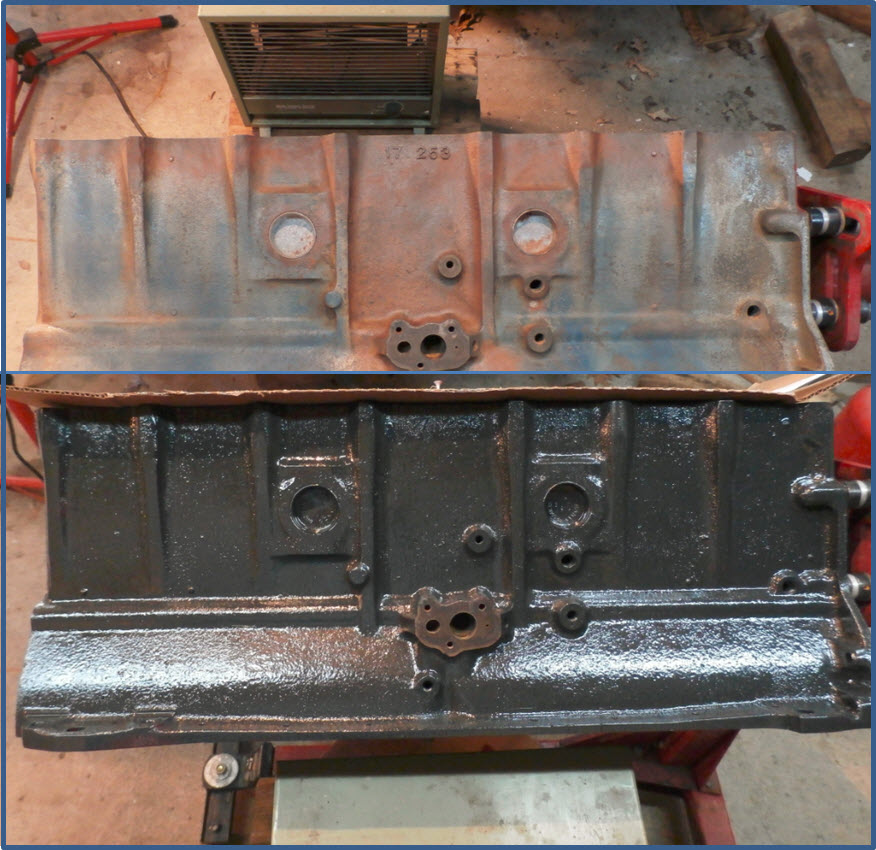
Surface prep includes degrease and pressure washing. Once dry (again with the space heater) the entire surface is buffed with a fine wire brush. Rusty areas will raise dust. Allow the block to cool overnight.
The dust is then cleaned off with a rag soaked in Accetone. What remains is raw metal with light rust and old paint that remains well bonded. Glyptal Red adhears well to both. Glyptal seems to work best when the surface it is applied to is cool - this increases working time. As soon as the majority of the solvent in the Glyptal has evaporated the dusting top coats can be applied.
The light top coats are then followed with two heavier coats that border on looking 'wet'. I let this stand for 10 minutes (for solvents to leave) and then immediately begin heating.
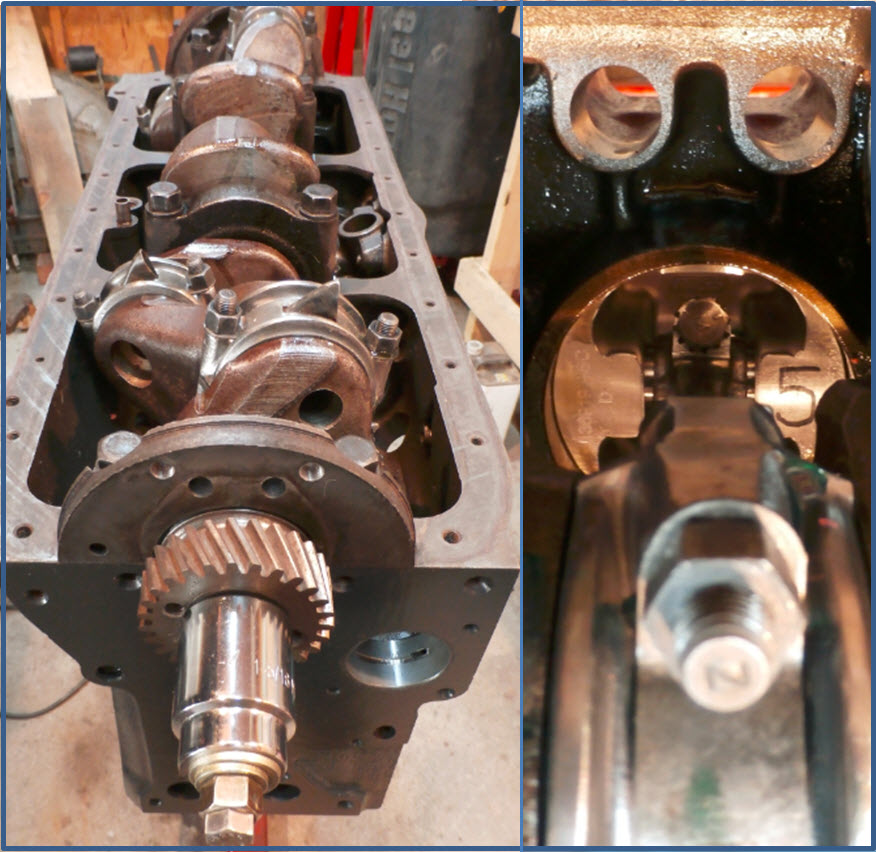
The next weekend I moved on to assembly of the short block. I acquired an NOS Bearing set from the now defunct Detroit Aluminum and Brass Corporation:
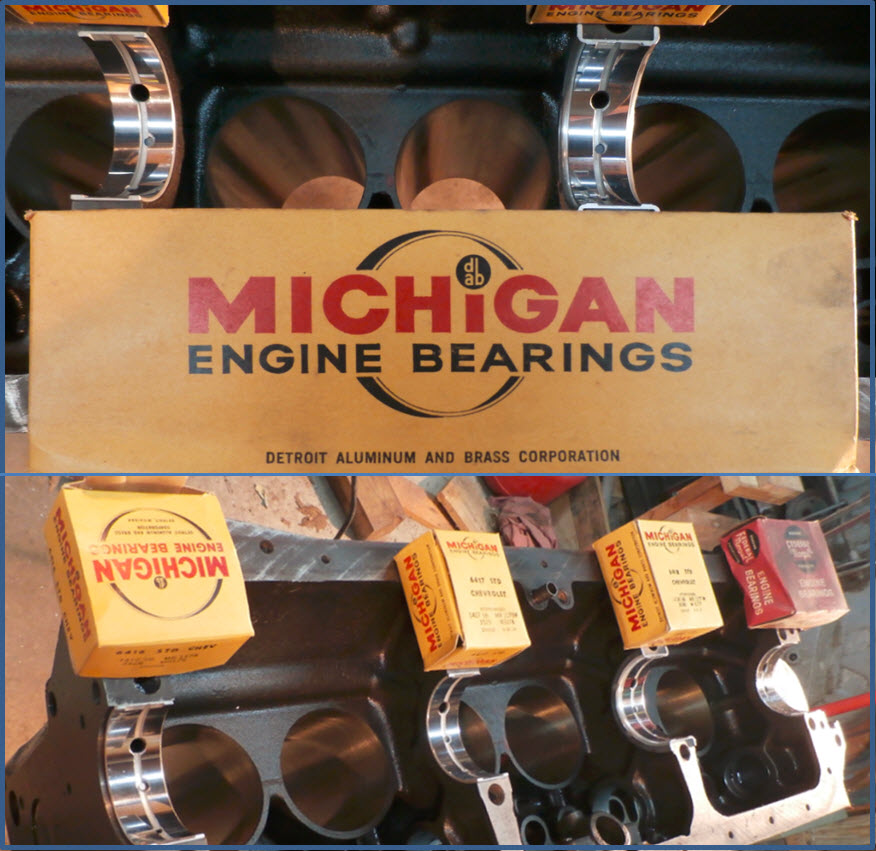
The set turned out to be short the rear bearing. I completed the set with an orphaned Federal Mogul part. This would turn out to be serendipitous because the FM part included two envelopes full of shim material . . . but I am getting ahead of myself.
The bearing shells are 'pre staked' which acts to key them into proper position in the block. I am using the Best Gaskets set which includes a really nice 'graphtite' rope seal. It installs easily but I ended up having to trim the ends well beyond the what the instructions suggested. Perhaps the instructions are assuming a certain amount of wear not present in the NOS crank I am fitting.
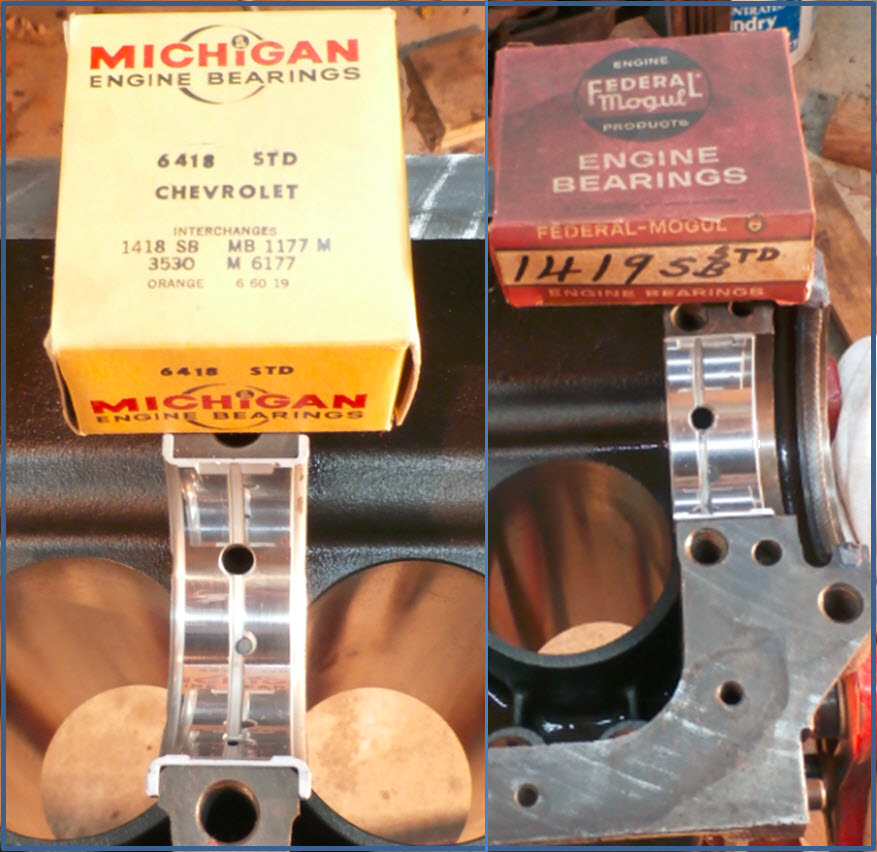
The bearing shells are works of art compared to currently available (drab) import parts:
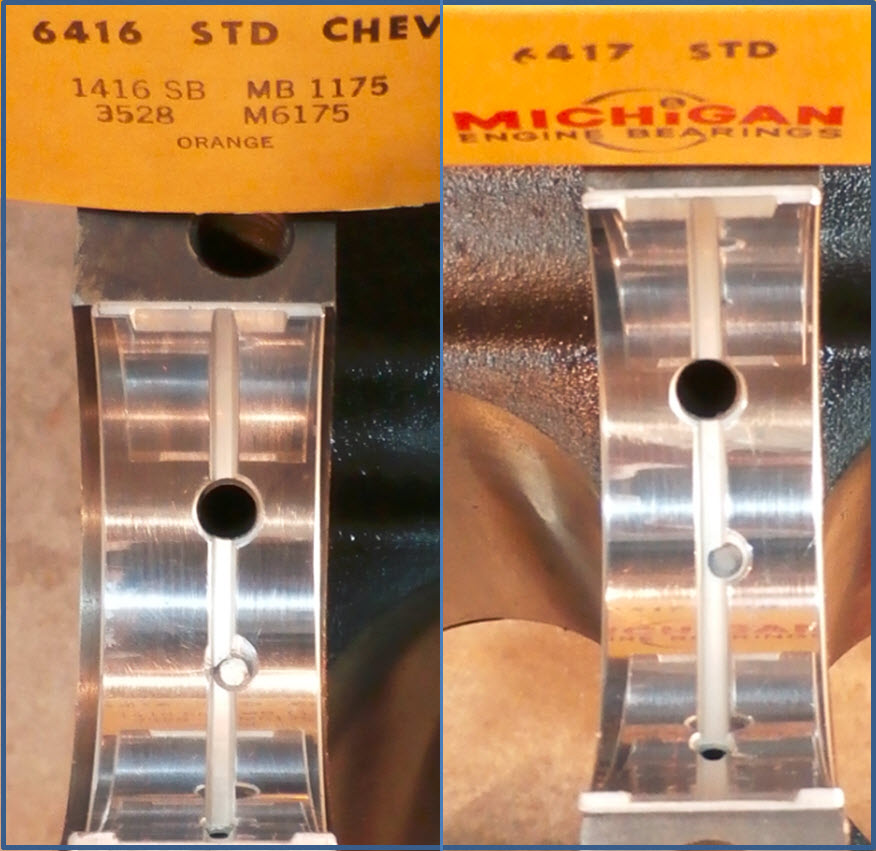
The plated and polished finish certainly looks great during the build process - but I don't know that it makes the parts perform any better.
Next I set out to check tolerances on the mains. The '49-50 shop manual that I have doesn't have a specification for the clearance (describing it instead as selective fit). Later versions of the manual call for clearance between .001 and .003. California Bill demands .025.
My first checks were with the red plastigauge. The journals all measured ~ .002 (or less) with red gauge wax:
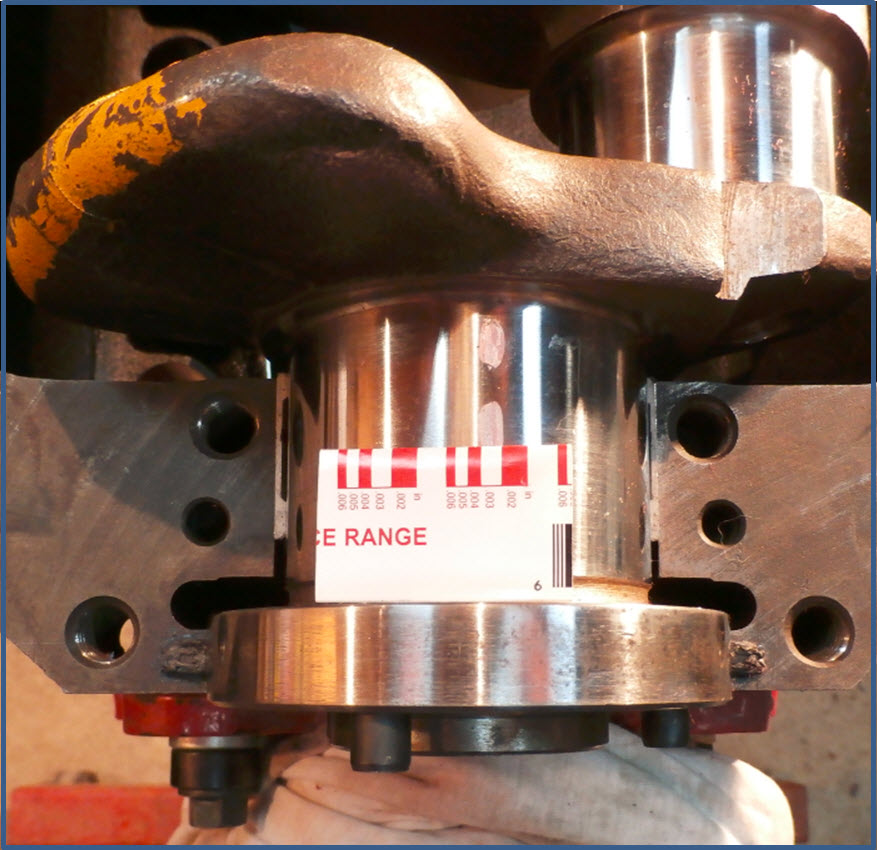
Switching to the smaller green gauge wax lead me to conclude that the clearances were somewhere between .0015 and .002

With the measured clearances smack in the middle of specification I decided that I had measured enough. I applied assembly lube to the surfaces and turned the crank to make sure the upper halves of the bearings weren't dry and began to torque things down.
I started in the front. With the front cap torqued to spec the crank could be easily turned with a 5/8-3/4 box wrench (10 inches long). With three caps torqued the effort to turn the crank increased noticeably. With the 4th torqued down the crank would freeze.
And so the fun began. First I concluded it was the rope seal on the rear cap locking up the assembly. I oiled it well and began torquing from the back this time. Surprisingly, with just the rear cap in place the crank turned freely. There went the rope seal theory . . .
I inspected the remaining bearing shells carefully to see if there were any signs of scoring or smearing before adding some assembly lube and torquing them down.
Once again with three caps in place the assembly began to feel tight when turning it with a box wrench (on the dampener retaining bolt). With the fourth in place the crank froze solid. I called it a night.
The next day (over morning coffee) I read the 'selective fit' bearing adjustment section of my shop manual. I read several posts online (stovebolt, H.A.M.B. among others) all the old timers suggested that regardless of the vintage of bearing shells and even with 'new' spec journal diameters - the assembly should be expected to require shims. Follow the steps in the manual - full stop.
My last order to chevs-of-the-40s included a shim set for the mains and the con-rods (just in case). I went and retrieved the main shim set. When I opened the package they seemed awfully thick. My calipers revealed .008. Yikes!! Some online forums suggested that they were likely a 'sandwich' of many .002 shims that could be separated with a razor knife - not in this case - .008 hard brass.
My next stop was the shelf worn box that contained the Federal Mogul rear bearing caps. It also contained two envelopes. One had eight .002 shims for the uniquely shaped front bearing cap - the other contained eight .002 shims for the huge (4 bolt) rear bearing cap. I used the .008 shims (from the set purchased from chevs-of-the-40s) as a template to cut .002 shims for the two middle bearing caps.
The orphaned FM bearing saved the day . . .
With .002 shims on both sides of the main caps the crank turned freely. Removing the shim material from one side - now the 'drag' described in the 'selective fit' process in the manual was present. I refitted shims to both sides of each cap, torqued to spec and called it done.
Moral of the story - don't fight the shop manual.

Next I moved on to the Piston assembly and installation. All of the components were weighed and balanced over the winter and then each was assigned to a hole. I was very surprised by the variability of the components. Even the Perfect Circle bearing shells ran between 51.1 and 52 grams (none identical):
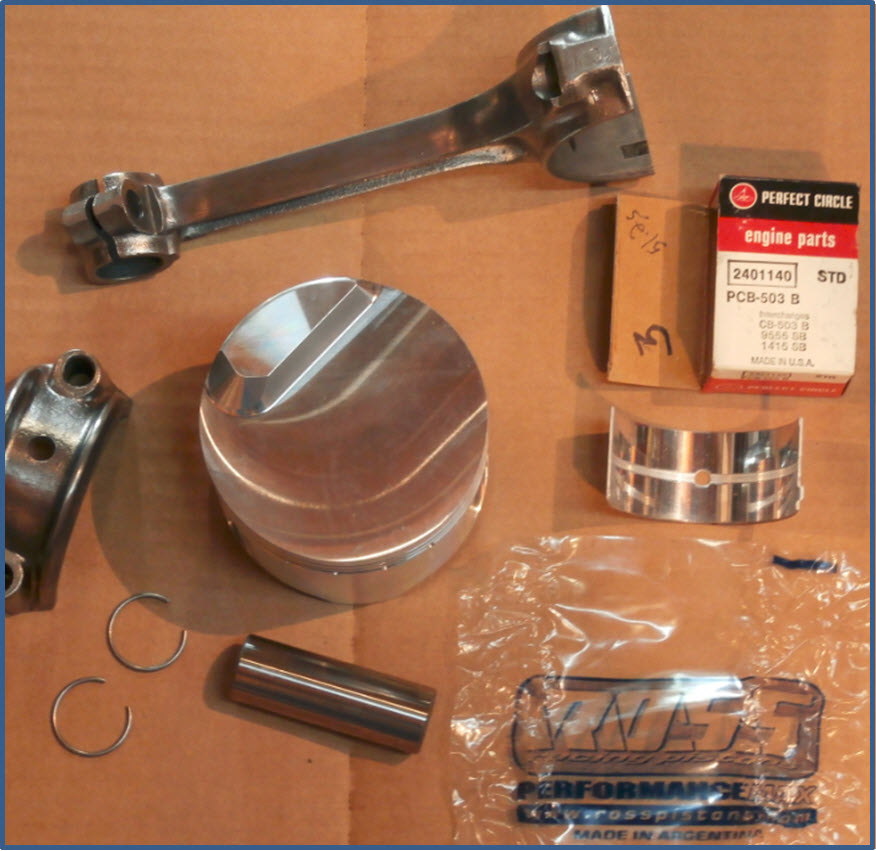
The Ross Pistons are works of art. The polished finish makes it hard to stuff them into a cylinder bore never to be seen again (at least once the head is installed). The pin fit is to very close tolerances and they are retained by spirolox rings that take some practice to install (and not launch them across the shop

).
The ring package was shipped by Ross - it is Hastings chrome molly:

The ring end gap had to be filed in as the rings fit the bores perfectly with zero gap. The shop manual called for .005 to .015. Hastings calls for .0035 minimum gap per inch of bore diameter
https://www.hastingsmfg.com/ServiceTips/ring_gaps.htmwhich is .012355 (given a 3.53 bore). I settled on .013 (because my feeler tool includes .006 and .007 gauge blades):
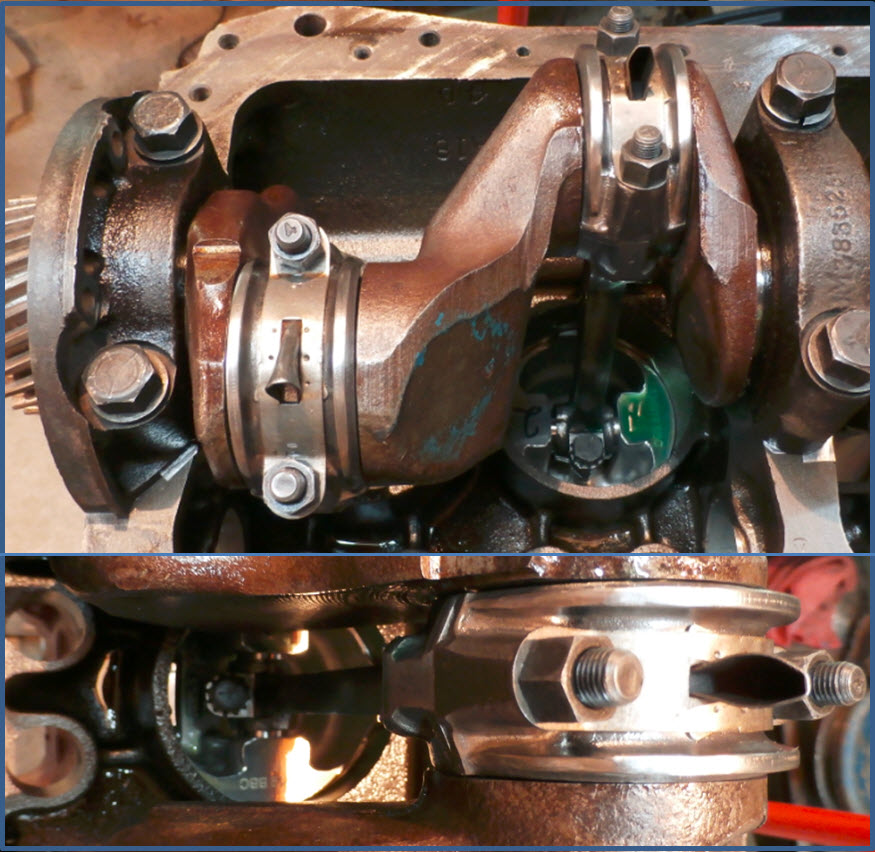
The rods for the build have been machined for insert bearings but they didn't come that way from the factory (Chevrolet didn't ship an insert rod until '53). I spent quite a bit of time getting the rod assemblies in balance as the components vary widely in weight:
Inliners Engine Post circa Jan '14 The bearing shells are from Perfect Circle. Everything I have read suggests that the Connecting Rods would not require shims if insert bearings were fitted. Plasti-gauge measurements (without shims) indicate between .002 and .003 clearances. The 'snap fit' technique described in the '49 shop manual is also in evidence. So I am considering this aspect of the build done as well.

The next post will address dipper fitting and clearances, pan geometry and fitting the cam . . . there is alot going on in a 216 shortblock!
regards,
stock49